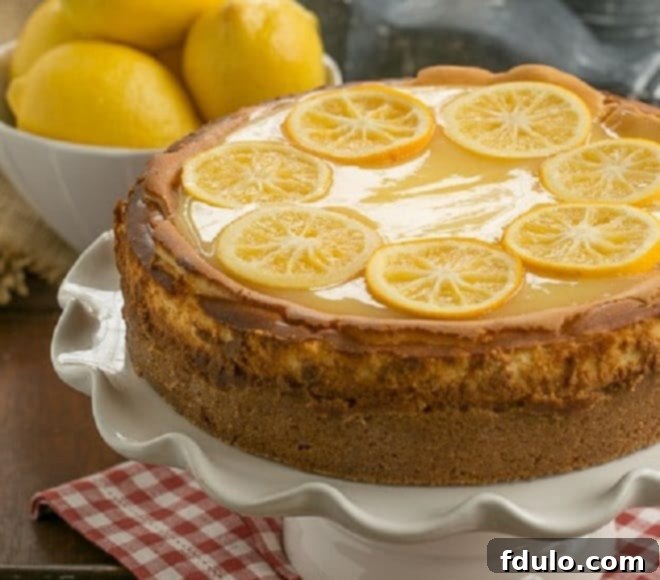
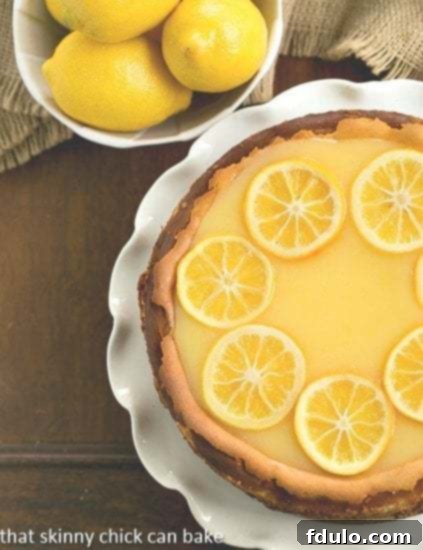
Indulge in the exquisite delight of a homemade Lemon Bar Cheesecake, a dessert that masterfully blends the creamy richness of cheesecake with the vibrant, zesty tang of fresh lemon. Swirled generously with bright lemon curd and crowned with elegant candied lemon slices, this creation transcends the ordinary, offering an unforgettable culinary experience that will leave a lasting impression on every palate. Prepare to be enchanted by the harmonious symphony of flavors in this truly spectacular cheesecake.
Your very first taste of this delectable Lemon Cheesecake Recipe promises a moment of pure bliss. Each forkful delivers a perfect balance of sweet and tart, enveloped in a smooth, luxurious texture that melts in your mouth. This isn’t just a dessert; it’s an invitation to savor the refreshing essence of citrus in a sophisticated and utterly satisfying form.
Why This Lemon Cheesecake is an Absolute Must-Bake
As an avid baker, I often find myself entrusted with crafting the perfect dessert for special occasions. For a recent New Year’s Day gathering, I decided to pivot from the usual decadent chocolate offerings and explore another universally adored flavor: lemon. The inspiration struck when a friend enthusiastically shared a recipe for a Southern Living cheesecake that had captivated him. Knowing its potential, I carefully preserved the recipe, awaiting the ideal moment to bring this citrusy masterpiece to life. That moment arrived, and the results were nothing short of sensational.
Here are compelling reasons why this particular lemon cheesecake recipe deserves a top spot in your baking repertoire:
- **Unmatched Flavor Profile:** If you possess a profound love for lemon desserts, this lemon cheesecake is unequivocally a champion. Its layers of creamy cheesecake and tangy lemon curd create an explosion of fresh, bright flavors that invigorate the senses.
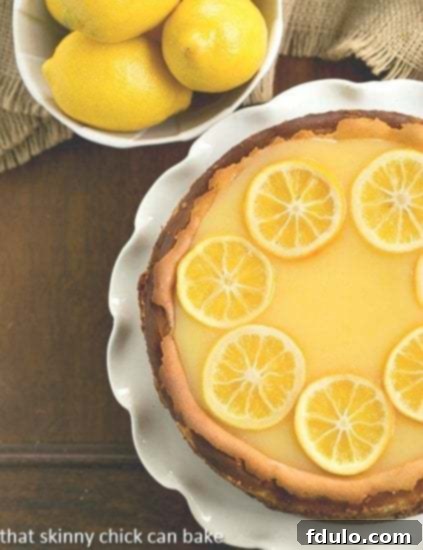
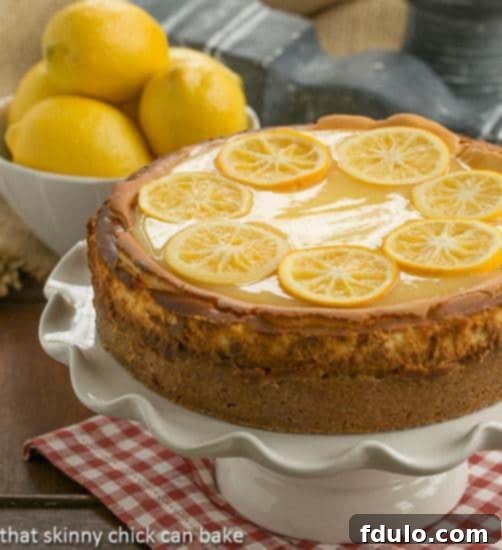
- **Stunning Bakery-Quality Presentation:** The meticulous touch of topping this cheesecake with a glistening layer of homemade lemon curd and meticulously sliced, beautifully candied lemons elevates it from a simple dessert to a show-stopping centerpiece. Its visual appeal is on par with the finest bakery creations, guaranteed to impress your guests.
- **A Taste of Pure Sunshine:** Every single bite of this cheesecake is like a concentrated dose of sunshine. The refreshing lemon notes awaken the palate, offering a cheerful and uplifting culinary experience, perfect for brightening any day or celebrating any occasion.
- **The Perfect Balance:** This recipe strikes an impeccable balance between the rich, velvety texture of a classic cheesecake and the lively, piquant character of lemon. It avoids being overly sweet, allowing the natural brightness of the citrus to shine through.
- **Versatility for Any Season:** While lemon flavors are often associated with spring and summer, this cheesecake’s comforting creaminess paired with its invigorating zest makes it a delightful choice year-round. It’s equally at home at a festive holiday table as it is at a casual summer picnic.
Crafting the Perfect Citrus Lover’s Dream Dessert
Over the past few years, a cherished tradition has emerged among my friends: gathering for a cozy soup and football viewing session on New Year’s Day. These friends are my most enthusiastic taste-testers, always eager to sample my latest culinary experiments. This year, I decided they would be the fortunate guinea pigs for this exquisite vanilla cheesecake featuring generous layers of lemon curd. To ensure optimal flavor and allow for a relaxed preparation schedule, I intelligently divided the baking process into three distinct phases.
On day one, I dedicated my efforts to crafting both the luscious lemon curd and the delicate candied lemons. Once prepared, these components were carefully stored in the refrigerator, allowing their flavors to deepen and mature. Day two was dedicated to baking the cheesecake itself. Cheesecakes notoriously benefit from a lengthy chill, so an overnight stint in the refrigerator was absolutely essential to achieve its perfect set and texture. This phased approach not only streamlines the baking experience but also ensures that each component is at its peak when assembled.
A note on baking cheesecakes: I initially chose not to bake this cheesecake in a traditional water bath, and there are distinct pros and cons to this method. On the positive side, eliminating the water bath removes the worry of water potentially seeping through the bottom of the (affiliate link) springform pan, which can lead to an undesirable soggy crust. However, the primary drawback of foregoing a water bath is the increased likelihood of cracks appearing on the top surface of the cheesecake during baking and cooling. But fear not! For this particular homemade lemon cheesecake, any such imperfections are beautifully camouflaged by the lavish topping of lemon curd and candied lemons. It’s our little secret—no one will ever be the wiser, and the stunning final presentation remains flawless.
By New Year’s Day, the bulk of the work was done. All that remained was the satisfying final assembly: carefully removing the set Lemon Cheesecake from its springform pan and artfully decorating it with the vibrant lemon curd and the elegant candied lemon slices. For the crust, I made a thoughtful deviation from the original recipe’s pastry crust, opting instead for a simpler yet equally delicious crust made from crushed vanilla wafers. I wholeheartedly recommend this easier route; it provides a delightful texture and subtle sweetness that perfectly complements the tangy filling without adding unnecessary complexity to the preparation. This streamlined approach allows you to focus on the joy of creating and sharing this magnificent dessert.
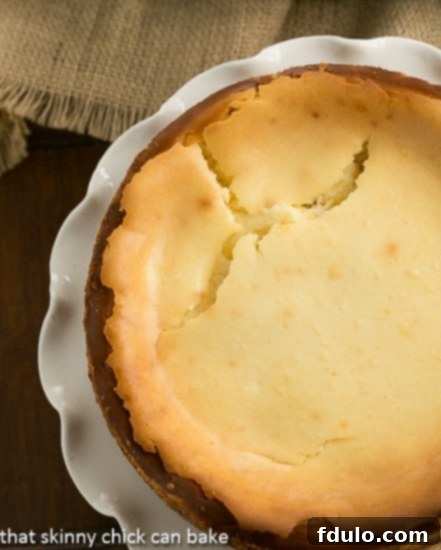
Expert Tip: Do not be concerned if minor cracks appear on the top of your cheesecake after baking. Since the entire surface will be generously covered with a layer of delicious lemon curd, these imperfections will be completely hidden, ensuring a beautiful and polished final look!
Essential Recipe Tips for a Flawless Lemon Bar Cheesecake
The reception from my friends for this homemade lemon cheesecake was overwhelmingly positive, earning rave reviews and widespread admiration. What began as small, polite slices quickly escalated into requests for second helpings, with the most ardent fans even taking doggy bags home. The delightful tartness of the lemon curd proved to be an exquisite counterpoint to the rich, velvety cream cheese filling, creating a truly harmonious flavor experience. To help you achieve similar success, here are some crucial tips for baking your own perfect lemon bar cheesecake:
- **Room Temperature Ingredients are Key:** Always ensure your cream cheese and eggs are at proper room temperature before you begin mixing. This is a non-negotiable step for achieving a smooth, creamy, and lump-free cheesecake batter. Cold ingredients do not emulsify properly, leading to a textured, often grainy, cheesecake.
- **Utilize the Paddle Attachment:** When preparing the cheesecake batter, opt for the paddle attachment on your stand mixer. The paddle attachment gently combines the ingredients, minimizing the incorporation of excess air into the batter. Too much air can lead to a puffy cheesecake that may crack or fall during cooling. A paddle attachment ensures a denser, smoother, and perfectly textured cheesecake.
- **Add Eggs One at a Time, Gently:** Integrate eggs into the batter individually, beating just until each egg is fully blended before adding the next. Overmixing the eggs can also introduce too much air, which we want to avoid for a dense cheesecake.
- **Avoid Over-Mixing:** Once all ingredients are added, resist the urge to over-mix the batter. Mix only until the ingredients are just combined and smooth. Use a spatula to scrape down the bottom and sides of the bowl a few times to ensure everything is thoroughly incorporated without excessive aeration.
- **Consider a Water Bath (Bain-Marie):** While I initially skipped this step, seeing the crack in my cheesecake has convinced me to strongly recommend it for the next time. Baking in a water bath creates a moist, even heat environment, which significantly reduces the risk of cracks forming on the cheesecake’s surface. It results in a beautifully smooth, uniformly cooked cheesecake.
- **Proper Water Bath Setup:** If you choose to use a water bath, meticulous preparation is essential. Wrap the exterior of your springform pan with at least two layers of heavy-duty aluminum foil. This forms a protective barrier, preventing any water from seeping into the pan and compromising your crust. Place the foil-wrapped springform pan into a larger roasting pan, then carefully pour boiling water into the roasting pan until it comes about 1-2 inches up the sides of the springform pan.
- **Embrace or Decorate Imperfections:** Should your cheesecake still develop cracks, remember that the lemon curd topping is your best friend! It will beautifully conceal any imperfections, ensuring your dessert looks picture-perfect. Alternatively, get creative with other toppings like fresh berries glazed with a vibrant red currant jelly, a dollop of slightly sweetened sour cream, or extra lemon zest.
Mastering this lemon bar cheesecake recipe will undoubtedly be a veritable triumph for you, just as it was for me. It’s a testament to the joy of baking and the simple pleasure of sharing truly exceptional food.
The Art of Crafting Perfect Lemon Curd
The soul of this cheesecake lies in its exquisite lemon curd. Achieving that vibrant, silky-smooth texture and intense citrus flavor is an art. The process begins with carefully zesting and juicing fresh lemons to capture their bright essence. When cooking the curd, constant whisking over medium-low heat is crucial. This continuous motion prevents the eggs from scrambling and ensures a smooth, thick consistency. You’ll know the curd is ready when it coats the back of a spoon and holds its shape, or when it reaches a temperature of around 170°F (77°C). Immediately after cooking, press plastic wrap directly onto the surface of the warm curd. This prevents a “skin” from forming as it cools, maintaining its luxurious smoothness. Chilling the curd for at least four hours, or preferably overnight, allows it to thicken to the perfect consistency and intensifies its tart, refreshing flavor. Any leftover lemon curd can be stored in an airtight container in the refrigerator for up to two weeks, perfect for spreading on toast or scones.
Mastering the Elegance of Candied Lemons
Candied lemons are not just a garnish; they are miniature works of edible art that add both visual appeal and a delightful chewy texture to the Lemon Bar Cheesecake. The secret to their success lies in thinly slicing the lemons—about ⅛-inch thick—and meticulously removing any seeds. These delicate slices are then simmered gently in a sugar syrup until their rinds become translucent and tender. The low and slow cooking process transforms the tart, bitter rind into a soft, sweet, and slightly chewy treat. Laying them out in a single layer on parchment paper to cool completely allows them to firm up and prevents them from sticking together. Candied lemons can be prepared a day or two in advance, making them a convenient component for your dessert. They are not only perfect for cheesecakes but also make a beautiful garnish for cocktails or other sweet treats.
Serving and Storage Suggestions
Once your Lemon Bar Cheesecake has been thoroughly chilled and adorned with its beautiful toppings, it’s ready to be served. For the cleanest slices, use a sharp, thin knife dipped in hot water and wiped clean between each cut. This creates pristine portions that highlight the cheesecake’s layers. This cheesecake pairs wonderfully with a cup of robust coffee, a delicate tea, or even a sparkling dessert wine. For an extra touch, consider serving it with a dollop of fresh whipped cream or a few fresh berries, though it is certainly magnificent on its own. To store, cover the cheesecake loosely with plastic wrap or aluminum foil and keep it refrigerated. It will maintain its exquisite flavor and texture for 3-5 days. For longer storage, slices can be individually wrapped and frozen for up to one month; simply thaw in the refrigerator before serving.
More Irresistible Lemon Desserts:
- Lemon Strawberry Trifle from Mom on Timeout
- Lemon Yogurt Breakfast Cake from The View from Great Island
- Raspberry Topped Lemon Souffle
- Classic Lemon Meringue Pie
- Lemon Cream Croquembouche
- Lemon Blueberry Muffin Bread
- Discover even more delightful Dessert Recipes
Stay connected with us for more delicious recipes and baking inspiration! Find us on social media @ Instagram, Facebook, and Pinterest. Don’t forget to tag us when you try one of our recipes! Your creations inspire us, and if you love the results, please consider leaving a 5-star rating in the recipe card below.
Lemon Bar Cheesecake Recipe
1 hour
1 hour 50 minutes
2 hours 50 minutes
18 servings
A truly luscious citrus cheesecake featuring creamy lemon curd and elegant candied lemons. This delightful recipe has been thoughtfully adapted from Southern Living, ensuring a dessert that is both classic and uniquely flavorful.
Ingredients
For the Crust:
- 8 ounces vanilla wafers, finely crushed or processed into crumbs
- 3 tablespoons granulated sugar
- 7 tablespoons unsalted butter, melted
For the Cheesecake Filling:
- 32 ounces (four 8-ounce packages) full-fat cream cheese, softened to room temperature
- 1 cup granulated sugar
- 4 large eggs, at room temperature
- 2 teaspoons pure vanilla extract
For the Lemon Curd:
- 6 large fresh lemons (for zest and juice)
- ½ cup unsalted butter, softened to room temperature
- 2 cups granulated sugar
- 4 large eggs
For the Candied Lemons:
- 2 small lemons
- 1 cup granulated sugar
- 2 tablespoons fresh lemon juice
- ¾ cup water
Instructions
Step 1: Prepare the Lemon Curd
- Carefully grate the zest from the lemons until you have 2 tablespoons. Then, juice the lemons to yield 1 cup of fresh lemon juice.
- In a medium bowl, use a hand mixer to beat the softened butter and 2 cups of sugar on medium speed until the mixture is light and blended.
- Add the 4 eggs, one at a time, beating only until each egg is just incorporated before adding the next.
- Gradually pour the 1 cup of lemon juice into the butter mixture, beating on low speed until just blended after each addition. Stir in the reserved lemon zest. The mixture may appear slightly curdled at this stage, which is normal.
- Transfer the mixture to a large saucepan. Cook over medium-low heat, whisking constantly, for 14 to 16 minutes, or until the curd visibly thickens and coats the back of a spoon.
- Remove from heat. Place plastic wrap directly onto the surface of the warm lemon curd to prevent a film from forming as it cools. Chill in the refrigerator for at least 4 hours, or preferably overnight, until thoroughly cold and set.
Step 2: Make the Candied Lemons
- Wash the 2 small lemons thoroughly. Slice them into very thin ⅛-inch-thick rounds, carefully removing any seeds.
- In a skillet, combine 1 cup of sugar, 2 tablespoons of fresh lemon juice, and ¾ cup of water. Stir over medium heat until the sugar is completely dissolved.
- Add the thin lemon slices to the skillet, arranging them in a single layer. Simmer gently, turning the slices occasionally, for 14 to 16 minutes, or until the lemon rinds become soft and translucent.
- Carefully remove the lemon slices from the syrup and place them in a single layer on a sheet pan lined with parchment paper. Allow them to cool completely. These can be made a day or two in advance and stored at room temperature in an airtight container.
Step 3: Prepare and Bake the Crust
- Preheat your oven to 375°F (190°C).
- In a medium bowl, stir together the vanilla wafer crumbs and 3 tablespoons of sugar. Pour in the melted butter and mix thoroughly until all crumbs are moistened.
- Press the crumb mixture firmly and evenly onto the bottom of a 9-inch springform pan, extending about 2 inches up the sides of the pan.
- Bake the crust in the preheated oven for 9 to 12 minutes, or until it is lightly golden brown and fragrant.
- Remove the crust from the oven and place it on a wire rack to cool completely.
- Reduce the oven temperature to 325°F (160°C).
Step 4: Assemble and Bake the Cheesecake
- In a large mixing bowl, beat the softened cream cheese at medium speed with an electric mixer for about 3 minutes, or until it is perfectly smooth and creamy.
- Gradually add 1 cup of granulated sugar to the cream cheese, continuing to beat until the sugar is fully blended and the mixture is fluffy.
- Add the 4 eggs, one at a time, beating only until each egg is just blended into the batter. Do not overmix.
- Stir in the 2 teaspoons of vanilla extract until just combined.
- Pour two-thirds of the cheesecake batter (approximately 4 cups) into the prepared and cooled crust.
- Dollop about 1 cup of the chilled lemon curd in large spoonfuls over the batter in the pan. Gently swirl the lemon curd into the cheesecake batter with a knife or skewer to create a beautiful marbled effect.
- Carefully spoon the remaining cheesecake batter over the swirled lemon curd mixture in the pan, spreading it evenly.
- Bake at 325°F (160°C) for 1 hour to 1 hour and 10 minutes, or until the edges are set and the center jiggles only slightly when gently shaken.
- Once baked, turn the oven off and leave the cheesecake inside for an additional 15 minutes. This slow cooling helps prevent cracking.
- Remove the cheesecake from the oven and immediately run a thin knife around the inside edge of the springform pan to loosen it. This crucial step helps prevent cracks as the cheesecake cools and contracts.
- Allow the cheesecake to cool completely on a wire rack for about 1 hour at room temperature.
- Cover the cooled cheesecake loosely with plastic wrap and chill in the refrigerator overnight (at least 8 hours) to allow it to fully set and firm up.
- When ready to serve, remove the sides of the springform pan. Carefully transfer the cheesecake to a serving platter.
- Spoon the remaining 1 cup of chilled lemon curd generously over the top of the cheesecake, spreading it evenly. Arrange the candied lemon slices artfully over the lemon curd as a beautiful garnish.
Chef’s Notes
For the best results, remember to make the lemon curd well in advance, allowing it to chill for at least 4 hours, or ideally overnight, to achieve its perfect consistency. Similarly, the entire cheesecake needs to chill for a minimum of 8 hours after baking to ensure it is fully set and offers the ideal creamy texture. If you happen to have any leftover lemon curd, store it in a covered container in your refrigerator where it will remain fresh for up to 2 weeks, perfect for various culinary uses. The precise timing of preparation and chilling is paramount for the success of this spectacular dessert.
Recommended Products for Success
As an Amazon Associate and member of other affiliate programs, I earn from qualifying purchases, helping to support this site.
- KitchenAid KSM150PSER Artisan Tilt-Head Stand Mixer with Pouring Shield, 5-Quart, Empire Red
- Nordic Ware Leakproof Springform Pan, 10 Cup, 9 Inch
- Nielsen-Massey Madagascar Bourbon Pure Vanilla Extract, 4 ounces
Nutrition Information:
Yield:
18
Serving Size:
1 slice
Amount Per Serving:
Calories: 854Total Fat: 52gSaturated Fat: 24gTrans Fat: 1gUnsaturated Fat: 23gCholesterol: 967mgSodium: 626mgCarbohydrates: 64gFiber: 1gSugar: 54gProtein: 34g
Share Your Love for This Recipe!
We’d be thrilled to hear how much you enjoyed this recipe! Please consider leaving a comment on the blog post or sharing a photo of your creation on Pinterest. Your feedback and photos inspire our community!
