Indulge in the ultimate chocolate experience with these rich, fudgy Refrigerator Brownies. Boasting a decadent trifecta of unsweetened chocolate, generous chocolate chips, and a smooth, shiny frosting, these brownies are truly swoon-worthy for any chocolate lover. Prepare to be thrilled by every dense, chewy bite!
There’s a special kind of magic that happens when you combine exceptional ingredients with a thoughtful cooling process. These Frosted Chocolate Chocolate Chip Brownies elevate the classic treat to new heights, delivering an unparalleled depth of flavor and a perfectly dense texture that sets them apart. They were an instant sensation among my family and friends, and I’m absolutely certain they’ll become a beloved staple in your kitchen, too. Get ready for an explosion of chocolate in every single delicious square!
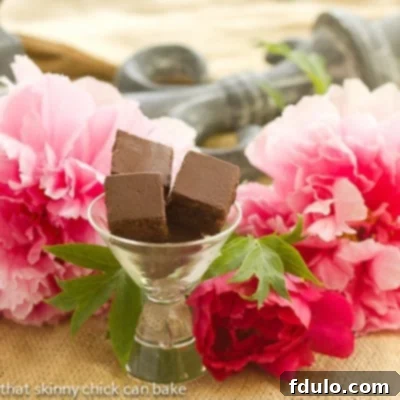
Refrigerator Brownies: The Ultimate Chilled Chocolate Treat
You might be thinking, “Another brownie recipe?” And you’d be right to wonder, given the sheer number of brownie variations out there. I often find myself overwhelmed when asked to pick a favorite from the many batches I’ve baked. However, these Refrigerator Brownies quickly rose to the top of the list, earning enthusiastic approval from even the most discerning chocolate connoisseurs in my household. The secret lies not just in the rich ingredients, but in the crucial chilling step that transforms them into an even more intensely fudgy and satisfying dessert.
What exactly makes a brownie a “refrigerator brownie”? It’s more than just a place to store leftovers. This specific recipe is designed to be chilled, which fundamentally changes its texture and enhances its flavor profile. As the brownies cool and firm up in the refrigerator, the fats solidify, creating an incredibly dense, chewy, and irresistibly fudgy consistency that’s impossible to achieve with room-temperature brownies. The frosting also sets beautifully, contributing to a clean cut and a delightful contrast of textures. It’s this dedication to the cooling process that truly elevates these Frosted Chocolate Chocolate Chip Brownies from good to utterly extraordinary.
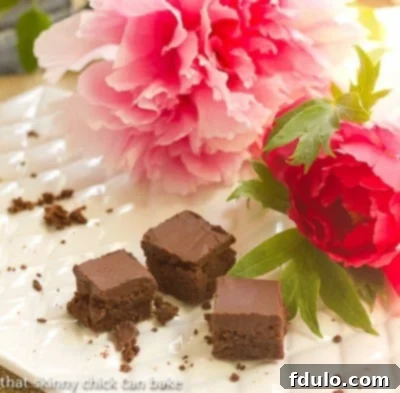
Mastering the Art of Slicing Brownies for Perfect Presentation
Achieving perfectly uniform and clean-cut brownie slices might seem like a minor detail, but it significantly enhances the presentation and overall enjoyment of your baked goods. While my own efforts aren’t always flawless (especially when rushing, as I did with this batch for an impromptu gathering after a volunteer gig), I’ve refined a technique over the years that consistently yields beautiful results. The main challenge I faced this particular time was not having enough time for a complete chill, which, as you’ll see, is absolutely paramount for neat slices. But rest assured, my standards are notoriously strict, far exceeding those of 99% of lucky recipients!
For those striving for bakery-quality, impeccably sliced brownies, I highly recommend adopting these meticulous steps. They transform the simple act of cutting into an art form:
- Thoroughly Chill Your Brownies or Bar Cookies: This is arguably the most critical step, especially for fudgy brownies like these Refrigerator Brownies. Chilling allows the fats to solidify, making the brownies firm and dense. This firmness prevents crumbling and smudging, ensuring a clean edge. For best results, chill them in the refrigerator for at least 2-4 hours, or even overnight. Patience truly pays off here.
- Line Your Pan with Parchment Paper or Non-Stick Foil with Overhangs: This simple trick makes removing your cooled brownies from the pan incredibly easy. The overhangs act as handles, allowing you to lift the entire slab of brownies out effortlessly. This prevents any damage that might occur from trying to pry them out of the pan, safeguarding those pristine edges.
- Use a Long, Sharp Knife for Cutting: A sharp knife is essential for making clean, precise cuts through dense brownies. A longer blade allows for a single, sweeping cut rather than multiple choppy motions, which can lead to ragged edges. A chef’s knife or a large serrated knife can work wonderfully.
- Utilize a Ruler for Evenly Sized Bars: If “eyeballing” perfectly symmetrical portions isn’t your strong suit (and let’s be honest, it’s a challenge for many!), a ruler is your best friend. Lightly score hash marks along both the vertical and horizontal edges of your brownie slab at your desired intervals. This provides a clear guide, ensuring every single piece is uniform in size and shape.
- Dip Your Knife in Hot Water and Wipe Clean Between Slices: This professional trick is a game-changer. Fill a tall container with very hot water. Dip your knife into the hot water for a few seconds, then immediately wipe it completely dry with a clean towel. The heat from the blade slightly melts the chocolate as it passes through, creating an incredibly smooth, non-stick cutting surface. Make one slice, then repeat the process – dip, dry, slice – for each subsequent cut. This prevents chocolate residue from building up on the knife and smudging the edges of your next slice.
In essence, the secret lies in thoroughly chilling your brownies, using a properly lined pan, and employing a hot, dry, sharp knife for each individual cut. Following these steps will transform your brownie-slicing game, delivering professional-looking results every time. Here are some examples of other well-cut baked goods that demonstrate the beauty of this technique:
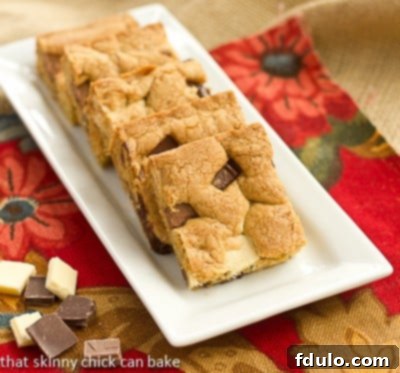
Brown Butter Chocolate Chunk Bars
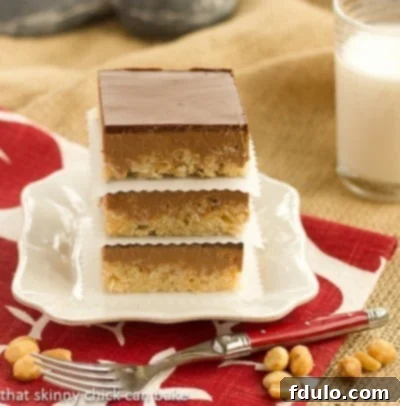
Chocolate Peanut Butter Krispie Bars
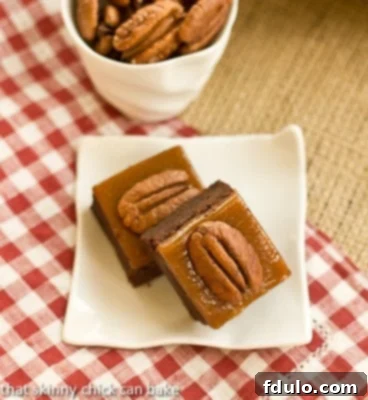
Turtle Brownies
The Magic of Chocolate in Refrigerator Brownies
The unparalleled richness of these Refrigerator Brownies comes from a carefully selected combination of chocolates, each playing a vital role in creating a complex and satisfying flavor profile. We start with unsweetened chocolate, which provides a deep, robust cocoa foundation. This isn’t just about sweetness; it’s about building a profound chocolate flavor that resonates throughout the brownie. Its bitterness is perfectly balanced by the sugars, resulting in a mature, not overly sweet, base.
Then, we introduce semisweet chocolate chips into the batter. These chips melt partially during baking, creating pockets of gooey, intensified chocolate that burst with flavor in every bite. This layering of chocolate ensures that from the first taste to the last, you’re experiencing multiple dimensions of cocoa goodness. The final touch, of course, is the luscious semisweet chocolate frosting, which adds another layer of smooth, glossy chocolate, sealing in the moisture and adding to the overall decadent experience. It’s this thoughtful interplay of different chocolate forms that makes these Frosted Chocolate Chocolate Chip Brownies truly exceptional.
Serving Suggestions and Storage Tips for Your Decadent Refrigerator Brownies
While these Refrigerator Brownies are utterly divine on their own, a few serving enhancements can elevate the experience even further. Imagine a square of this fudgy delight warmed slightly and topped with a scoop of vanilla bean ice cream, allowing the frosting to soften and mingle with the creamy coldness. A drizzle of caramel or a sprinkle of sea salt can also provide a delightful contrast to the rich chocolate. For a more sophisticated pairing, serve them alongside a robust cup of coffee, a glass of cold milk, or even a dry red wine, which complements the deep chocolate notes beautifully.
Proper storage is key to maintaining the incredible texture and flavor of your Refrigerator Brownies. As their name suggests, these brownies thrive when chilled. Once frosted, store them in an airtight container in the refrigerator. This will keep them wonderfully fudgy and fresh for up to a week. For longer storage, you can individually wrap them in plastic wrap, then place them in an airtight container or freezer bag, and freeze for up to 2-3 months. Thaw them in the refrigerator overnight or at room temperature for an hour before serving to enjoy their rich, dense goodness.

Refrigerator Brownies: Frosted Chocolate Chocolate Chip Delight
20 minutes
30 minutes
50 minutes
25 brownies
Experience the ultimate fudgy indulgence with these rich Frosted Refrigerator Brownies. Packed with chocolate chips and topped with a glossy, decadent frosting, these chilled chocolate treats are a must-try for any serious dessert enthusiast. Prepare for dense, chewy perfection in every bite!
Ingredients
Gather your high-quality chocolate and essential baking staples to create the base for these extraordinary brownies. Fresh ingredients ensure the best flavor and texture.
For the brownies:
- ¼ cup all-purpose flour
- 1 teaspoon baking powder
- ½ teaspoon salt
- ½ cup (1 stick) unsalted butter
- 3 ounces unsweetened chocolate (chopped for easier melting)
- ½ cup packed light brown sugar
- ½ cup granulated sugar
- 2 large eggs
- 1 large egg yolk (for extra richness and chewiness)
- 1 teaspoon pure vanilla extract
- ½ cup semisweet chocolate chips (for mixing into the batter)
For the luscious, glossy frosting, you’ll need just a few simple ingredients to create a perfect topping that sets beautifully when chilled.
For the chocolate frosting:
- 1 cup semisweet chocolate chips
- 4 tablespoons (1/2 stick) unsalted butter
- 1 teaspoon pure vanilla extract
- 1/2 cup powdered sugar (confectioners’ sugar)
- 1-2 tablespoons milk (dairy or non-dairy, as needed)
Instructions for Baking and Perfect Frosting
- Prepare Your Pan and Oven: Preheat your oven to 350ºF (175ºC). Line an 8-inch square baking pan with non-stick foil or regular foil sprayed generously with non-stick cooking spray. Ensure there’s an overhang on two sides to easily lift the brownies out later. Set aside.
- Melt Chocolate and Butter: In a microwave-safe bowl, combine the ½ cup butter and 3 ounces of chopped unsweetened chocolate. Microwave in 30-second increments, stirring well after each interval, until the mixture is completely melted and smooth. Be careful not to overheat the chocolate, as it can seize.
- Combine Wet Ingredients: Whisk the brown sugar and granulated sugar into the melted chocolate mixture. Allow it to cool for a couple of minutes – this prevents the eggs from scrambling when added. Then, whisk in the 2 eggs, the extra egg yolk, and the vanilla extract until fully incorporated and smooth.
- Fold in Dry Ingredients and Chips: In a separate small bowl, whisk together the flour, baking powder, and salt. Gradually add these dry ingredients to the chocolate mixture, folding gently with a rubber spatula until just combined. Avoid overmixing, as this can lead to tough brownies. Finally, fold in the ½ cup semisweet chocolate chips.
- Bake the Brownies: Pour the brownie batter into your prepared pan, spreading the top evenly with an offset spatula. Bake for 25-30 minutes, or until a toothpick inserted into the center comes out with moist crumbs clinging to it. The edges should be set, but the center can still be slightly soft for ultimate fudginess. Remove from the oven and allow to cool completely on a wire rack before attempting to frost. Cooling fully is critical for a clean frosting application.
- Prepare the Chocolate Frosting: While the brownies cool, prepare the frosting. In another microwave-safe bowl, combine the 1 cup semisweet chocolate chips and 4 tablespoons butter. Microwave in 30-second increments, stirring thoroughly after each, until the mixture is fully melted and smooth.
- Finish the Frosting: Whisk the vanilla extract into the melted chocolate and butter mixture. Then, gradually stir in the powdered sugar until smooth.
- Adjust Frosting Consistency: Add one tablespoon of milk and whisk briskly to incorporate. If the frosting is too thick, add up to another tablespoon of milk, a teaspoon at a time, whisking continuously until you reach your desired smooth, glossy, and spreadable consistency.
- Frost and Chill: Immediately spread the prepared frosting evenly over the completely cooled brownies using an offset spatula. Once frosted, place the pan in the refrigerator. Chill until the frosting is fully set and firm, typically 1-2 hours, before slicing and serving. This chilling step is what makes them “Refrigerator Brownies” and gives them their signature dense, fudgy texture and clean cuts.
Nutrition Information:
Yield:
25
Serving Size:
1
Amount Per Serving:
Calories: 173Total Fat: 11gSaturated Fat: 7gTrans Fat: 0gUnsaturated Fat: 4gCholesterol: 37mgSodium: 115mgCarbohydrates: 19gFiber: 1gSugar: 15gProtein: 2g
Thatskinnychickcanbake.com occasionally offers nutritional information for recipes contained on this site. This information is provided as a courtesy and is an estimate only. This information comes from online calculators. Although thatskinnychickcanbake.com attempts to provide accurate nutritional information, these figures are only estimates. Varying factors such as product types or brands purchased can change the nutritional information in any given recipe. Also, many recipes on thatskinnychickcanbake.com recommend toppings, which may or may not be listed as optional and nutritional information for these added toppings is not listed. Other factors may change the nutritional information such as when the salt amount is listed “to taste,” it is not calculated into the recipe as the amount will vary. Also, different online calculators can provide different results. To obtain the most accurate representation of the nutritional information in any given recipe, you should calculate the nutritional information with the actual ingredients used in your recipe. You are solely responsible for ensuring that any nutritional information obtained is accurate.
HOW MUCH DID YOU LOVE THIS RECIPE?
Please leave a comment on the blog or share a photo on Pinterest and tag us!
I’d love you to follow my blog via Bloglovin’ for more delicious recipes and baking tips.
