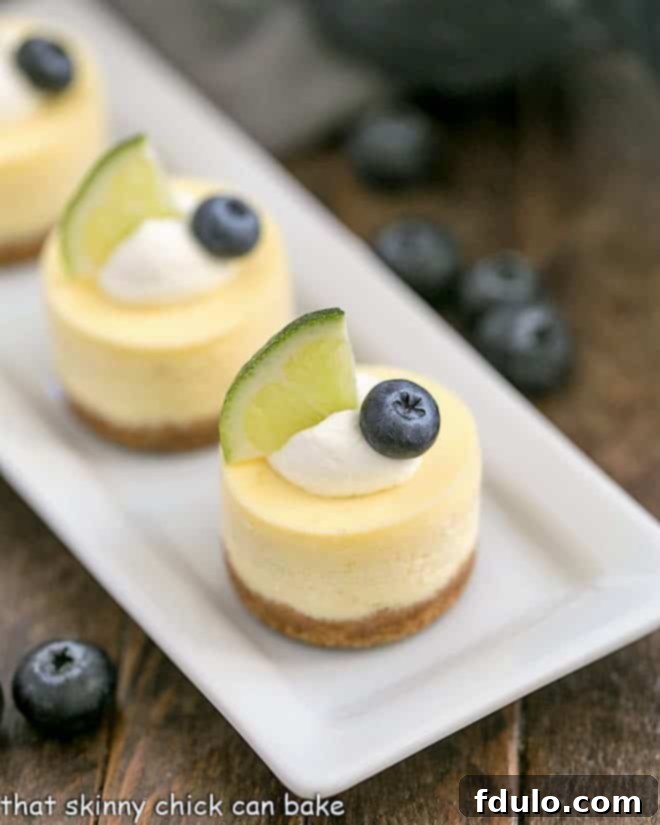
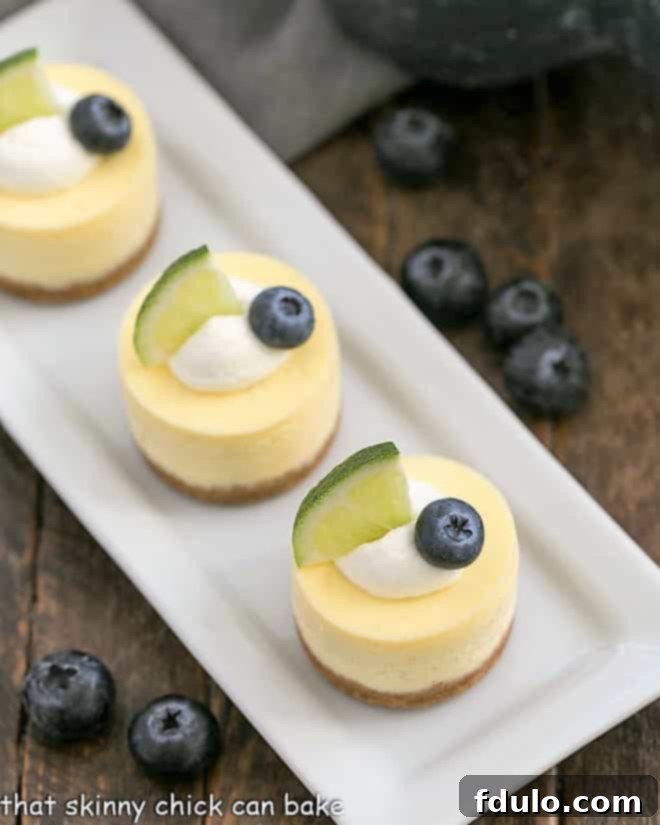
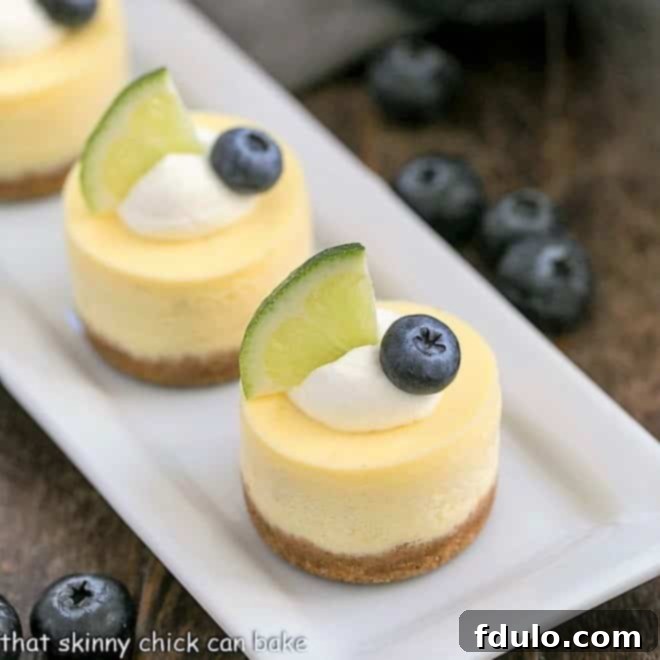
Who can resist the allure of a perfectly portioned, bite-sized dessert? These delightful Mini Margarita Cheesecakes are an absolute dream, delivering an irresistible burst of zesty lime flavor that will captivate your taste buds. Imagine the classic vibrant taste of a margarita cocktail, elegantly transformed into a creamy, luscious cheesecake. This recipe takes everything you love about the iconic drink – the refreshing tang of lime, a subtle warmth from tequila, and the sophisticated sweetness of orange liqueur – and crafts it into individual servings of pure joy.
Each mini cheesecake begins with a crisp graham cracker crust, providing the perfect foundation for the incredibly smooth and velvety lime-infused filling. A delicate balance of fresh lime juice and zest elevates the citrus notes, while a touch of premium tequila and Grand Marnier (or Cointreau) introduces that distinctive margarita character without being overpowering. These aren’t just cheesecakes; they’re an experience, promising to be the star of any gathering, from casual get-togethers to elegant dinner parties.

Why These Mini Margarita Cheesecakes are a Must-Make
- Effortless Entertaining Brilliance: These mini margarita cheesecake bites are tailored for all your entertaining needs. Their individual size makes serving a breeze, eliminating the need for slicing and messy plates. They’re perfect for a Tex-Mex feast finale, a festive Cinco de Mayo celebration, an elegant cocktail party, or simply when you’re hosting friends for dinner. They add a sophisticated yet fun touch to any dessert spread, leaving your guests impressed and delighted.
- Perfectly Portioned Indulgence: After a satisfying meal, sometimes a full slice of cheesecake can feel daunting. These mini cheesecakes offer the ideal serving size to satisfy your sweet cravings without any guilt. Their compact nature means you can enjoy a decadent treat without overindulging, making it perfectly acceptable to go back for a second if you truly desire!
- Irresistible Flavor Fusion: Infused with a double dose of vibrant lime flavor from both fresh zest and juice, these cheesecakes burst with refreshing citrus notes. What truly sets them apart is the subtle, sophisticated taste of a classic margarita cocktail, achieved with just the right touch of premium tequila and orange liqueur like Grand Marnier. The flavors are harmonious, bright, and utterly irresistible, making them a year-round favorite, especially as a delightful summer treat.
My love for mini desserts runs deep. Years ago, I perfected a decadent, full-sized Margarita Cheesecake, but there’s something uniquely charming and convenient about individual servings. Adapting beloved recipes into mini versions has become a passion, and these Mini Margarita Cheesecakes stand proudly alongside my Mini Chocolate Cheesecakes and delightful Pecan Tassies as cherished favorites. They capture all the flavor of their larger counterparts in a delightful, compact form.

Essential Expert Tips for Perfect Mini Margarita Cheesecakes
Crafting the perfect cheesecake requires a bit more finesse than baking a standard cake. The texture, the rise, and the overall creaminess depend on precise techniques. For even more detailed insights, you can explore More Tips for Making Cheesecakes. Below, we’ll cover everything from preparing your ingredients to mixing the batter flawlessly, and presenting your delicious creations beautifully.
Prepping for Success: Ingredients and Tools
- Room Temperature Ingredients are Key: This is a golden rule for cheesecake baking. Ensure your eggs and, most importantly, your cream cheese are at room temperature. This allows for a smoother, lump-free batter, which is crucial for achieving that signature velvety cheesecake texture. Cold ingredients tend to clump, leading to an inconsistent batter and potentially a cracked cheesecake surface.
- Plan Ahead: Set out your cold ingredients on the counter for at least 1 to 2 hours before you plan to begin baking. If you’re short on time and forgot, a quick trick for eggs is to place them in a bowl of warm (not hot!) water for about 10-15 minutes to take the chill off. Never use hot water that might cook them.
- The Right Mixer Attachment: When mixing your cheesecake batter, always use the paddle attachment on your stand mixer if available. The paddle gently combines ingredients without incorporating too much air. Excess air can cause your cheesecakes to puff up significantly during baking, only to sink and crack as they cool. Scrape down the sides of the bowl frequently to ensure all ingredients are fully incorporated.
- Eggs, One by One: Add eggs one at a time, mixing only until each egg is just incorporated into the batter. Overmixing after adding the eggs can also lead to too much air being incorporated, which can result in a less dense, soufflé-like texture rather than the desired smooth and creamy cheesecake consistency.
Flavor Profile & Liqueur Choices
- Embrace the Lime-Forward Flavor: Don’t expect an overwhelmingly strong, alcoholic margarita taste. These are individual lime cheesecakes with a delightful cocktail essence. The primary flavor profile is bright, zesty lime, complemented by the subtle background notes of tequila and orange liqueur. This balance makes them wonderfully refreshing and suitable for all palates.
- Orange Liqueur Options: I prefer Grand Marnier for its smooth, rich orange flavor, which pairs beautifully with lime. Cointreau is another excellent choice, offering a slightly drier, more intense orange profile. In a pinch, Triple Sec can be used; while not as smooth or complex as Grand Marnier or Cointreau, it will still impart the necessary orange notes.
Indispensable Tools for Mini Cheesecake Perfection
- Nonstick Mini Cheesecake Pan: This is a game-changer! A specialized mini cheesecake pan, often featuring 12 wells with individual removable discs, makes extracting your delicate cheesecakes incredibly easy and ensures they maintain their perfect shape. This feature alone makes it a worthwhile investment for any mini dessert enthusiast.
- Stand Mixer: While a hand mixer can work, a Stand Mixer is highly recommended, especially if you plan to make cheesecakes regularly. It allows for hands-free mixing with a paddle attachment, which, as mentioned, is crucial for developing a smooth, air-free batter. Its power and stability make the mixing process much more efficient and effective.
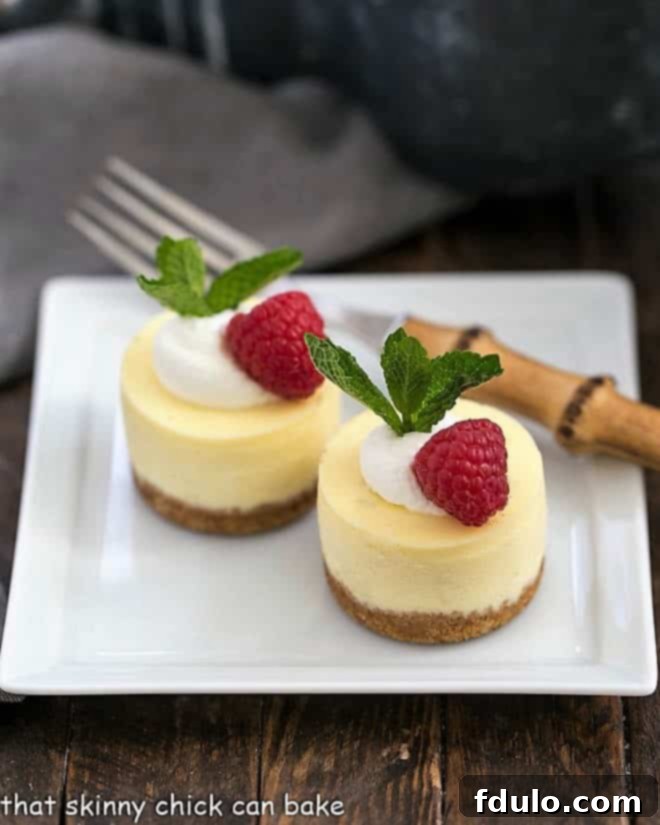
- Mini Muffin Tins as an Alternative: If you don’t have a mini cheesecake pan, mini muffin tins can be a viable alternative, as I’ve demonstrated with my Raspberry Topped Mini Cheesecakes. However, it’s essential to use paper mini muffin liners to ensure easy removal from the pan. Keep in mind that mini muffin tins hold less batter, so you might yield more than 12 cheesecakes per batch. Please note that I have not specifically tested *this* Margarita Cheesecake recipe in mini muffin tins, so baking times and exact yield may vary slightly.
- Tassie Tamper: For a perfectly uniform crust, a tassie tamper is invaluable. This tool helps you evenly and firmly press the graham cracker crumb mixture into each well of the mini cheesecake tin, creating a solid base that won’t crumble.

Tips for Baking, Cooling, and Serving Your Mini Margarita Cheesecakes
- Filling the Tins: The cheesecake batter will almost fill each well to the brim. Don’t worry if they rise a touch above the edges of the tin during baking; this is normal. As they cool, they will gently settle back down, ending up perfectly level with the size of the wells in your mini cheesecake pan.
- Doneness Check: The centers of the cheesecakes should look almost set, with a slight jiggle remaining when gently shaken. This indicates they are baked through but still moist and creamy. Overbaking can lead to a dry texture or cracks.
- Patience is a Virtue: Cooling and Chilling: For the absolute best texture and flavor, cheesecakes benefit significantly from thorough chilling. Allow your mini cheesecakes to cool completely on a wire rack at room temperature before transferring them to the refrigerator. Then, chill them overnight (at least 4 hours) to allow the flavors to meld and the texture to firm up beautifully. This step is non-negotiable for a truly sublime cheesecake experience.
- Serve at Room Temperature for Optimal Creaminess: While chilling is essential, cheesecakes taste best when allowed to come to room temperature for about 30-60 minutes before serving. This softens the texture slightly, enhancing their creamy consistency and allowing the complex flavors to truly shine. Plan accordingly for your serving time.
- Garnishing for a Flourish: Elevate your mini cheesecakes with elegant garnishes. A simple dab of sweetened whipped cream is always a winner. Pair it with a thin, mini wedge of fresh lime and a single blueberry for a pop of color, or opt for a vibrant fresh raspberry and a sprig of fragrant mint. For an extra touch of sophistication, consider adding a sprinkle of flaky sea salt (mimicking a margarita rim!) or a candied lime slice.
You May Also Like:
- Mini Chocolate Cheesecakes
- Mini Pumpkin Cheesecakes
- Caramel Topped Mini Cheesecakes
- Chocolate Dipped Cheesecake Bites
- More of my Best Cheesecake Recipes
Connect with me on social media! Find me @ Instagram, Facebook, and Pinterest. Don’t forget to tag me when you try one of my delicious recipes! If you loved these Mini Margarita Cheesecakes, please consider leaving a 5-star rating and a comment on the blog – your feedback means the world to me!

Mini Margarita Cheesecakes
20 minutes
25 minutes
45 minutes
12
Delightful Mini Lime Cheesecakes infused with all the vibrant flavors of your favorite margarita cocktail, perfect for any celebration!
Ingredients
For the Crust:
- ¾ cup graham cracker crumbs
- 1 tablespoon sugar
- 2 tablespoons melted butter
For the Mini Cheesecakes:
- 12 ounces cream cheese, at room temperature
- ½ cup sugar
- ½ cup sour cream
- 1 tablespoon fresh lime juice
- 1 teaspoon fresh lime zest
- 1 ½ teaspoons Grand Marnier or Cointreau
- 1 tablespoon tequila
- 2 eggs, at room temperature
- Lime slices, fresh berries and sweetened whipped cream, to garnish (optional)
Instructions
- Preheat your oven to 350°F (175°C). Lightly spray a mini cheesecake tin with nonstick cooking spray.
- In a medium bowl, mix together the graham cracker crumbs, sugar, and melted butter until thoroughly combined.
- Divide the crumb mixture evenly among the wells in the prepared pan. Use a tamper tool or your fingers to firmly press the mixture into the bottom of each well, creating a compact crust. Bake for 5 minutes, then remove the pan to a cooling rack while you prepare the filling.
- Using a stand mixer fitted with a paddle attachment (or a hand mixer), beat the room temperature cream cheese with ½ cup sugar until smooth and well combined. Be sure to scrape the bottom and sides of the bowl with a spatula as needed to ensure even mixing.
- Add the sour cream, fresh lime juice, lime zest, Grand Marnier (or Cointreau), and tequila to the cream cheese mixture. Mix on low speed until all ingredients are just combined and the batter is smooth.
- Add the eggs, one at a time, mixing on low speed only until each egg is fully incorporated into the batter. Avoid overmixing once the eggs are added.
- Carefully divide the cheesecake batter evenly between the 12 openings in the mini cheesecake pan (the batter will fill the cups almost to the top). Bake for approximately 18-20 minutes, or until the centers of the cheesecakes look almost set with a slight jiggle. The batter may rise above the tin during baking but will settle as they cool.
- Allow the cheesecakes to cool completely on a wire rack at room temperature. Once cool, transfer the pan to the refrigerator and chill for at least 4 hours, or preferably overnight, before serving. Garnish as desired with whipped cream, lime slices, and fresh berries.
Notes
For the smoothest, creamiest cheesecake batter, ensure all your dairy ingredients and eggs are at room temperature before mixing.
While chilling for at least 4 hours is necessary, refrigerating your cheesecakes overnight yields the best results. For optimal flavor and texture, let them sit out at room temperature for about 30-60 minutes before serving.
Recommended Products
As an Amazon Associate and member of other affiliate programs, I earn from qualifying purchases.
- KitchenAid KSM150PSER Artisan Tilt-Head Stand Mixer with Pouring Shield, 5-Quart, Empire Red
- Tassie Tamper
- Norpro Mini Nonstick Cheesecake Pan
Nutrition Information:
Yield:
12
Serving Size:
1 mini cheesecake
Amount Per Serving:
Calories: 218Total Fat: 15gSaturated Fat: 8gTrans Fat: 0gUnsaturated Fat: 5gCholesterol: 71mgSodium: 144mgCarbohydrates: 18gFiber: 1gSugar: 13gProtein: 4g
Thatskinnychickcanbake.com occasionally offers nutritional information for recipes contained on this site. This information is provided as a courtesy and is an estimate only. This information comes from online calculators. Although thatskinnychickcanbake.com attempts to provide accurate nutritional information, these figures are only estimates.
Varying factors such as product types or brands purchased can change the nutritional information in any given recipe. Also, many recipes on thatskinnychickcanbake.com recommend toppings, which may or may not be listed as optional and nutritional information for these added toppings is not listed. Other factors may change the nutritional information such as when the salt amount is listed “to taste,” it is not calculated into the recipe as the amount will vary. Also, different online calculators can provide different results.
To obtain the most accurate representation of the nutritional information in any given recipe, you should calculate the nutritional information with the actual ingredients used in your recipe. You are solely responsible for ensuring that any nutritional information obtained is accurate.
HOW MUCH DID YOU LOVE THIS RECIPE?
Please leave a comment on the blog or share a photo on Pinterest
