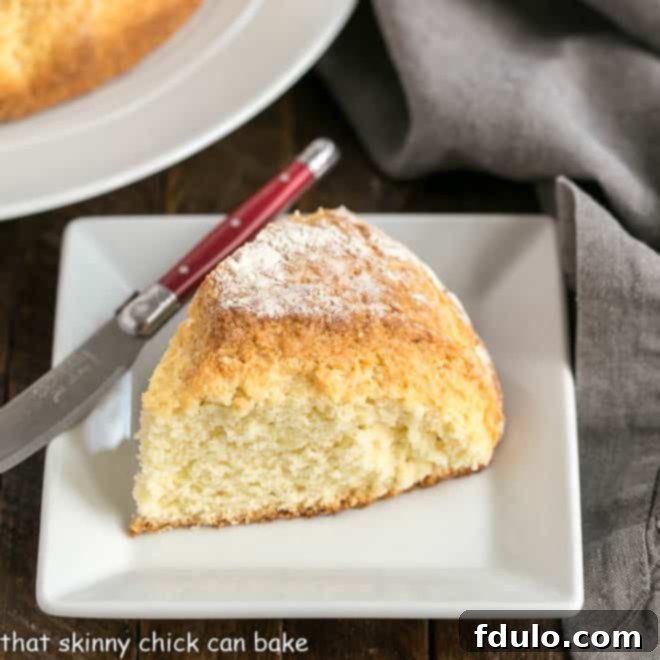
Delve into the comforting embrace of a warm loaf of Irish Soda Bread – a timeless classic that’s deceptively simple to make. Perfect for your St. Patrick’s Day celebrations, yet so utterly delicious, you’ll find yourself baking it year-round!
This Easy Soda Bread stands apart from traditional yeast-leavened breads, achieving its delightful rise through the magic of baking soda. Often called a “quick bread,” it relies on a chemical reaction between the alkaline baking soda and acidic ingredients like buttermilk. This dynamic duo creates a light, tender crumb with minimal effort, making it an ideal choice for bakers of all skill levels. The addition of buttermilk is key, not only providing that essential acidity for lift but also contributing a distinct tangy flavor and incredibly tender texture that truly elevates this rustic loaf.
Why This Simple Irish Soda Bread Will Become Your Favorite
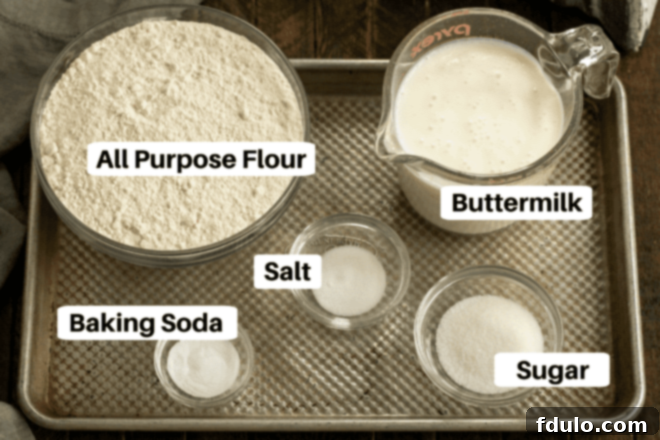
Having previously explored the hearty depths of Irish brown bread, I sought out a traditional soda bread recipe and found one that was wonderfully straightforward. This particular recipe captured my attention with its remarkably short ingredient list – typically just four core items: flour, baking soda, salt, and buttermilk. I barely needed to consult a shopping list, which speaks volumes about its accessibility and ease. It’s a truly humble bread, but its charm lies in its simplicity and comforting results.
- Effortless Baking: This quick bread recipe is a dream for busy schedules, requiring only a handful of staple ingredients like all-purpose flour, baking soda, salt, and essential buttermilk. Forget about long proofing times or complex techniques; this bread comes together in minutes.
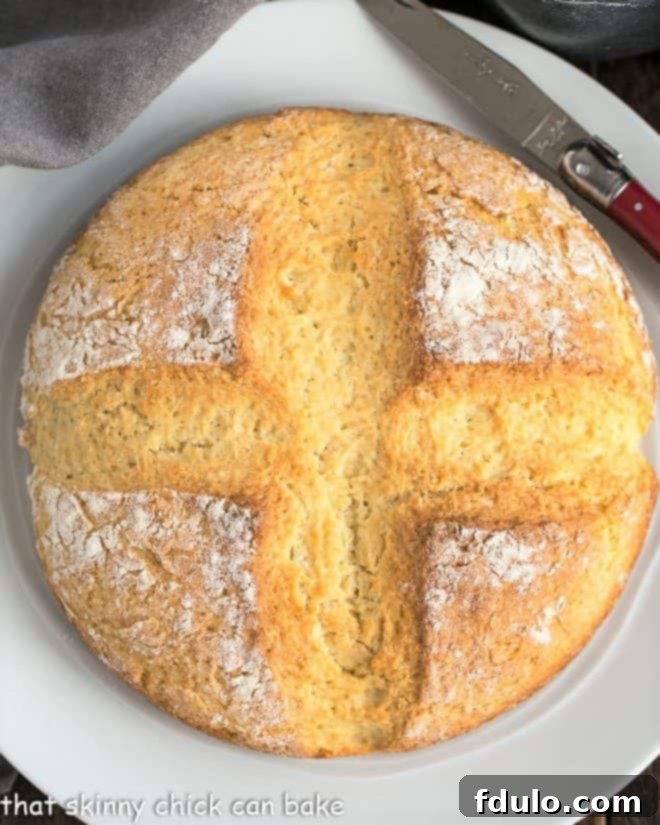
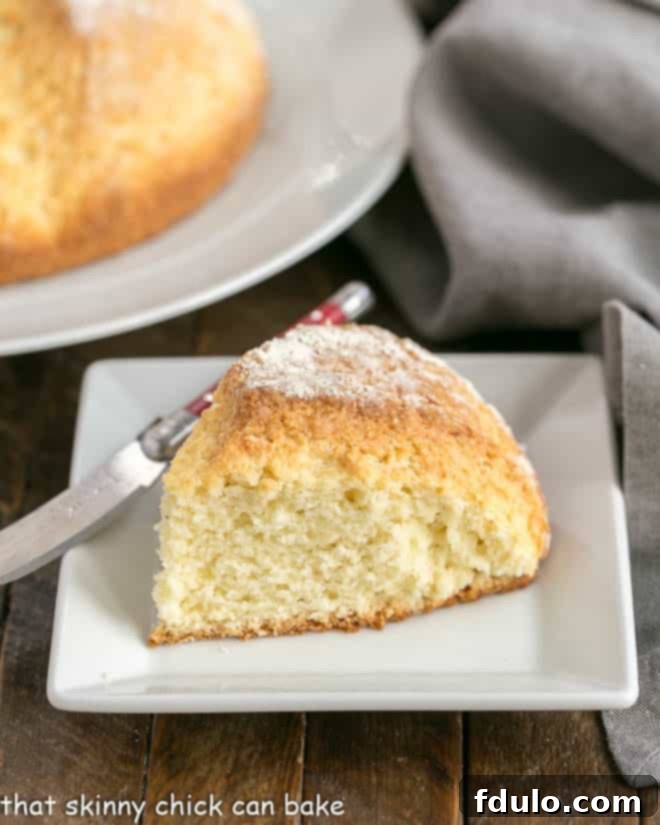
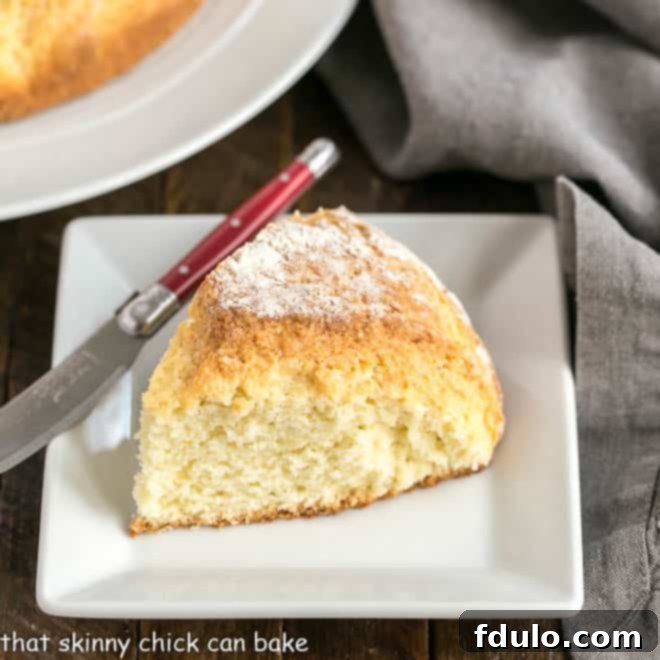
- Irresistible Texture: After a mere 50 minutes in the oven, you’ll be rewarded with a beautifully dense loaf crowned with a perfectly chewy, golden-brown crust. Slice into it to reveal a wonderfully tender interior that’s satisfying and comforting.
- Minimal Effort, Maximum Flavor: Despite its rustic, unpretentious appearance, this soda bread delivers exceptional flavor for such minimal effort. The genuine appreciation from my family, like the enthusiastic “this is really, really good” from Bill, confirmed its winning appeal.
- A Trusted Classic: This cherished recipe hails from the acclaimed Marion Cunningham, a respected cookbook author and food writer, guaranteeing a tried-and-true result that honors traditional Irish baking.
- No Yeast Required: Ideal for those who are new to bread making or simply prefer a faster process, Irish soda bread relies on baking soda for its leavening, eliminating the need for yeast and its associated proofing times.
- Versatile & Welcoming: Whether enjoyed warm with butter, alongside a hearty stew, or as part of a festive spread, this bread adapts beautifully to any meal, providing a wholesome and satisfying addition.
Key Ingredients for Authentic Irish Soda Bread
Creating a truly magnificent Irish Soda Bread starts with understanding the role of each ingredient. While the recipe is famously simple, the quality and type of ingredients you choose can significantly impact the final texture and flavor of your loaf.
- All-Purpose Flour: The foundation of our bread. While some traditional recipes might call for Irish plain flour (which has a lower protein content than American all-purpose), standard all-purpose flour works beautifully, yielding a tender crumb. For a more rustic, wholesome loaf, consider experimenting with a blend that includes whole wheat flour for a “brown soda bread.”
- Baking Soda: This is the hero of our quick bread! Baking soda (sodium bicarbonate) is an alkaline leavening agent that reacts with acidic ingredients to produce carbon dioxide gas, which creates those airy pockets and helps the bread rise rapidly without yeast. Ensure your baking soda is fresh for optimal lift.
- Salt: A crucial flavor enhancer, salt balances the sweetness (if added) and complements the tang of the buttermilk. Standard table salt is perfectly fine, but sea salt can also be used.
- Sugar (Optional, but Recommended for a Sweeter Loaf): Traditionally, Irish soda bread is savory, but many modern recipes (and personal preferences) include a touch of sugar for a slightly sweeter profile. Two tablespoons of granulated sugar add a subtle hint of sweetness that many find delightful, without making it overly dessert-like. Feel free to adjust or omit based on your taste.
- Buttermilk: The indispensable liquid ingredient. Buttermilk is vital for two reasons: its acidity reacts with the baking soda to create lift, and its unique properties contribute to an incredibly tender crumb and a distinct tangy flavor. If you don’t have buttermilk on hand, you can easily make a substitute by adding one tablespoon of white vinegar or lemon juice to a measuring cup, then filling the rest with regular milk (dairy or non-dairy) to reach the required volume. Let it sit for 5-10 minutes until it slightly thickens and curdles. However, for the most authentic taste and texture, real buttermilk is always preferred.
- Dried Fruit (Optional – Currants are Classic!): For a truly traditional “Spotted Dog” soda bread, currants are the classic choice, adding small bursts of sweetness and chewiness. However, feel free to get creative! Other delicious additions include chopped raisins, dried cranberries, dried cherries, or even a blend of your favorite dried fruits. If using larger fruits, chop them into smaller pieces to ensure even distribution throughout the dough.
Step-by-Step Guide: How to Bake Your Homemade Irish Soda Bread
Baking Irish soda bread is a wonderfully straightforward process, making it perfect for novice bakers and seasoned pros alike. Follow these simple steps for a perfect loaf every time.
- Prepare Your Oven and Pan: Begin by preheating your oven to the specified temperature (typically 375°F or 190°C). While the oven heats, lightly grease your chosen baking dish – an 8-inch pie plate, a cast iron skillet, or a baking sheet all work wonderfully. Proper greasing prevents sticking and helps achieve a beautiful crust.
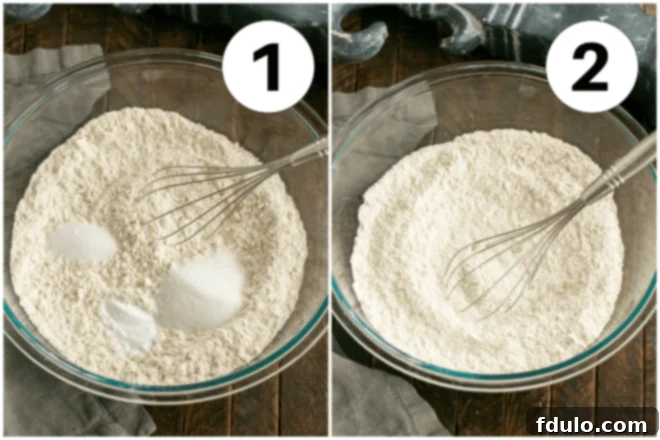
- Combine Dry Ingredients: In a large mixing bowl, meticulously measure out all your dry ingredients: flour, baking soda, salt, and sugar (if you’re adding it). Use a whisk to thoroughly combine them. This step is crucial to ensure that the baking soda is evenly distributed throughout the flour, guaranteeing an even rise.
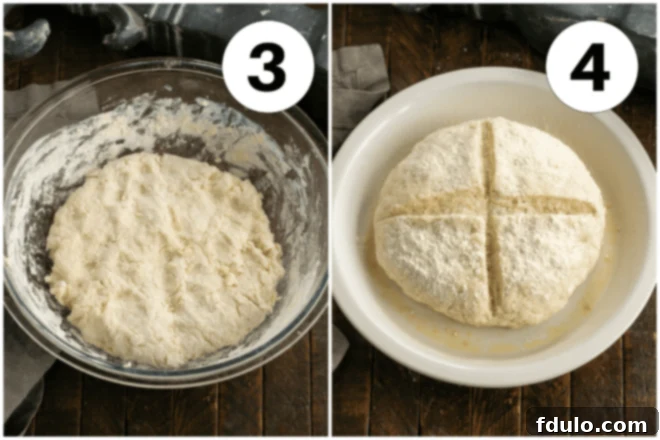
- Introduce the Buttermilk: Create a well in the center of your dry ingredients and pour in the buttermilk. Mix gently with a wooden spoon or your hands until the dough just comes together. Be careful not to overmix; soda bread benefits from a light touch to prevent a tough texture. If adding dried fruits, fold them in at this stage.
- Shape and Score the Dough: Turn the dough out onto a lightly floured surface. Knead it very gently for just a minute or so, enough to bring it into a cohesive ball. Over-kneading will develop the gluten too much, leading to a tough bread. Shape the dough into a round, approximately 6 inches in diameter, and place it in your prepared pan. Using a sharp knife, make a deep ‘X’ across the surface of the loaf. This traditional scoring helps the bread bake evenly and is steeped in Irish folklore.
- Bake to Golden Perfection: Transfer the pan to your preheated oven and bake for approximately 50 minutes. The bread is ready when it turns a beautiful golden brown, the ‘X’ has visibly widened, and when tapped on the bottom, it sounds hollow. A knife inserted into the center should come out clean. Allow to cool completely on a wire rack before slicing and serving.
Expert Tips for Baking the Perfect Irish Soda Bread
While Irish soda bread is forgiving, a few simple tips can elevate your homemade loaf from good to truly exceptional. These insights will help you achieve the ideal texture, flavor, and appearance.
- The Art of Mixing: My Italian friend, Ann, swears by mixing the dough with her hands, advocating for a lighter, more airy consistency. Her delicious version also incorporates a stick of butter for added richness! While a whisk is perfectly acceptable for combining dry ingredients, using your hands for the final mix can give you a better feel for the dough’s consistency and help prevent overworking.
- Avoid Overworking the Dough: This is perhaps the most crucial rule for any quick bread. The dough should be just blended until cohesive, but never overworked. Excessive mixing develops gluten, leading to a dense, tough texture and potentially unsightly “tunnels” within the loaf. A gentle touch ensures a tender crumb.
- Achieving the Right Dough Consistency: Your dough should feel heavy and substantial, but not overly wet or sticky. If it seems too dry, add a tiny bit more buttermilk, a tablespoon at a time, until it just comes together. Conversely, if it’s too wet to handle, dust your hands and the work surface with a little extra flour.
- Shaping Your Loaf: To prevent the dough from sticking to your hands during shaping, lightly dust them with flour. Form the dough into a rustic, round loaf – perfection isn’t the goal here; the charm lies in its homemade look.
- The Traditional “X” Score: This deep cut across the top of the loaf is quintessential Irish soda bread. While Ann uses the back of a fork for a rustic indent, a sharp knife is excellent for making a clean, deep ‘X’. This score isn’t just for aesthetics; it helps the loaf bake more evenly by allowing steam to escape and encourages a uniform rise. For an even more dramatic ‘X’, dust the top of the loaf lightly with flour before making the cut.
- Consider Your Add-ins: Raisins are a very traditional addition, often creating a “Spotted Dog” effect. While my family might not be keen on them, and I personally favor dried cherries (though I’m often the only fan in the house!), don’t hesitate to customize. Currants are classic, but dried cranberries or a mix of berries can add wonderful flavor and texture. Ensure dried fruits are evenly distributed without overmixing.
- Choosing Your Baking Vessel: For optimal results, bake your soda bread in a well-greased 8-inch pie plate or a heavy cast iron skillet. A cast iron skillet is particularly recommended as it conducts heat beautifully, promoting a superior rise and a wonderfully crisp bottom crust.
- Testing for Doneness: Toward the end of the baking time, insert a thin, sharp knife or a wooden skewer into the thickest part of the bread. If it comes out clean, your bread is fully cooked. You should also look for a rich golden-brown color and a hollow sound when you tap the bottom of the loaf.
- Serve it Fresh: Irish soda bread is at its absolute best on the day it’s baked. Its simple ingredients and low fat content mean it can dry out quickly. Enjoy it warm from the oven, perhaps with a generous smear of butter.
Remember, a slightly smaller loaf made with a half batch, such as one incorporating 1/3 cup of dried cherries (my personal favorite over more traditional raisins), would typically require a shorter baking time, around 35 minutes. I hope these insights help you bake a truly marvelous loaf, perhaps even for a festive St. Patrick’s Day celebration. Erin Go Bragh!
Frequently Asked Questions About Irish Soda Bread
The cross cut on top of Irish soda bread holds both practical and historical significance. Historically, in the 1800s, it was believed to ward off evil spirits or “let the Devil out” of the bread as it baked, ensuring a blessed loaf. It also served as a symbol of giving thanks and protection for the home and hearth. Practically, the cross helps the dense dough bake more evenly by allowing steam to escape from the center, promoting a uniform rise and preventing the crust from cracking unevenly.
Determining when your soda bread is perfectly baked involves a few cues. First, follow the recipe’s recommended baking time as a guide. Visually, the loaf should develop a beautiful golden-brown crust, and the cross cut on top should have visibly widened. For a more definitive test, gently tap the bottom of the loaf – a hollow sound indicates it’s cooked through. You can also insert a clean, thin knife or wooden skewer into the center of the bread; it should come out clean, with no wet dough clinging to it.
Irish soda bread is incredibly versatile and can be served in many delightful ways. It’s best enjoyed warm, shortly after baking. Serve it plain to appreciate its rustic flavor, or spread generously with butter – salted Irish butter is a classic choice. For a sweeter touch, add your favorite jam, marmalade, or honey. It also makes a wonderful accompaniment to savory dishes like hearty soups, stews (especially Irish stew!), or alongside roasted meats and vegetables, soaking up all the delicious juices.
Irish soda bread is famously best on the day it’s made due to its lack of fat, which causes it to dry out relatively quickly. To store it, wrap any leftovers tightly in plastic wrap or aluminum foil, or place it in an airtight container at room temperature. It will remain edible for 1-2 days, though its texture will become firmer. To refresh day-old bread, you can lightly toast slices or warm the entire loaf in a low oven for a few minutes. For longer storage, slices can be frozen for up to 2-3 months; simply thaw and toast when ready to enjoy.
Explore More Delicious Recipes
If you’ve enjoyed baking this classic Irish Soda Bread, you might love these other delightful recipes, perfect for expanding your culinary repertoire:
- Festive St. Patrick’s Day Desserts from Hoosier Homemade – discover sweet treats to complete your celebration.
- Wholesome Sunflower Whole Wheat Bread – for another satisfying homemade loaf.
- Authentic Homemade Pita Bread – elevate your next meal with fresh, fluffy pita.
- Indulgent Irish Cream Pots de Creme – a rich, creamy dessert with a delightful Irish twist.
- Luxurious Irish Chocolate Mousse Cake – perfect for chocolate lovers and special occasions.
- Plus, browse all my Best Bread Recipes for more baking inspiration!
Stay connected and share your baking creations! Follow me on Instagram, Facebook, and Pinterest. Don’t forget to tag me when you try one of my recipes! If you love the results, please consider leaving a 5-star rating in the recipe card below – your feedback means the world.
Irish Soda Bread Recipe
15 minutes
50 minutes
1 hour 5 minutes
6 servings
A classic, easy-to-make loaf of traditional Irish soda bread, perfect for any occasion!
Ingredients
- 4 cups all-purpose flour
- 1 teaspoon baking soda
- 1 ½ teaspoons salt
- 2 tablespoons granulated sugar (optional, for a sweeter loaf)
- 2 cups buttermilk*
- ⅓-1 cup dried cherries or raisins, optional
Instructions
- Position an oven rack in the center and preheat your oven to 375 degrees F (190°C). Lightly grease an 8-inch pie plate or a baking sheet.
- In a large mixing bowl, whisk together the flour, baking soda, salt, and sugar (if using) until well combined. Gradually whisk in the buttermilk until the dough just comes together. If using, gently fold in the dried cherries or other dried fruit.
- Turn the dough out onto a lightly floured surface. Knead gently for about one minute, just enough to form a cohesive ball. Avoid overworking the dough to keep it tender.
- Pat the dough into a round, 6-inch ball and carefully place it in the prepared pan. Using a sharp knife, cut a deep ‘X’ into the top surface of the loaf.
- Bake for 50 minutes, or until the bread is golden brown, the ‘X’ has widened, and a knife inserted into the center comes out clean. Let the bread cool completely on a wire rack before slicing and serving.
Notes
This recipe is inspired by techniques found in “Baking with Julia.”
*Buttermilk Substitute: If you don’t have buttermilk, you can easily make your own. For every 1 cup of buttermilk needed, measure out 1 tablespoon of white vinegar or lemon juice into a liquid measuring cup, then fill the rest of the cup with regular milk (dairy or non-dairy) to the 1-cup line. Let it sit for 5-10 minutes until it slightly thickens and curdles. Use as directed.
Dried Fruit Variations: Feel free to add raisins, currants, dried cranberries, or other chopped dried fruit to the bread dough based on your preference. For a truly traditional loaf, currants are often favored.
Best Enjoyed Fresh: Irish soda bread is best eaten on the day it’s baked, as its simple composition means it can dry out quickly. Store any leftovers wrapped tightly at room temperature for up to 1-2 days.
Recommended Products
As an Amazon Associate and member of other affiliate programs, I earn from qualifying purchases.
- Measuring Spoons
- 10-Inch Wire Whisk
- Ceramic pie plate
Nutrition Information:
Yield:
6
Serving Size:
1
Amount Per Serving:
Calories: 441Total Fat: 2gSaturated Fat: 1gTrans Fat: 0gUnsaturated Fat: 1gCholesterol: 3mgSodium: 899mgCarbohydrates: 93gFiber: 3gSugar: 26gProtein: 12g
HOW MUCH DID YOU LOVE THIS RECIPE?
Please leave a comment on the blog or share a photo on Pinterest
