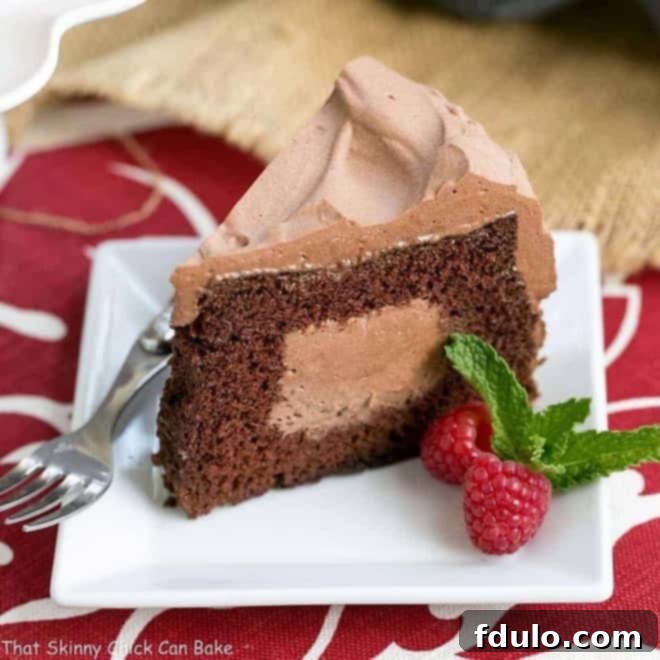
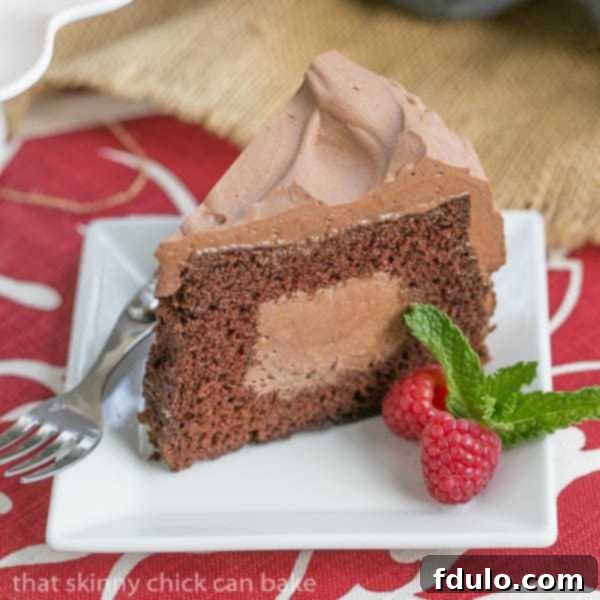
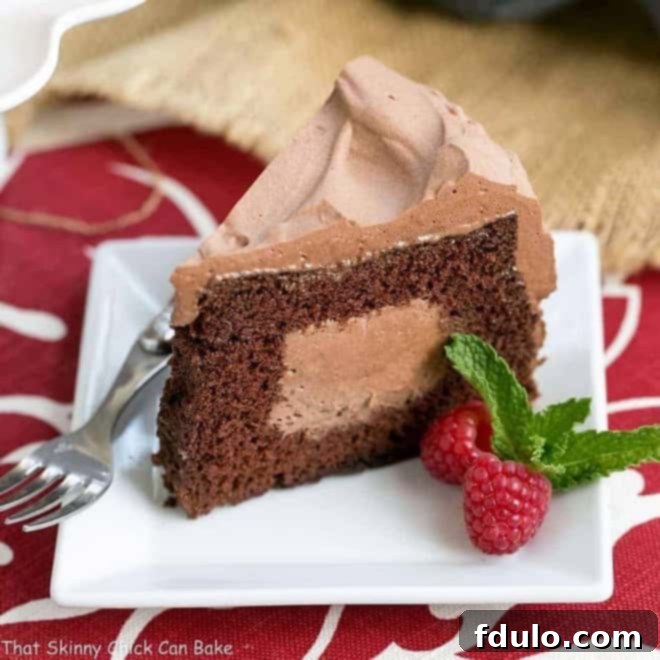
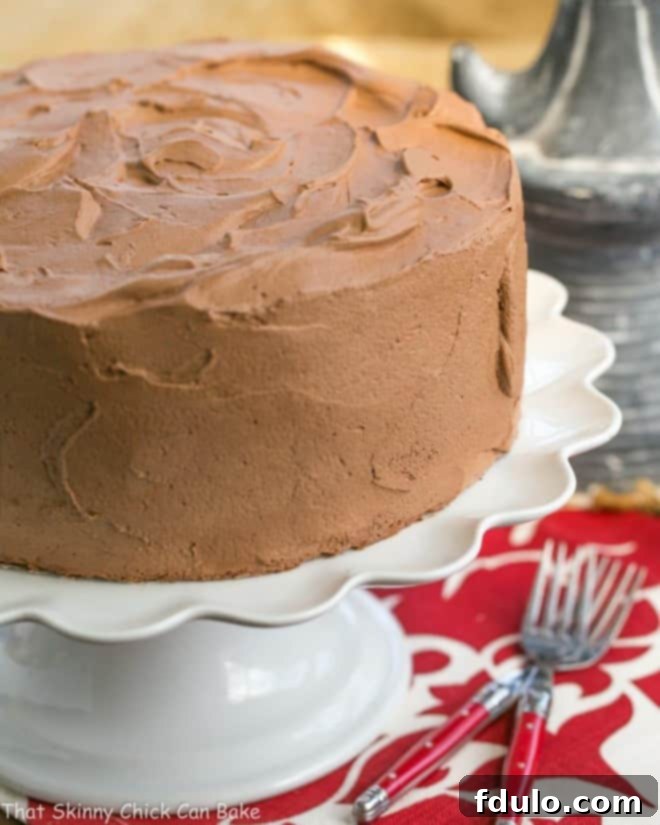
Who doesn’t love a chocolate mousse cake? But prepare for something truly extraordinary: a Tunnel of Mousse Cake where the dreamy mousse serves as both a luscious frosting and a delightful surprise filling! This dessert isn’t just a treat; it’s an experience.
This Chocolate Mousse Cake Recipe promises an unforgettable moment with every slice. Imagine cutting into a rich, dark chocolate cake, only to discover a hidden core of airy, melt-in-your-mouth chocolate mousse. It’s an elegant showstopper that’s perfect for dazzling guests at holiday gatherings, impressing company, or simply elevating a family dinner into a special occasion. Its unique construction and irresistible flavor profile make it a standout dessert that will have everyone asking for the recipe.

The Irresistible Allure of the Tunnel of Mousse Cake
If you’re searching for a dessert that combines elegance with pure indulgence, look no further. This Tunnel of Mousse Cake is more than just a sweet treat; it’s a culinary masterpiece that promises to delight on multiple levels. Here’s why this recipe deserves a prime spot in your baking repertoire:
- A Dream for Chocolate Mousse Lovers: If the mere mention of chocolate mousse sends shivers of delight down your spine, then this cake is your ultimate calling. The generous layers of light, airy chocolate mousse, both inside and out, will envelop your palate in a cloud of cocoa perfection. Each bite offers a harmonious balance of rich chocolate flavor and an ethereal, melt-in-your-mouth texture that is simply irresistible.
- A Stunning Centerpiece That Impresses: Prepare for gasps of admiration when you unveil this creation. The “tunnel” effect, revealing a decadent core of mousse within the cake, is an unexpected and sophisticated touch. Your friends and family will be utterly awestruck, wondering how you managed to “bake” such a delicate mousse into the heart of a cake. It’s a true conversation starter and an impressive display of baking prowess, without being overly complicated to achieve.
- The Perfect Dessert for Any Celebration: From festive holiday feasts like Easter and Christmas to joyous birthday parties, anniversaries, or even a simple family gathering that calls for something special, this cake fits every occasion. Its elegant appearance makes it ideal for formal events, while its comforting chocolatey goodness ensures it’s a hit with everyone, regardless of age. It’s a versatile dessert that brings joy and sophistication to any table.
- Superior Texture and Flavor Contrast: Unlike traditional cakes, this recipe offers a dynamic interplay of textures. The moist, tender chocolate cake provides a delightful contrast to the silky, cool mousse. This combination creates a multi-layered sensory experience that keeps each bite exciting and satisfying.
My friend, Cindee, graciously shared her cherished family recipe for this Tunnel of Mousse Cake shortly after I posted a different mousse cake on my blog last month. I’d long admired the concept of “tunnel” cakes, much like the enticing Chocolate Tunnel Cake from my talented friend Maria at Two Peas & Their Pod. The thought of a hidden core of deliciousness always made my mouth water, sparking an immediate desire to try my hand at one.
So, when the time came to decide on our Easter dessert, beyond our beloved annual fudge lamb, this brilliant mousse-filled confection instantly sprang to mind. And what an inspired choice it proved to be! The entire family, from the youngest to the oldest, absolutely devoured it, leaving not a crumb behind. The mousse, with its velvety texture and deep chocolate notes, vividly reminded me of soft, homemade chocolate ice cream – a testament to its simple yet rich composition of heavy cream, cocoa, and sugar. What truly made this cake a universal favorite was its delicate crumb and balanced chocolate flavor, which avoided the intensity my daughter sometimes finds too rich in other chocolate desserts. Everyone was thoroughly pleased, and I, the baker, certainly scored a win!
Essential Ingredients for a Perfect Tunnel of Mousse Cake
Crafting a truly exceptional Tunnel of Mousse Cake begins with understanding the role of each ingredient. Quality and proper preparation are key to achieving the cake’s delicate crumb and the mousse’s airy perfection.
- Kitchen Staples: You’ll need fundamental baking ingredients such as Granulated Sugar, Salt, Vegetable Oil, Boiling Water, and Baking Soda. These form the backbone of the cake’s structure and flavor.
- Cocoa Powder: Essential for both the rich chocolate cake and the decadent mousse. For the mousse, it is crucial to sift the cocoa powder to prevent lumps and ensure a velvety, smooth texture. Unsweetened natural cocoa powder works best to provide a deep, authentic chocolate flavor.
- Cake Flour: Sifting the cake flour is a non-negotiable step. Cake flour has a lower protein content compared to all-purpose flour, which results in a significantly more tender, delicate crumb for your cake. This contributes to the cake’s melt-in-your-mouth quality, making it less dense and more elegant.
- Egg Whites (for the Cake): You’ll need approximately 1 cup of egg whites, which usually comes from about 7 or 8 large eggs. The secret to beautifully whipped egg whites for a light cake lies in separating them when cold (as the yolk is less likely to break) but beating them when they’ve come to room temperature. Room temperature whites whip up with more volume and stability.
- Egg Yolks (for the Cake): Don’t discard these! You’ll need the yolks for the cake batter as well. When separating eggs, a three-bowl method is highly recommended: use the first bowl to crack an egg and separate the white, depositing it into a second bowl. The yolk goes into a third bowl. This extra precaution ensures that if a yolk breaks, it contaminates only the initial bowl, keeping your collected egg whites yolk-free. Any trace of yolk or grease will prevent the whites from whipping properly.
- Vanilla Extract: Always opt for pure vanilla extract over imitation. Real vanilla adds a complex, aromatic depth that artificial vanilla simply cannot replicate. Brands like Nielsen-Massey are known for their high quality and provide a superior flavor profile to your desserts.
- Cream of Tartar: This acidic powder is a vital stabilizer for whipped egg whites. It helps them reach maximum volume and maintain their stiff, fluffy peaks, which are essential for the cake’s light texture.
- Heavy Cream (36% Milkfat): The star ingredient for your indulgent chocolate mousse. Ensure you use heavy cream with at least 36% milkfat for the best whipping results and the richest, creamiest mousse. Lower fat creams will not whip as stiffly or hold their shape as well.
- Powdered Sugar (Confectioners’ Sugar): For both the mousse and the frosting. Sifting powdered sugar is just as important as sifting cocoa. It removes any lumps, guaranteeing a silky-smooth, uniform texture in your mousse and a flawlessly smooth frosting without grittiness.
Expert Tips for Baking a Flawless Tunnel of Mousse Cake
Achieving bakery-worthy results with your Tunnel of Mousse Cake is entirely possible with a few key techniques and considerations. Follow these expert tips to ensure your cake is a resounding success:
- The Art of Whipped Egg Whites: This cake relies heavily on perfectly whipped egg whites to achieve its signature light and airy texture. For optimal fluffiness and volume, ensure absolutely no oil, grease, or even a tiny speck of egg yolk contaminates your mixing bowl or beaters. Use clean, dry equipment. Even a minuscule amount of fat can prevent the egg whites from whipping to stiff peaks.
- Temperature Matters for Egg Whites: While cold eggs are easier to separate (the yolks are firmer and less likely to break), egg whites whip best when they are at room temperature. Plan ahead by separating your eggs a few hours before baking and letting the whites sit on the counter to warm up. This allows them to incorporate more air, resulting in higher volume and a more stable meringue.
- Precision Slicing with a Serrated Knife: For cleanly slicing off the cake’s top and carving out the tunnel, a long serrated knife is your best friend. Its saw-like edge cuts through the tender cake without tearing or compressing it. Use a gentle sawing motion rather than pressing down firmly to achieve neat, even cuts. This precision is crucial for the cake’s aesthetic appeal and structural integrity.
- The Importance of Refrigeration: Since the mousse and frosting are made with fresh whipped cream and eggs, proper storage is paramount. The cake should not be left at room temperature for longer than 2 hours. Always store your Tunnel of Mousse Cake in the refrigerator to maintain its freshness, texture, and food safety. Allow it to chill thoroughly before serving for the best experience.
- Cooling the Cake Completely: Resist the urge to rush! Allow the cake to cool completely on a wire rack for at least 1½ hours before attempting to unmold or work with it. A warm cake is delicate and prone to breaking. A fully cooled cake is much firmer and easier to handle, preventing cracks or crumbling when you slice and fill it.
- Testing for Doneness: To check if your cake is baked through, gently press the top center with your finger. If it springs back, it’s done. If an indentation remains, bake for a few more minutes and retest. Overbaking can lead to a dry cake, while underbaking can cause it to collapse.
- Sifting Dry Ingredients: Beyond cake flour and cocoa, sift all dry ingredients together (flour, sugar, baking soda, salt). This ensures they are evenly distributed, lump-free, and aerated, which contributes to a smoother batter and a finer cake crumb.
- Gentle Folding: When incorporating the whipped egg whites into the chocolate batter, use a light, gentle folding technique. Overmixing will deflate the air from the egg whites, resulting in a dense cake. The goal is to blend them just until no streaks of white remain, preserving the airy structure.
Frequently Asked Questions About Mousse Cakes
Mousse is a French culinary term literally meaning “froth” or “foam.” It refers to a light, airy dish, which can be either sweet or savory. Sweet mousses, like the one used in this cake, typically achieve their characteristic fluffy texture by incorporating whipped cream, beaten egg whites, or both. The aeration process creates a delicate, melt-in-your-mouth consistency that is both rich in flavor and wonderfully ethereal.
The term “mousse cake” can describe a few different types of desserts. Some mousse cakes are entirely composed of mousse, where the whipped egg whites or cream provide the structural integrity, replacing traditional flour-based cake layers. These are often molded and chilled. Other mousse cakes, like our Tunnel of Mousse Cake, feature a traditional baked cake base or layers that are then filled, topped, or surrounded by a generous amount of mousse. This particular recipe offers the best of both worlds: a delightful combination of moist cake and creamy mousse filling and frosting.
Absolutely, yes! Mousse cakes, especially those made with whipped egg whites (meringue) or whipped heavy cream, are highly perishable at room temperature. These ingredients are dairy- or egg-based and can spoil quickly or lose their delicate texture if not kept cold. Refrigeration is essential to ensure food safety, maintain the mousse’s stable, airy consistency, and prevent it from melting or collapsing. Always store your mousse cake in the refrigerator until ready to serve, and avoid leaving it out for more than two hours.
Yes, this cake is an excellent make-ahead dessert! You can bake the chocolate cake layers a day in advance, allow them to cool completely, and then wrap them tightly in plastic wrap before storing them at room temperature. The mousse can also be prepared a day ahead and kept refrigerated in an airtight container. Assemble the cake a few hours before serving, allowing ample time for the mousse to set firmly within the tunnel and as frosting. This makes entertaining much less stressful.
For beautiful, clean slices that show off the impressive mousse tunnel, make sure the cake is thoroughly chilled in the refrigerator for at least 3-4 hours, or even overnight. Use a long, sharp serrated knife. For each slice, dip the knife in hot water and wipe it clean with a towel before making the cut. This helps to create a clean separation through both the cake and the mousse, ensuring every serving looks perfect.
Explore More Mousse Dessert Recipes You’ll Love:
If you’ve fallen in love with the luscious texture and rich flavor of chocolate mousse, there’s a whole world of mousse desserts waiting to be discovered. Here are some other fantastic mousse cake recipes that promise a similar level of indulgence and delight:
- Chocolate Hazelnut Mousse Cake from Saving Room for Dessert: A sophisticated twist, combining the classic chocolate mousse with the nutty richness of hazelnuts.
- Strawberry Mousse Cake from Inside BruCrew Life: A refreshing and fruity alternative, perfect for spring or summer gatherings with its vibrant strawberry flavor.
- Chocolate Mousse Cake with Truffles from Pint Sized Baker: For the ultimate chocolate indulgence, this cake is adorned with decadent truffles, elevating it to an extraordinary dessert.
- Frozen Chocolate Mousse Cake: A chilled delight that offers a different texture experience, perfect for hot weather or when you crave a frosty treat.
- Peanut Butter Chocolate Mousse Cake: The iconic pairing of peanut butter and chocolate comes alive in this mousse cake, a dream for fans of this flavor combination.
- Plus, explore all my other Best Homemade Cake Recipes for more baking inspiration!
Stay in touch and share your baking triumphs on social media! Find me @ Instagram, Facebook, and Pinterest. Don’t forget to tag me when you try one of my recipes! And if you love the results, please consider giving it a 5-star rating in the recipe card below – your feedback means the world.

Tunnel of Mousse Cake
45 minutes
1 hour
1 hour 45 minutes
12 servings
Who doesn’t love a chocolate mousse cake? But even better is a Tunnel of Mousse Cake with mousse utilized as both frosting and filling! This show-stopping dessert is perfect for any special occasion.
Ingredients
For the Chocolate Cake:
- ½ cup sifted cocoa powder
- ¾ cup boiling water
- 1¾ cups sifted cake flour
- 1¾ cups granulated sugar
- 1½ teaspoons baking soda
- ½ teaspoon salt
- ½ cup vegetable oil
- 7 large egg yolks, whites reserved
- 2 teaspoons pure vanilla extract
- 1 cup of egg whites (from 7 or 8 large eggs), at room temperature
- ½ teaspoon cream of tartar
For the Chocolate Mousse:
- 4 cups heavy cream (36% milkfat)
- 1½ cups powdered sugar (confectioners’ sugar), sifted
- ¾ cup sifted unsweetened cocoa powder
- 2 teaspoons pure vanilla extract
- ¼ teaspoon salt
Instructions
- Prepare Oven: Preheat your oven to 325ºF (160ºC). This lower temperature helps ensure a moist cake.
- Prepare Cocoa Mixture & Dry Ingredients: In a small bowl, combine the sifted cocoa powder with boiling water, stirring until completely smooth. Set aside to cool for at least 30 minutes; it should be lukewarm or cool. In a separate large bowl, sift together the cake flour, granulated sugar, baking soda, and salt. Create a well in the center of the dry ingredients.
- Combine Wet & Dry Ingredients (Cake): Into the well, pour the vegetable oil, egg yolks, vanilla extract, and the cooled cocoa mixture. Using a hand mixer, beat the mixture until it is smooth and well combined, scraping down the sides of the bowl as needed to ensure everything is incorporated. Set this chocolate batter aside.
- Whip Egg Whites: Place the room-temperature egg whites into the very clean bowl of a stand mixer fitted with the whisk attachment. Sprinkle with cream of tartar. Beat on medium-high speed until stiff peaks form. The whites should be glossy and hold their shape when the whisk is lifted.
- Combine Batter: Gently pour the chocolate batter over the whipped egg whites. Using a spatula, carefully fold the egg whites into the chocolate batter until just blended. Avoid overmixing, as this will deflate the air from the egg whites, resulting in a denser cake.
- Bake the Cake: Pour the lightened batter into an ungreased tube pan (Angel food cake pan). Bake for 50-60 minutes, or until the top of the cake springs back when gently pressed.
- Cool & Unmold Cake: Allow the cake to cool completely upside down on a wire rack for at least 1½ hours. This is crucial for its structure. Once cooled, use a straight, thin metal spatula or knife to carefully go around the perimeter of the cake, helping to loosen it from the pan before carefully removing it.
- Prepare the Mousse: While the cake cools, combine all the mousse ingredients (heavy cream, sifted powdered sugar, sifted cocoa, vanilla, and salt) in a large mixing bowl. Whisk until soft peaks form, then refrigerate for one hour. After chilling, beat the mousse again until it is quite firm and holds its shape well. Refrigerate for another hour before assembling the cake to ensure it’s very cold and stable.
- Prepare Cake for Tunnel: Once the whipped mousse is fully chilled and firm, prepare the cooled cake. With a long, sharp serrated knife, carefully slice off the top 1 inch of the cake horizontally. For guidance, you can insert toothpicks one inch below the top around the perimeter. Reserve this cake top for later.
- Carve the Tunnel: Next, using your serrated knife, cut vertically around the perimeter of the cake, approximately one inch from the outside edge and one inch from the inside edge (around the central tube). You are essentially creating a channel or “well” in the middle of the cake. Be extremely careful not to cut all the way through to the bottom of the cake, leaving about one inch of cake as the base. Carefully cut the inside core into sections and pull out the pieces of cake. Reserve these cake pieces.
- Fill the Tunnel: Fill the created cavity (tunnel) generously with the chilled, firm chocolate mousse.
- Create Mousse-Cake Mixture: Crumble some of the reserved cake pieces into a separate bowl. Mix in about ½ cup of the prepared chocolate mousse. This mixture will be used to fill the central hole left by the tube pan, creating a solid base for the top layer.
- Fill Center Hole & Frost: Fill the central hole of the cake with the mousse/cake mixture. Carefully replace the reserved cake top. Finally, frost the entire cake generously with the remaining chocolate mousse.
- Garnish & Chill: Garnish as desired with chocolate shavings, cocoa powder, or fresh berries. Refrigerate the cake for at least 3-4 hours before serving to allow the mousse to fully set and the flavors to meld beautifully. Store any leftovers in the refrigerator.
Notes
Enjoy snacking on any leftover cake pieces!
Total time indicated does not include the essential cooling time for the cake or the chilling time for the mousse, both of which are crucial for success.
Recommended Products
As an Amazon Associate and member of other affiliate programs, I earn from qualifying purchases.
- Serrated Knife
- Non-stick Tube Pan
- 3 cup sifter
Nutrition Information:
Yield:
12
Serving Size:
1 slice
Amount Per Serving:
Calories: 671Total Fat: 41gSaturated Fat: 20gTrans Fat: 1gUnsaturated Fat: 18gCholesterol: 197mgSodium: 356mgCarbohydrates: 66gFiber: 2gSugar: 45gProtein: 10g
HOW MUCH DID YOU LOVE THIS RECIPE?
Please leave a comment on the blog or share a photo on Pinterest

