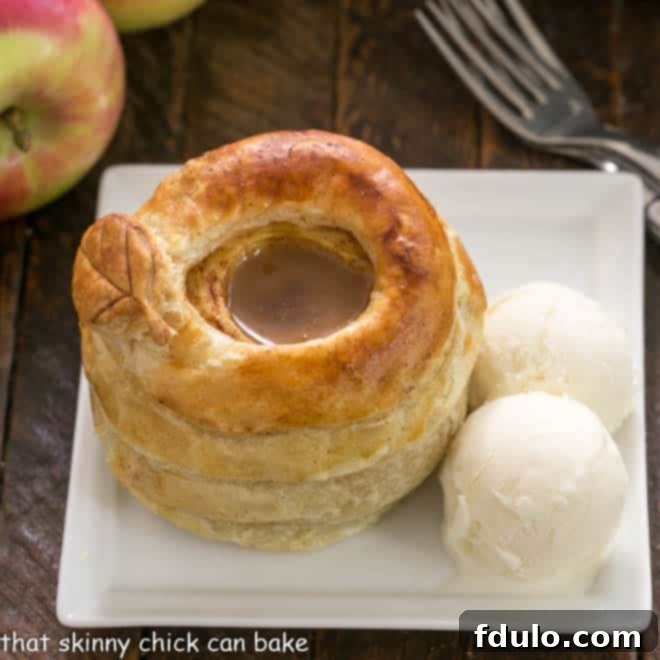
Experience the ultimate autumn indulgence with these exquisite Pastry Wrapped Caramel Apples. An elegant and delectable dessert, they offer a sophisticated twist on a beloved classic. While they require a little love and care to prepare, the stunning presentation and irresistible flavor make every moment spent in the kitchen utterly worthwhile, resulting in a truly memorable fall treat.
The world of Baked Apple Recipes is vast and varied, but few can compare to the captivating charm and unique appeal of these “inside-out” Caramel Apples. Instead of being dipped, the caramel is tucked inside, creating a delightful surprise with every bite. The flaky puff pastry exterior adds a layer of texture and richness that elevates this simple fruit dessert into a show-stopping culinary masterpiece.
Why These Pastry Wrapped Caramel Apples Are a Must-Try
As the leaves begin to turn and the crisp autumn air fills our homes with the scent of spices, there’s no better time to embrace the warmth and comfort of a perfectly baked apple dessert. Our Pastry Wrapped Caramel Apples are not just any treat; they are a celebration of seasonal flavors and masterful presentation. Here’s why this recipe deserves a special place in your fall baking repertoire:
- The Quintessential Fall Dessert: Baked apples have long been synonymous with autumn, offering a cozy and comforting experience. This recipe takes that familiar comfort and infuses it with an extra layer of gourmet sophistication, making it perfect for holiday tables, family gatherings, or a special evening by the fireplace.
- Effortless Elegance with Smart Shortcuts: We understand that life can be busy, which is why this recipe artfully combines homemade charm with convenient shortcuts. Utilizing premade, store-bought puff pastry and a high-quality jarred caramel sauce means you can achieve an incredibly impressive dessert without spending hours from scratch. This intelligent approach allows you to focus on the fun of assembly and the joy of presentation, delivering spectacular results with minimal fuss.
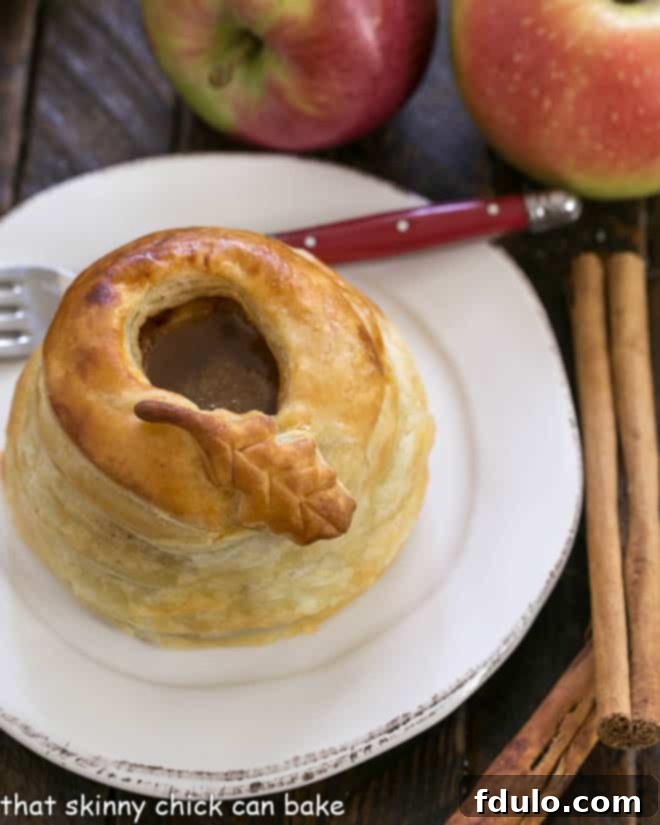
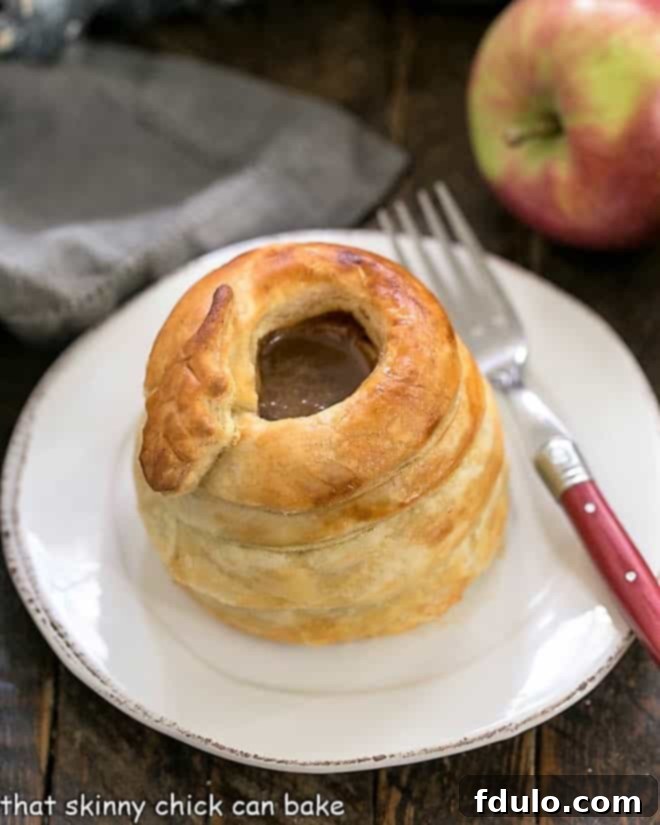
- A Show-Stopping Presentation: Prepare to dazzle your guests! These pastry-wrapped apples are an absolute feast for the eyes. Each apple, lovingly encased in golden, flaky pastry and crowned with decorative leaves, transforms into a miniature edible sculpture. When sliced, the warm, tender apple and gooey caramel filling create a captivating cross-section that promises a delightful taste experience. They are truly an elegant centerpiece that will garner admiring glances and rave reviews.
- A Unique “Inside-Out” Caramel Apple Experience: Unlike traditional caramel apples, where the caramel is on the exterior, this recipe ingeniously places a generous pool of rich caramel sauce *inside* the cored apple. This ensures that every bite offers a perfect balance of sweet, tender apple, luscious caramel, and crisp, buttery pastry. It’s a delightful surprise that truly sets this dessert apart.
We discovered the inspiration for these stunning gems through a video that showcased peeled baking apples, dusted in cinnamon sugar, artfully wrapped in strips of grocery store puff pastry, and then filled with a velvety caramel sauce from a jar. The concept was simple yet undeniably beautiful. While homemade puff pastry and a rich, from-scratch caramel sauce would undoubtedly elevate these Pastry Wrapped Caramel Apples to an otherworldly status, they remain spectacularly delicious and visually appealing even with their convenient store-bought counterparts. The French, with their flair for culinary artistry, might affectionately refer to these as “Caramel Apples en Croute” – apples beautifully encased in a flaky pastry crust!
Mastering Your Baked Apple Recipe: A Step-by-Step Guide
Creating these elegant Pastry Wrapped Caramel Apples is an enjoyable process, and a few key tips can ensure your success and perfect results every time. Follow these detailed steps and recommendations for a flawless autumn dessert:
- Choosing and Preparing Your Apples: The choice of apple is crucial. We highly recommend using firm, tart apples like Granny Smith. Their tartness beautifully balances the sweetness of the caramel and holds up well during baking without becoming mushy. When peeling, ensure a smooth surface for the pastry to adhere to.
- The Art of Coring: Once your apples are peeled, use a melon baller or a small paring knife to carefully remove the core from the top. The most critical aspect here is to ensure you do *not* cut all the way through the bottom of the apple. This hollowed space is designed to hold the luscious caramel sauce, so a leak-proof bottom is essential. Aim for a well that is large enough to comfortably hold about 2 tablespoons of caramel sauce. If your apple is on the smaller side, simply adjust the amount of caramel accordingly to prevent overflow.
- Puff Pastry Preparation is Key: Begin by unrolling your puff pastry sheets onto a lightly floured surface. Using a sharp knife or a pizza cutter, slice each sheet into uniform 1-inch wide strips. For ease of handling and a cohesive wrap, you’ll typically need to join several strips together. Moisten the ends of 4 strips with a dab of water or egg wash and gently press them to create one long, continuous strip. Repeat this process for each apple. Don’t forget to cut out 4-8 small leaf shapes from any leftover pastry; these will be used for decoration.
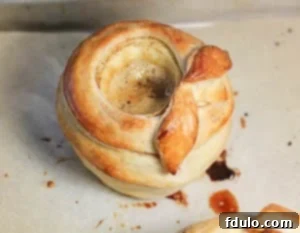
- Wrapping Perfection: Start wrapping the elongated puff pastry strip at the very bottom of the apple. Work your way upward, gently overlapping the edges of the pastry as you go, creating a beautifully spiraled effect. The pastry should be snug but not stretched taut. Once you reach the top, trim any excess pastry if needed, and then delicately add your pre-cut pastry leaves to cover the end of the strip, giving your apple a natural, decorative finish. A tiny dab of water or egg wash can help secure the leaves in place.
- The Golden Touch: Egg Wash: Before baking, generously brush the entire exterior of each pastry-wrapped apple with an egg wash (a simple mixture of one beaten egg and one tablespoon of water). This magical coating is responsible for the beautiful, glossy, golden-brown sheen that the puff pastry achieves in the oven, making your dessert look as irresistible as it tastes.
- Chilling for Optimal Puff: This is a crucial step often overlooked. After assembling and brushing your apples with egg wash, place them on a parchment-lined baking sheet and chill them in the refrigerator for 20-25 minutes. This brief chilling period allows the puff pastry to firm up again, ensuring it will puff up beautifully and evenly when it hits the hot oven.
- Baking Guidance: Our initial attempts taught us that apple size can significantly impact baking time. If your apples are larger than medium or if they don’t feel tender when you gently insert a knife after the initial baking time, don’t fret. We recommend reducing the oven temperature slightly (e.g., from 400°F to 375°F) at about the 20-minute mark and extending the baking time by another 10-15 minutes. The apples are perfectly cooked when a sharp knife slides in easily, indicating they are tender throughout. The pastry should be a rich, golden brown, indicating flaky perfection.
Pro Tips for Achieving Puff Pastry Perfection
Working with puff pastry can seem intimidating, but with a few professional insights, you’ll master it in no time. Its delicate layers are what give these Pastry Wrapped Caramel Apples their incredible texture and make them truly special. Here are some essential tips to ensure your puff pastry puffs to its fullest potential:
- PRO-Tip: The Magic of Chilling and Heat. Puff pastry performs at its absolute best when it is thoroughly chilled before being placed into a very hot oven. This temperature contrast is critical for its characteristic “puff.” As you work with the pastry, especially when wrapping the apples, it will inevitably warm up from the heat of your hands and the ambient kitchen temperature. Therefore, a crucial step is to give your assembled pastry-wrapped apples a brief, yet essential, chilling period in the refrigerator (20-25 minutes is ideal) just before baking. This firms up the butter layers within the pastry.
- Understanding the Puff: When this cold puff pastry enters a preheated, hot oven, the tiny pockets of water and butter between its many delicate layers rapidly turn into steam. This steam expands, creating separation between the layers and causing the pastry to dramatically puff up, resulting in that wonderfully airy, flaky, and golden-brown covering that perfectly complements these caramel apples.
- PRO-Tip: Timing is Everything – Bake in Cooler Months. The ambient temperature of your kitchen plays a significant role in how easy or challenging puff pastry is to work with. It’s considerably tougher to handle puff pastry when your kitchen is warm or humid, as it can be in the peak of summer. The butter within the pastry quickly softens, making it sticky and difficult to manage without tearing. For the most pleasant and successful baking experience, we highly recommend making these caramel apples during the cooler months of fall and winter.
- Quality Matters: While store-bought puff pastry is a fantastic convenience, the quality can vary. This recipe was inspired by the Pepperidge Farm website, which uses their popular brand. However, for the absolute best flavor and flakiest texture, we strongly prefer an all-butter puff pastry (brands like Dufour or Trader Joe’s often offer excellent options). The richness of real butter elevates the entire dessert.
- Handle with Care: Puff pastry is delicate. Handle it gently and as little as possible to prevent overworking the dough, which can inhibit its ability to puff properly. If it becomes too soft or sticky, don’t hesitate to pop it back into the refrigerator for 10-15 minutes to firm up.
- Sharp Tools are Your Friend: Use a very sharp knife or a pizza cutter when cutting pastry strips. A dull blade can drag the dough, compressing the layers and again, hindering the puff.
Troubleshooting Your Pastry Wrapped Caramel Apples
Even with the best intentions, baking can sometimes present challenges. Here are solutions to common issues you might encounter when making your Pastry Wrapped Caramel Apples, ensuring a stress-free and delicious outcome:
- Undercooked Apples: If your apples feel hard after the recommended baking time, especially if they are large, it simply means they need more time. As mentioned in the baking section, lower the oven temperature slightly (e.g., to 375°F) and continue baking for another 10-15 minutes, checking periodically with a sharp knife. Overly dense apples require a longer, gentler bake to soften without burning the pastry.
- Overcooked Pastry, Undercooked Apples: If your pastry is browning too quickly while the apples are still raw, you can loosely tent the apples with aluminum foil. This will protect the pastry from further browning while allowing the apples to continue cooking through.
- Puff Pastry Not Puffing: The most common culprits here are warm pastry or insufficient oven temperature. Ensure your pastry is well-chilled before baking and that your oven is fully preheated to the correct temperature. Avoid opening the oven door too frequently during the initial baking phase, as this can cause temperature drops that hinder the puff.
- Caramel Leaks: This usually happens if the apple wasn’t cored properly, leaving a small hole at the bottom. While a small leak might just create a delicious caramel puddle on your baking sheet, significant leakage can be prevented by ensuring the apple’s base is perfectly intact. If you suspect a tiny pinhole, you can try to plug it with a small piece of reserved puff pastry before filling with caramel.
- Pastry Tears or Doesn’t Stick: If the pastry strips are tearing while wrapping, they might be too warm or stretched too thin. If they’re not sticking when joining, use a little more water or egg wash, and ensure you’re pressing firmly but gently.
Creative Variations and Perfect Pairings
While the classic Pastry Wrapped Caramel Apple is sublime on its own, don’t hesitate to get creative! This recipe provides a fantastic foundation for experimentation. Here are some ideas to customize your dessert and enhance your serving experience:
Delicious Variations:
- Spiced Apples: Amp up the autumnal flavors by adding a pinch of nutmeg, allspice, or a touch of pumpkin pie spice to your cinnamon sugar mixture. You can also mix a tiny bit of these spices directly into the caramel sauce for an extra aromatic kick.
- Nutty Crunch: Before spooning in the caramel sauce, add a tablespoon of finely chopped pecans, walnuts, or almonds into the cored apple. This introduces a wonderful textural contrast and nutty flavor.
- Boozy Caramel: For an adult twist, stir a teaspoon of bourbon, rum, or Grand Marnier into your caramel sauce before filling the apples.
- Cream Cheese Delight: For a richer, creamier center, mix a tablespoon of softened cream cheese with a tiny bit of sugar and vanilla, then add a dollop to the apple core before adding the caramel.
- Fruit & Spice Combo: Tuck a few dried cranberries or golden raisins into the apple core along with the caramel for an added layer of flavor and chewiness.
- Chocolate Drizzle: After baking and cooling slightly, drizzle melted dark or white chocolate over the pastry for an extra layer of decadence and visual appeal.
Serving Suggestions:
- Classic with Vanilla Ice Cream: The quintessential pairing! The cold, creamy vanilla ice cream melts beautifully into the warm baked apple and caramel, creating a heavenly symphony of temperatures and textures.
- Whipped Cream & Cinnamon: A generous dollop of freshly whipped cream, perhaps lightly sweetened and dusted with a touch of cinnamon, offers a lighter, airy counterpoint.
- Extra Caramel Drizzle: Have some extra caramel sauce warmed and ready to drizzle generously over the top of each apple just before serving.
- Dusting of Powdered Sugar: A simple dusting of powdered sugar adds a touch of elegance and subtle sweetness.
- Coffee or Tea Companion: These apples pair wonderfully with a hot cup of coffee, espresso, or a spiced chai latte, making them ideal for an indulgent afternoon treat or a sophisticated after-dinner dessert.
- Breakfast or Brunch Treat: Don’t limit these to dinner! A warm pastry-wrapped apple with a side of Greek yogurt could make for a decadent brunch item.
More Apple Recipes You’ll Love:
If you’re as passionate about apples as we are, you’ll be thrilled to explore more of our cherished recipes. From comforting classics to innovative bakes, these apple creations are perfect for any occasion:
- Favorite Apple Recipes from the blog – A curated collection of our best apple-centric dishes.
- Apple Bar Recipe – Chewy, sweet, and perfectly spiced apple bars that are easy to make and share.
- Classic Apple Pie – The timeless dessert, perfected, with a flaky crust and fragrant apple filling.
- Maple Glazed Apple Tart – An elegant tart featuring thinly sliced apples and a sweet maple glaze.
- More Dessert Recipes – Explore our full array of delightful desserts for every craving and celebration.
This beloved recipe was first introduced in October 2011, captivating palates with its unique charm. The photos and accompanying text were thoughtfully updated in 2020 to provide even clearer guidance and more enticing visuals, ensuring that this delightful dessert continues to inspire home bakers for years to come.
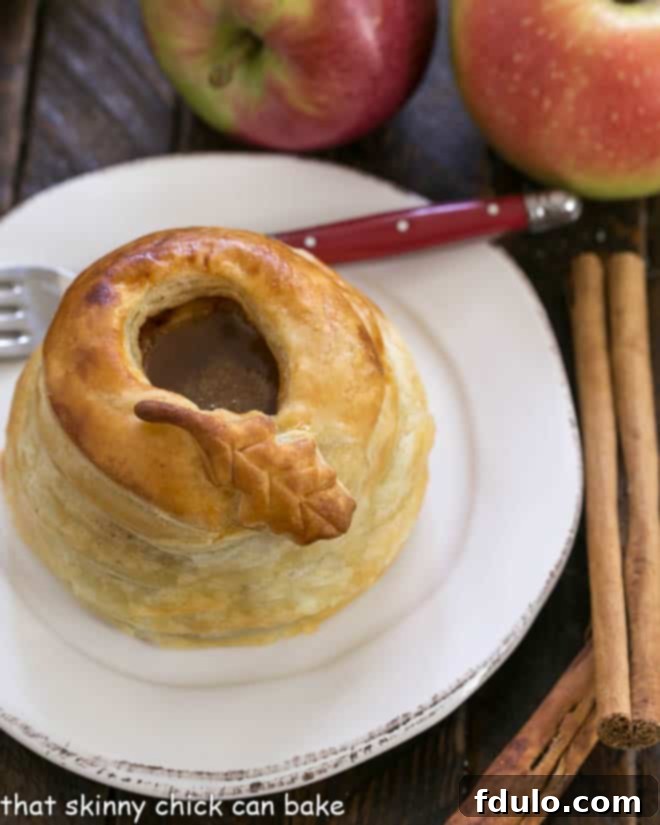
Pastry Wrapped Caramel Apples
30 minutes
40 minutes
1 hour 10 minutes
4 servings
An elegant baked apple recipe filled with luscious caramel sauce and wrapped in golden, flaky puff pastry, perfect for any autumn celebration.
Ingredients
- ½ teaspoon ground cinnamon
- 2 tablespoons granulated sugar
- 1 large egg
- 1 tablespoon cold water
- 4 medium Granny Smith apples, peeled and cored
- ½ cup high-quality caramel sauce (store-bought or homemade)
- 10-ounce package of all-butter puff pastry (such as Trader Joe’s or Dufour)
- Vanilla ice cream, for serving (optional)
Instructions
- Preheat your oven to 400ºF (200ºC). Line a baking sheet with parchment paper or a silicone baking mat (Silpat).
- In a small bowl, thoroughly stir together the ground cinnamon and granulated sugar.
- In another small bowl, beat the egg and water together with a fork or whisk to create an egg wash. Set aside.
- Using a melon baller or a small paring knife, carefully scoop the cores out of the peeled apples from the top, ensuring that the bottom of each apple remains completely intact to prevent caramel leakage. Create a well large enough to hold approximately 2 tablespoons of caramel.
- Generously coat the exterior of each cored apple with the cinnamon-sugar mixture.
- Place the puff pastry sheets on a lightly floured work surface. Gently roll each pastry sheet into a 10 x 9-inch rectangle.
- Cut each pastry rectangle into 9 uniform 1-inch strips. Moisten the ends of 4 pastry strips with a dab of water or egg wash, then firmly press them together to create one long, continuous strip. Repeat this process to make 4 long strips in total, one for each apple. From any leftover pastry, cut out 4-8 small leaf shapes for decoration.
- Starting at the bottom of one apple, begin winding one of the long pastry strips around it. Work your way up to the top, slightly overlapping the edges of the pastry as you go to create a beautiful spiral. Repeat with the remaining pastry strips and apples.
- Top each pastry-wrapped apple with 1-2 of the cut-out pastry leaves, using a tiny dab of egg wash to secure them in place at the top.
- Carefully spoon 2 tablespoons of caramel sauce into the cored well of each apple. Brush the entire exterior of the pastry-wrapped apples with the prepared egg wash. Place the assembled pastries onto your prepared baking sheet. Chill briefly in the refrigerator for 20-25 minutes to firm up the pastry.
- Bake for 25-30 minutes, or until the pastries are beautifully golden brown and the apples are tender when pierced with a sharp knife. If apples are large, you may need to reduce oven temperature to 375°F (190°C) after 20 minutes and bake for an additional 10-15 minutes until tender. Serve the warm pastries immediately, ideally with a scoop of vanilla ice cream.
Notes
This delightful recipe is lovingly adapted from the original inspiration found on the Pepperidge Farm website.
For the absolute best flavor and flakiest texture, always seek out a brand of puff pastry made with real butter. It makes a significant difference!
Baking times can vary depending on your specific oven and, crucially, the size and density of your apples. In our experience, some larger apples might still be a bit firm after 25 minutes, even if the pastry is golden. If this happens, don’t worry! Simply lower your oven temperature to around 375°F (190°C) and continue baking for another 10-15 minutes, or until a sharp knife slides into the apple with ease. You can loosely tent the apples with aluminum foil if the pastry starts to brown too much.
Recommended Products
As an Amazon Associate and member of other affiliate programs, I earn from qualifying purchases.
- Silicone Pastry Brush
- Reynolds Cookie Baking Sheets Non-Stick Parchment Paper, 25 Sheet, 4 Count
- USA Pan Bakeware Half Sheet Pan
Nutrition Information:
Yield:
4
Serving Size:
1 apple
Amount Per Serving:
Calories: 692Total Fat: 32gSaturated Fat: 7gTrans Fat: 0gUnsaturated Fat: 24gCholesterol: 61mgSodium: 365mgCarbohydrates: 93gFiber: 6gSugar: 53gProtein: 9g
Thatskinnychickcanbake.com occasionally offers nutritional information for recipes contained on this site. This information is provided as a courtesy and is an estimate only. This information comes from online calculators. Although thatskinnychickcanbake.com attempts to provide accurate nutritional information, these figures are only estimates.
Varying factors such as product types or brands purchased can change the nutritional information in any given recipe. Also, many recipes on thatskinnychickcanbake.com recommend toppings, which may or may not be listed as optional and nutritional information for these added toppings is not listed. Other factors may change the nutritional information such as when the salt amount is listed “to taste,” it is not calculated into the recipe as the amount will vary. Also, different online calculators can provide different results.
To obtain the most accurate representation of the nutritional information in any given recipe, you should calculate the nutritional information with the actual ingredients used in your recipe. You are solely responsible for ensuring that any nutritional information obtained is accurate.
HOW MUCH DID YOU LOVE THIS RECIPE?
Please leave a comment on the blog or share a photo on Pinterest
