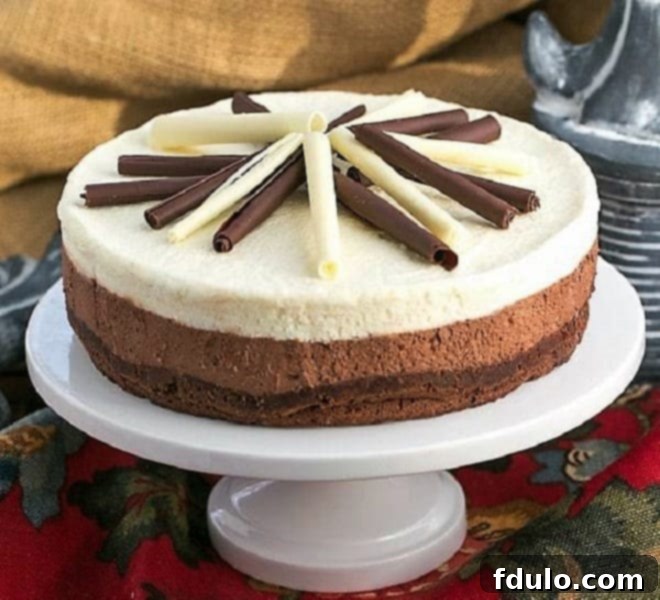
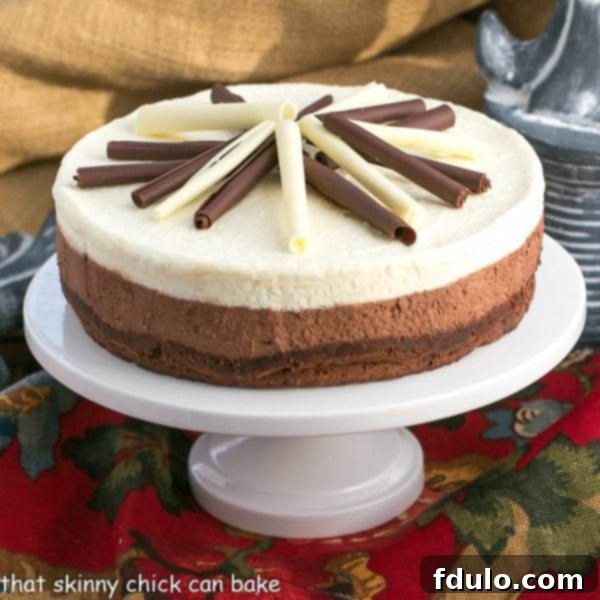
Prepare to embark on a culinary journey into the realm of pure indulgence with this breathtaking Layered Mousse Cake. More than just a dessert, it’s a masterpiece of confectionery, boasting rich, velvety textures and an unparalleled depth of chocolate flavor. This isn’t just any cake; it’s a show-stopping creation worthy of your most cherished celebrations and special gatherings. Imagine the delight as your guests discover the exquisite layers of this magnificent cake, each bite a symphony of chocolatey bliss.
The inspiration for this particular recipe comes from deep within my cherished archives – a classic Chocolate Mousse Cake that has consistently earned rave reviews and countless accolades. It’s the kind of dessert that creates lasting memories, perfect for surprising a dear friend on her birthday, as I recently did for a holiday luncheon. The unanimous praise and joyous “oohs” and “aahs” confirmed what I already knew: this layered mousse cake is truly something extraordinary.
Why This Triple Chocolate Mousse Cake Is an Absolute Must-Make
If you’re looking for a dessert that goes beyond the ordinary, offering both an incredible taste experience and an elegant presentation, then this layered mousse cake is your answer. Here’s why it deserves a prime spot in your baking repertoire:
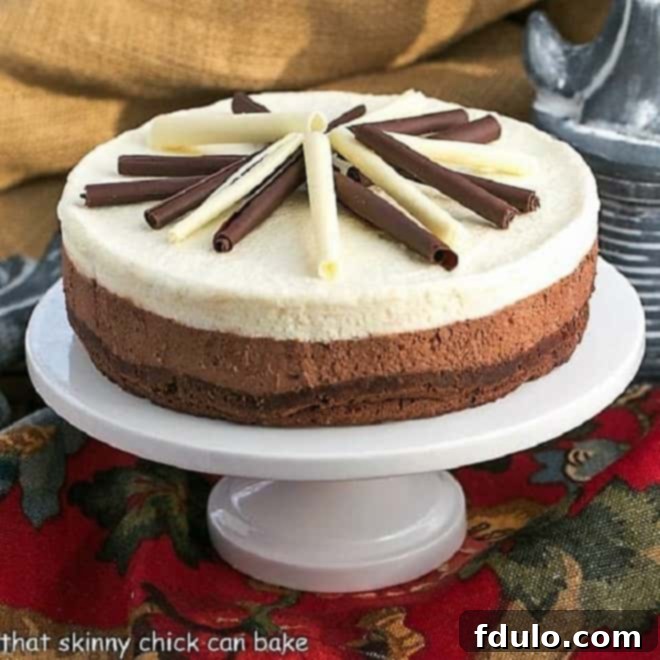
- A Symphony of Chocolate: This cake is a dream come true for any chocolate enthusiast, featuring a delightful spectrum of flavors. You’ll savor the creamy sweetness of White Chocolate, the familiar richness of Milk Chocolate, and the profound intensity of Dark Chocolate, all harmoniously blended in one extraordinary dessert. It’s an adventure for your taste buds in every single slice.
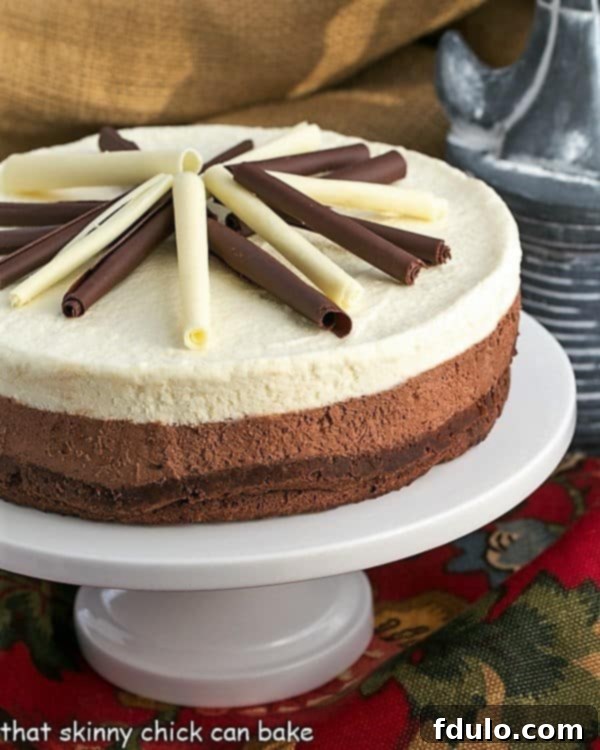
- Decadent Triple-Layer Indulgence: Prepare for an unparalleled textural and flavor experience with its three distinct layers. The foundation is a delicate yet rich chocolate soufflé cake, providing a tender, airy base. This is followed by a luscious layer of semisweet chocolate mousse, offering a deep, smooth chocolate punch. Crowned with a light and airy white chocolate mousse, this cake delivers a complex, multi-faceted dessert experience that truly elevates it to gourmet status.
- Exquisite Presentation for Any Celebration: Beyond its incredible taste, this layered mousse cake is a visual masterpiece. Its distinct layers create a stunning contrast, making for an incredibly gorgeous presentation that will impress guests at any gathering. Whether it’s a birthday, anniversary, holiday, or simply a desire to treat yourself and your loved ones, this elegant dessert is perfectly suited for any special occasion. It’s a guaranteed conversation starter and a memorable centerpiece for your dessert table.
- Perfect for Make-Ahead Convenience: While this cake appears elaborate, many of its components can be prepared in advance, making it a fantastic option for entertaining. The chilling time allows the flavors to meld beautifully and the textures to set perfectly, meaning you can assemble it hours, or even a day, before your event. This frees you up to enjoy your guests without last-minute stress.
- A True Crowd-Pleaser: With its universal appeal of chocolate and its luxurious, melt-in-your-mouth texture, this cake is destined to be a hit with everyone who tries it. From the most discerning palates to casual dessert lovers, its decadent charm is simply irresistible.
Through countless baking experiments with chocolate mousse recipes and an array of mousse cakes, I’ve discovered many wonderful variations. However, this particular recipe stands out as truly exceptional. I’ve made it more than once for a reason; it’s not just memorable—it’s a show-stopper. There are countless amazing mousse recipes out there, but few combine such elegance with pure, unadulterated chocolate bliss. (And don’t worry, there won’t be any Brussels sprouts mousse recipes appearing here anytime soon! Though I do have a soft spot for this delightful White Chocolate Mousse with Frangelico, which remains a family favorite.)
I distinctly remember making this sublime creation to celebrate my friend Shelli’s birthday, which, like my son Tom’s, falls just two days after Christmas. Often, special days around the holidays can get lost in the shuffle, but we were determined to make sure she felt cherished. The moment our guests sampled this layered mousse cake, there was an audible chorus of “swoons.” If you’re searching for an incredible dessert that promises to captivate and delight, look no further – this is truly the one you’ve been waiting for!
Unlock Baking Success: Essential Expert Tips for Your Mousse Cake
Creating a dessert as stunning and delicious as this Layered Mousse Cake is incredibly rewarding, but a few expert tips can ensure your success and make the process even smoother. Pay close attention to these insights, refined over years of baking, to achieve a professional-quality result:
- The Indispensable Springform Pan: When crafting a layered dessert, a high-quality springform pan is not merely helpful—it’s absolutely essential. Its removable sides are a game-changer, allowing you to gracefully unveil your gorgeous, multi-layered creation without the risk of flipping or damaging it, which is often unavoidable with traditional cake pans. Invest in a sturdy 9-inch model for best results.
- Understanding the Layers and Raw Eggs: This cake begins with a delightful baked chocolate soufflé base, where separated eggs contribute to a wonderfully light, cake-like texture thanks to carefully whipped egg whites. Following this are the dreamy chocolate and white chocolate mousse layers. It’s crucial to note that the mousse components contain raw eggs. Therefore, this dessert should not be served to young children, pregnant individuals, the elderly, or anyone with a compromised immune system. Always prioritize food safety when incorporating raw egg yolks.
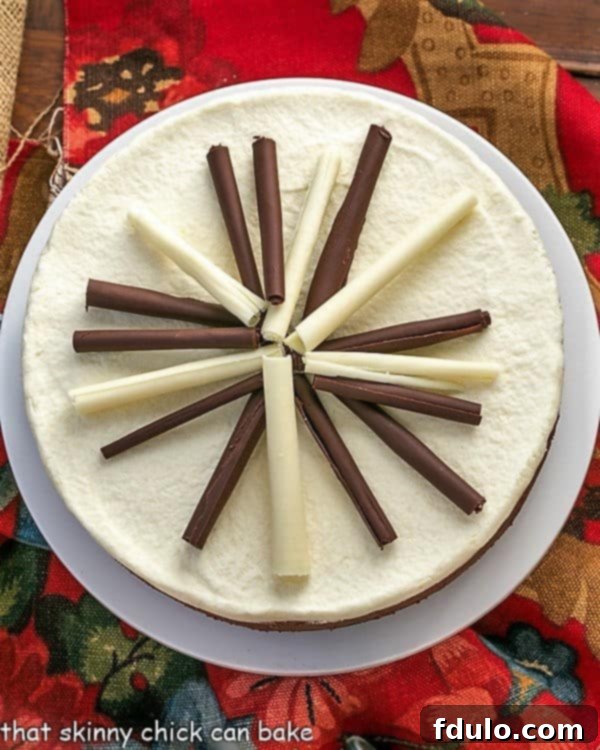
- Mastering Chocolate Curls for Garnish: The elegant touch of homemade chocolate curls truly elevates the presentation of this Layered Mousse Cake. While they can be a bit finicky, especially on warmer days, they are absolutely worth the effort. A cool environment, perhaps by cranking up your air conditioning for a short while, can make them much easier to manage. The detailed “how-to” for making them can be found in our FAQ section below. These delicate adornments add both visual appeal and an extra dimension of chocolate flavor.
- PRO-Tip: The Science of Whipping Egg Whites: For the chocolate soufflé base, achieving perfectly stiff egg white peaks is critical for the cake’s light structure. This requires scrupulous attention to detail: your mixing bowl and beaters must be impeccably clean and completely free of any grease or oil residue. Even the slightest speck of egg yolk (which contains fat) in your egg whites will prevent them from whipping properly, resulting in a flat, dense texture. If any yolk accidentally contaminates your whites, it’s best to discard them and start fresh.
- PRO-Tip: Flawless Egg Separation Technique: To minimize the risk of yolk contamination, adopt this method: separate your yolk into one small, clean bowl, and then the white into another *separate* small bowl. Only if the egg white is perfectly clear of yolk should you transfer it to your main bowl of egg whites. Repeat this process, using the empty small bowl for the next egg white separation. This extra step, while seemingly tedious, saves you the frustration and waste of accidentally ruining a large batch of egg whites, a mishap many bakers, myself included, have experienced more than once!
- Avoid Overwhipping the Cream: When preparing your mousse layers, be mindful not to over-whip the heavy cream. Over-whipped cream can become grainy and lose its smooth, silky texture, which is paramount for a light and airy mousse. Whip just until soft peaks form—the cream should hold its shape but still be somewhat fluid.
- Gentle Folding is Key: Once your whipped cream is ready, the next critical step is to gently fold it into your chocolate base. The goal here is to incorporate the cream without deflating all the precious air you’ve just whipped into it. Use a rubber spatula and a light hand, folding from the bottom up, until no streaks remain. This technique ensures your mousse retains its light, ethereal, and airy consistency.
- The Importance of Chilling: Patience is a virtue, especially with mousse cakes. Always allow your mousse or layered mousse cake ample time to chill thoroughly in the refrigerator before serving. This isn’t just for cooling; it’s essential for the mousse to properly set and firm up, allowing the layers to become stable and the flavors to fully develop and meld together. A well-chilled cake will slice cleanly and present beautifully.
- Quality Ingredients Matter: While simple, the quality of your chocolate, cream, and eggs will significantly impact the final taste. Opt for good-quality baking chocolate for the best flavor profile.
- Measure Precisely: Baking is a science, and precision is key. Use accurate measuring cups and spoons, and for best results, consider using a kitchen scale for ingredients like chocolate for exactness.
- Patience Through the Process: This is an elegant dessert, and while not overly complicated, it benefits from a calm and methodical approach. Take your time with each layer, allow adequate cooling and chilling, and you will be rewarded with an absolutely spectacular cake.
Frequently Asked Questions About Mousse and This Cake
To help you perfect your Layered Mousse Cake and understand the magic behind it, here are some commonly asked questions:
Mousse, derived from the French word for “foam,” is a culinary preparation that is typically light and airy. It can be sweet or savory, characterized by its foamy, delicate texture. This texture is achieved by incorporating air through methods like stiffly whipped egg whites (as in this recipe), whipped cream, or sometimes even pureed fruits. The base of a mousse often provides its primary flavor, such as melted chocolate, fruit puree, or savory ingredients like fish or vegetables. Its versatility makes it a beloved dish in kitchens worldwide.
While variations exist, most classic mousse recipes consist of four fundamental components working in harmony to create that signature light, fluffy texture:
- The Aerator: This is what gives mousse its characteristic airiness. Common aerators include stiffly beaten egg whites (creating a meringue), whipped heavy cream, or sometimes whole whipped eggs. In our Layered Mousse Cake, both whipped egg whites (in the base) and whipped cream (in the mousse layers) contribute to the ethereal texture.
- The Thickener: This component provides structure and helps the mousse set. Gelatin is a common thickener, often used in recipes like ours to ensure a stable, sliceable mousse, especially for layered cakes. Other thickeners can include agar-agar for vegetarian options or simply the natural thickening properties of rich chocolate or fruit purees.
- The Base (Flavoring): This is where the primary taste of the mousse comes from. For this chocolate mousse cake, the base is rich, melted chocolate (semisweet and white chocolate), infused with espresso for depth. Other bases can include fruit purees, coffee, liqueurs, or savory ingredients for savory mousses.
- The Sweetener: Typically, granulated sugar, powdered sugar, or brown sugar is incorporated to balance the flavors of the base and aerator. Often, it’s mixed with the aerator to create a meringue or sweetened whipped cream, adding not only sweetness but also contributing to the stability and texture of the mousse.
Making chocolate curls is a surprisingly simple yet incredibly effective way to elevate the look of your dessert. It typically requires just two ingredients: good quality chocolate and a touch of shortening. Here’s a basic, step-by-step process:
- Melt Chocolate: Gently melt 3 ounces of semisweet chocolate with 1 tablespoon of vegetable shortening (like Crisco) in a heatproof bowl set over simmering water, or carefully in the microwave in 30-second intervals, stirring until smooth. The shortening makes the chocolate more pliable and less prone to cracking.
- Spread Thinly: Pour the melted chocolate onto the back of a smooth, clean baking sheet (or a marble slab) and spread it into a very thin, even layer using an offset spatula or the back of a spoon. Aim for a thickness similar to paper.
- Chill Briefly: Place the baking sheet in the freezer for a very short period, typically 2-3 minutes. This step is crucial for achieving the right consistency.
- Test for Readiness: Remove the pan from the freezer. The chocolate needs to be firm enough to curl but not so hard that it immediately cracks when scraped. Gently press the chocolate with your finger; you should see a slight mark, but if it’s too soft and leaves a deep indentation, return it to the freezer for another minute. If it’s too hard, let it sit at room temperature for 30 seconds to a minute.
- Scrape the Curls: Using a bench scraper or a wide metal spatula, hold it at a 45-degree angle against the chocolate. Starting from the bottom edge of the sheet, firmly but smoothly push the scraper forward. As you push, the chocolate should peel back and curl into beautiful ribbons.
- Repeat and Re-chill: Continue scraping until the chocolate becomes too warm and starts to break or smear. If this happens, simply place the pan back into the freezer for another minute or so to re-chill before resuming.
- Store Properly: Carefully transfer the finished chocolate curls to a plate or airtight container, ensuring they are in a single layer or separated by parchment paper. Keep them chilled in the refrigerator or freezer until you are ready to use them for garnishing your cake. Note that white chocolate is often softer than dark or semisweet chocolate and may require a slightly higher chocolate-to-shortening ratio to achieve the desired consistency for curling.
Absolutely! This is one of the many beauties of this cake. The mousse layers require significant chilling time to set properly, which makes it an ideal make-ahead dessert. You can prepare the entire cake up to 1-2 days in advance. Just be sure to keep it well-covered in the refrigerator. In fact, making it ahead often allows the flavors to deepen and meld, resulting in an even more delicious and cohesive dessert.
Leftover Layered Mousse Cake should be stored in an airtight container in the refrigerator. This will help maintain its freshness, texture, and prevent it from absorbing any odors from other foods. It typically keeps well for 3-4 days. For longer storage, you can freeze individual slices, well-wrapped, for up to a month. Thaw in the refrigerator before serving.
A mousse that doesn’t set is usually due to a few common culprits. Firstly, ensure you’ve used the correct amount of gelatin and allowed it to soften and dissolve completely. Gelatin is crucial for structure. Secondly, make sure your heavy cream was whipped to soft peaks – over-whipping can separate the fat and liquid, reducing its ability to set smoothly, while under-whipping won’t provide enough aeration or body. Lastly, and most importantly, sufficient chilling time is non-negotiable. Mousse needs several hours, sometimes even overnight, to fully firm up. Don’t rush the chilling process!
Explore More Decadent Chocolate Dessert Recipes
If your heart, like mine, beats for all things chocolate, then you know the endless joy of discovering a new, irresistible chocolate dessert. This chocolate mousse cake offers a satisfying fix with just a sliver, but there’s a whole world of cocoa-infused delights waiting to be explored. Here are some of my tried-and-true favorites, perfect for entertaining guests or simply indulging your sweet tooth:
- Chocolate Hazelnut Tart from Taste And See – A sophisticated blend of rich chocolate and nutty hazelnuts in a buttery crust.
- Layered Chocolate Mousse Cake – Another variation of layered chocolate indulgence.
- Individual Chocolate Souffles – Light, airy, and impressive, these soufflés are a personal triumph in a ramekin.
- Chocolate Raspberry Pavlova – A delicate meringue shell filled with chocolate and vibrant raspberries, perfect for a lighter touch.
- Warm Chocolate Cheesecakes – A comforting and rich twist on a classic, served warm for extra deliciousness.
- More of my Best Chocolate Dessert Recipes – Dive into my complete collection of beloved chocolate creations!
Stay connected and share your baking adventures with me through social media! Follow @ Instagram, Facebook, and Pinterest. Don’t forget to tag me when you whip up one of my recipes! If you adore the results as much as I do, please consider leaving a 5-star rating in the recipe card below – your feedback means the world!
Layered Mousse Cake Recipe
40 minutes
18 minutes
58 minutes
12 servings
A decadent, 3 layer chocolate mousse cake that will thrill the chocoholics in your life!
Ingredients
Bottom layer (Chocolate Soufflé Cake):
- 6 tablespoons unsalted butter, cut into pieces (plus extra for greasing the pan)
- 7 ounces semisweet chocolate, finely chopped
- ¾ teaspoon instant espresso powder
- 1½ teaspoons pure vanilla extract
- 4 large eggs, separated
- Pinch of salt
- 1/3 cup packed light brown sugar
Chocolate Mousse Layer:
- 2 tablespoons Dutch-processed cocoa powder
- 5 tablespoons hot water
- 7 ounces semisweet chocolate, finely chopped
- 1½ cups heavy cream (cold)
- 1 tablespoon granulated sugar
- Pinch of salt
White Chocolate Mousse Layer:
- ¾ teaspoon powdered gelatin (I use Knox brand)
- 1 tablespoon cold water
- 6 ounces white chocolate, finely chopped
- 1½ cups heavy cream (cold)
For garnish:
- Chocolate curls (homemade or store-bought)
Instructions
- Prepare the Cake Pan & Preheat Oven: Lightly butter the bottom and sides of a 9-inch springform pan. Center a rack in your oven and preheat it to 325ºF (160ºC).
- Melt Chocolate Mixture (Bottom Layer): In a large heatproof bowl, combine the butter, semisweet chocolate, and instant espresso powder. Set the bowl over a saucepan of simmering water (ensure the bowl doesn’t touch the water). Stir occasionally until the mixture is smooth and fully melted.
- Add Vanilla & Egg Yolks: Remove the bowl from the heat and let the chocolate mixture cool slightly for about 5 minutes. Whisk in the vanilla extract and the separated egg yolks until well combined. Set this mixture aside.
- Whip Egg Whites: In the clean bowl of a stand mixer (or using a hand mixer) with a whisk attachment, beat the separated egg whites and a pinch of salt on medium speed until they become foamy. Gradually crumble the brown sugar into the egg whites and continue mixing until fully incorporated.
- Achieve Stiff Peaks: Increase the mixer speed to high and continue beating until stiff, glossy peaks form (this usually takes an additional minute or two).
- Lighten Chocolate Mixture: Using a whisk, gently mix about one-third of the beaten egg whites into the chocolate-yolk mixture to lighten it. This step helps in incorporating the rest of the whites without deflating them.
- Fold in Remaining Egg Whites: With a rubber spatula, carefully fold in the remaining two-thirds of the egg whites into the chocolate mixture until no white streaks are visible. Be gentle to maintain the airy texture. Pour the batter evenly into the prepared springform pan and smooth the top with a spatula.
- Bake the Bottom Layer: Bake for approximately 14-18 minutes, or until the center of the cake is just set but still feels soft (it should spring back slightly when gently pressed with a finger). Cool the cake completely on a wire rack within the springform pan.
- Prepare Cocoa Mixture (Chocolate Mousse Layer): In a small bowl, whisk together the Dutch-processed cocoa powder and hot water until smooth. Set aside.
- Melt Chocolate (Chocolate Mousse Layer): Melt the 7 ounces of semisweet chocolate in a heatproof bowl set over simmering water, stirring occasionally until smooth. Remove from heat and let cool slightly for 2-5 minutes.
- Whip Cream (Chocolate Mousse Layer): In a clean, cold stand mixer bowl fitted with the whisk attachment, whip the 1½ cups heavy cream, 1 tablespoon granulated sugar, and a pinch of salt on medium speed until the mixture begins to thicken (about 30 seconds). Increase the speed to high and continue whipping until soft peaks form when the whisk is lifted (30-60 seconds). Be careful not to over-whip.
- Combine for Chocolate Mousse: Whisk the cocoa powder mixture into the cooled melted chocolate until smooth. Gently mix one-third of the whipped cream into the chocolate mixture to lighten it. Then, using a rubber spatula, carefully fold in the remaining whipped cream until no streaks remain, ensuring the mousse stays light and airy.
- Assemble Chocolate Mousse Layer: Pour the chocolate mousse over the completely cooled chocolate soufflé cake in the springform pan. Gently tap the pan on the counter a few times to release any air bubbles and smooth the top with a spatula. Wipe away any mousse that may have dripped onto the interior sides of the pan. Refrigerate the cake while you prepare the final layer.
- Soften Gelatin (White Chocolate Mousse Layer): Sprinkle the ¾ teaspoon powdered gelatin over 1 tablespoon of cold water in a small bowl. Let it stand for at least 5 minutes to soften and bloom.
- Prepare White Chocolate Base: Place the 6 ounces of finely chopped white chocolate in a medium bowl. In a small saucepan, bring ½ cup of the heavy cream to a boil. Remove the pan from the heat, add the softened gelatin mixture, and stir until the gelatin is completely dissolved.
- Melt White Chocolate: Pour the hot cream-gelatin mixture over the white chocolate and let it stand undisturbed for about 1 minute. Then, whisk until the mixture is completely smooth. Allow this mixture to cool to room temperature, stirring occasionally to prevent it from setting prematurely.
- Whip Remaining Cream (White Chocolate Mousse Layer): In another clean, cold bowl, whip the remaining 1 cup of heavy cream until it begins to thicken. Increase the speed to high and whip until soft peaks form.
- Combine for White Chocolate Mousse: Using a whisk, mix one-third of the whipped cream into the cooled white chocolate mixture to lighten it. Then, gently fold in the remaining whipped cream with a rubber spatula until no streaks remain, ensuring the mousse is light and airy.
- Assemble White Chocolate Mousse Layer: Carefully spoon the white chocolate mousse into the springform pan, spreading it evenly over the set chocolate mousse layer. Smooth the top with an offset spatula for a pristine finish.
- Final Chill: Return the entire cake to the refrigerator and chill until it is completely set, which will take at least 2½ hours. For best results and easiest slicing, chilling overnight is highly recommended.
- Garnish and Serve: Once fully set, carefully remove the sides of the springform pan. Garnish with homemade or store-bought chocolate curls if desired, and serve slices of this magnificent Layered Mousse Cake. Enjoy!
Notes
Total preparation and cook time listed (58 minutes) does not include the essential chilling time required for the mousse layers to set.
For instructions on how to make your own elegant chocolate curls, please refer to the “Frequently Asked Questions” section above, specifically “How Do You Make Elegant Chocolate Curls for Garnish?”. The basic recipe involves melting 3 ounces of semisweet chocolate with 1 tablespoon of Crisco (vegetable shortening).
The base chocolate soufflé cake recipe has been slightly adapted from a trusted source, Cook’s Illustrated, known for its precise and reliable recipes.
Recommended Products
As an Amazon Associate and member of other affiliate programs, I earn from qualifying purchases.
- Bench Scraper
- Nesting Mixing Bowls
- 9-inch springform pan
Nutrition Information:
Yield:
12
Serving Size:
1 slice
Amount Per Serving:
Calories: 544Total Fat: 44gSaturated Fat: 27gTrans Fat: 1gUnsaturated Fat: 14gCholesterol: 148mgSodium: 126mgCarbohydrates: 38gFiber: 2gSugar: 34gProtein: 6g
HOW MUCH DID YOU LOVE THIS RECIPE?
Please leave a comment on the blog or share a photo on Pinterest
