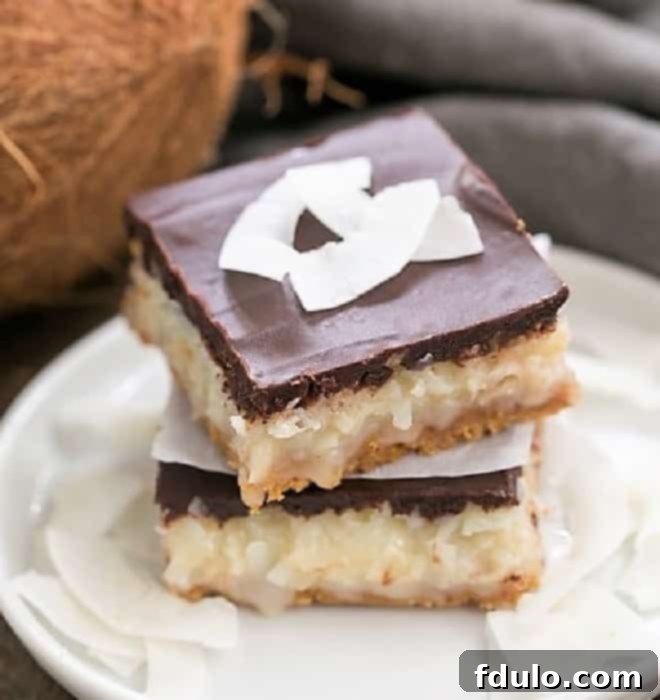
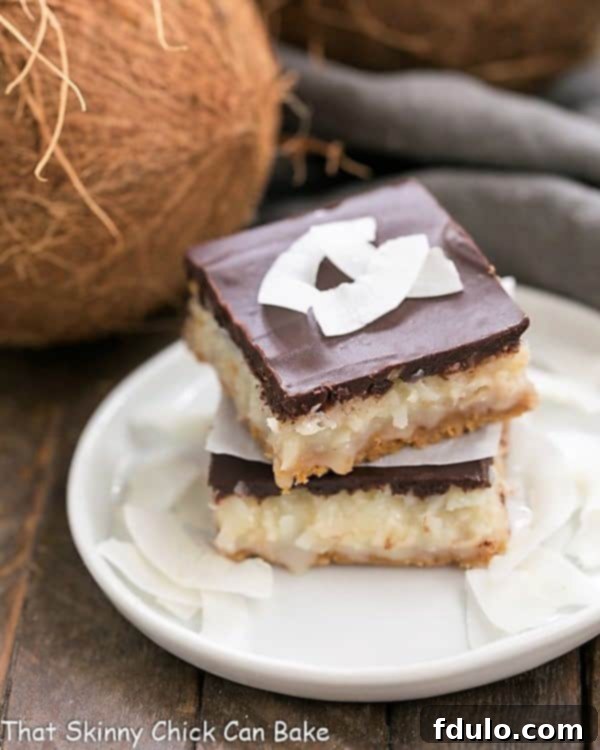
Welcome, fellow dessert enthusiasts and coconut lovers! Prepare to be captivated by these absolutely divine Coconut Mounds Bars. Forget everything you thought you knew about your favorite candy bar; this homemade version transcends the original with layers of rich flavor and irresistible texture. Featuring a buttery, crisp graham cracker crust, a sweet and gooey coconut filling, and a luscious dark chocolate ganache topping, these bars are not just a treat—they’re an experience. Indulge in the simple pleasure of creating these exquisite Coconut Bars right in your own kitchen, guaranteed to impress every palate.
In my humble opinion, these homemade Coconut Chocolate Bars don’t just rival the classic Mounds candy bar; they surpass it. The magic lies in the exquisite contrast of textures and tastes: the satisfying crunch and buttery notes of the graham cracker base, the soft, sweet, and incredibly moist coconut center, and the smooth, slightly bitter sophistication of the semi-sweet chocolate ganache. Each bite is a symphony of flavors, making these easy-to-make bars an outrageously delicious addition to any dessert spread or a perfect craving-quencher for a quiet evening at home. Get ready to elevate your dessert game with a recipe that’s sure to become a cherished favorite.
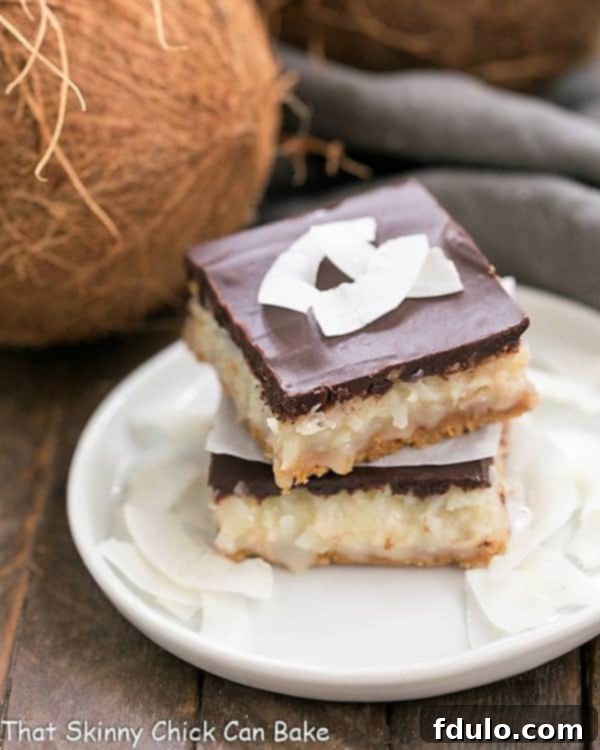
Why You Need to Bake These Irresistible Coconut Mounds Bars
There are countless reasons why this Mounds Bars Recipe deserves a prime spot in your baking repertoire, but a few stand out as absolute game-changers:
- A Timeless Family Favorite: This particular recipe holds a special place in my heart, having been a cherished family recipe for decades. Passed down through generations, it embodies comfort and nostalgia. If you’re a devoted fan of coconut desserts, you’ll find yourself completely captivated by the authentic and rich coconut flavor these bars offer. They truly are a taste of tradition, perfected.
- Remarkably Simple to Prepare: Despite their decadent appearance and gourmet taste, these bars are incredibly straightforward to make. You don’t need to be a seasoned baker to achieve professional-looking and tasting results. With readily available ingredients and clear, easy-to-follow steps, you can whip up a batch of these glorious treats without any stress or fuss. It’s the perfect recipe for both novice bakers and those looking for a quick yet impressive dessert.
- Unforgettably Gooey and Decadent: Prepare for an explosion of rich, satisfying textures and flavors. The coconut filling is exquisitely moist and delightfully gooey, perfectly complementing the crisp graham cracker crust. Topped with a silky, deep chocolate ganache, each bar is a symphony of indulgence. These aren’t just bars; they’re a luxurious dessert experience, designed to satisfy even the most intense sweet cravings with their profound decadence.
My adoration for Mounds Bars began early in life, and I’ve often reminisced about them. This very recipe for homemade mounds bars was my contribution to a cherished family cookbook, lovingly compiled for our mothers when I was just a first-grader. This treasured book, bound with metal brackets and covered in a wood-grain patterned shelf paper, became my go-to resource whenever an intense craving for coconut struck. Tragically, this culinary gem mysteriously disappeared from my childhood home during a period when I was desperately craving the familiar taste of those coconut bars, leaving a void that was hard to fill. For years, I searched for a similar recipe, attempting to recreate the magic, but nothing quite lived up to the nostalgic taste and texture of that original family classic.
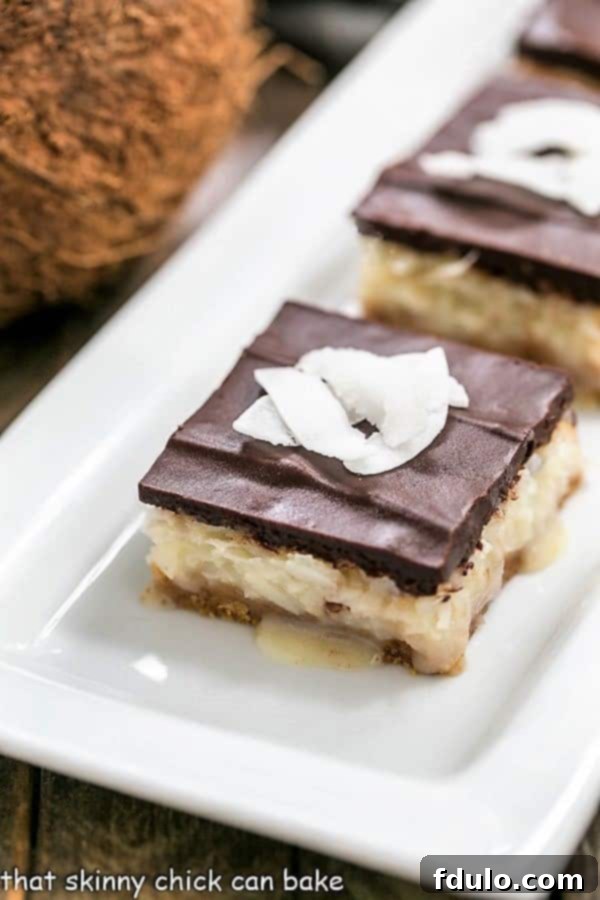
Essential Ingredients for Your Perfect Coconut Mounds Bars
Creating these sensational bars starts with a selection of high-quality ingredients. Here’s a closer look at what you’ll need and some tips for each:
- Kitchen Staples: You’ll begin with common pantry items like Powdered Sugar, which contributes to the crust’s tender texture, and Melted Butter (salted butter works perfectly well here, adding a subtle depth of flavor to the crust). Ensure your butter is good quality, as it forms the foundation of your delicious base.
- Graham Cracker Crumbs: These form the iconic crunchy and buttery crust. You can conveniently find boxed graham cracker crumbs in the baking aisle of most large supermarkets. For an even fresher taste and control over texture, consider making your own by simply adding broken graham crackers to a food processor and pulsing them until finely ground into crumbs. This ensures maximum freshness and flavor for your crust.
- Sweetened Condensed Milk: This ingredient is the heart of our gooey coconut filling. You’ll need one standard 14-ounce can. This sweet, thick milk not only binds the coconut together but also imparts a rich, creamy sweetness and helps achieve that signature chewy, irresistible texture that defines a perfect Mounds bar.
- Sweetened, Shredded Coconut: The star of the show! I personally recommend using Angelflake coconut for its fine shred and optimal sweetness, which creates a wonderfully tender and moist filling. You can find this easily in the baking section. Ensure it is sweetened, as this is crucial for the classic Mounds flavor profile.
- Semisweet Chocolate: For the luxurious ganache topping, quality matters. Choose good-quality semisweet chocolate; I prefer Ghirardelli semisweet chocolate bars, which I chop myself for easier and more even melting. Using chopped bars instead of chips often results in a smoother, glossier ganache.
- Heavy Cream: Essential for a silky, pourable ganache. Aim for heavy cream with at least 36% butterfat content. This high-fat content ensures your ganache is rich, stable, and sets beautifully, creating a perfect complement to the sweet coconut layer.
Crafting the Ultimate Coconut Chocolate Bars
My journey to recreate these perfect coconut bars took a delightful turn thanks to my dear friend, Susan, from Schnitzel and the Trout. Hearing about my years-long predicament and my unsuccessful attempts to replicate my mom’s original recipe, Susan came to my rescue with a recipe of her own. My previous efforts, while resulting in good coconut bars, always fell short. Either my nostalgic memory had exaggerated the original’s decadence, or the recipes I tried simply lacked that essential richness and gooeyness that defined the authentic Mounds bar experience I craved.
Susan’s recipe provided a fantastic foundation. With her generous contribution, I embarked on a mission to perfect them. My primary tweaks included baking the bars in a slightly smaller pan to create a thicker, more substantial coconut layer, effectively doubling the luxurious filling. But the most significant upgrade came with replacing the simple melted chocolate chip topping—a common choice in many recipes—with a glossy, rich, and impeccably smooth chocolate ganache. This transformation elevated the bars from merely “good” to truly exceptional, delivering a sophisticated finish that harmonized beautifully with the sweet coconut and buttery crust. The result was beyond my wildest expectations.
Expert Tips for Crafting Your Homemade Coconut Mounds Bars
Achieving bakery-quality coconut bars at home is easier than you think with these professional tips:
- Prepare Your Pan for Perfection: When baking most bar cookies, a key step for effortless removal and clean slices is to line your baking pan. I highly recommend using non-stick foil for this purpose. Not only does it make cleanup a breeze, but it also creates convenient “handles” that allow you to easily lift the entire slab of baked bars from the pan. Once lifted, you can place them on a sturdy cutting board, providing a flat and stable surface for precise slicing. If non-stick foil isn’t available, regular aluminum foil lightly greased with butter or cooking spray, or even parchment paper, will also work wonders.
- Mastering the Art of Cooling: Patience is a virtue, especially when it comes to cooling your coconut layer. After baking, it’s crucial to allow the bars to cool sufficiently before you even think about applying the ganache topping. While they can be slightly warm to the touch, they absolutely must not be hot. Applying ganache to a warm or hot coconut layer will cause the chocolate to melt and run, resulting in a messy, unappealing topping rather than the smooth, distinct layer you desire. A completely cool base ensures a beautifully set ganache.
- The Essential Tool: An Offset Spatula: For spreading the decadent chocolate ganache over your cooled coconut layer, a small offset spatula is an indispensable kitchen tool (Amazon affiliate link). Its angled blade provides superior control and leverage, allowing you to achieve an incredibly smooth, even, and professional-looking layer of chocolate without disturbing the delicate coconut underneath. If you don’t have one, a regular small spatula or even the back of a spoon can work in a pinch, though with less precision.
- Achieving Flawless Slices: The secret to perfectly clean, sharp cuts lies in chilling your coconut bars after the ganache has been applied. Refrigerating the bars for at least an hour (or until the ganache is firm) allows the chocolate to set completely, preventing it from smudging or tearing when sliced. To minimize any potential cracking of the chocolate topping, I recommend scoring the bars lightly with a sharp knife first, outlining your desired bar sizes. For the ultimate clean cut, warm a dry knife under hot water, wipe it completely dry, and then slice. Re-warm and wipe the knife between each cut for consistently pristine edges. This simple technique ensures your presentation is as impressive as the taste!
Well, the verdict is in, and I couldn’t be happier: these coconut bars are not just an improvement on my childhood memory; they are unequivocally BETTER than the original! A massive thank you, Susan, for helping me rediscover and elevate this beloved dessert!
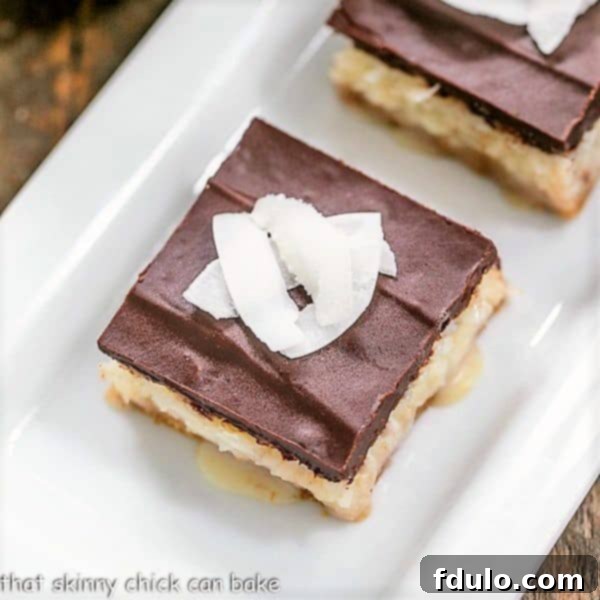
Frequently Asked Questions About Coconut Mounds Bars
Introduced in 1920 by the Hershey Company, Mounds Bars are a classic American candy bar composed of a sweet, moist coconut filling enrobed in a rich dark chocolate coating. They are renowned for their intense coconut flavor and the pleasant bitterness of the dark chocolate, offering a distinct contrast to other popular candy bars. For those living abroad, the taste and concept are very similar to Bounty Bars, with the key difference being that Bounty Bars are typically bathed in milk chocolate instead of the dark chocolate found on Mounds. These Easy Mounds Bars with Chocolate are a delightful homemade riff on the candy bar I finally tasted and fell for in my early teens, bringing that nostalgic flavor directly to your home kitchen.
While both Mounds and Almond Joy candy bars are iconic products from the Hershey Company and share a delicious coconut filling, they have two key distinctions. A Mounds Bar is exclusively coated in a rich, dark chocolate, offering a more intense chocolate experience to complement the sweet coconut. In contrast, an Almond Joy is coated in a sweeter milk chocolate, and each individual piece is topped with a whole, crunchy almond, adding an extra layer of flavor and texture. So, if you prefer dark chocolate and pure coconut, Mounds is your go-to; if you enjoy milk chocolate and a nutty crunch, Almond Joy is the choice!
For optimal freshness and to maintain their delightful texture, store your homemade Coconut Mounds Bars in an airtight container in the refrigerator. They will stay fresh for up to one week. If you prefer a firmer texture, you can even store them in the freezer for up to 3 months; just be sure to thaw them slightly before enjoying for the best eating experience.
Absolutely! These bars are an excellent make-ahead dessert. You can prepare them a day or two in advance and keep them chilled in the refrigerator. In fact, some people find that the flavors meld and deepen even further after a day or so, making them taste even better. This makes them perfect for parties, holidays, or any event where you want to reduce last-minute stress.
Explore More Coconut and Chocolate Delights
If you’ve fallen in love with this Mounds Bar Recipe, you’re sure to enjoy these other fantastic coconut and chocolate treats:
- Coconut Cream Truffles from Crazy for Crust – rich, creamy, and bite-sized.
- Classic Coconut Macaroons – chewy on the inside, crispy on the outside.
- German Chocolate Brownie Cupcakes – a decadent fusion of two favorites.
- Fluffy Coconut Cupcakes – light, airy, and bursting with coconut flavor.
- Chewy Coconut Cookies – simple, sweet, and perfectly textured.
- Pistachio Coconut Granola – a healthy, flavorful start to your day.
- Mounds Brownie Cupcakes – combines brownies and the classic Mounds taste.
- Plus, you may find this tutorial on How to Cut Bar Cookies very helpful for perfect presentation.
- And for a quick, no-bake option, these Classic Chocolate Peanut Butter No-Bake Cookies are super easy and delicious!
Stay in touch through social media @ Instagram, Facebook, and Pinterest. Don’t forget to tag me when you try one of my recipes! And if you love the results, please give it a 5-star rating in the recipe card below.
Coconut Mounds Bars Recipe
30 minutes
25 minutes
55 minutes
16 bars
Outrageously delicious coconut bars that outshine Mounds candy bars with a perfect graham cracker crust and rich ganache!
Ingredients
- 1 cup graham cracker crumbs
- 2 tablespoons powdered sugar
- ¼ cup butter, melted
- 14 ounces sweetened condensed milk (1 can)
- 7 ounces sweetened, shredded coconut
- 4 ounces semi-sweet chocolate, chopped
- 2 tablespoons plus 2 teaspoons of heavy cream
Instructions
- Preheat the oven to 350ºF (175ºC).
- In a medium bowl, thoroughly mix the graham cracker crumbs, powdered sugar, and melted butter until well combined. Press this mixture firmly and evenly into the bottom of an 8×8-inch baking pan. For easy removal and clean slices, you may line the pan with non-stick foil, leaving an overhang on the sides. Bake for 10 minutes, then remove from oven and set aside.
- Pour the entire can of sweetened condensed milk into a microwave-safe bowl. Heat in the microwave until it’s quite warm to the touch (about 1-2 minutes, stirring halfway). This step helps the milk combine better with the coconut and creates a smoother filling. Stir in the sweetened, shredded coconut until it’s fully coated and evenly distributed.
- Carefully spread the coconut mixture evenly over the pre-baked graham cracker crust in the pan. Return the pan to the oven and bake for another 15-20 minutes, or until the coconut layer is lightly browned around the edges and set. Once baked, remove the bars from the oven and allow them to cool slightly on a wire rack before proceeding to the ganache. They should be cool to the touch, not hot, to ensure the ganache sets properly.
- To prepare the ganache, combine the chopped semi-sweet chocolate and heavy cream in a microwave-safe bowl. Heat in the microwave in 30-second increments, stirring well after each interval, until the chocolate is fully melted and the mixture is smooth and glossy. Alternatively, you can melt them together in a double boiler over simmering water.
- Once the ganache is smooth, give the mixture a good whisk to ensure it’s perfectly emulsified. Carefully pour the warm ganache over the cooled coconut layer, using a small offset spatula or the back of a spoon to spread it evenly to cover the entire surface.
- For the cleanest possible cuts, chill the bars in the refrigerator for at least 1-2 hours, or until the ganache is firm. If the chocolate becomes too hard and threatens to crack when cutting, you can lightly score the top first. For perfectly crisp slices, use a hot, dry knife: warm the knife under hot running water, wipe it completely dry, then make each cut. Re-warm and wipe the knife between slices.
Notes
Adapted from a beloved family recipe passed down by my mom, with key improvements inspired by my friend, Susan. This perfected version combines nostalgic flavors with enhanced decadence.
Recommended Products
As an Amazon Associate and member of other affiliate programs, I earn from qualifying purchases.
- Small Offset Spatula
- Nonstick Foil
- 8 x 8-inch Baking Pan
Nutrition Information:
Yield:
16
Serving Size:
1 bar
Amount Per Serving:
Calories: 252Total Fat: 12gSaturated Fat: 8gTrans Fat: 0gUnsaturated Fat: 3gCholesterol: 20mgSodium: 126mgCarbohydrates: 34gFiber: 2gSugar: 29gProtein: 4g
HOW MUCH DID YOU LOVE THIS RECIPE?
Please leave a comment on the blog or share a photo on Pinterest
