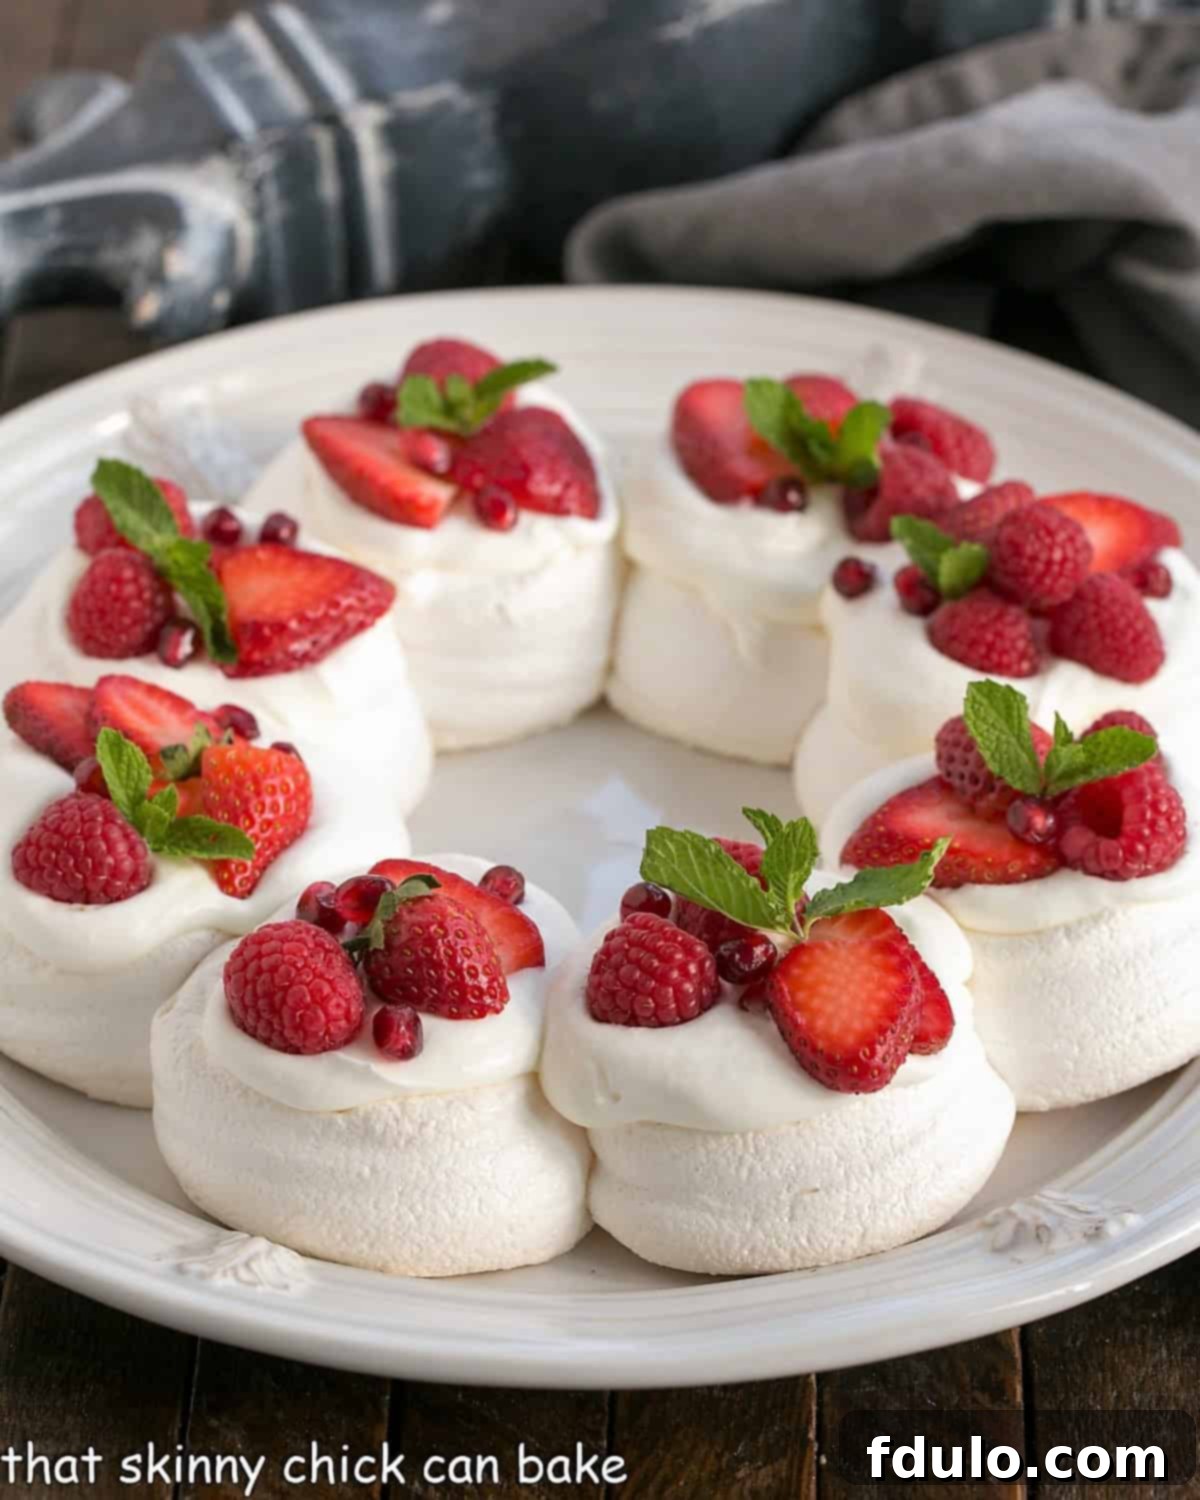
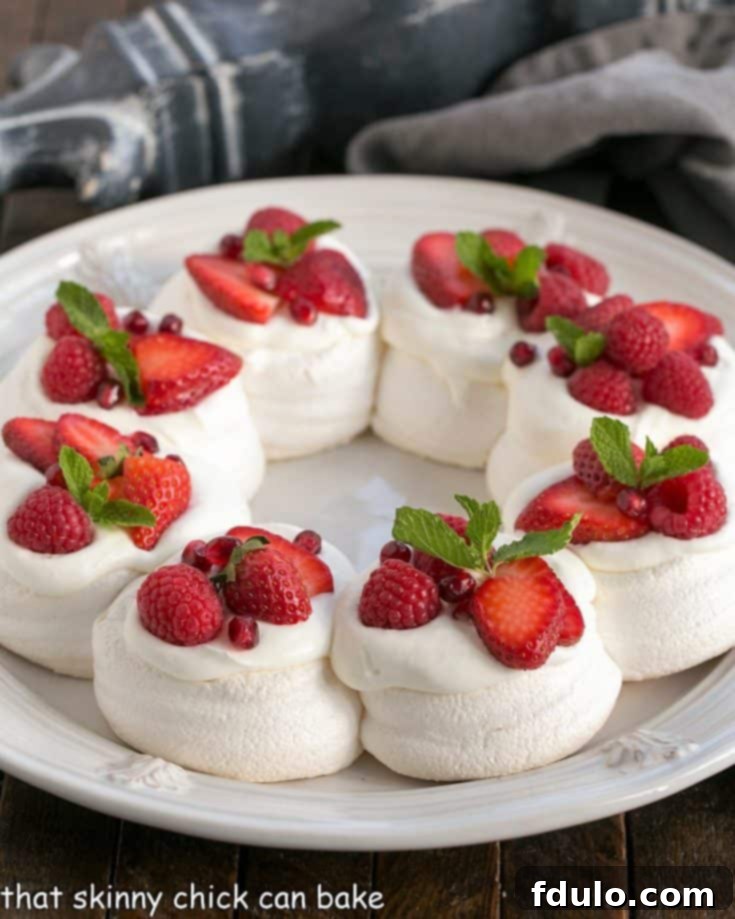
Step into a world of festive delight with this truly magnificent Christmas Pavlova Wreath. More than just a dessert, it’s a centerpiece, a conversation starter, and an absolute joy to behold and devour. Imagine a delicate, crisp meringue shell, baked to perfection, then artfully adorned with fluffy whipped cream, vibrant red berries, and fresh green mint sprigs. This stunning creation isn’t just delicious; it’s a visual celebration that perfectly captures the spirit of the holiday season, making it an unforgettable addition to your Christmas table.
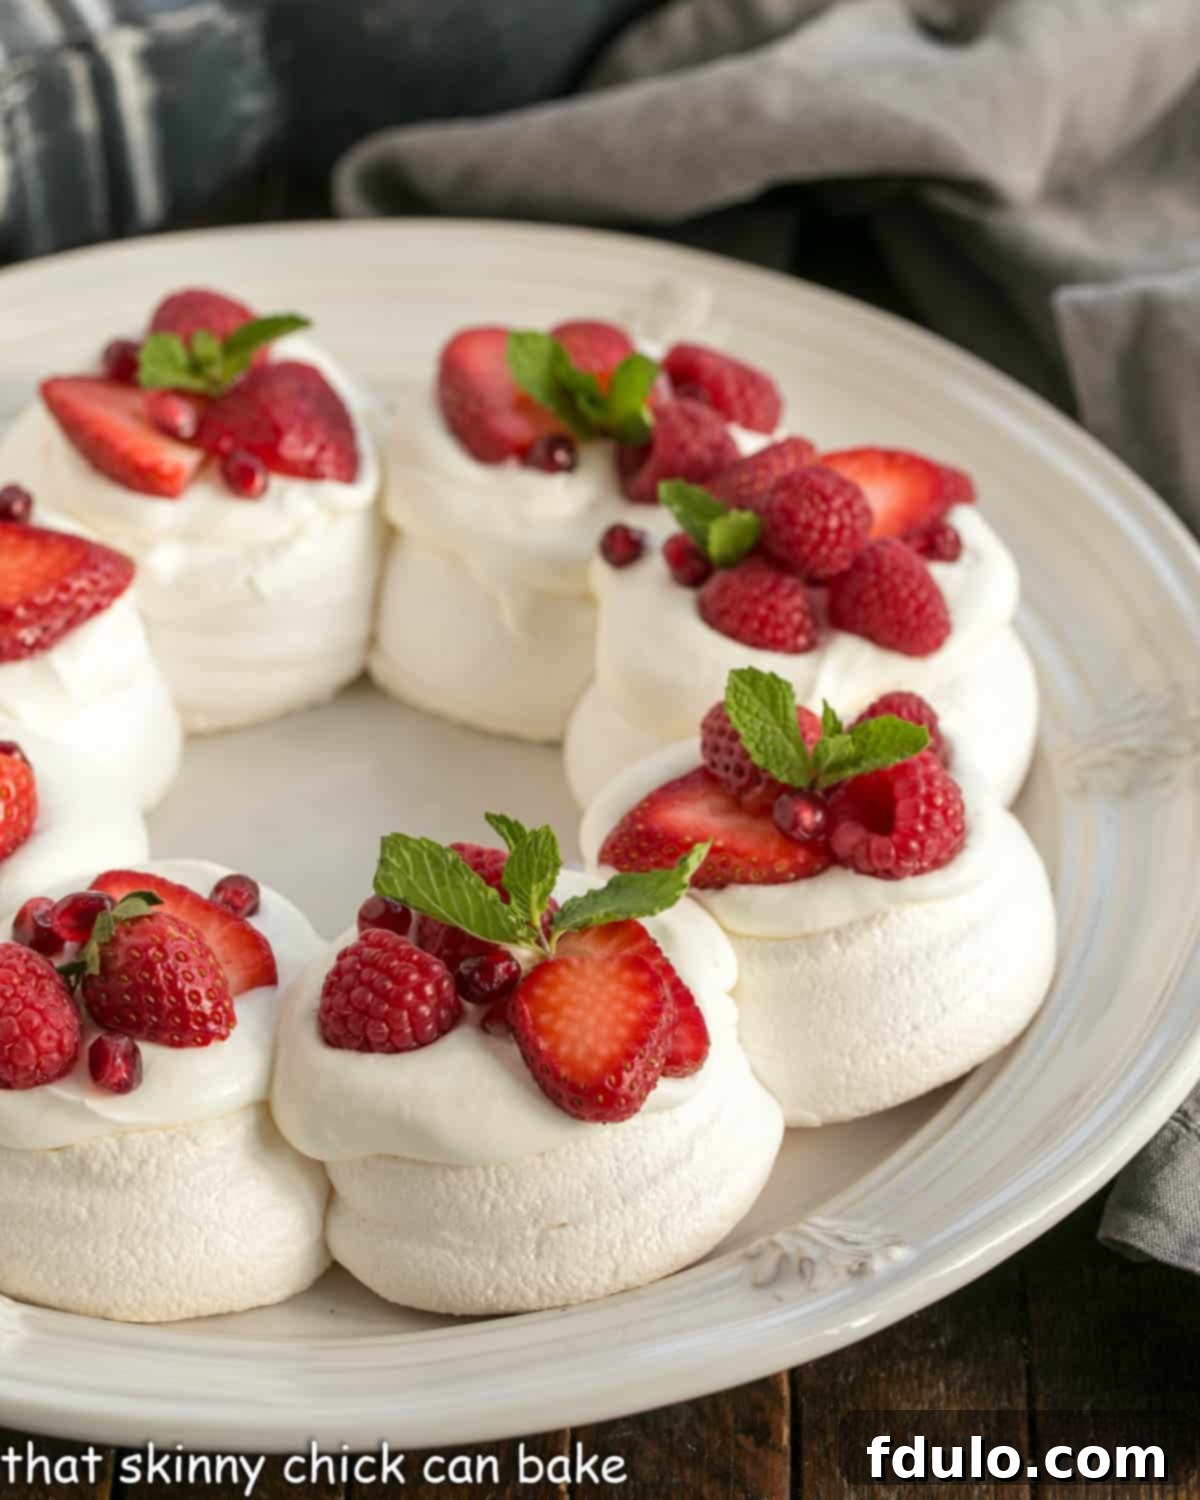
While classic pavlovas are often round, transforming this delightful Pavlova Dessert into a wreath shape instantly elevates its holiday charm. The circular form, reminiscent of a festive wreath, creates a canvas for vibrant, seasonal decorations. The contrast of the pristine white meringue with the ruby-red berries and emerald mint leaves adds an exquisite touch, making it an irresistible treat that will surely impress your guests and leave them asking for the recipe. It’s an elegant yet surprisingly simple dessert that brings a touch of magic to any gathering.
Why You’ll Adore This Christmas Pavlova Wreath
The Christmas Pavlova Wreath isn’t just another dessert; it’s an experience waiting to happen. Here’s why this recipe will become a cherished part of your holiday traditions:
- A Unique Culinary Discovery: For many, pavlova remains a delightful secret. You’ll likely be introducing your friends and family to this ethereal dessert for the very first time. Its unique texture – a crisp exterior giving way to a marshmallow-soft interior – is truly unlike anything else, guaranteeing a memorable dessert that stands out from typical holiday fare. It’s a special treat that feels gourmet without requiring excessive effort.
- Easier Than You Think: Don’t let its elegant appearance intimidate you! If you can master meringue cookies or a simple meringue topping for a pie, you absolutely have the skills to create this pavlova. The process involves precise steps, but none are overly complicated, making it a rewarding baking project for home cooks of all levels. The core technique is whipping egg whites to perfection, a skill easily acquired with a few expert tips.
- A Symphony of Flavors and Textures: Prepare your taste buds for an unforgettable journey. The sweetness of the meringue perfectly complements the rich, airy whipped cream and the tart burst of fresh berries. Each bite offers a delightful contrast: the delicate crunch of the meringue shell, the yielding, slightly chewy interior, and the refreshing cream and fruit. It’s a beautifully balanced dessert that’s light yet satisfying.
- Stunning Presentation: This pavlova is more than just a dessert; it’s a showstopper. Shaped into a festive wreath and adorned with holiday colors, it instantly becomes the focal point of any dessert table. Its gorgeous aesthetic will garner gasps of admiration and endless compliments, making you the star of your holiday gathering. It proves that culinary masterpieces can be both beautiful and attainable.
- Naturally Gluten-Free: For those with dietary restrictions, this pavlova is a fantastic option. Made primarily from egg whites and sugar, it naturally caters to gluten-free diets, ensuring that everyone at your holiday celebration can indulge in a slice of this festive magic. It’s wonderful to have an inclusive dessert that doesn’t compromise on flavor or presentation.
Ingredient Notes for the Perfect Pavlova
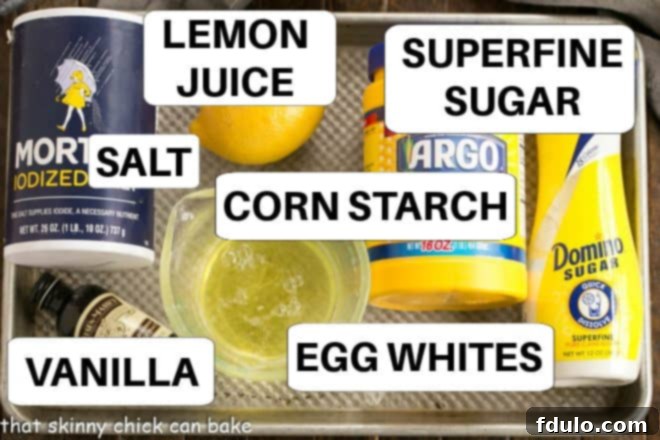
Crafting the perfect Christmas Pavlova Wreath relies on understanding the role each ingredient plays. Here’s a closer look at the key components and why they are essential:
- Superfine Sugar: This is not merely a suggestion; it’s a critical component for achieving the signature pavlova texture. Superfine sugar, also known as caster sugar, has finer crystals than regular granulated sugar, allowing it to dissolve more quickly and completely into the egg whites. This quicker dissolution prevents a grainy texture and contributes to a more stable, glossy meringue. While some attempt to make their own by blitzing regular sugar in a food processor, this can create sharp edges on the sugar grains, which may compromise the meringue’s structure and prevent it from reaching its full volume. Stick to store-bought superfine sugar for the best results.
- Cornstarch: The secret to the pavlova’s unique interior. While the sugar helps create a crisp exterior, cornstarch is crucial for keeping the center delightfully soft, chewy, and marshmallow-like. It helps to stabilize the egg whites and creates that desirable “squidgy” (as Nigella Lawson beautifully puts it) texture that distinguishes a pavlova from a simple meringue. Without it, your pavlova might be uniformly crisp, lacking the delightful contrast.
- Egg Whites: The foundation of any meringue. For optimal volume and stability when whipped, ensure your egg whites are at room temperature. Cold egg whites are more viscous and resist incorporating air, leading to less voluminous peaks. Furthermore, cleanliness is paramount: any trace of oil, grease, or egg yolk can prevent the egg whites from whipping properly. To be absolutely safe, run your mixer bowl and whisk attachment through the dishwasher or wash them thoroughly with hot, soapy water and rinse completely before use.
- Lemon Juice or White Vinegar: The acidic hero. A small amount of acid, such as fresh lemon juice or white vinegar, plays a vital role in stabilizing the whipped egg whites. It helps to strengthen the protein structure, allowing the egg whites to hold more air and create those beautiful, stiff, glossy peaks that are essential for a robust pavlova. This stabilization also helps prevent the meringue from collapsing during baking.
- Salt: A flavor enhancer, even in desserts. Just a quarter teaspoon of table salt might seem insignificant, but it makes a noticeable difference. Salt balances the sweetness of the sugar and prevents the dessert from tasting flat or overly sugary. It subtly enhances all the other flavors, making the pavlova taste brighter and more complex.
- Vanilla Extract: Pure vanilla is non-negotiable. Always opt for pure vanilla extract over imitation vanilla. The quality of vanilla significantly impacts the overall flavor profile of your pavlova. Pure vanilla provides a rich, aromatic depth that imitation versions simply cannot replicate, adding a sophisticated warmth to the sweet meringue.
- Whipped Cream and Berries: The crowning glory. These garnishes transform a simple baked meringue into a festive masterpiece. Heavy cream, whipped until light and airy, provides a rich, cool contrast to the sweet pavlova. Fresh raspberries, strawberries, pomegranate arils, and vibrant mint sprigs offer bursts of color, tanginess, and freshness, making each bite an exhilarating experience. Don’t skimp on quality here; fresh, seasonal berries make all the difference.
Expert Tips for a Flawless Christmas Pavlova Wreath
Achieving pavlova perfection is all about precision and a few insider tricks. Many of these tips are fundamental for any meringue-based dessert, ensuring your Christmas Pavlova Wreath turns out beautifully every time:
- The Art of Egg Separation: This is perhaps the most crucial step. Separate your eggs one at a time, using a dedicated third bowl for the egg whites. First, separate the yolk and white into two separate bowls. Once you’re certain the white is absolutely free of any yolk contamination, transfer it to your main mixing bowl (the third bowl). This method minimizes the risk of a single broken yolk contaminating your entire batch of whites. Even a minuscule speck of yolk, which contains fat, can prevent your egg whites from whipping to stiff peaks.
- PRO-Tip: Cold Eggs Separate Best: While room temperature egg whites whip best, cold eggs are actually easier to separate. The yolks are firmer and less likely to break when cold. Separate your eggs while they’re cold, then let the whites come to room temperature (about 30 minutes to an hour) before whipping.
- Immaculate Equipment is Key: Reiterating an earlier point, ensure all equipment that touches the egg whites—your mixing bowl, whisk, and any spatulas—is meticulously clean and completely free of oil or grease. The slightest residue can sabotage your meringue. Running your beaters and bowl through the dishwasher is an excellent way to guarantee they are scrupulously clean. Fat molecules interfere with the egg white proteins, preventing them from forming a stable foam.
- The Superfine Sugar Advantage: Always use superfine sugar. Its smaller crystals dissolve more readily and completely into the egg whites, leading to a smoother, more stable, and less grainy meringue. Regular granulated sugar takes longer to dissolve and can sometimes leave a gritty texture, even after extensive beating.
- Slow and Steady Sugar Addition: Patience is a virtue when adding sugar. Gradually incorporate the sugar, a tablespoon at a time, while the mixer is running. This slow addition allows the sugar to dissolve properly without deflating the egg whites. My mother taught me a simple test: rub a small amount of meringue between your fingers. If you still feel sugar granules, continue mixing until it feels as smooth as possible. While a few tiny granules might remain, the goal is to get the sugar mostly incorporated for that perfect texture.
- Timing is Everything for Topping: Resist the urge to top your pavlova with whipped cream and berries too far in advance. Meringue is highly susceptible to moisture, and the cream can cause it to become chewy or soggy. For the best texture—crisp exterior and soft interior—garnish your pavlova no more than an hour before serving. This ensures maximum freshness and textural integrity.
- PRO-Tip: Humidity is the Enemy: Meringues are extremely sensitive to humidity. Store your ungarnished pavlova in a dry, airtight location. The refrigerator, while cold, is often too humid and will soften your crisp meringue shell. A cool, dry pantry or even your oven (turned off, of course!) makes a better storage spot.
- Oven Storage Savvy: An excellent place to store your completely cooled, ungarnished pavlova is in your turned-off oven. The oven provides a dry, enclosed environment. However, this comes with a crucial caveat: always place a prominent note on the oven door to prevent anyone from accidentally preheating it while your beautiful creation is inside! This simple precaution can save your dessert from disaster.
- Patience During Cooling: After baking, turn off the oven and prop the door open slightly, allowing the pavlova to cool gradually inside. This slow cooling prevents a sudden temperature shock that can cause the meringue to crack or collapse. This step is key to maintaining its beautiful shape and structure.
Frequently Asked Questions About Pavlova
Pavlova is an exquisite dessert of Australian and New Zealand origin, though both countries famously claim its invention. At its heart, it’s a large meringue, distinct from its smaller meringue cookie cousins. It’s crafted from whipped egg whites, stabilized with a touch of acid (like lemon juice or white vinegar), and sweetened with superfine sugar, with cornstarch added to create its unique texture. The magic of a pavlova lies in its contrast: a beautifully crisp, melt-in-your-mouth exterior shell that gives way to a wonderfully soft, chewy, marshmallow-like interior. This “squidgy” center, as culinary guru Nigella Lawson calls it, is what truly sets a pavlova apart, making it a beloved dessert worldwide.
Absolutely! The meringue base of your pavlova can be baked the day before you plan to serve it. This makes it an ideal dessert for entertaining, as it significantly reduces last-minute stress. However, the golden rule for pavlova is to never top it with whipped cream and berries until just before serving. Moisture is the enemy of crisp meringue. Store the undecorated meringue shell in a low-humidity environment, such as a cool, dry pantry or even a turned-off oven. Do not refrigerate the plain meringue shell, as the humidity inside a refrigerator will cause it to soften and lose its crispness.
For the ultimate textural experience, decorate your pavlova no more than one hour before you intend to serve it. The whipped cream, while delicious, introduces moisture that will gradually soften the crisp meringue shell. While it can still be enjoyed after an hour, its peak crispness and delicate balance of textures are best experienced shortly after assembly. If you have any leftovers after serving, these should be refrigerated due to the whipped cream and fresh fruit. Be aware that the meringue will continue to soften in the refrigerator, but it will still be delicious.
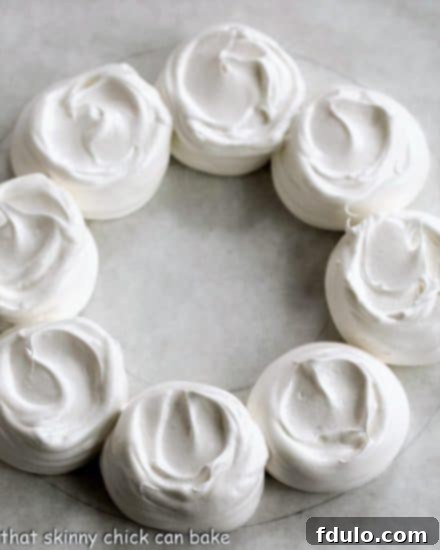
Creating the wreath shape is simpler than it looks! Start by drawing a template on a sheet of parchment paper. Use a 10-inch cake pan as a guide to draw the outer circle, and then a smaller 4-inch mixing bowl (or similar object) to draw the inner circle for the wreath’s opening. Flip the parchment paper over so the drawn lines are on the underside – this prevents pencil marks from transferring to your meringue. To secure the parchment to your baking sheet, dab a small amount of raw meringue under each corner of the paper. Next, prepare a large piping bag fitted with a large open star tip, or simply snip a corner off a large Ziploc bag for a more rustic look. Pipe distinct round mounds of meringue between the two drawn lines, aiming for 8-10 mounds total. Start with one mound, then pipe another directly opposite it to help maintain an even circle. Continue filling in the spaces. You can always add more meringue to any mound to build it up. Alternatively, you could use an offset spatula to smooth the sides and top, but the individual mounds create a beautiful, organic, and festive look that’s wonderfully easy to achieve.
What You’ll Need: Essential Equipment
Having the right tools makes all the difference in achieving pavlova perfection. Here’s a list of essential equipment for your Christmas Pavlova Wreath:
- Stand Mixer with Whisk Attachment: While a hand mixer can work, a stand mixer is highly recommended for whipping egg whites. It provides consistent speed and allows you to gradually add sugar without tiring your arm, ensuring optimal volume and stiff peaks.
- Large Baking Sheet: A sturdy, flat baking sheet is necessary to hold your parchment paper and meringue wreath during baking.
- Parchment Paper: Crucial for preventing sticking and for drawing your wreath template. Always use parchment paper, not wax paper, as wax paper can melt at oven temperatures.
- Pencil (for template): For drawing the circles on your parchment paper.
- 10-inch Cake Pan & 4-inch Mixing Bowl: These are perfect for tracing the outer and inner circles of your wreath template.
- Large Piping Bag & Large Open Star Tip (or Ziploc Bag): A piping bag makes forming the wreath mounds much easier and neater. An open star tip creates a beautiful texture. If you don’t have one, a large freezer-safe Ziploc bag with a corner snipped off works just as well for a more rustic look.
- Small Bowls (for egg separation): Essential for separating egg whites one at a time to prevent yolk contamination.
- Measuring Cups and Spoons: For accurate measurement of all ingredients.
- Rubber Spatula: For scraping down the sides of the mixing bowl and gently folding in ingredients.
Step-by-Step Guide to Your Christmas Pavlova Wreath
Let’s walk through the process of creating this dazzling Christmas Pavlova Wreath, ensuring every step is clear and your baking journey is smooth and successful:
- Prepare Your Baking Surface: Begin by preheating your oven to 275°F (135°C). While the oven heats, line a large baking sheet with a sheet of parchment paper. Take a 10-inch cake pan and trace a circle in the center of the parchment. Then, use a 4-inch mixing bowl to trace a smaller circle in the very middle of the larger circle. This creates your guide for the wreath shape. Flip the parchment paper over so the pencil markings are on the underside, preventing any lead transfer to your meringue.
- Combine Dry Ingredients: In a small, separate bowl, whisk together the 2 teaspoons of superfine sugar and the cornstarch. This mixture will be added later to help stabilize the meringue and create its unique texture. Set it aside.
- Whip Egg Whites to Soft Peaks: In the impeccably clean bowl of your stand mixer, combine the room-temperature egg whites, lemon juice (or white vinegar), and salt. Using the whisk attachment, beat on medium-high speed for approximately 2 minutes, until soft peaks begin to form. The mixture should look foamy and hold a gentle shape.
- Gradually Add Sugar: With the mixer still running on medium-high, begin to slowly add the remaining cup of superfine sugar, a tablespoon at a time. This process should take about 5 minutes. Be patient and allow the sugar to fully incorporate. Scrape down the sides of the bowl as needed to ensure all sugar is mixed in. Continue beating until the meringue is glossy and stiff peaks form. You should not feel many sugar granules when you rub a small amount between your fingers.
- Incorporate Cornstarch and Vanilla: Once you have stiff, glossy peaks, gently add the reserved cornstarch-sugar mixture and the vanilla extract. Scrape down the bowl one last time, then mix for about another minute, just until everything is well combined and the meringue holds its shape beautifully.
- Secure the Parchment: To prevent your parchment paper from shifting during piping, use small dabs of your freshly made meringue to “glue” each corner of the underside of the parchment paper to the baking pan.
- Pipe the Wreath: Transfer the meringue into a large piping bag fitted with a large open star tip (or a large Ziploc bag with a snipped corner). Following the template on your parchment, pipe 8-10 distinct, round mounds of meringue between the two lines. Start by piping one mound, then pipe the next on the opposite side of the wreath to ensure even distribution. Continue around the circle until the wreath outline is filled. You can always go back and add more meringue to any mound to achieve your desired height and shape.
- Create Divots: Using the back of a spoon, gently make a slight indentation or “divot” in the center of each meringue mound. These small hollows will be perfect for holding generous dollops of whipped cream and berries later, preventing them from sliding off.
- Bake the Pavlova: Carefully place the baking sheet with the piped meringue into your preheated 275°F (135°C) oven. Immediately reduce the oven temperature to 250°F (120°C). Bake for approximately 1.5 hours, or until the meringue feels dry and crisp to the touch. Rotate the pan halfway through the baking time to ensure even baking.
- Cool in the Oven: Once the baking time is complete, turn off the oven completely. Prop the oven door open slightly and allow the pavlova to cool gradually inside the oven for at least 1 hour, or until the oven is completely cool. This slow cooling process prevents cracking and helps the meringue maintain its structure and crispness.
- Prepare the Topping: When you are ready to serve (ideally within an hour of serving), prepare your whipped cream. In a clean, cold bowl, whip the heavy cream and powdered sugar until stiff peaks form.
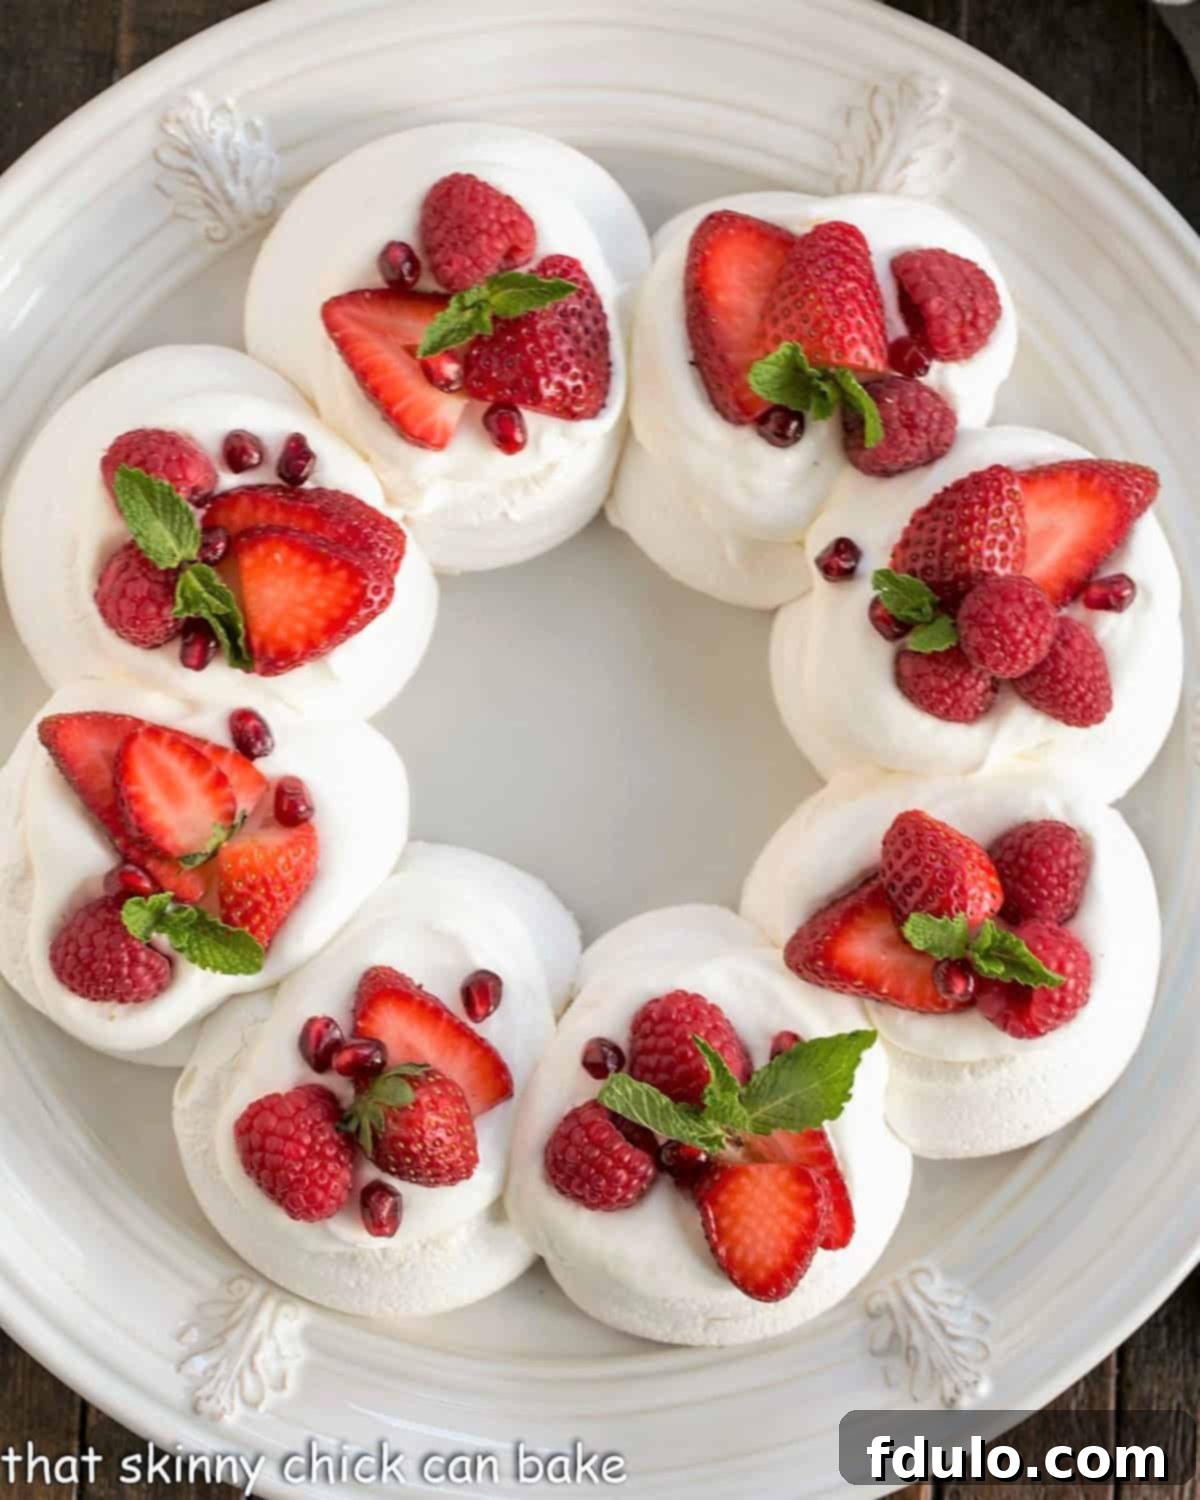
- Assemble and Serve: Carefully transfer the cooled pavlova wreath to a beautiful serving plate. Spoon generous amounts of the freshly whipped cream into the divots of the meringue mounds. Finally, adorn your Christmas Pavlova Wreath with an assortment of fresh red raspberries, sliced strawberries, glistening pomegranate arils, and vibrant green mint sprigs. Serve immediately to enjoy its perfect crisp-soft texture.
You May Also Love These Dessert Creations:
If you’ve fallen in love with the light and airy magic of meringue, explore these other delightful recipes perfect for any occasion:
- Peppermint Meringue Cookies from Shugary Sweets: A festive twist on classic meringue, perfect for holiday cookie platters.
- Egg White Cookies: Simple, elegant, and melt-in-your-mouth delicious, a great way to use up leftover egg whites.
- Individual Pavlovas: Perfect single-serving desserts for guests, offering all the charm of a larger pavlova.
- Chocolate Raspberry Pavlova: A rich and fruity variation, combining the decadence of chocolate with the tartness of raspberries.
- Layered Chocolate Meringue Cake: An impressive multi-layered dessert featuring delicate meringue and rich chocolate.
- More of the Best Dessert Recipes: Discover an array of other delectable treats to satisfy any sweet craving.
Stay in touch through social media @ Instagram, Facebook, and Pinterest. Don’t forget to tag me when you try one of my recipes! And if you love the results, please give it a 5-star rating in the recipe card.
Christmas Pavlova Wreath Recipe
30 minutes
1 hour 30 minutes
1 hour (cooling)
3 hours
8 servings
A stunning and festive meringue wreath, topped with sweet whipped cream, vibrant red berries, and fresh mint, making it the perfect showstopper dessert for your Christmas celebrations.
Average Rating: 5 stars from 58 reviews.
Ingredients
For the Pavlova:
- 1 cup plus 2 teaspoons superfine sugar
- 2 teaspoons cornstarch
- 4 large egg whites, at room temperature
- 2 teaspoons fresh lemon juice or white vinegar
- ¼ teaspoon table salt
- ½ teaspoon pure vanilla extract
For the Topping:
- 1 cup heavy cream
- ¼ cup powdered sugar, sifted
- Fresh raspberries, strawberries, pomegranate arils, and mint sprigs (for garnish)
Instructions
- Preheat your oven to 275°F (135°C).
- Line a baking sheet with parchment paper. Draw a 10-inch circle in the middle of the sheet, then a 4-inch circle in the center of the larger circle. This will be your template for the wreath. Flip the paper over so the markings are on the bottom side.
- In a small bowl, mix together the 2 teaspoons of sugar and the cornstarch. Set aside.
- In the bowl of your stand mixer, combine the egg whites, lemon juice or vinegar, and salt. Beat on medium-high speed with the whisk attachment until soft peaks form, about 2 minutes.
- With the mixer running, slowly add the remaining 1 cup of sugar, one tablespoon at a time. Scrape down the sides of the bowl as needed. This will take about 5 minutes, ensuring the sugar is fully dissolved.
- Add the cornstarch mixture and vanilla extract. Scrape down the bowl, then mix until the meringue forms stiff, glossy peaks, about another minute.
- Use a dab of the meringue to “glue” each corner of the underside of the parchment paper to the baking pan, securing it in place.
- Transfer the meringue to a large piping bag with a large open piping tip (or a Ziploc bag with a corner cut off). Pipe 8-10 round mounds of meringue between the two lines drawn on the parchment. Start with one mound, then pipe the second on the opposite side of the wreath. Repeat until the center area of the wreath outline is filled with meringue. You can always add more to any of the mounds to build them up.
- Using the back of a spoon, gently make a divot (indentation) in the center of each meringue mound. These indentations will help hold the whipped cream on the baked pavlova.
- Place the meringue in the oven, then immediately reduce the oven temperature to 250°F (120°C).
- Bake until the meringue is dry and crisp to the touch, approximately 1 ½ hours. Rotate the pan halfway through the baking time for even cooking.
- Turn the oven off and let the pavlova cool completely inside the oven with the door propped open slightly. This prevents cracking and maintains crispness.
- When ready to serve (ideally within an hour of serving), whip the heavy cream and powdered sugar to stiff peaks.
- Carefully transfer the cooled pavlova wreath to a serving plate.
- Add a generous spoonful of whipped cream to each divot in the pavlova, then elegantly top with fresh raspberries, strawberries, pomegranate arils, and mint sprigs.
- Serve within one hour for optimal freshness and texture.
Notes
Ensure all bowls and utensils are immaculately clean and free of any grease. Even a tiny speck of egg yolk or fat can prevent your egg whites from whipping properly.
For drawing your template, a 10-inch cake pan for the outer circle and a 4-inch mixing bowl for the inner circle work perfectly.
Store your baked and undecorated pavlova shell in a dry location, such as your turned-off oven (with a reminder note on the door so it’s not accidentally turned on), but never in the refrigerator, as humidity will compromise its crisp texture.
This recipe has been adapted from a classic Fine Cooking (Pavlova with Rhubarb and Strawberries) technique.
Watch the Process:
Recommended Products for Success
As an Amazon Associate and member of other affiliate programs, I earn from qualifying purchases.
- KitchenAid Artisan Tilt-Head Stand Mixer, 5-Quart
- Reynolds Kitchens Non-Stick Baking Parchment Paper Sheets
- USA Pan Bakeware Half Sheet Pan
Nutrition Information:
Yield:
8
Serving Size:
1
Approximate Amount Per Serving:
Calories: 165
Total Fat: 11g
Saturated Fat: 7g
Trans Fat: 0g
Unsaturated Fat: 3g
Cholesterol: 34mg
Sodium: 103mg
Carbohydrates: 14g
Fiber: 2g
Sugar: 11g
Protein: 3g
Nutritional information provided is an estimate only, based on calculations from common ingredients. Values may vary depending on specific brands, preparation methods, and actual amounts used. To obtain the most accurate nutritional data, it is recommended to calculate with the exact ingredients you utilize in your recipe. This information is offered as a courtesy and should not be considered a substitute for professional dietary advice.
HOW MUCH DID YOU LOVE THIS RECIPE?
Please leave a comment on the blog or share a photo on Pinterest!
