This Honey Whole Wheat Bread Wreath is more than just a recipe; it’s an invitation to bring warmth, aroma, and a touch of rustic elegance to your table. While its festive shape makes it a stunning centerpiece for holiday gatherings, this tender, slightly sweet loaf is a delight to bake and enjoy throughout the entire year. Its golden-brown crust and soft, flavorful interior promise a truly satisfying experience with every bite.
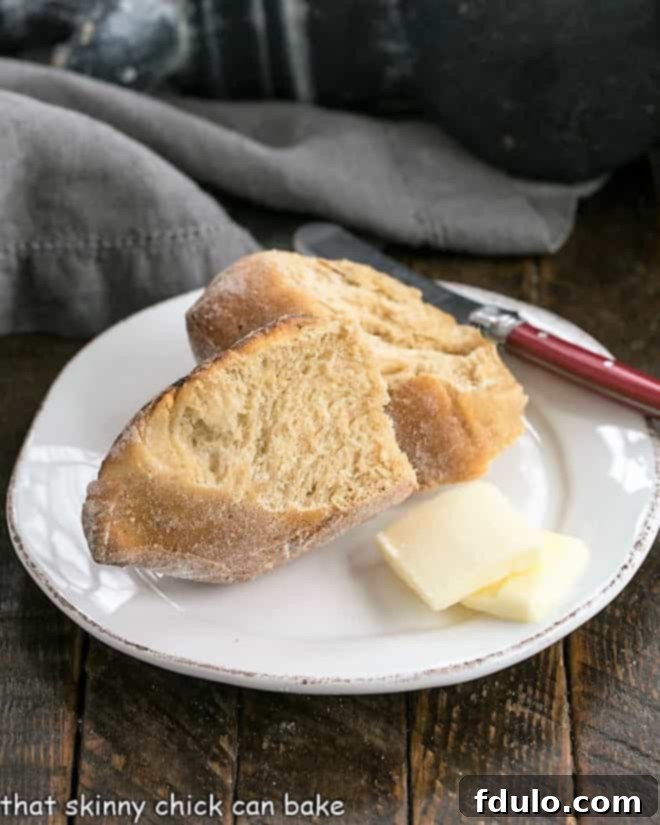
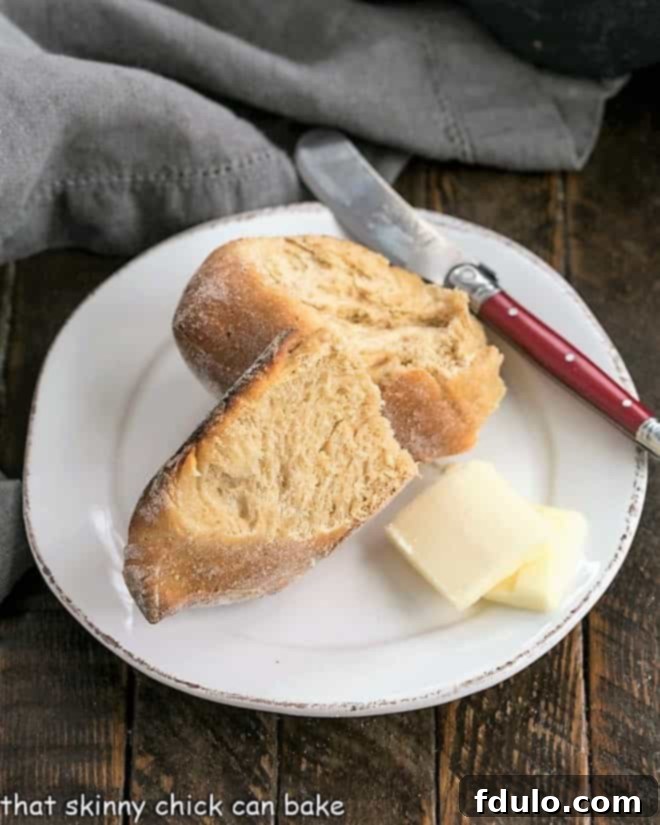
There’s something truly magical about the aroma of freshly baked bread wafting through the home, and this particular Whole Wheat Bread Recipe is no exception. My family’s enthusiasm for it was undeniable when I baked it recently. Each slice, tender and perfectly balanced in sweetness, becomes an irresistible treat, especially when graced with a generous smear of cool, melting butter. It’s a simple pleasure that speaks volumes, making every meal feel a little more special. Prepare to be enchanted by its wholesome goodness!

Honey Whole Wheat Bread: A Wholesome Delight
The colder months and the festive season often inspire us to spend more time in the kitchen, indulging in the comforting art of baking. Few things compare to the intoxicating scent of yeast bread rising and baking to perfection. This slightly sweet and incredibly hearty honey whole wheat bread takes on a charming wreath shape, adding a visual appeal that’s perfect for celebrations. The dough is strategically sliced and twisted before its final proofing and baking, transforming a simple loaf into a beautiful, edible wreath. It’s an ideal addition to any holiday spread, yet comforting enough for a cozy weekend breakfast.

The Nutritional Benefits of Whole Wheat Bread
When it comes to making healthier dietary choices, opting for whole wheat bread is a significant step. Compared to loaves made primarily with refined white flour, whole wheat varieties offer a wealth of health benefits that contribute to overall well-being. Whole grains, by definition, include the entire grain kernel—the bran, germ, and endosperm—each packed with essential nutrients.
The bran layer is rich in fiber, which is crucial for digestive health, helping to regulate bowel movements and prevent constipation. Fiber also plays a vital role in maintaining stable blood sugar levels by slowing down the absorption of sugar, which can be particularly beneficial for managing energy levels throughout the day. Beyond digestion, adequate fiber intake has been linked to a reduced risk of heart disease and type 2 diabetes.
The germ, the embryo of the grain, is a powerhouse of B vitamins (like niacin, thiamine, and folate), vitamin E, and healthy fats. These vitamins are essential for energy metabolism, nerve function, and red blood cell formation. The endosperm, while primarily carbohydrate, still contributes protein and some B vitamins. Together, these components make whole wheat bread a more nutrient-dense option, providing iron, magnesium, zinc, and selenium, which are often lost during the refining process of white flour.
While whole wheat bread is undeniably healthier, it’s important to remember that it is not “diet food.” Calories are still present, and portion control remains key. Enjoy it as part of a balanced diet, savoring its robust flavor and nutritional advantages in moderation.
Understanding the Calorie Count in Your Bread Wreath
The exact caloric content of any homemade bread can fluctuate based on several factors, including the specific recipe used, the proportion of whole wheat flour to other flours, and the type and quantity of sweeteners like honey or brown sugar. Our particular recipe is designed to yield three beautiful wreaths, with each wreath typically sliced into eight generous pieces. Following this standard, each slice contains approximately 215 calories.
It’s important to note that this calorie count is for the bread itself, before any additions. Spreading butter, layering on jam, or adding other toppings will naturally increase the caloric intake per serving. If you’re mindful of your calorie intake, consider lighter spreads or enjoy the bread on its own to fully appreciate its natural sweetness and hearty texture. Always remember that these figures are estimates; for the most precise nutritional information, especially if you modify the recipe, you may want to use a nutritional calculator with your exact ingredients.
Crafting Your Own Honey Whole Wheat Bread Wreath: A Step-by-Step Guide
The journey to creating this stunning bread wreath is surprisingly simple and immensely rewarding. My inspiration for this unique presentation came from discovering a brilliant wreath shaping technique on artisanbreadinfive.com, which perfectly coincided with a generous holiday gift of whole wheat pastry flour from Hodgson Mill. It felt like destiny to combine the wholesome goodness of whole wheat with this beautiful presentation. Here’s how you can bring this exquisite bread to life in your own kitchen:
- Prepare the Dough: Begin by carefully mixing your ingredients according to the recipe instructions. Ensure the yeast is properly activated and all components are well combined. Once the dough comes together, allow it to undergo its first rise in a warm, draft-free environment until it has doubled in size. This initial proofing develops flavor and texture.
- Punch Down and Portion: Gently punch down the risen dough to release the air. Then, remove a one-pound portion of the dough – this will be one wreath. The remaining dough can be used to make additional wreaths or traditional loaves.
- Form the Ring: Take the one-pound dough piece and gently form it into a smooth ball. Flatten this ball slightly, then use your fingers to create a large hole in the very center, much like you would for a bagel. Stretch the opening to be a few inches across. It’s common for the dough to be springy and want to bounce back, so keep working with it to maintain the desired opening size.
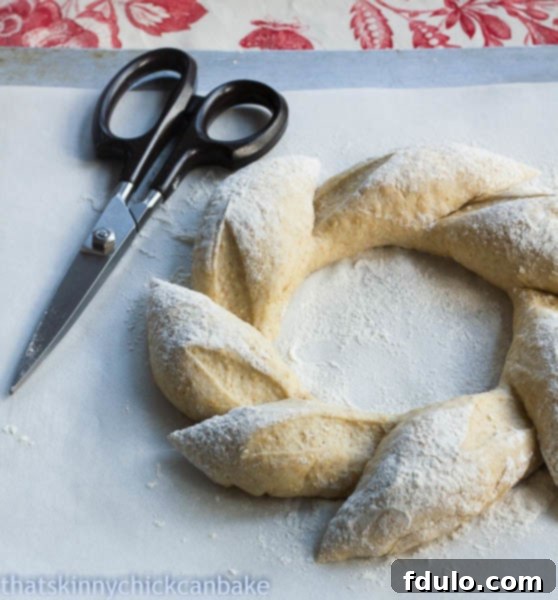
- Shape the Wreath with Precision: Transfer your dough ring to a parchment-lined baking sheet. Using sharp kitchen shears or a very sharp knife, make cuts nearly all the way through the ring at regular intervals around its circumference. Aim for a sharp angle with each cut. Once the cuts are made, gently pull and twist each point away from the center of the ring, creating the distinctive, intricate wreath pattern. This step transforms the simple ring into its beautiful, festive form.
- Second Rise (Proofing): Loosely cover the shaped wreath with greased plastic wrap and allow it to rise again in a warm place. This second proofing is crucial for achieving a light and airy texture in the final baked bread. It should double in size once more, usually taking about half an hour.
- Bake to Golden Perfection: Preheat your oven to 400°F (200°C). Carefully place the risen wreath into the preheated oven and bake for 25-30 minutes, or until the bread achieves a beautiful golden-brown color and registers an internal temperature of 200°F (93°C) when tested with an instant-read thermometer. This ensures it’s cooked through.
- Cool and Serve: Once baked, transfer the gorgeous Honey Whole Wheat Bread Wreath to a wire rack to cool completely. Allowing it to cool properly helps the bread set and prevents it from becoming gummy. Slice, serve, and enjoy the fruits of your labor!

Achieving Perfection with Your Honey Whole Wheat Bread Wreath
This Honey Wheat Bread is not only a delightful treat for the taste buds but also incredibly straightforward to prepare, making for a truly lovely presentation that’s sure to impress. My initial attempt left me quite satisfied with the results, though for next time, I might experiment with making slightly more frequent slashes to create an even fuller, more intricate wreath pattern. What truly stands out in this recipe is the perfect balance of sweetness; I finally achieved a wheat bread that wasn’t overly sugary but had just the right touch of honeyed warmth.
Moreover, the subtle inclusion of oatmeal contributes an indescribable depth, enhancing both the flavor profile and the overall texture. Whether it’s the chewiness, the added earthy notes, or a combination of both, it elevates this bread from simply good to truly exceptional. It’s a testament to how small tweaks in ingredients can make a significant difference in the final product, creating a bread that’s simply plain good and utterly satisfying.
Explore More Wholesome Bread Recipes
If you’ve enjoyed baking this beautiful Honey Whole Wheat Bread Wreath, you might be keen to expand your repertoire of wholesome bread recipes. For another fantastic option perfect for any meal, be sure to check out these delicious Whole Wheat Dinner Rolls. They offer a similarly satisfying texture and flavor, ideal for pairing with a variety of dishes. And for those who might feel a little intimidated by working with yeast, don’t despair! You can still enjoy the goodness of homemade bread by trying this delightful Whole Wheat Molasses Quick Bread. It requires no yeast, making it a quick and easy alternative to satisfy your bread cravings without the extra fuss of proofing.

Honey Whole Wheat Wreath
45 minutes
30 minutes
1 hour 15 minutes
24
A beautiful, delicious whole wheat bread shaped like a wreath, perfect for festive tables or any day enjoyment.
Ingredients
- 1 ¼ cup quick oats
- 1 cup boiling water
- 1 package dry active yeast (2 ¼ teaspoons)
- ¼ cup warm water (110º)
- 1 ½ cups buttermilk
- 6 tablespoons honey
- 2 tablespoons brown sugar
- 3 tablespoons olive or canola oil (plus more for greasing bowl)
- 1 tablespoon salt
- 4 ½ cups all-purpose flour (plus more for dusting dough ring)
- 2 cups whole wheat pastry flour
Instructions
- Place oats into boiling water and let sit for 10 minutes, stirring occasionally. This allows the oats to soften and absorb the liquid.
- In another bowl, dissolve yeast in warm water (around 110ºF or 43ºC) and let sit for 5 minutes until foamy. This step activates the yeast.
- Add buttermilk, honey, brown sugar, and oil to the softened oats and mix well. The mixture may still appear lumpy due to the oats, which is perfectly fine.
- Transfer the oat mixture to the bowl of a large stand mixer. Add the activated yeast mixture and mix on low speed with the paddle attachment until the lumps of oats begin to break apart and the mixture is well combined.
- Switch out the paddle attachment for a dough hook. Add the salt, 3 cups of the all-purpose flour, and all of the whole wheat pastry flour to the mixture in the stand mixer.
- Knead the dough on low speed for 10 minutes. Reposition the dough in the bowl as needed to ensure even kneading. Continue until the dough is smooth and elastic. If the dough is too sticky, up to ½ cup more all-purpose flour may be added gradually until it reaches the desired consistency. Alternatively, the dough can be kneaded by hand.
- Lightly grease a large bowl with oil. Place the kneaded dough into the greased bowl, turning it once to coat. Cover the bowl loosely with greased plastic wrap and allow the dough to rise in a warm, draft-free place until it has doubled in size, which typically takes about one hour.
- While the dough is rising, line a baking sheet with parchment paper to prevent sticking.
- Once the dough has doubled, gently punch it down to release the air. Remove 1 pound of the dough to make one wreath. The remaining dough can be used to bake additional wreaths or formed into traditional loaves of bread.
- Form the 1-pound dough portion into a smooth ball. Then, create a ring by gently punching through the middle of the dough with your fingers. Stretch the hole in the center until it is approximately three times the width of the ring itself. The dough may be elastic, so work with it patiently.
- Place the formed dough ring onto the prepared baking sheet. Lightly dust the ring with a bit of all-purpose flour. Using clean kitchen scissors (or a very sharp knife), cut nearly through the ring at a sharp angle, forming points around the circumference. After making the cuts, gently reposition and pull each point away from the center of the ring to create the distinctive wreath shape.
- Loosely cover the shaped wreath with greased plastic wrap and let it sit in a warm place for its second rise until it has doubled in size, which should take approximately ½ hour.
- While the wreath is completing its second rise, preheat your oven to 400ºF (200ºC). Once preheated, bake the wreath for 25-30 minutes, or until the bread achieves a golden-brown crust and reaches an internal temperature of 200ºF (93ºC).
- Once baked, carefully remove the Honey Whole Wheat Wreath from the oven and transfer it to a wire rack to cool completely before slicing and serving.
Notes
This recipe yields enough dough to make 3 individual loaves or wreaths.
This recipe has been thoughtfully adapted from a delightful creation originally found in Cooking Light.
Recommended Products
As an Amazon Associate and member of other affiliate programs, I earn from qualifying purchases.
- Nicewell Food Scale, 22lb Digital Kitchen Scale Weight Grams and oz for Cooking Baking, 1g/0.1oz Precise Graduation, Stainless Steel and Tempered Glass
- Set of Glass Mixing Bowls
- Reynolds Cookie Baking Sheets Non-Stick Parchment Paper, 25 Sheet, 4 Count
- USA Pan Bakeware Half Sheet Pan
- Kitchen Shears
- KitchenAid KSM150PSER Artisan Tilt-Head Stand Mixer with Pouring Shield, 5-Quart, Empire Red
Nutrition Information:
Yield:
24
Serving Size:
1 slice
Amount Per Serving:
Calories: 215Total Fat: 2gSaturated Fat: 1gTrans Fat: 0gUnsaturated Fat: 1gCholesterol: 2mgSodium: 325mgCarbohydrates: 42gFiber: 3gSugar: 7gProtein: 7g
Thatskinnychickcanbake.com occasionally offers nutritional information for recipes contained on this site. This information is provided as a courtesy and is an estimate only. This information comes from online calculators. Although thatskinnychickcanbake.com attempts to provide accurate nutritional information, these figures are only estimates.
Varying factors such as product types or brands purchased can change the nutritional information in any given recipe. Also, many recipes on thatskinnychickcanbake.com recommend toppings, which may or may not be listed as optional and nutritional information for these added toppings is not listed. Other factors may change the nutritional information such as when the salt amount is listed “to taste,” it is not calculated into the recipe as the amount will vary. Also, different online calculators can provide different results.
To obtain the most accurate representation of the nutritional information in any given recipe, you should calculate the nutritional information with the actual ingredients used in your recipe. You are solely responsible for ensuring that any nutritional information obtained is accurate.
HOW MUCH DID YOU LOVE THIS RECIPE?
Please leave a comment on the blog or share a photo on Pinterest
