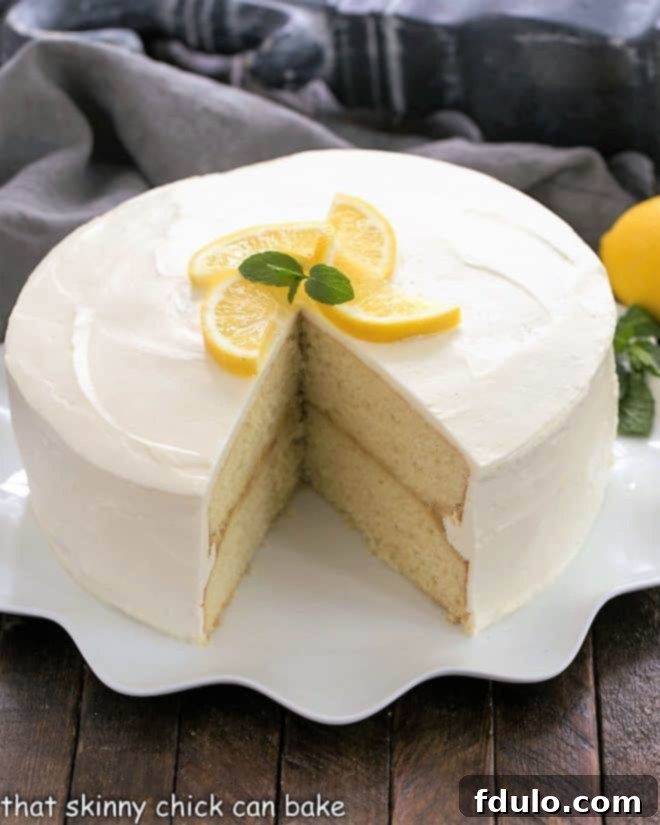
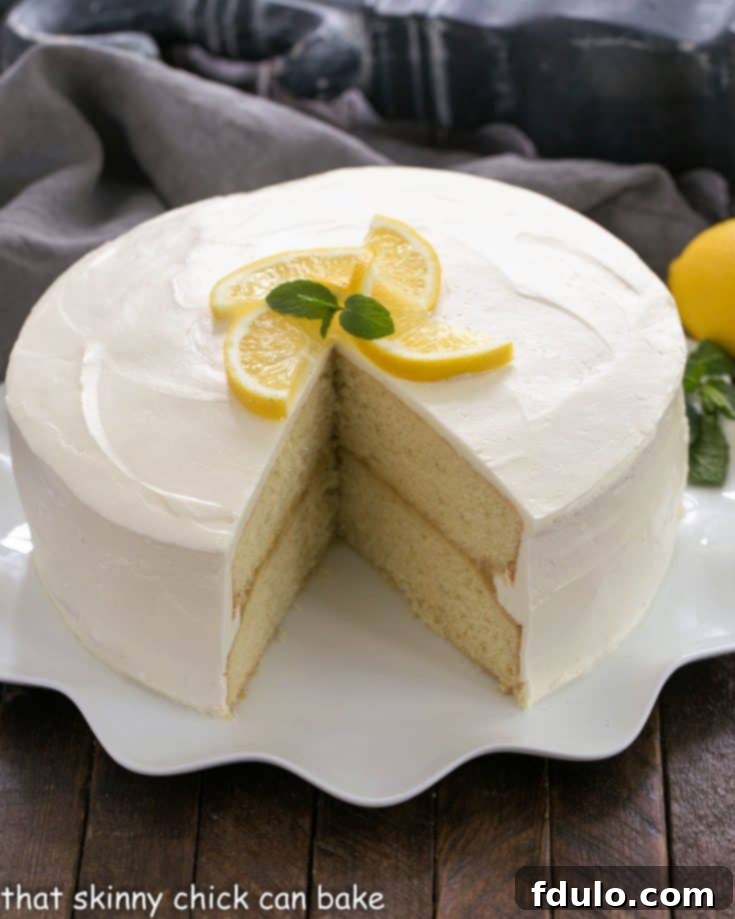
This Lemon Layer Cake, with 2 vanilla layers topped with luscious lemon curd, and Swiss meringue buttercream, is the perfect dessert for a lemon lover!
One of my dear friends begged me (well, maybe that’s a bit of an exaggeration!) to bake a cake for her mom’s 90th birthday. The family matriarch wasn’t a huge chocolate fan, so we decided to celebrate her big day with spectacular a Lemon Cake Recipe.
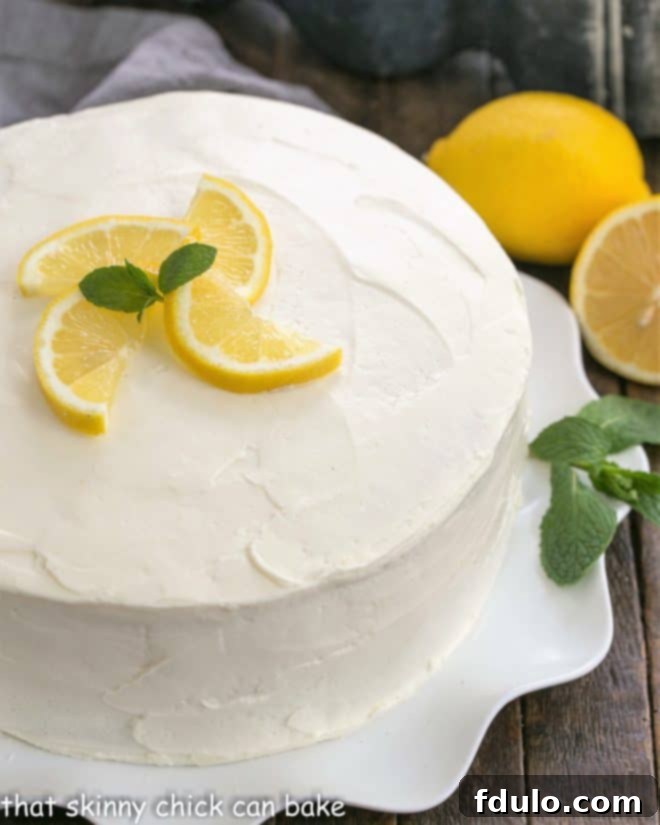
The Ultimate Lemon Layer Cake: A Bright and Beautiful Celebration Dessert
There’s a special magic in a perfectly baked cake, and when that cake is bursting with the vibrant, zesty flavor of fresh lemon, it’s truly unforgettable. This spectacular Lemon Layer Cake combines tender vanilla cake layers with a tangy, luscious lemon curd filling and a cloud-like Swiss meringue buttercream, creating a dessert that is both elegant and intensely satisfying. Whether you’re a devoted lemon enthusiast or simply seeking a show-stopping centerpiece for your next gathering, this recipe promises an extraordinary culinary experience that will delight every palate.
Why This Lemon Layer Cake Stands Out from the Rest
More than just a dessert, this Lemon Layer Cake is a carefully balanced symphony of flavors and textures designed to impress. Its unique qualities make it a standout choice for any celebration or simply when you crave something truly special and homemade.
- A Citrus Lover’s Dream Come True: Every component of this cake sings with bright, authentic lemon flavor. From the intensely zesty homemade curd to the subtle lemon notes in the buttercream (which are optional but highly recommended!), it’s a pure expression of citrus joy that will captivate any lemon aficionado.
- Perfect Sweet-Tart Harmony: The inherent tartness of the homemade lemon curd brilliantly cuts through the sweetness of the tender vanilla cake and the rich, smooth buttercream. This delightful contrast ensures each bite is refreshing, exciting, and never overwhelmingly sweet, keeping you coming back for more.
- The Unforgettable Luxury of Swiss Meringue Buttercream: If you’ve yet to experience Swiss meringue buttercream, prepare for a revelation. Unlike traditional American buttercreams, this frosting is incredibly light, airy, silky-smooth, and significantly less sweet. It offers a sophisticated, melt-in-your-mouth finish that elevates the entire cake to a gourmet level. It’s a truly decadent introduction to the world’s most luxurious frostings, promising a truly unique texture.
The inspiration for this magnificent cake came from a truly special occasion: a dear friend’s mother’s 90th birthday. The family matriarch, not a fan of chocolate, specifically requested a lemon dessert to celebrate her milestone. With 11 children traveling from across the country to join the festivities, it was clear she deserved nothing less than a spectacular homemade lemon cake recipe. My friend, already juggling the monumental task of planning the entire celebratory meal, entrusted me with creating this showstopper, and I was absolutely thrilled to help make her mother’s momentous birthday unforgettable with this exquisite lemon dessert.
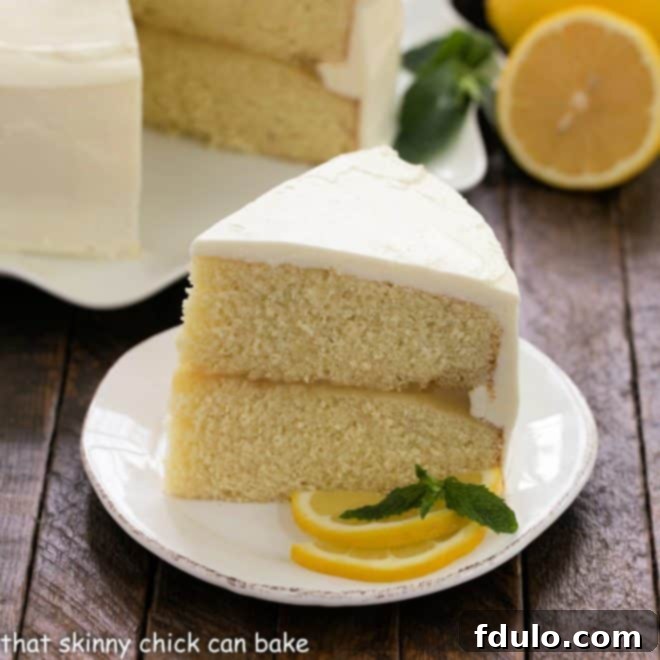
Crafting Your Lemon Layer Cake: A Comprehensive Step-by-Step Guide
Creating this lemon layer cake is a deeply rewarding baking journey. It involves three main, yet distinct, components: the tender vanilla cake layers, the bright and tangy lemon curd filling, and the velvety Swiss meringue buttercream. Let’s walk through the process to ensure every element is perfect.
1. The Foundation: Perfect Vanilla Cake Layers
While lemon is undoubtedly the star, a beautifully balanced, moist vanilla cake provides the ideal canvas for its vibrant flavor. We begin with a tried-and-true recipe for a two-layer vanilla cake. For an even more impressive presentation and a higher filling-to-cake ratio – which means more delicious lemon curd in every slice – each cooled cake layer can be carefully sliced horizontally, yielding four thinner layers. This technique allows for multiple ribbons of tangy lemon curd throughout the cake, significantly enhancing both flavor and visual appeal. Alternatively, if time is a factor or you prefer a simpler, more rustic approach, a classic two-layer cake still works wonderfully and is equally delicious.
2. The Heart of the Cake: Luscious Homemade Lemon Curd
The lemon curd is truly the essential component of this cake, providing that irresistible zing that defines a great lemon dessert. Made with fresh lemon juice, it offers a vibrant, intense tartness that beautifully contrasts with the sweet cake and creamy frosting. While homemade lemon curd is always highly recommended for its unparalleled depth of flavor, luxurious texture, and freshness, a high-quality store-bought lemon curd can be a convenient and perfectly acceptable substitute without compromising too much on taste, especially when you’re short on time. If you choose to make your own, ensure it’s properly chilled and firm enough to spread without oozing, which typically takes at least four hours in the refrigerator.
Expert Tip for Layering Cakes with Lemon Curd:
When spreading the lemon curd onto your cake layers, it’s absolutely crucial to leave a half-inch border around the perimeter of each cake layer. This creates a natural “dam” or barrier that effectively prevents the curd from oozing out the sides once the next cake layer is placed on top and gentle pressure is applied. This simple yet effective trick will save you from a potentially messy situation and help you achieve a clean, professional finish for your layered cake. Any minor overflow that might occur can be easily tidied with an offset spatula.
3. Assembling Your Masterpiece: Stacking Techniques for a Show-Stopping Cake
Proper stacking is key to creating a beautiful, stable, and visually appealing layer cake. Follow these steps meticulously for a flawless assembly that will impress your guests:
- Prepare Your Base for a Clean Finish: Place your first cooled cake layer, top side down, onto your chosen cake plate or stand. For effortless cleanup, tuck strips of wax or parchment paper just under the edges of the cake around its perimeter. These strips act as a protective barrier, catching any stray frosting and ensuring your serving plate remains pristine.
- Apply the First Frosting Layer: Depending on the desired thickness and the total amount of frosting you have, spread about 1/2 to 3/4 cup of the silky Swiss meringue buttercream evenly over the bottom cake layer, extending it to the edges.
- Add the Tangy Lemon Curd: Spoon a generous amount of your firm, prepared lemon curd onto the frosted layer, meticulously remembering to leave that essential half-inch border from the edge of the cake.
- Place the Second Cake Layer: Gently place the second cake layer on top of the curd and buttercream, this time with the top side facing upwards. This orientation strategically places the two flat bottom sides of your original cakes in the middle of the stack, creating a more stable and perfectly even structure for your cake. Repeat the frosting and lemon curd layers for any additional cake layers you have.
- The All-Important Crumb Coat: Once all cake layers are stacked, apply a very thin, almost translucent, layer of buttercream all over the entire cake – both the sides and the top. This vital “crumb coat” effectively traps any loose crumbs, preventing them from mixing into your final, pristine frosting layer. Chill the cake in the refrigerator for 15-20 minutes to allow the crumb coat to firm up. This step is a complete game-changer for achieving a smooth, professional, and crumb-free finish.
- The Grand Finale: Final Frosting Layer: Once the crumb coat is firm and chilled, apply the remaining Swiss meringue buttercream for your final, smooth, and elegant layer. Use a large offset spatula or a bench scraper to achieve a beautifully even and polished finish around the entire cake.
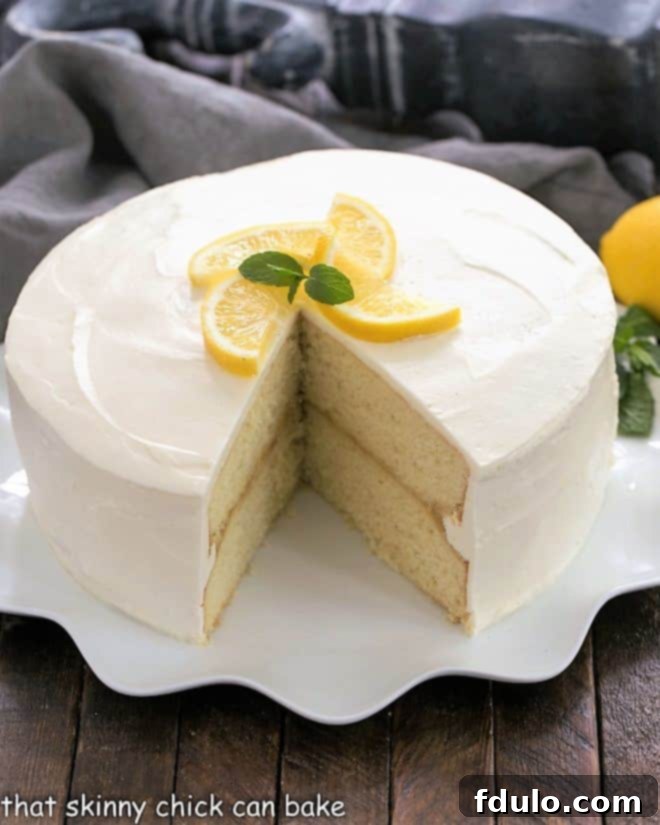
Mastering Swiss Meringue Buttercream: Advanced Tips for a Flawless Finish
Swiss Meringue Buttercream (SMB) might sound intimidating with its multi-step process, but with these key tips and a little patience, you’ll be whipping up this outrageously delicious, silky-smooth frosting like a seasoned professional. It’s truly one of the most luxurious frostings you can make, offering a distinctly less sweet, incredibly stable, and exceptionally smooth alternative to traditional American buttercream or even cream cheese frosting. Don’t be afraid to give it a try – the exquisite results are absolutely worth the effort!
Essential Preparation for Perfect Meringue Success:
- Absolutely, Positively Grease-Free Equipment: This is the golden rule and paramount for Swiss meringue buttercream success! Any trace of grease, oil, or egg yolk (which inherently contains fat) in your mixing bowl or on your beaters will unequivocally prevent the egg whites from whipping into stiff, stable peaks. Before you even begin, thoroughly clean your stand mixer bowl and whisk attachment with hot, soapy water, then wipe them down meticulously with a paper towel dampened with a splash of lemon juice or white vinegar. This ensures a pristine, fat-free surface.
- Eggs at the Right Temperature for Optimal Results: Eggs are universally easiest to separate when they are cold, as the yolks are firmer and less likely to break. However, paradoxically, egg whites whip best and achieve maximum volume when they are at room temperature. The professional trick is to separate your eggs one at a time, using three separate bowls: one for the yolks, one for the whites as you separate each individual egg, and finally, your main mixing bowl where you transfer each uncontaminated egg white. This vigilant, bowl-by-bowl separation process prevents a single broken yolk from ruining your entire batch of precious egg whites.
The Double Boiler Method and Crucial Temperature Control:
- Precise Temperature Monitoring is Key: An instant-read thermometer is your absolute best friend and an indispensable tool for mastering Swiss meringue buttercream. The egg whites and granulated sugar mixture must be gently yet thoroughly heated to a precise temperature of 160°F (71°C). This specific temperature is critical for two fundamental reasons: firstly, it ensures that all the sugar fully dissolves into the egg whites, resulting in a perfectly smooth, non-gritty meringue; and secondly, and equally important, it safely pasteurizes the egg whites, effectively killing any potential pathogens that could cause food poisoning, making the frosting safe to consume.
- Setting Up Your Double Boiler Method Correctly: This traditional method utilizes a heatproof bowl (ideally your stand mixer bowl if it’s made of heat-safe stainless steel or glass) placed directly over a medium saucepan filled with approximately 1 to 2 inches of gently simmering water. The absolutely critical detail here is that the bottom of your mixing bowl must NOT come into direct contact with the simmering water. The steam, rather than direct radiant heat, is what gently and gradually cooks the egg white and sugar mixture.
- Heating and Ensuring Sugar Dissolves Fully: Whisk the egg whites and granulated sugar together constantly and vigorously over the simmering water. Continue whisking continuously for approximately 4-5 minutes, or until the mixture consistently registers 160°F (71°C) on your instant-read thermometer. To definitively double-check for fully dissolved sugar, carefully rub a very small amount of the hot mixture between your thumb and forefinger. If you feel any discernible grittiness, continue whisking and gently heating for another minute or two longer until the mixture feels perfectly smooth and no sugar crystals remain.
Whipping to Perfection and Finishing the Buttercream:
- Whip to Stiff, Glossy, and Cool Peaks: Carefully remove the bowl from the double boiler (caution: it will be very hot!). Immediately attach it to your stand mixer, fitted with the whisk attachment. Beat the mixture on medium-high speed for about 10 minutes. During this crucial whipping phase, you are looking for the meringue to transform into glossy, very stiff peaks that hold their shape beautifully. Equally important, the bottom of the mixing bowl should feel completely cool to the touch. This thorough cooling process is absolutely essential before you begin incorporating the butter.
- Gracefully Incorporating Butter with the Paddle Attachment: Once the meringue is cool and stiff, switch to the paddle attachment. This is where the magic truly begins to unfold! Start adding your unsalted butter, one tablespoon at a time. The butter MUST be at a perfect room temperature – soft enough to easily indent with your finger but still cool and not melted or greasy. Add the next tablespoon only after the previous one has been fully and completely incorporated into the meringue. Initially, the mixture might look somewhat curdled, broken, or even soupy; do not panic! This is a completely normal phase in the process. Keep mixing on medium-low speed; it will magically come together into a beautifully smooth, fluffy, and cohesive buttercream. This process typically takes about 5-10 minutes of continuous beating.
- Flavoring and the Final Touch of Perfection: Once all the butter is incorporated and your buttercream is beautifully smooth and cohesive, reduce the mixer speed to low and mix in your chosen flavorings. A classic touch of pure vanilla extract is always wonderful, but for this delightful lemon layer cake, adding 1/2 teaspoon of high-quality lemon extract will magnificently amplify that bright, intense citrus flavor even further, making it truly irresistible. Sample, swoon, and get ready to frost your exquisite, homemade lemon layer cake!
Presentation and Serving Suggestions for Your Masterpiece
Once your Lemon Layer Cake is frosted to perfection, consider these final touches to elevate its presentation from delicious to truly unforgettable:
- Elegant Garnishes for Visual Appeal: A simple sprinkle of fresh, finely grated lemon zest over the top of the cake immediately signals its star flavor and adds a beautiful pop of color. For an extra touch of elegance and freshness, adorn the cake with vibrant fresh berries like raspberries or blueberries, or delicate edible flowers. Candied lemon slices also make a stunning and deliciously chewy decoration that complements the cake’s theme perfectly.
- Achieving Clean Slices Every Time: For neat, professional-looking slices that beautifully showcase your careful layering, use a sharp, thin-bladed knife. For the cleanest cuts, wipe the knife blade clean with a hot, damp cloth after each slice. This prevents frosting and crumbs from dragging and creates pristine portions.
- Optimal Serving Temperature for Flavor and Texture: While the cake is best stored in an airtight container in the refrigerator to maintain its freshness and stability, allow it to come to room temperature for about 30-60 minutes before serving. This crucial step allows the cake layers to soften to their ideal tenderness and the luxurious buttercream to achieve its perfectly silky, spreadable texture, ensuring the best possible eating experience.
Tips for Success and Troubleshooting Common Baking Challenges
Even the most experienced bakers encounter challenges from time to time. Here are some extra tips and troubleshooting advice to help ensure your Lemon Layer Cake turns out perfectly every single time:
- Practice Mise en Place: This French culinary term means “everything in its place.” Have all your ingredients measured, prepped, and ready before you start mixing. Baking is a science, and precision in preparation significantly contributes to consistent, successful results.
- Avoid Overmixing the Cake Batter: Overmixing develops gluten in the flour, which can lead to a dense, tough cake texture. Mix the cake batter only until the ingredients are just combined and no streaks of dry flour remain.
- Cool Cakes Completely and Thoroughly: Attempting to frost warm or even slightly warm cake layers will inevitably result in melted, sliding frosting and a messy situation. Patience is key here! Ensure your cake layers are completely and thoroughly cooled to room temperature before you even think about applying frosting or curd.
- Lemon Curd Consistency Adjustment: If, after chilling, your homemade lemon curd seems too thin or runny to hold its shape between cake layers, you can gently reheat it over low heat. Whisk in a small amount of cornstarch slurry (cornstarch mixed with a little cold water) and cook, stirring constantly, until it thickens to your desired spreadable consistency. Then re-chill it completely.
- Troubleshooting Swiss Meringue Buttercream (SMB):
- Soupy or Liquid Buttercream: If your SMB appears soupy or liquidy after adding the butter, it’s most likely too warm. Do not despair! Simply place the entire mixing bowl (without the mixer) into the refrigerator for 15-20 minutes to cool slightly. Then, return it to the mixer and continue beating on medium-high speed; it should come together beautifully.
- Curdled or Broken Buttercream: This appearance is surprisingly normal and quite common during the butter incorporation phase of SMB. The fats and liquids are still emulsifying. The most important advice is: keep beating! It will almost always magically come together into that beautifully smooth, fluffy buttercream. If it persists, double-check that your butter was truly at room temperature – not too cold (which can cause clumping) and not too warm (which can make it greasy).
- Proper Storage for Freshness: The finished Lemon Layer Cake can be stored beautifully in an airtight container in the refrigerator for up to 3-4 days. For optimal texture and flavor, always allow the cake to come to room temperature for about 30-60 minutes before slicing and serving.
Explore More Zesty Lemon Delights
If this Lemon Layer Cake has ignited your passion for all things lemon, you’re in for a treat! The world of lemon desserts is vast, vibrant, and delightfully versatile. Here are a few more favorites to tantalize your taste buds and keep that irresistible citrus craving wonderfully satisfied:
- Strawberry Lemon Blondies from The View from Great Island
- Lemon Layer Cake with Lemon Curd Filling (another variation for delightful inspiration!)
- Butter and Rum Crepes with Lemon Curd Filling
- Strawberry Lemon Tart
- Lemon on a Cloud
- Discover even more of the Best Dessert Recipes for every occasion.
This recipe was first shared in September 2015. Photos, text, and the recipe were updated in 2020 to provide clearer instructions and enhanced content. This updated version aims to offer the most comprehensive and delightful baking experience for you, ensuring a perfect Lemon Layer Cake every time.
Lemon Layer Cake
30 minutes
40 minutes
1 hour 10 minutes
16 servings
A luscious four-layer cake filled with tangy lemon curd and topped with a cloud-like Swiss meringue buttercream.
Rated 5 out of 5 stars by 6 readers.
Ingredients
For the Lemon Curd (or use a premium store-bought lemon curd):
- 1 cup fresh lemon juice
- 1 teaspoon unflavored gelatin (Knox brand recommended)
- 1 1⁄2 cups granulated sugar
- 1⁄8 teaspoon salt
- 4 large eggs
- 6 large egg yolks (reserve whites for cake)
- 8 tablespoons unsalted butter, cut into cubes and frozen
For the Vanilla Cake:
- 2 1⁄4 cups cake flour
- 1 cup whole milk, at room temperature
- 6 large egg whites, at room temperature
- 2 teaspoons vanilla extract
- 1 3⁄4 cups granulated sugar
- 4 teaspoons baking powder
- 1 teaspoon salt
- 12 tablespoons unsalted butter, softened but still cool
For the Swiss Meringue Buttercream:
- 3 large egg whites
- 1 cup granulated sugar
- 3/4 cup unsalted butter, at room temperature
- 1/2 teaspoon lemon extract or 1 teaspoon vanilla extract
Instructions
Part 1: Preparing the Lemon Curd
- Measure 1 tablespoon of lemon juice into a small bowl; sprinkle gelatin evenly over the top and let it bloom for 5 minutes.
- In a medium saucepan, combine the remaining lemon juice, 1 1/2 cups sugar, and 1/8 teaspoon salt. Heat over medium-high heat, stirring occasionally until the sugar fully dissolves and the mixture is hot but not boiling.
- In a large non-reactive bowl, whisk together the 4 whole eggs and 6 egg yolks until thoroughly combined.
- While whisking constantly, slowly pour the hot lemon-sugar mixture into the egg mixture to temper the eggs. Immediately return the combined mixture to the saucepan.
- Cook over medium-low heat, stirring constantly with a rubber spatula, until the mixture thickens and reaches 170°F (77°C) on an instant-read thermometer, approximately 4-6 minutes. Do not boil.
- Immediately remove the saucepan from the heat and stir in the bloomed gelatin mixture until completely dissolved. Then, stir in the frozen butter cubes, one at a time, until fully incorporated and melted.
- Pour the filling through a fine-mesh strainer into a clean bowl to ensure a silky-smooth texture.
- Cover the surface of the lemon curd directly with plastic wrap to prevent a skin from forming. Refrigerate until firm enough to spread, typically about 4 hours or overnight.
Part 2: Baking the Vanilla Cake Layers
- Preheat your oven to 350°F (175°C). Grease and flour two 9-inch round cake pans. Line the bottoms with parchment paper rounds for easy release.
- In a medium bowl, whisk together the 6 egg whites (reserved from the curd or fresh) and 2 teaspoons vanilla extract. Set aside.
- In the bowl of a stand mixer fitted with the paddle attachment, combine the 2 1/4 cups cake flour, 1 3/4 cups sugar, 4 teaspoons baking powder, and 1 teaspoon salt. Mix on slow speed for about 30 seconds to combine.
- Add the 12 tablespoons unsalted butter, one softened piece at a time, to the dry ingredients. Continue to beat on low speed until the mixture resembles moist crumbs and no visible butter chunks remain.
- Add all but 1/2 cup of the milk mixture (egg whites, vanilla, milk) to the crumb mixture. Beat on medium speed for about 1 1/2 minutes, until the batter is pale and fluffy.
- With the mixer still running on low speed, gradually add the remaining 1/2 cup milk mixture. Beat for 1 minute more until just combined, scraping down the sides of the bowl as needed. Do not overmix.
- Divide the cake batter evenly between the two prepared cake pans.
- Bake for 23-25 minutes, or until a wooden toothpick inserted into the center of the cakes comes out clean.
- Cool the cakes in their pans on a wire rack for 10 minutes. Then, carefully invert them onto the greased wire rack, remove the parchment paper, and invert again to cool completely right side up. Ensure cakes are completely cool before frosting.
Part 3: Preparing the Swiss Meringue Buttercream
- In a heatproof bowl (preferably your stand mixer bowl), combine the 3 egg whites and 1 cup sugar. Place this bowl over a medium saucepan filled with about 2 inches of simmering water, ensuring the bottom of the bowl does not touch the water.
- Cook, whisking constantly, until the mixture reaches 160°F (71°C) on an instant-read thermometer and the sugar is completely dissolved (rub a small amount between your fingers to check for grittiness). This typically takes 5-10 minutes.
- Carefully remove the bowl from the heat and attach it to your stand mixer fitted with the whisk attachment. Beat on medium-high speed until glossy, stiff peaks form and the bottom of the bowl is no longer warm to the touch (this can take about 10 minutes).
- Switch to the paddle attachment. With the mixer running on low speed, slowly add the 3/4 cup room temperature butter, one tablespoon at a time. Add the next tablespoon only after the previous one is fully incorporated. The mixture may look curdled or soupy at first, but keep beating; it will come together.
- Once all the butter is incorporated and the buttercream is smooth and fluffy, mix in the 1/2 teaspoon lemon extract (or 1 teaspoon vanilla extract) until just combined.
Part 4: Assembling the Lemon Layer Cake
- If desired for a taller cake, carefully slice each cooled cake layer horizontally in half to create four thinner layers.
- Place the first cake layer on your chosen serving plate. If using, tuck strips of parchment paper under the edges to keep the plate clean.
- Spread about 1/2 to 3/4 cup of Swiss meringue buttercream evenly over the first cake layer.
- Spread 1 cup of the firm lemon curd evenly over the buttercream, leaving a 1/2-inch border around the perimeter to prevent oozing.
- Carefully place the next cake layer on top. Repeat the steps of frosting and adding lemon curd for subsequent layers.
- Once all layers are stacked, apply a thin “crumb coat” of buttercream all over the cake (sides and top) to seal in any loose crumbs. Refrigerate for 15-20 minutes to set the crumb coat.
- Finally, apply the remaining Swiss meringue buttercream to frost the entire cake smoothly. Garnish with fresh lemon zest, berries, or candied lemon slices as desired.
- Allow the cake to sit at room temperature for about 30-60 minutes before slicing and serving for the best texture and flavor.
Notes
Adapted from Southern Living. For a simplified version, you can opt for two cake layers and use a premium store-bought lemon curd, omitting Part 1 of the instructions.
Nutrition Information:
Yield:
16
Serving Size:
1 slice
Amount Per Serving:
Calories: 469Total Fat: 18gSaturated Fat: 10gTrans Fat: 0gUnsaturated Fat: 7gCholesterol: 155mgSodium: 329mgCarbohydrates: 72gFiber: 0gSugar: 56gProtein: 7g
HOW MUCH DID YOU LOVE THIS RECIPE?
Please leave a comment on the blog or share a photo on Pinterest
