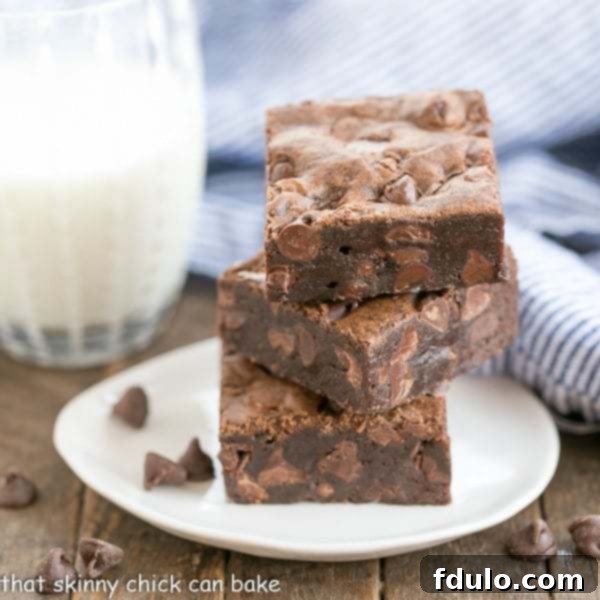
A college care package for the chocoholic full of cookies and brownies will put a huge smile on your child’s face when the mail arrives. Here’s a trio of goodies I put together for my youngest chocoholic.
The Ultimate Chocolate College Care Package: A Taste of Home
Bringing Comfort and Joy to College Students with Homemade Treats
The transition to college life can be exhilarating, yet often challenging, for young adults. Far from the comforts of home, students navigate new academic demands, social dynamics, and the inevitable pangs of homesickness. In these moments, a thoughtful gesture can make all the difference, and few things convey warmth and love quite like a surprise care package filled with homemade delights. For those with a sweet tooth, especially a deep love for chocolate, a specially curated “chocoholic” care package is an absolute game-changer. It’s more than just food; it’s a tangible hug, a reminder of family, and a much-needed morale boost.
This sentiment resonated deeply with me when my son, Nick, and his long-time friend, Matt, embarked on their freshman year of college this fall. Their moms, bonded by years of friendship and a shared desire to support our boys, decided to team up for a baking project. The mission? To create an irresistible assortment of chocolate-laden treats destined to brighten their dorm rooms and lift their spirits. Knowing their profound love for all things chocolate, the theme for our baking day was clear: a College Care Package for the Chocoholic.
Our goal was simple: craft three distinct chocolate recipes that would not only bring immense joy to Nick and Matt but also become instant hits with their new friends and dorm-mates. The idea was to provide enough variety and quantity for sharing, fostering community and giving them a little something extra to offer during study breaks or late-night chats. There’s a unique magic in sharing homemade cookies, and we wanted our boys to experience that connection, even from afar. The planning and baking session itself became a wonderful way for us, as moms, to feel connected to our children, channeling our love into every batch of chocolatey goodness.
Three Irresistible Chocolate Recipes for the Ultimate College Care Package
To ensure our college-bound chocoholics received an unforgettable assortment, we carefully selected a trio of recipes, each offering a different facet of chocolate indulgence. These weren’t just any recipes; they were chosen for their robust flavor, travel-friendly nature, and undeniable appeal to anyone who adores chocolate.
Fudgy Cocoa Brownies: A Classic Elevated
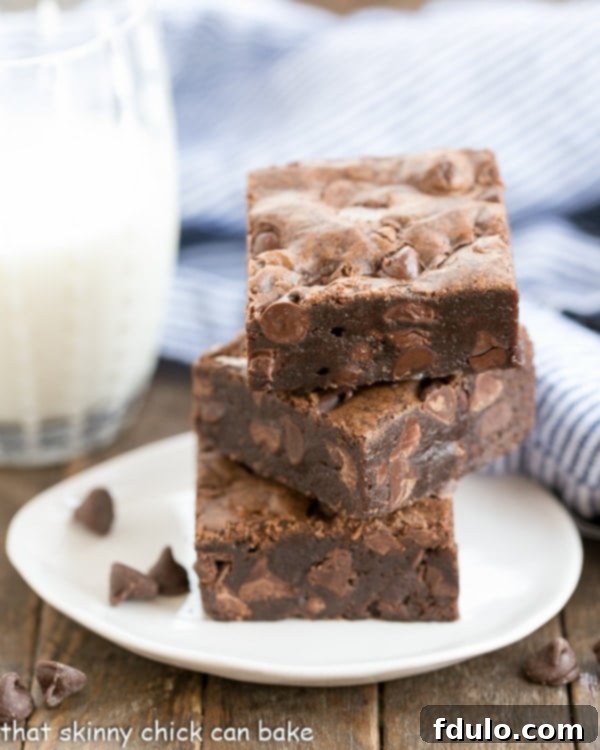
Our first selection was a classic for a reason: the Chewy Cocoa Brownie. These aren’t your average brownies; they’re thick, intensely fudgy, and boast a rich, deep chocolate flavor that satisfies even the most discerning chocoholic. To elevate them further and ensure an extra decadent experience, we generously stirred in an additional bag of semi-sweet chocolate chips into the batter. This not only added more chocolatey pockets but also contributed to their delightful chewiness. Brownies are ideal for care packages because they tend to stay moist and fresh for several days, and their sturdy structure holds up well during transit. They’re a universally loved treat, perfect for sharing or savoring solo during a quiet moment of reflection.
Promise Stuffed Cookies: A Sweet Surprise Inside
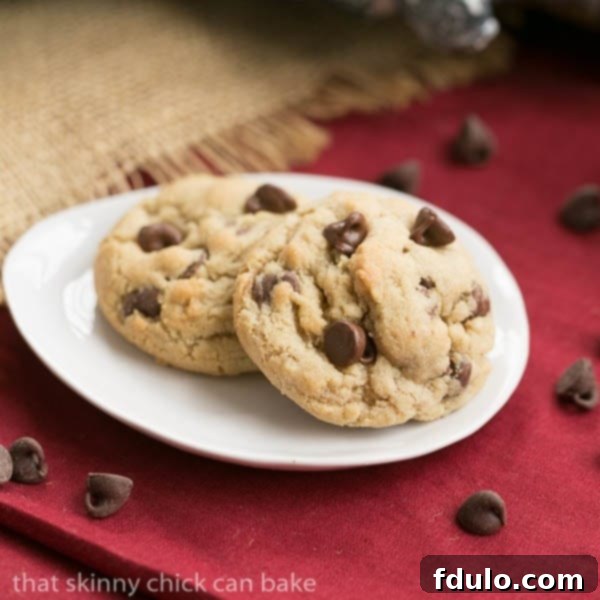
Next on our list was a truly inventive and utterly delightful creation: the Candy Stuffed Cookie. This recipe, inspired by a fantastic online bake sale find from Amber of Bluebonnets and Brownies, takes a classic chocolate chip cookie to an extraordinary new level. The magic lies in wrapping individual Dove Promises (we used both luscious Dark Chocolate and creamy Caramel Filled Milk Chocolate for variety) within generous scoops of chocolate chip cookie dough. The result is a golden-brown cookie with a wonderfully soft, chewy exterior and a molten, gooey chocolate or caramel center that oozes out with every bite. Freezing the chocolates beforehand is a clever trick that helps prevent them from melting too quickly during baking, ensuring that perfect “lava” effect. These cookies are not just delicious; they offer a fun, interactive eating experience that’s sure to be a conversation starter in any dorm room.
Chocolate Chip Lava Cookies (Mini Button Bites): Portion-Perfect Indulgence
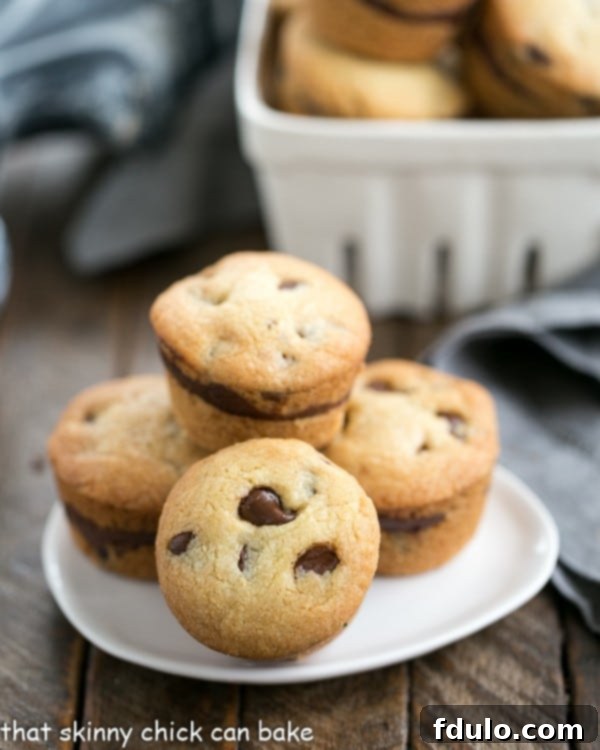
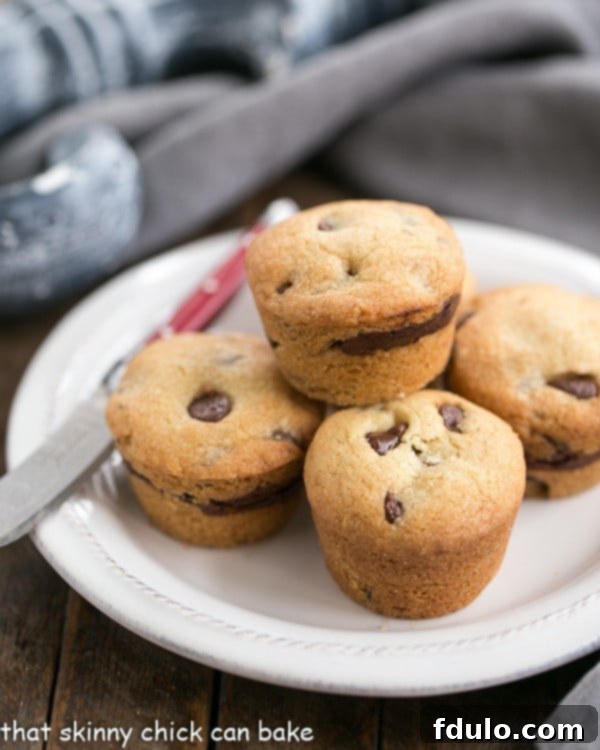
Finally, we included a recipe that offered a charming and easily shareable form of chocolate bliss: Chocolate Chip Lava Cookies. These ingenious treats, originally from my friend Jen of Juanita’s Cocina, were adapted into an even smaller, bite-sized version by baking them in mini muffin tins. This method creates adorable “button” shaped cookies, each with a hidden layer of melted chocolate in the center, much like a tiny chocolate lava cake. Their petite size makes them perfect for quick snacks, study breaks, or for handing out to friends without committing to a full-sized cookie. The combination of the soft chocolate chip cookie exterior and the rich, gooey chocolate core makes them incredibly addictive and satisfying, providing a gourmet touch to the care package.
The Joy of Giving: Sending Cookies to College Students and Their Delightful Reactions
The effort put into baking and meticulously packaging these chocolate treasures truly paid off. The most rewarding part of sending a college care package isn’t just the act of sending, but witnessing the sheer joy and appreciation it brings to the students. A simple text to Nick that his cookies were en route elicited an enthusiastic, one-word reply: “Awesome.” That single word spoke volumes about the anticipation and excitement a package from home can generate.
Matt, on the other hand, was kept in the dark about his sweet surprise until his mom instructed him to check his mail. The mystery only heightened the delight! His first phone call home after opening the package was filled with exuberance, his voice brimming with happiness over his unexpected loot. Four days later, when I happened to bump into his mom, she confirmed what we had hoped for: “They were all gone.” Two happy boys, whose faces lit up with joy and whose dorm rooms temporarily became the most popular spots on campus thanks to our chocolatey creations. This immediate and overwhelmingly positive feedback reinforced exactly what we aimed for: a tangible reminder of our love and a much-needed taste of home. These little moments of connection are invaluable during their first year away, making the baking and shipping effort incredibly worthwhile.
Expert Packing Tips for Mailing Baked Goods: Ensuring Freshness and Safe Arrival
Sending homemade baked goods across distances requires a bit of strategy to ensure they arrive fresh, intact, and as delicious as when they left your kitchen. Proper packing is paramount, especially when dealing with delicate items like cookies and brownies. Here’s a detailed guide to help you master the art of the college care package:
Choosing the Right Shipping Method and Materials
- Opt for Priority Mail Flat Rate Boxes: For baked goods, speed is of the essence. Priority Mail from the Post Office is an excellent choice as it typically guarantees delivery in 2-3 business days within the US. The Flat Rate boxes are particularly convenient and cost-effective, as you pay a fixed price regardless of weight (up to 70 lbs), as long as it fits in the box. This simplifies budgeting and makes planning easier.
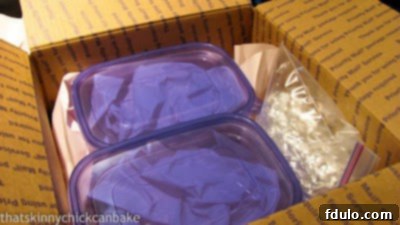
- Select Sturdy, Airtight Containers: Once your cookies and brownies have completely cooled, pack them into reusable, lightweight plastic containers with tight-fitting lids. These containers offer a crucial layer of protection against crushing and help maintain freshness by keeping air out. Avoid flimsy containers or simply wrapping in plastic wrap, which offers minimal protection.
- Layer with Care: If you’re sending different types of treats, consider using parchment paper or wax paper between layers of cookies to prevent them from sticking together or flavors from mingling.
The Art of Cushioning and Filling Space
- Utilize Food-Safe Packing Material: Carefully fill any excess space within your plastic containers with food-safe packing paper, tissue paper, or even crumpled wax paper. This helps to cushion the baked goods, preventing them from shifting around during transit and minimizing the risk of breakage. The less movement inside the container, the better your treats will fare.
- Prepare Your Shipping Box: When you get to the Post Office, select an appropriate-sized Flat Rate Priority Mail box. Before placing your plastic containers inside, line the bottom of the shipping box with a generous layer of crumpled newspaper, packing paper, or bubble wrap. This initial layer provides shock absorption.
- Fill All Voids: Once the containers are inside the larger shipping box, don’t leave any empty space. Crumple up additional newspaper, packing paper, or even small, lightweight gifts (like a new pair of socks or a fun novelty item) to snugly fill all remaining voids. The goal is to make the entire package a compact, immovable block.
- The “Jostle Test”: Before sealing your box, shut the top flaps and give the box a gentle jostle. Listen and feel for any internal movement. If you hear or feel items shifting, open it up and add more packing material until everything is held firmly in place. This simple test is crucial for preventing damage.
Final Steps for a Successful Delivery
- Seal Securely: Once packed to perfection, use strong packing tape to seal all seams and edges of the box. Reinforce the corners for added durability.
- Clear Labeling: Clearly write the recipient’s full name, dorm address, and your return address. Consider adding “Fragile” or “Perishable” labels, though Priority Mail is generally handled with care.
- Timing is Everything: Always aim to mail your care package early in the week (Monday or Tuesday) to ensure it arrives before the weekend. This minimizes the chance of your delicious treats sitting in a warm mailroom over a weekend, which could compromise their freshness.
- Expectation Management: While Priority Mail is fast, keep in mind that baked goods are best enjoyed within a few days of baking. While college students are notorious for eating anything, even slightly less-than-fresh treats, aiming for peak deliciousness is always the goal!
Armed with these packing tips and a selection of irresistible chocolate recipes, you’re now ready to send a truly memorable college care package. It’s an investment of time and love that yields immeasurable returns in happiness and a strong connection with your student.
Featured Recipes for Your College Care Package
Here are the detailed recipes for two of the chocolate delights we sent, carefully selected to survive shipping and bring maximum joy.
Promise Stuffed Cookies
25 minutes
17 minutes
42 minutes
2.5 dozen
Delicious chocolate chip cookies stuffed with your favorite Dove Promise chocolates, adapted from Bluebonnets and Brownies. These offer a delightful gooey center!
Ingredients
- 26 or more Dove Promise Candy (Dark Chocolate and/or Caramel Filled Milk Chocolate recommended), frozen for at least 2 hours
- 1 ½ cups unsalted butter, softened to room temperature
- 1 cup granulated sugar
- 1 cup packed light brown sugar
- 1 tablespoon pure vanilla extract
- 2 large eggs
- 3 ¾ cups all-purpose flour
- 2 teaspoons baking soda
- 1 teaspoon kosher salt
- 2 cups semi-sweet chocolate chips
Instructions
- Prepare Chocolates: Before beginning, ensure your Dove Promise candies have been frozen for at least 2 hours. This helps prevent them from melting out during baking.
- Preheat and Prep: Preheat your oven to 375ºF (190ºC). Line several baking sheets with parchment paper. Unwrap the frozen candies and place them back in the freezer while you prepare the cookie dough to keep them as cold as possible.
- Cream Butter and Sugars: In a large mixing bowl, using either a hand mixer or a stand mixer with the paddle attachment, cream together the softened butter, granulated sugar, and brown sugar until the mixture is light, fluffy, and pale in color (about 2-3 minutes).
- Add Wet Ingredients: Mix in the vanilla extract and eggs one at a time, beating until just combined after each addition. Scrape down the sides of the bowl as needed.
- Combine Dry Ingredients: In a separate bowl, whisk together the flour, baking soda, and kosher salt. Gradually add the dry ingredients to the wet ingredients, mixing on low speed until just combined and no streaks of flour remain. Be careful not to overmix.
- Fold in Chocolate Chips: Stir in the semi-sweet chocolate chips by hand using a spatula.
- Stuff the Cookies: Scoop out rounded tablespoons of cookie dough. Flatten each scoop slightly, place one frozen Dove Promise candy in the center, and carefully wrap the dough around it, rolling it into a ball until the candy is completely covered by the dough. Ensure there are no cracks for the chocolate to escape.
- Chill Dough Balls: Place the stuffed dough balls (about 6-8 per baking sheet) on the prepared baking sheets. Freeze the entire baking sheet for about 20 minutes before baking. This extra chilling step is crucial for maintaining the cookie’s shape and ensuring a gooey center.
- Bake: Bake the chilled cookies for 12-17 minutes, depending on the size of your cookies and your oven, or until the edges are golden brown and the centers are set but still soft and puffy.
- Cool: Allow the cookies to cool on the baking sheets for a few minutes before carefully transferring them to a wire rack to cool completely. Enjoy the warm, gooey centers!
Nutrition Information:
Yield:
30 cookies
Serving Size:
1 cookie
Amount Per Serving (estimated):
Calories: 303Total Fat: 16gSaturated Fat: 10gTrans Fat: 0gUnsaturated Fat: 5gCholesterol: 39mgSodium: 252mgCarbohydrates: 38gFiber: 1gSugar: 23gProtein: 3g
HOW MUCH DID YOU LOVE THIS RECIPE?
Please leave a comment on the blog or share a photo on Pinterest

Chocolate Chip Button Cookies
30 minutes
12 minutes
42 minutes
18 cookies
Delightful chocolate chip button cookies, each filled with a molten chocolate surprise! Adapted from Juanita’s Cocina, these mini treats are perfect for sharing.
Ingredients
- ½ cup unsalted butter, softened to room temperature
- ½ cup granulated sugar
- ½ cup packed light brown sugar
- 1 large egg
- 1 ½ teaspoons pure vanilla extract
- 1 ¾ cups all-purpose flour
- ½ teaspoon kosher salt
- ½ teaspoon baking soda
- 1 ½ cups semi-sweet chocolate chips (divided)
Instructions
- Prepare Muffin Tin: Preheat your oven to 350ºF (175ºC). Generously spray a mini muffin tin with Baker’s Joy or another flour and oil cooking spray. Set aside.
- Melt Chocolate: Place ½ cup of the semi-sweet chocolate chips in a ziplock bag. Microwave gently, flipping the bag after 30 seconds, until the chocolate is melted and smooth. Be careful not to overheat. Set aside, snipping a small corner off the bag later for piping.
- Cream Butter and Sugars: In a large bowl, cream together the softened butter, granulated sugar, and brown sugar until light and fluffy.
- Add Wet Ingredients: Mix in the egg and vanilla extract until well combined.
- Combine Dry Ingredients: In a separate bowl, whisk together the flour, salt, and baking soda. Gradually add these dry ingredients to the wet mixture, mixing on low speed until just combined.
- Fold in Remaining Chocolate: Stir in the remaining 1 cup of chocolate chips by hand.
- Fill Muffin Cups (Bottom Layer): Place a scant tablespoon of cookie dough into approximately 18 of the 24 muffin cups in your prepared mini muffin tin. Gently press the dough down to form a flat base.
- Add Melted Chocolate Layer: Take the ziplock bag with the melted chocolate (if you haven’t already, snip a tiny corner off). Pipe a small amount of melted chocolate onto the center of each cookie dough base in the muffin cups.
- Cover with Top Layer: Take another scant tablespoon of cookie dough, flatten it into a small disk (roughly the size of the muffin cup opening), and gently press it over the melted chocolate layer, sealing the chocolate inside.
- Bake: Bake for approximately 12 minutes, or until the tops of the cookies appear lightly golden and cooked through.
- Cool and Remove: As soon as they come out of the oven, run a small knife around the perimeters of the cookies while they are still warm. This helps loosen them and makes for easier removal once cooled slightly. Let them cool in the tin for a few minutes before transferring to a wire rack to cool completely.
Notes
You can experiment with different types of chocolate chips for the melted center – milk chocolate, bittersweet chocolate, or even white chocolate chips would work wonderfully to create varied flavor profiles.
Recommended Products
As an Amazon Associate and member of other affiliate programs, I earn from qualifying purchases.
- Measuring Spoons
- Baker’s Joy
- Non Stick Mini Muffin Pan
Nutrition Information:
Yield:
18 cookies
Serving Size:
1 cookie
Amount Per Serving (estimated):
Calories: 160Total Fat: 5gSaturated Fat: 3gTrans Fat: 0gUnsaturated Fat: 2gCholesterol: 10mgSodium: 101mgCarbohydrates: 29gFiber: 1gSugar: 18gProtein: 2g
HOW MUCH DID YOU LOVE THIS RECIPE?
Please leave a comment on the blog or share a photo on Pinterest
Beyond Chocolate: The Lasting Impact of College Care Packages
While this particular care package was a chocolate lover’s dream, the concept extends far beyond just sweets. A college care package, in its essence, is a powerful tool for maintaining connection and providing emotional support to students navigating their newfound independence. It serves as a tangible reminder that they are loved, missed, and thought of, even when miles separate them from home. These packages can alleviate homesickness, provide a much-needed study break snack, or simply offer a moment of familiar comfort in an unfamiliar environment.
Consider diversifying future care packages with items tailored to your student’s needs: a new pair of cozy socks for dorm life, essential school supplies for upcoming exams, healthy snacks to balance out the sweet treats, or even a small gift card to their favorite coffee shop near campus. The key is personalization and thoughtfulness. Engage your student by asking what they might need or miss. The frequency of sending isn’t as important as the sentiment behind each package. Whether it’s once a semester or for special occasions like birthdays and exam weeks, each delivery reinforces your bond and provides a crucial emotional anchor.
In conclusion, sending a college care package, especially one crafted with the passion for chocolate, is a wonderful way to express love and support. It transforms a simple act of mailing into a memorable experience for both giver and receiver. So, gather your ingredients, follow these proven packing tips, and prepare to bring immense joy to your favorite college student. Happy baking and happy sending!
