Mastering the Art of Rustic Whole Wheat Country Bread: A Comprehensive Guide
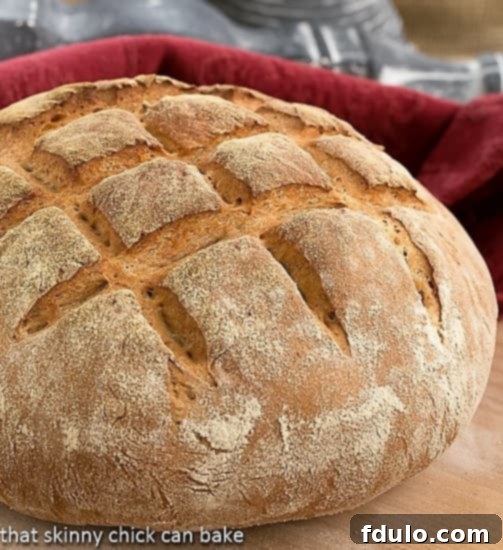
There’s an undeniable magic in the aroma of freshly baked bread filling your home. This simple yet profound pleasure reached new heights with our latest culinary endeavor: a hearty, rustic Whole Wheat Country Bread. Imagine a robust loaf, boasting an exceptionally thick, crunchy crust and an incredibly tender, open crumb. Each warm slice, slathered with a generous pat of cold butter, transforms into a moment of pure bliss. This isn’t just bread; it’s an experience – a comforting treat that promises to captivate your senses from the very first bite, making you fall in love with the art of traditional bread baking.

The Journey to a Perfect Loaf: Embracing Rustic Whole Wheat Country Bread
Our culinary journey into the world of artisanal bread began with a special assignment from “Tuesdays with Dorie,” a beloved baking group dedicated to exploring the recipes of Dorie Greenspan. This particular challenge centered around a robust Country Bread Recipe, generously shared by contributing baker Joe Ortiz, renowned for his expertise in authentic baking. The recipe promised a substantial, heavy loaf, characterized by its signature thick, crunchy crust – a hallmark of truly rustic bread.
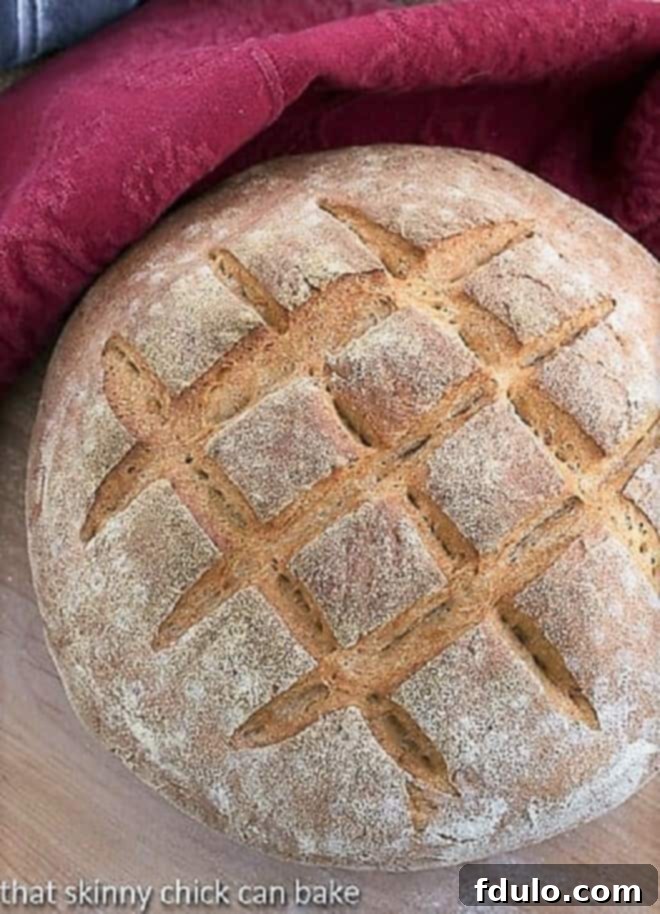
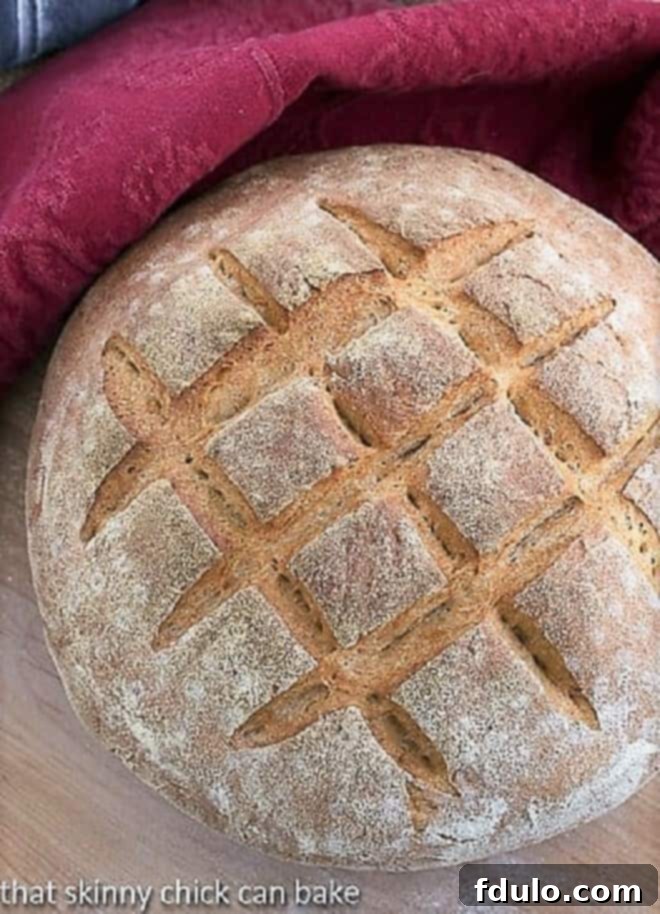
For this loaf, I deliberately chose to forego elaborate decorations, such as intricate outer braids or delicate wheat stalk motifs, which often require step-by-step visual guidance to master. While these artistic touches are beautiful, my focus for this baking session was on simplicity and the pure enjoyment of the process. Instead, I opted for a straightforward crosshatch pattern scored across the top, a technique that not only looks beautifully rustic but also allows for excellent oven spring and a satisfying texture. This approach made the baking experience more approachable and enjoyable, proving that sometimes, the simplest designs yield the most compelling results.

The Secret to Depth of Flavor: Mastering the Sponge
The perfect setting for this baking adventure presented itself during one of our recent snow days. With an urgent warning to stay indoors due to unbelievably harsh sub-zero wind chills, I was more than happy to retreat to the warmth of my kitchen. The evening prior, I initiated the crucial first step: creating the sponge. This foundational mixture, comprising yeast, a blend of white, rye, and whole wheat flours, and water, is the soul of this rustic bread. Parking the sponge in the refrigerator overnight allowed for a slow, gentle fermentation process. This extended cold ferment is a baker’s secret weapon, diligently working to develop complex flavors, imparting that coveted, subtle “sourdough” tang and depth that truly elevates a simple loaf into something extraordinary. This patient approach is what differentiates a good loaf from a great one, allowing the natural enzymes to break down starches and enhance the bread’s character.
The following morning, after the sponge had matured overnight, my trusty KitchenAid stand mixer took center stage. This powerful ally handled the bulk of the hard work, effortlessly kneading the dough for a full ten minutes. The beauty of this rustic whole wheat bread recipe lies in its simplicity: a combination of yeast, water, a variety of flours, salt, and, of course, the vibrant, fermented sponge. With ample time on my hands due to the weather, I embraced the unhurried pace of the baking process. The second and third rises were leisurely affairs, allowed to proceed fully at room temperature, contributing significantly to the final loaf’s airy texture and exquisite flavor development. Patience truly is a virtue in bread making, and each slow rise deepens the bread’s character.
During this baking session, I also encountered a new term in my baking lexicon: the banneton. This specialized round proofing basket is traditionally called for in such recipes, designed to hold the dough during its final rise, imparting a beautiful spiral pattern and helping it maintain its shape. However, fear not if you don’t possess this particular item in your kitchen arsenal! I successfully improvised by lining a regular colander with a heavily floured linen towel. This simple hack worked like an absolute charm, demonstrating that resourceful home bakers can achieve professional-looking results without needing every single specialized gadget. A few precise razor slashes across the top of the risen loaf, coupled with tossing a handful of ice cubes into the hot oven to create a burst of steam, and a preheated baking stone eagerly awaiting in the oven, all contributed to crafting a truly picture-perfect Whole Wheat Country Bread with an enviable crispy crust and magnificent structure.

The Aromatic Reward: Savoring Your Homemade Country Bread
The tantalizing aroma of baking bread is, without a doubt, one of life’s greatest sensory pleasures. As this magnificent loaf spent a full hour transforming in the oven, the enticing scent wafted through the house, sending Bill and Nick into a delightful frenzy of anticipation. They were literally “chomping at the bit” for their first slices. The anticipation only grew during the essential additional hour-long cool-down period – a crucial step often rushed, but vital for the bread’s internal structure to set and for its flavors to fully develop. Finally, the wait was over. Both enjoyed thick, satisfying slabs of the rustic bread for dinner, immediately making plans to incorporate it into their breakfast menu the following morning. This enthusiastic reception is a testament to the profound satisfaction that only homemade bread can bring.
Initially, I admit, this particular loaf wasn’t my absolute favorite compared to some richer, sweeter recipes. The absence of sugar, butter, and eggs – ingredients I often associate with a more indulgent bread – was noticeable to my palate. However, as a true country-style loaf, it truly excels. Its inherent appeal lies in its fundamental simplicity: relying on a few core ingredients, it delivers an utterly lovely crumb texture and an intensely crusty exterior. This bread perfectly fulfills its role as a versatile, wholesome, and truly authentic rustic creation. It’s a reminder that sometimes, less is indeed more, allowing the natural flavors of the grains and the slow fermentation process to shine through.
This authentic Country Bread recipe, originally from Joe Ortiz, is a cherished part of the baking community. You can find the full recipe details online or in the classic cookbook, “Baking with Julia” by Dorie Greenspan, an essential resource for any serious baker. For both the vital sponge and the main bread dough, I relied on Red Star Active Dry Yeast, a dependable choice known for consistent results.
Essential Tools for the Home Baker
Achieving baking success often comes down to having the right tools. For this Whole Wheat Country Bread, a few key items can significantly enhance your experience and the final outcome:
- Banneton (Proofing Basket): A banneton is invaluable for giving your dough its shape during the final proof, promoting a beautiful crust, and absorbing excess moisture.
- Colander: If a banneton isn’t available, a simple colander lined with a floured linen towel makes an excellent, budget-friendly alternative.
- Stand Mixer with Dough Hook: While hand kneading is therapeutic, a stand mixer greatly simplifies the kneading process, ensuring proper gluten development.
- Baking Stone or Dutch Oven: Essential for creating a crisp bottom crust and providing consistent, high heat.
- Razor Blade or Lame: For scoring the dough, which allows for controlled expansion during baking and creates beautiful patterns.
Share your baking triumphs on platforms like Yeastspotting!
For more baking inspiration and to see other delicious interpretations of this recipe, be sure to visit the Tuesdays with Dorie website.
Explore More Bread Recipes
If you enjoyed baking this rustic loaf, you might also love exploring these other delightful bread recipes from our collection:
- Fluffy Whole Wheat Dinner Rolls
- Hearty Classic Oatmeal Bread
- Sweet and Soft Honey Oatmeal Bread
- Incredibly Tender Japanese Milk Bread
- Discover more amazing Yeast Bread Recipes for every occasion!

Whole Wheat Country Bread
1 hour 15 minutes
1 hour 10 minutes
2 hours 25 minutes
1 large loaf
A crusty whole wheat bread with a delicious nutty flavor, perfect for any meal.
★★★★★ (Rated 5 out of 5 stars by 3 bakers)
Ingredients
For the Sponge:
- 1 ½ cups water (105 to 115 degrees F), plus a little extra to warm the mixing bowl
- 2 ½ teaspoons active dry yeast (1 full packet)
- 1 cup all-purpose unbleached flour
- 1 cup rye flour
For the Dough:
- 1 teaspoon dry active yeast
- 1 cup water (105 to 115 degrees F)
- The prepared sponge
- 3 ½ to 4 ½ cups unbleached, all-purpose flour (plus more if needed)
- 1 cup whole wheat flour
- 1 tablespoon coarse Kosher salt
Instructions
- Prepare the Sponge: First, warm your mixer’s bowl by adding some additional warm water, swirling it around, then pouring it out. Add approximately 1/2 cup of the warm water specified for the sponge into the bowl.
- Sprinkle the 2 ½ teaspoons of yeast over this water and gently stir to combine. Allow the yeast to bloom and turn creamy, indicating it’s active, before adding the remaining warm water for the sponge.
- In a separate bowl, thoroughly combine the all-purpose unbleached flour and rye flour. Mix them together well.
- Add the remaining warm water to the yeast mixture in the mixer bowl. Then, gradually incorporate the combined flours, mixing with a heavy spoon until smooth. The consistency should resemble a thick pancake batter.
- Cover the bowl with plastic wrap and let the sponge ferment at room temperature for 6 to 8 hours, or preferably, in the refrigerator overnight for deeper flavor. If refrigerated, pull it out at least one hour before mixing the dough to allow it to come to room temperature.
- Prepare the Dough: In a separate large bowl, combine the 3 ½ cups of regular flour, the whole wheat flour, and the coarse Kosher salt. Whisk them together until well distributed.
- Attach the dough hook to your stand mixer. Place the bowl containing the prepared sponge onto the machine.
- In a small bowl, dissolve the 1 teaspoon of active dry yeast in ½ cup of warm water. Let it sit for a few minutes until frothy.
- Turn the mixer on low/medium speed. Pour the other ½ cup of water (from the dough ingredients) into the sponge. Gradually add about 2 cups of the mixed flour to the sponge. Mix for approximately 3 minutes until just combined.
- Add the dissolved yeast mixture to the bowl and continue to beat to fully incorporate. Gradually work in the remaining flour mixture, adding more all-purpose flour by the tablespoon if needed, until the dough begins to pull away from the sides of the bowl. Mix for about 10 minutes on medium speed. The final dough should be moist and satiny, yet still slightly sticky to the touch.
- First Rise: Lightly oil a large clean bowl. Transfer the dough into the bowl, turning it once to coat with oil. Cover the bowl tightly with plastic wrap. Let the dough proof at room temperature for at least 2 to 3 hours, or for an even more pronounced flavor, allow it to rise overnight in the refrigerator. The dough should at least double in size.
Final Rise and Bake:
- Prepare for Final Proof: Prepare a resting spot for your dough. If using a banneton, heavily flour its linen liner. If using a colander, line it with a clean linen towel and flour generously, rubbing it into the fabric. Set aside.
- Shape the Loaf: Turn the risen dough onto a lightly floured work surface. Gently pat it into a flat round using your fingers and palms.
- Fold the edge of the dough inward, pressing down firmly with the heel of your hand. Rotate the dough slightly and repeat this folding and pressing process around the circumference to form a tight, round ball (boule). Repeat this shaping process up to four more times to build tension in the dough, which helps with oven spring.
- Carefully flip the shaped loaf over so the smooth, seam-side is down. Gently place it into your prepared, floured basket or colander.
- Second Rise (Final Proof): Cover the basket with a light towel or plastic wrap. Let the loaf rise at room temperature for another 2 to 3 hours, or until it has nearly doubled in size and feels light and airy.
- Preheat Oven: About 30 minutes before you plan to bake, place a baking stone or a heavy cast-iron Dutch oven on the bottom third rack of your oven. Preheat the oven to 425°F (220°C).
- Prepare for Baking: If not using a Dutch oven, lightly dust a baking sheet with cornmeal or line it with nonstick foil. Carefully invert the risen loaf from the basket onto the prepared baking sheet, being careful not to compress it.
- Score the Loaf: Using a sharp razor blade or lame, make 3 long slashes about ½ inch deep across the top of the loaf, or create a decorative crosshatch pattern. This allows the bread to expand without tearing.
- Egg Wash (Optional): For a richer, glossier crust, whisk one egg with 2 tablespoons of water. Lightly brush this egg wash over the surface of the bread.
- Bake: Carefully slide the bread (on the baking sheet or inside the Dutch oven) into the preheated oven. If using a baking stone, you can toss a few ice cubes onto the bottom of the oven (or into a pan on the bottom rack) to create steam, which helps achieve a crispy crust. Immediately reduce the oven temperature to 400°F (200°C). If baking one large loaf, bake for 60 to 70 minutes. The bread is done when an instant-read thermometer inserted into the center reads 200°F (93°C).
- Cool: Remove the loaf from the oven and transfer it to a wire rack. Let it cool for at least 10 to 20 minutes (or ideally an hour for best texture) before slicing and serving. Then, watch it be devoured!
Nutrition Information:
Yield:
1 large loaf (approximately 12 servings)
Serving Size:
2 slices
Amount Per Serving (estimated):
Calories: 766
Total Fat: 7g
Saturated Fat: 2g
Trans Fat: 0g
Unsaturated Fat: 4g
Cholesterol: 0mg
Sodium: 612mg
Carbohydrates: 152g
Fiber: 8g
Sugar: 1g
Protein: 21g
HOW MUCH DID YOU LOVE THIS RECIPE?
Please leave a comment on the blog or share a photo on Pinterest and tag us!
