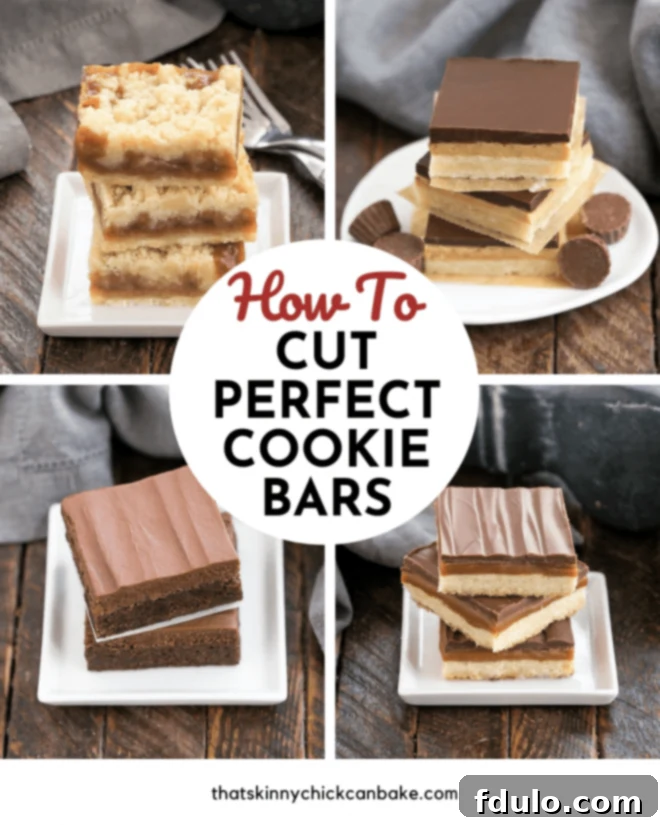
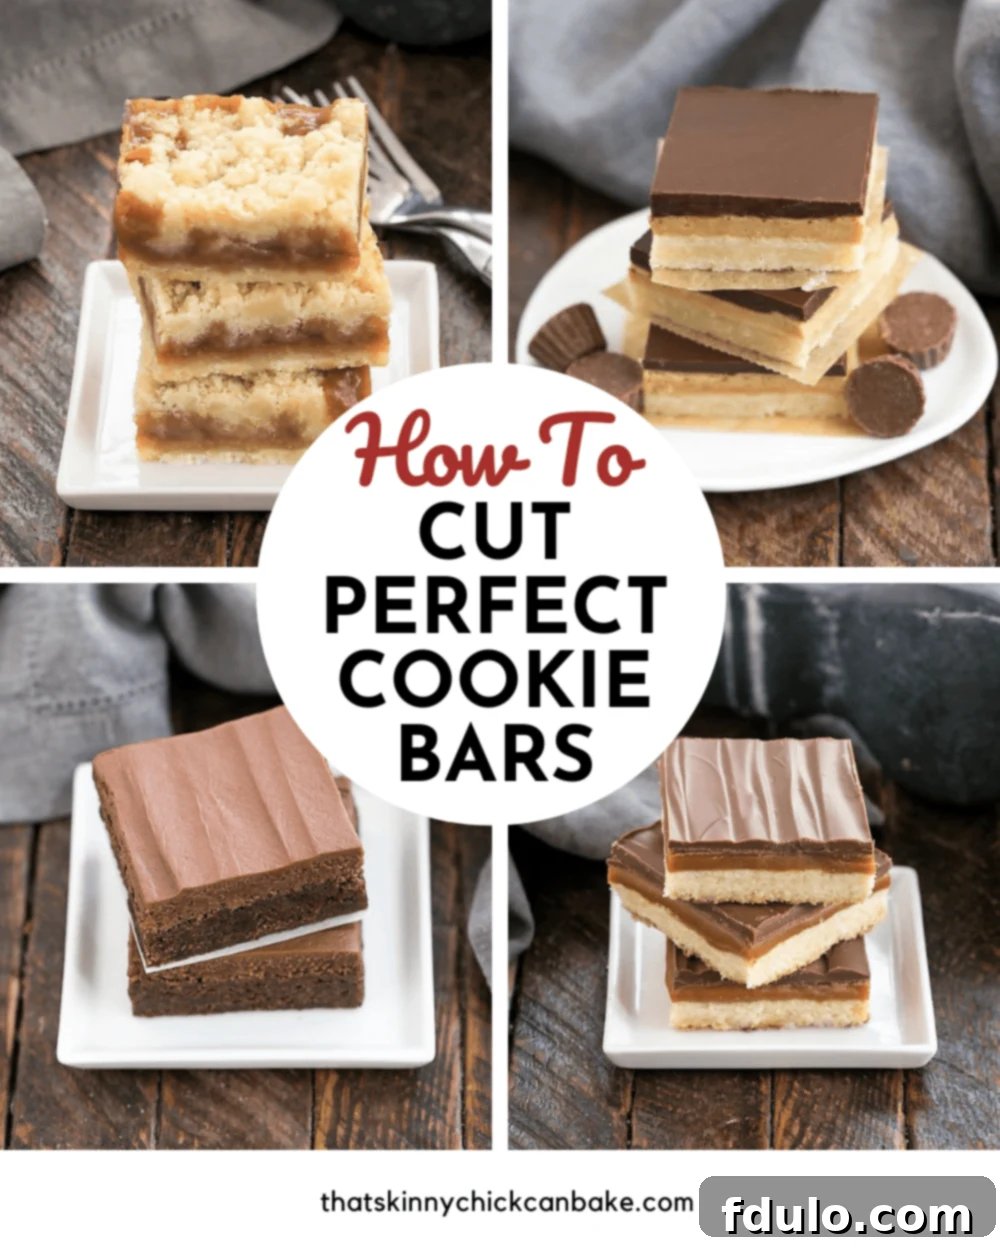
Mastering the Art of Cutting Perfect Cookie Bars, Brownies, and Dessert Squares
Achieving impeccably neat and uniform dessert squares can seem like a baker’s elusive dream, yet it’s a skill that elevates your homemade treats from delicious to truly professional-looking. Many home bakers find the task of slicing baked goods into attractive, consistent pieces quite challenging. However, with the right approach and a few clever tricks, you can easily conquer this culinary hurdle. As someone frequently asked about my knack for attractively cutting desserts, I’ve consolidated my most effective, tried-and-true methods into this comprehensive guide. Here, you’ll discover precisely how to cut perfect cookie bars, brownies, and other dessert squares with ease and precision.
Prepare to transform your dessert presentation! This detailed guide unveils all my top secrets for achieving flawless cuts every single time. Whether you’re working with rich, fudgy brownies, delightfully chewy chocolate chip bars, or delicate, crumbly fruit bars, these simple yet powerful tips will refine your dessert-cutting skills. By following these expert recommendations, you’ll consistently produce professional-looking results that will impress everyone who samples your perfectly portioned, visually appealing baked creations.

The Foundation: Setting Up for Flawless Cuts
The journey to perfectly portioned dessert squares begins long before you pick up a knife. Proper preparation of your baking pan is the critical first step to ensuring easy removal and ultimately, pristine cuts. While a keen eye developed through practice is helpful, a simple ruler can be an invaluable tool for beginners to maintain consistency and precision as you learn the ropes. Here’s a detailed breakdown of my foundational method for perfect cookie bar presentation:
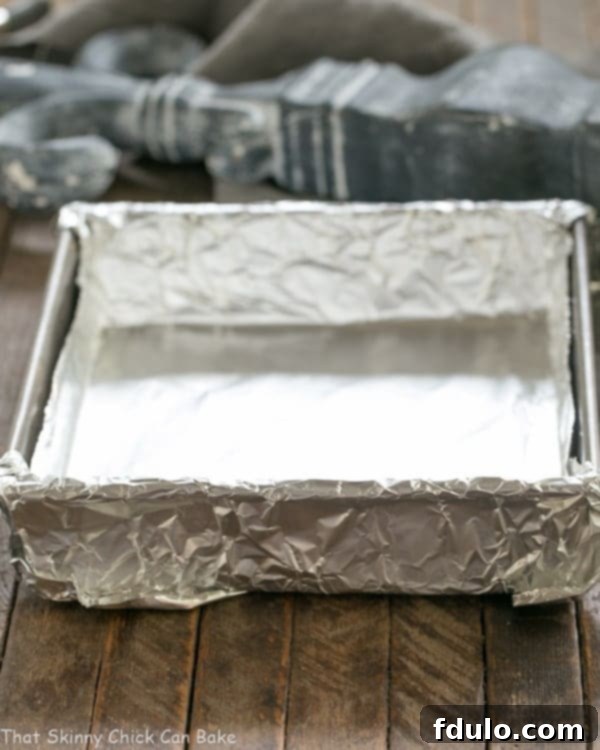
- PRO-Tip: Line Your Baking Pan with Precision. The secret to effortless removal and impeccably clean cuts starts even before your dessert enters the oven. I strongly recommend lining your baking pan with non-stick foil. This technique creates a convenient sling that allows you to easily lift the entire baked slab of bars out of the pan once it’s cooled. By transferring the uncut bars to a flat cutting board, you eliminate the hassle of navigating the pan’s sides, making the subsequent cutting process significantly simpler, more precise, and less messy.
- Alternative Pan Lining Options: If specialized non-stick foil isn’t readily available, fear not! Parchment paper serves as an excellent and equally effective substitute, offering similar non-stick properties and the crucial “lift-out” benefit. Another practical option is to create your own non-stick surface: generously spray regular aluminum foil with a high-quality non-stick cooking spray, ensuring the entire surface that will come into contact with your dough or batter is thoroughly coated.
- Why Proper Lining is Paramount: Beyond merely facilitating easy removal, a well-lined pan is fundamental for preventing your delicate bar edges from sticking and tearing during transfer. It also plays a vital role in promoting uniform cooling and chilling, which are crucial preparatory steps that significantly impact the cleanliness and definition of your final slices, as we’ll explore next.

Essential Preparatory Steps for Flawless Slices
Before you even consider picking up a knife, there are a few critical stages that ensure your cookie bars and brownies are in optimal condition for clean, professional-looking cuts. These preparatory tips, though often underestimated, are fundamental to achieving bakery-quality results that stand out.
- Achieve Even Dough or Batter Distribution: The uniformity of your baked bars starts with how you spread the dough or batter. Utilize a small offset spatula to carefully and evenly distribute your cookie dough or brownie batter across the prepared pan. The objective is to achieve a consistent thickness from every corner to the very center. Bars that possess uniform thickness will not only bake more evenly, preventing raw spots or burnt edges, but will also present a significantly more professional appearance with level tops and bottoms once they are cut. Inconsistent thickness, conversely, often leads to uneven baking and can make clean, non-crumbly cuts a frustrating challenge.
- The Unwavering Importance of Complete Cooling: Once your dessert is baked, exercise patience and resist the immediate urge to cut. Allow your bars or brownies to cool completely to room temperature while they are still in the pan, ideally on a wire cooling rack. This crucial step permits the internal structure of the dessert to fully set and firm up. Attempting to cut warm or even slightly warm bars makes them far more susceptible to crumbling, tearing, and smudging, ruining their perfect edges.
- The Indispensable Chilling Advantage: After your bars have thoroughly cooled to room temperature, securely cover the pan and transfer it to the refrigerator. Allow them to chill for at least 2-4 hours, or even overnight, for optimal results.
- PRO-Tip: Cold is Gold for Precision Cuts. This is arguably one of the most critical pieces of advice for perfect slicing: thoroughly chilled bars cut dramatically more cleanly than those at room temperature. Chilling solidifies the butter or fat content within the dessert, rendering it much firmer, less sticky, and significantly more stable. This rigidity translates directly into sharper, more defined edges and drastically minimizes crumbling during the cutting process. While cold bars undeniably cut better, remember that most bar desserts offer the best flavor and texture when allowed to come back to room temperature before serving. Plan your cutting time accordingly to provide for this brief warming period prior to presentation.

Precision Slicing Techniques for Uniform Cookie Bars
With your dessert bars perfectly baked, cooled, and thoroughly chilled, it’s finally time for the main event: the slicing process. This section provides practical, step-by-step guidance and crucial considerations for achieving uniform, attractive pieces that will impress.
- Effortless Transfer to Your Cutting Surface: Once your bars are adequately chilled and firm, carefully remove the entire slab from its baking pan. Utilize the non-stick foil or parchment paper as a convenient sling to gently lift the whole piece out and transfer it directly onto a clean, flat, and stable cutting board. This maneuver provides an unrestricted and secure surface, which is absolutely essential for precision cutting, allowing you to move freely without bumping into pan edges.
- Strategic Cutting for Optimal Portions and Aesthetic Appeal: When working with a standard 8 x 8-inch pan, I typically aim to cut the batch into 16 individual bars. This size yields pieces that are slightly smaller than 2×2 inches, which I find to be a perfect, manageable portion. To achieve this, begin by making your first cut directly down the middle of the slab, dividing it into two equal halves. Rotate the entire slab 90 degrees and make a second perpendicular cut straight down the middle. This strategic initial step creates four perfectly symmetrical, larger squares. From there, you can easily subdivide each of these four squares into four smaller squares by cutting each in half horizontally and then vertically. As your confidence and manual dexterity improve, you can experiment with cutting into 25 or even 36 smaller bars, though this certainly requires a bit more finesse and meticulous precision.
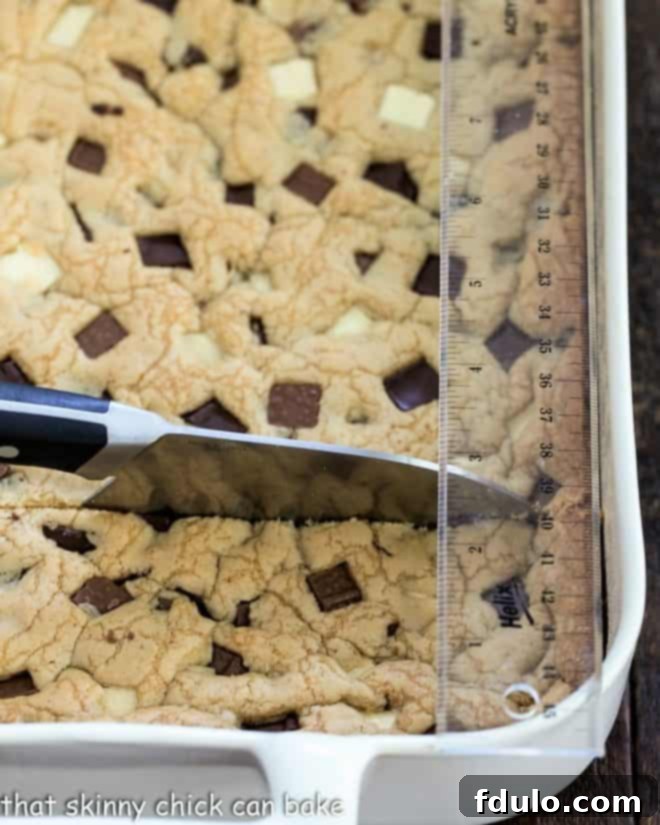
- PRO-Tip: Embrace the Ruler for Unwavering Straightness. For consistently straight, uniform, and professional-looking cuts, especially when you are just starting out or dealing with an important presentation, a ruler is your absolute best friend. Do not hesitate to use it as a precise guide. Measure your desired cuts, and if preferred, lightly score the surface of the dessert before committing to the full slice. This small investment of effort in measuring and guiding pays tremendous dividends in the final presentation, ensuring every piece is identical.
- To Trim or Not to Trim the Edges: For an ultra-polished, refined, and truly bakery-style finish, you may choose to carefully trim the very edges of the entire baked slab of bars. This optional step ensures that every single individual bar you cut has four perfectly clean, straight sides, free from any slightly irregular or overly baked perimeter. While purely aesthetic, trimming definitely elevates the overall visual appeal and contributes to a more professional presentation.
Achieving Immaculate Brownie Squares
Brownies, with their distinctive rich and often fudgy texture, present their own specific set of challenges when it comes to cutting. However, many of the core principles applied to cookie bars are equally effective here, complemented by a few specialized tricks to ensure they slice beautifully without sticking, tearing, or crumbling.
- Pan Lining Remains Key: Just as with other bar cookies, meticulously lining your baking pan with non-stick foil or parchment paper is absolutely crucial for easy removal of the entire brownie slab and preserving intact edges. This foundational step cannot be overstated for clean results.
- The Indispensable Power of Chilling for Brownies: For brownies, chilling is not merely recommended; it is an absolute non-negotiable step for clean cuts. Place your freshly baked brownies, still in their lined pan, into the refrigerator for at least 30 minutes, and ideally for one to two hours (or even longer for extremely fudgy varieties) before you attempt to cut them. This extended firming-up process significantly minimizes any sticking to the knife and ensures far cleaner, more defined, and less crumbly edges.
- Guide Your Cuts with Pre-Scoring: Before making your final, decisive slices, it can be extremely helpful to gently score or mark the top surface of the brownies where you intend to cut. This provides a clear visual guide, assisting you in maintaining perfectly straight lines and uniform portion sizes. Once again, a ruler can be an immensely helpful tool at this stage, guaranteeing precise and even spacing between your brownie squares.
- PRO-Tip: Embrace the Magic of a Plastic Knife. This is an absolute game-changer for effortlessly cutting brownies! Consider purchasing a dedicated large plastic knife specifically for this purpose. Brownies, particularly those that are rich and fudgy, have a notorious tendency to cling tenaciously to metal blades, creating drag and messy cuts. Plastic, however, offers a much smoother, inherently less sticky surface. This reduced friction allows the knife to glide through the brownie with remarkable ease, resulting in cleaner, more defined edges. Even those small, sturdy, disposable plastic knives often found at picnics can surprisingly work wonders due to the material’s advantageous properties against the brownie’s texture.
- Maintain a Spotless Blade: Regardless of whether you opt for a plastic or a metal knife, rigorously wiping the blade clean after every single cut is paramount. Moist, fudgy brownies will inevitably accumulate residue on the knife, and this residue will then drag through subsequent cuts, creating unappealingly messy edges and causing tearing. A clean knife always slices with significantly greater precision, ease, and less damage than a dirty one. Keep a damp cloth or a roll of paper towels handy and make it an unwavering habit to clean the blade thoroughly between each and every slice.
Selecting and Using the Right Tools for Clean Cuts
The choice of knife and the specific techniques you employ in using it can dramatically impact the neatness and overall finish of your dessert bars. Investing in quality cutting tools and understanding specialized methods can fundamentally transform your cutting experience, taking it from a chore to a satisfying precision task.
- The Heated Knife Technique for Supreme Cleanliness: For achieving incredibly clean, smooth cuts, especially through desserts adorned with chocolate toppings or possessing a particularly firm texture, I wholeheartedly endorse the heated knife technique. I personally favor a large, exceptionally sharp knife, such as my Wusthof Classic 7-Inch Santoku Knife. Before making your very first cut, run the blade under very hot water – I often use a hot water dispenser set around a scorching 190 degrees Fahrenheit (approximately 88°C). Immediately and thoroughly wipe the blade completely dry. The residual warmth from the blade helps to slightly melt the fats and sugars within the dessert upon contact, effectively reducing friction and allowing the knife to glide through with minimal resistance. This method is particularly effective when cutting through thoroughly chilled bars and those featuring thick, hardened chocolate layers.
- Consistent Reheating and Thorough Cleaning: When employing the heated knife technique, it is absolutely crucial to understand that the blade will gradually cool down and inevitably accumulate residue. Therefore, you must diligently wipe the blade clean and reheat it at frequent intervals – ideally after every one or two cuts, depending on the specific stickiness and density of the dessert. I find disposable paper towels to be exceptionally effective for cleaning the knife, particularly when rich chocolate is involved, as they efficiently absorb any accumulated residue.
- Mastering Cuts Through Crusted Tops: Some cookie bars feature a delicate, thin, or even firm crust on top, which can be notoriously prone to unsightly cracking if not handled with care. For bars adorned with such a crust (like those often depicted in professional bakery displays), I highly recommend using the very tip of a sharp knife to gently poke a few small, shallow holes or lightly score a guiding line along your intended cut path. This pre-perforates the crust, creating a controlled “fault line” that guides your knife seamlessly through the dessert and significantly reduces the likelihood of wide, unappealing cracks spreading across the beautiful surface.
- Serrated Versus Straight Edge: The Right Tool for the Job: Don’t be afraid to experiment with the various knives in your collection. Occasionally, a serrated knife proves to be the superior tool for specific textures, especially those with a slightly tougher, chewier crust or a delicate, crumbly topping. The saw-like action of a serrated blade can cut through these layers without crushing them. Conversely, for soft, incredibly fudgy brownies or desserts with very smooth textures, a straight-edged knife (especially when heated) often performs with greater precision and cleaner results. Through experience, you’ll quickly discern which type of knife pairs best with each unique variety of cookie bar you bake, making your cutting process more efficient and effective.
I genuinely hope this comprehensive tutorial on how to cut perfect cookie bars provides you with the confidence, knowledge, and practical skills needed to make every single square of your homemade desserts look absolutely picture-perfect! Your dedication to baking deserves a professional and polished finish. Please feel free to share any additional tips or ingenious tricks you’ve discovered, or pose any questions you might have, in the comments section below. Now, scroll down to explore some of my absolute favorite bar cookie and brownie recipes, eagerly awaiting your newly honed, masterful cutting skills!
Delightful Bar Cookie and Brownie Recipes to Try
Put your refined cutting skills to the ultimate test with these irresistible recipes that are sure to be a crowd-pleasing hit:
- Ricotta Cheesecake Brownies
- Ganache Topped Caramel Bars
- Candy Bar Blondies
- One Bowl Fudgy Brownies
- Simple Fudgy Brownies
- Apricot Bars
- Chocolate Chip Cookie Dough Brownies
- Explore 90+ Amazing Bar Cookie Recipes
- Discover 50+ Best Brownie Recipes
Frequently Asked Questions About Cutting Dessert Bars
How Do You Cut Lemon Bars for a Perfect Finish?
To achieve impeccably clean, sharp slices for delicate lemon bars, the preparation is paramount. First, ensure your bars were baked in a pan meticulously lined with non-stick foil or parchment paper. Once baked and completely cooled to room temperature, the crucial next step is thorough chilling. Transfer the pan to the refrigerator for at least 2 to 4 hours, or ideally, overnight, to ensure the bars are profoundly firm and cold. This chilling process is absolutely essential for preventing the soft lemon curd from squishing or smudging during cutting. When ready, use the foil or parchment as a sling to carefully lift the entire chilled slab onto a sturdy cutting board. For the actual slicing, fill a tall glass with very hot water. Dip a sharp, thin, non-serrated knife into the hot water, wipe it completely dry with a paper towel, and then make your first swift, decisive slice. The warm, dry blade will glide smoothly through the chilled lemon layer and crust, minimizing sticking. Repeat this precise heating, wiping, and slicing process for every single cut to maintain immaculate edges and prevent any sticky residue from compromising subsequent slices.
What’s the Best Way to Cut Brownies Without Them Sticking?
Cutting brownies without encountering a sticky mess and ragged, uneven edges is a common challenge, but it’s simpler to overcome than you might think. Start by baking your brownies in a pan lined with non-stick foil or parchment paper; this facilitates effortless removal of the entire slab. The absolute golden rule for the cleanest, stick-free slices is to chill your brownies thoroughly. Place them in the refrigerator for at least 30 minutes to an hour (or even longer for very fudgy varieties) before attempting to cut them. This firming-up process makes the rich, gooey texture less prone to sticking and more stable. A classic trick that many professional bakers swear by is utilizing a plastic knife. Plastic creates significantly less friction and resistance against the dense, often gooey texture of brownies compared to metal, resulting in remarkably smoother, cleaner cuts. You can even find specialized large plastic brownie knives specifically designed for this purpose, but even a sturdy, disposable picnic knife can surprisingly work wonders. Alternatively, if you’re using a metal knife, generously spray the blade with non-stick cooking spray (like Pam) before each cut. After making each slice, meticulously wipe the knife clean, re-spray if necessary, and then proceed with your next cut, repeating this careful process until all your brownies are perfectly portioned.
How Do You Slice Magic Cookie Bars Cleanly?
Magic cookie bars, often characterized by their multiple gooey, condensed layers and sticky toppings, benefit immensely from specific cutting techniques to ensure cleanliness and definition. As with virtually all bar desserts, the initial and crucial step is to bake your magic bars in a pan meticulously lined with non-stick foil or parchment paper. This allows for the easiest and most intact removal of the baked slab. After baking, allow the bars to cool completely to room temperature, then transfer the pan to the refrigerator for a thorough chill – ideally for several hours or even overnight. This chilling is paramount to firm up the sticky layers. Once firm and cold, use the foil or parchment to carefully lift the entire slab onto a stable cutting board. For slicing, a sharp, straight-edged knife is generally recommended. The most critical tip here is to clean the knife blade completely after every single slice. The sticky, caramelized, and condensed layers of magic bars will inevitably accumulate on the knife, and a dirty blade will drag, tear, and smudge subsequent cuts, ruining their appearance. If you find the layers are still excessively sticking even with a consistently clean knife, you can lightly spray the clean blade with a small amount of non-stick cooking spray before each cut. Consistent chilling and diligent knife cleaning are the absolute keys to perfectly defined, attractive magic bar squares.
What’s the Trick to Slicing Bars into Elegant Diamond Shapes?
Slicing your dessert bars into elegant diamond shapes is a fantastic way to add a touch of sophistication and visual appeal to your presentation. This technique works particularly beautifully for bars baked in a 9 x 13-inch pan. First, ensure your bars are thoroughly chilled and firm, as this is absolutely essential for achieving clean, crisp lines that define the diamond shape. Begin by cutting the entire slab of bars lengthwise into four equal-sized strips. To execute this, make your first precise cut directly down the middle, extending from one short side of the pan to the other. Then, carefully measure and make a second cut halfway between the edge of the pan and the newly created center cut, repeating this on both sides. This will leave you with four long, uniform strips. Next, to create the distinctive diamond pattern, you will make a series of diagonal cuts. Start at one corner of a strip and cut at a consistent angle, moving towards the opposite long side. Continue making parallel diagonal cuts at the same interval across all four strips until the entire pan is sliced. The key to elegant diamonds is maintaining a consistent angle and uniform spacing for each diagonal cut. Use a ruler to guide your initial cuts and ensure symmetry. A sharp, clean knife (preferably heated and meticulously wiped clean between each cut, especially if your bars have a sticky topping) will help achieve the sharpest, most defined diamond edges.
Further Reading and Complementary Baking Resources
Continue to expand your baking knowledge and enhance your culinary skills with these valuable related articles and resources:
- How to Make Chocolate Ganache from Fifteen Spatulas
- How to Make Chocolate Shards
- How to Eat Salad Every Day and Like It from Barefeet in the Kitchen
- How to Make Simple Meringue Cookies
- How to Organize the Pantry in 5 Easy Steps from Comfortably Domestic
