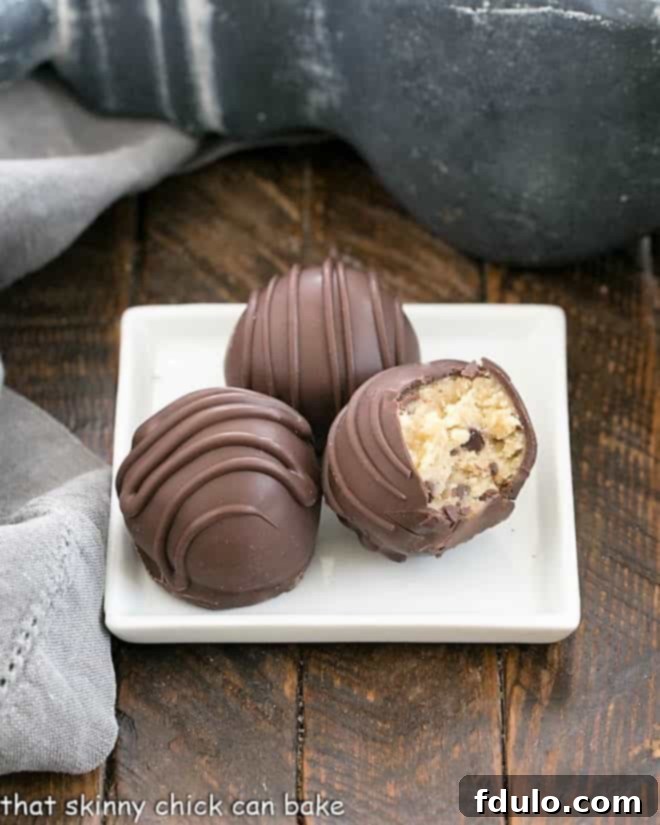
Cookie Dough Chocolate Truffles offer a sophisticated and, most importantly, safer way to satisfy those undeniable cookie dough cravings. Forget the spoon straight to the bowl – these elegant bites are crafted without any raw eggs or flour, ensuring pure enjoyment without a single worry!
Prepare yourself to whip up a batch of these absolutely irresistible Edible Cookie Dough Bites. They provide a delightful, convenient, and safe solution to get your ultimate cookie dough fix, perfect for sharing or indulging solo.
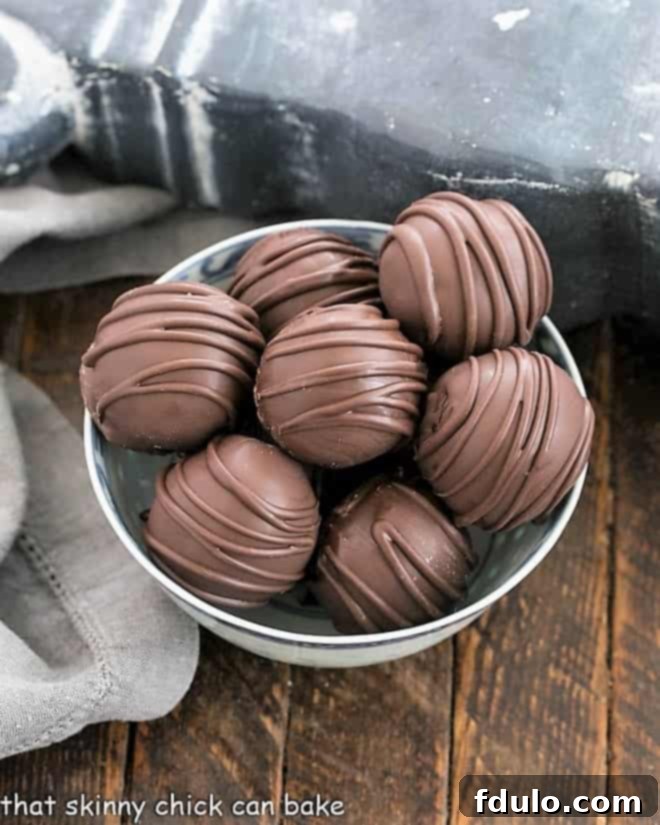
Decadent & Safe Cookie Dough Chocolate Truffles: Your Ultimate Guide
The allure of raw cookie dough is a universal weakness for many, myself included. It’s a delightful temptation that often leads to internal debates about self-control, especially after a grueling treadmill session! The moment that irresistible batter comes together, it’s almost impossible not to sneak a spoonful. My husband’s knowing glance from across the kitchen is a familiar sight when he catches me “sampling” the raw dough. However, with these revolutionary cookie dough truffles, those days of guilt and concern are over. We’re transforming that beloved illicit pleasure into an elegant, perfectly safe, and utterly gourmet experience.
Why You’ll Fall in Love with These Edible Cookie Dough Truffles
These aren’t just any cookie dough bites; they are a game-changer for anyone who adores the taste of raw cookie dough but shies away from the risks. Here’s why this recipe will become your new go-to:
- Unquestionable Safety: The primary concern with raw cookie dough, salmonella from eggs, is completely eliminated here. These truffles are entirely egg-free. But we don’t stop there; we address the often-overlooked risk of raw flour, ensuring every bite is worry-free and delicious.
- Effortless Chocolate Coating: Say goodbye to the complexities of chocolate tempering! Thanks to high-quality melting wafers like Ghirardelli, achieving a smooth, professional-looking chocolate coating is a total breeze. This shortcut saves you time and stress, making the entire process enjoyable.
- Gourmet Flavor & Versatility: Whether you prefer the rich depth of dark chocolate or the creamy sweetness of white chocolate, this recipe allows for both scrumptious variations. I became a true truffle-making expert this week, and with these tips, you will too!
- Perfect for Any Occasion: From a casual treat to an impressive homemade gift, these truffles fit every scenario. Their elegant appearance belies their simple preparation, making you look like a pastry chef with minimal effort.
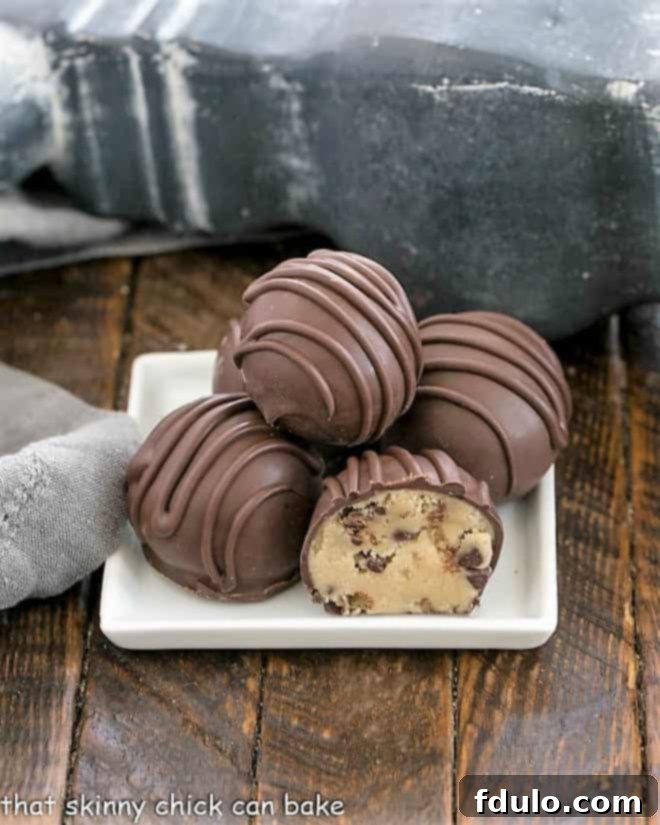
Mastering the Art of Cookie Dough Truffles: Essential Tips & Tricks
Creating these heavenly cookie dough truffles is straightforward, but a few expert tips can elevate your results from great to truly extraordinary. Pay attention to these details for a batch of truffles that will impress everyone.
- The Secret to Safe Enjoyment: Heat-Treated Flour. While everyone knows about the risks of raw eggs, many are unaware that raw flour can also harbor harmful bacteria like E. coli. To ensure these truffles are absolutely safe for everyone to enjoy, especially children, the elderly, or those with compromised immune systems, heating your flour is a crucial step. This simple process eliminates any potential bacteria, allowing you to indulge without concern.
- PRO-Tip for Flour Safety: To effectively kill bacteria in flour, spread it evenly on a baking sheet and bake it in a preheated 350ºF (175ºC) oven for exactly 5 minutes. This will bring the flour temperature to approximately 160ºF (71ºC), which is sufficient to sterilize it. After baking, allow the flour to cool completely before incorporating it into your dough. This prevents it from melting your butter or other ingredients prematurely.
- Elevating Flavor: The Magic of Brown Butter. For cookie dough truffles that are anything but ordinary, consider making brown butter instead of using regular softened butter. The process of browning butter involves gently cooking it until the milk solids caramelize, developing a rich, nutty aroma and a complex, deeper flavor profile. This simple tweak adds an incredible depth and sophistication that makes these truffles utterly irresistible. While using regular butter will still yield delicious results, taking the extra step to brown it is highly recommended for a truly gourmet experience.
- Choosing Your Chocolate Coating: Wafers vs. Tempering. The beauty of using melting wafers, such as Ghirardelli, lies in their ease of use. These wafers are designed to melt smoothly and harden with a beautiful, glossy finish without the tedious process of tempering. Tempering chocolate is a technique involving precise temperature control to stabilize the chocolate crystals, preventing “bloom” (a whitish, dull coating) and ensuring a crisp snap. While professional chocolatiers might opt for tempering pure chocolate, melting wafers provide a convenient shortcut that guarantees a lovely, smooth coating without any graying or streaking.
- Creative Topping Ideas for Every Palate. While these truffles are incredible unadorned, adding a garnish can enhance their visual appeal and flavor. Consider a delicate drizzle of contrasting chocolate (white on dark, or vice versa), a sprinkle of more mini-chocolate chips, or even a few crushed Heath bar toffee bits for a delightful crunch (though some might eye them suspiciously, they are genuinely fantastic!). Other ideas include sea salt flakes, finely chopped nuts, or festive sprinkles for holidays.

Dipping Like a Pro: Achieving Beautifully Coated Truffles
Dipping truffles can seem intimidating, but with a few clever techniques, you can achieve a finish that looks like it came straight from a high-end confectionery. While matching Godiva’s perfection might be a tall order, these tips will make your dipping process smoother and less stressful.
- Preparing Your Chocolate for Dipping. My preferred method for melting chocolate wafers is in the microwave. Always follow the package instructions, which typically advise melting slowly in short bursts (30-second intervals), stopping to stir frequently, until the wafers are completely smooth and fluid. It’s crucial not to overheat the chocolate, as this can cause it to seize or burn.
- Maintain Optimal Chocolate Temperature. To ensure a consistent, thin coating and ease of dipping, keep your melted chocolate on the warmer side, especially if you’re new to candy making. A double boiler is an excellent tool for this, or if you have a warming tray, it works wonderfully to maintain a steady temperature without scorching. This prevents the chocolate from thickening prematurely.
- The Importance of Chilled Dough Balls. Before you even think about dipping, ensure your cookie dough balls are thoroughly chilled and firm. Cold dough balls hold their shape better when introduced to warm chocolate, preventing them from melting or becoming misshapen during the dipping process. This step is non-negotiable for perfectly round truffles.
- Step-by-Step Dipping Technique.
- Carefully place a chilled cookie dough ball onto a fork (a standard dinner fork works just fine, or a specialized candy fork).
- Gently lower the dough ball into the melted chocolate, submerging it completely.
- Quickly spoon extra chocolate over any areas that may not be fully coated.
- Lift the truffle out of the chocolate, allowing the excess to drip back into the bowl. Lightly tap the handle of the fork against the edge of the bowl or your hand to encourage more excess chocolate to fall off, creating a thinner, smoother coating.
- Tools for a Smooth Finish. If you’re an avid candy dipper, special candy forks with only two thin tines are incredibly useful. However, a fantastic homemade alternative is to break off the middle tines of a plastic fork, leaving two outer tines that mimic the specialized tools. Once you’re satisfied with the coating, use a toothpick or an offset spatula to gently nudge the truffle off the fork onto a parchment paper or wax paper-lined baking sheet. Any small puddles of chocolate at the base can be neatly trimmed away with a sharp knife once the chocolate has fully hardened.
- The Grand Finale: Cooling and Enjoying! Allow your freshly dipped truffles to cool completely at room temperature or in the refrigerator until the chocolate coating is firm and set. Once set, they are ready to be devoured!
Frequently Asked Questions (FAQ) About Cookie Dough Truffles
How Do You Store Chocolate Cookie Dough Truffles?
For optimal freshness and texture, these delicious truffles should be stored in an airtight container. They are perfectly fine at room temperature for about a day or two, especially if your home isn’t overly warm. However, for extended enjoyment and to maintain their firm structure and fresh flavor, keeping them in the refrigerator for up to a week is highly recommended. Ensure the container is truly airtight to prevent them from absorbing refrigerator odors.
Can You Freeze Cookie Dough Truffles?
Absolutely! These delightful cookie dough bites freeze exceptionally well, making them perfect for meal prep or enjoying later. They can be stored in the freezer for up to 3 months. To freeze, arrange them in a single layer on a parchment-lined baking sheet and flash freeze until solid. Then, transfer them to an airtight freezer-safe container or bag. When defrosting in the refrigerator, you might notice some condensation developing on the chocolate coating, which could cause it to appear slightly spotty. Rest assured, this is purely aesthetic and they will still be perfectly safe and delicious to eat.
Why Is It Necessary to Cook the Flour for Edible Cookie Dough?
For a long time, the primary concern with eating raw cookie dough revolved around the risk of salmonella food poisoning from uncooked eggs. However, more recently, food safety experts have highlighted another significant, yet often overlooked, danger: raw flour. Raw flour can harbor harmful bacteria, particularly E. coli, which can cause severe illness. These bacteria are naturally present in the environment where wheat is grown and processed. Therefore, it is absolutely essential to heat your flour to a temperature that effectively kills these potential bacteria if you plan to consume it uncooked. Heating the flour to 160ºF (71ºC) is the recommended temperature to neutralize E. coli. This step is especially critical when serving these delectable truffles to vulnerable populations, such as very young children, the elderly, or anyone with a compromised immune system, ensuring a truly safe and enjoyable treat for all.
The Recipe: Brown Butter Cookie Dough Truffles
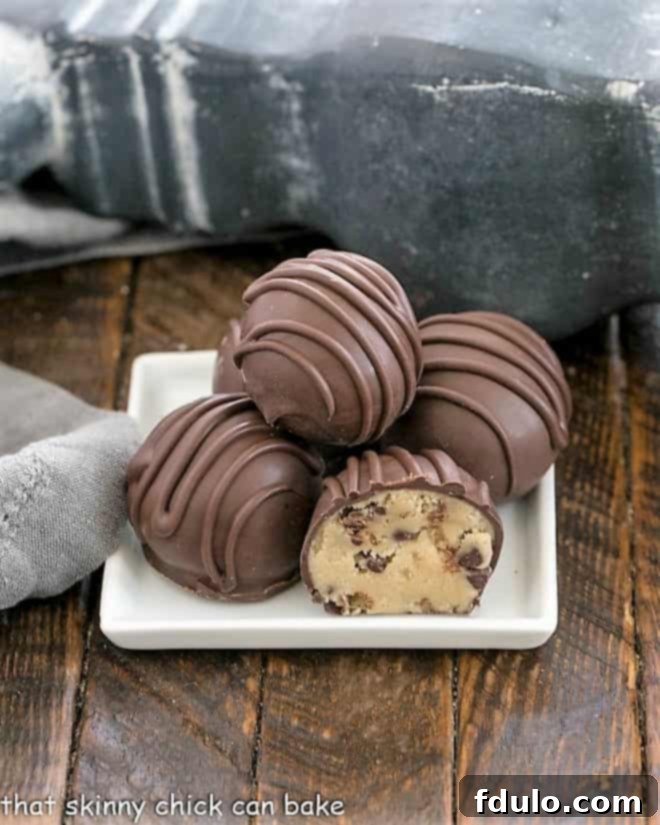
A Sweet Creation:
Brown Butter Cookie Dough Truffles
30 minutes
5 minutes
35 minutes
2 dozen
A truly decadent and irresistible homemade truffle, boasting a rich, egg-free cookie dough filling. Inspired by the classic cookie dough flavors, elevated to gourmet status.
Rating: 5/5 stars (Based on 34 reviews)
Ingredients
- 1 stick (8 tablespoons) unsalted butter, cut into chunks*
- ¾ cup packed light brown sugar
- ¼ cup heavy cream
- ½ teaspoon pure vanilla extract
- ¼ teaspoon fine sea salt
- 1 cup plus 2 tablespoons all-purpose flour*
- ½ – ¾ cup mini semi-sweet chocolate chips (adjust to your preference)
- 12 ounces Ghirardelli Dark Melting Wafers (or white melting wafers for a white chocolate version)
- Crushed Heath bars, colorful sprinkles, or a chocolate drizzle to garnish (optional)
Instructions
- Brown the Butter (Optional but Recommended): In a light-colored saucepan, melt the butter over medium heat. Continue cooking, stirring occasionally, until the butter turns a rich golden-brown color and develops a distinct nutty aroma. Small brown bits will form at the bottom of the pan. Immediately scrape the brown butter, including the browned bits, into a heatproof bowl. Chill the brown butter in the refrigerator until it solidifies back to a firm, butter-like consistency (this can take 30-60 minutes).
- Heat-Treat the Flour: Preheat your oven to 350ºF (175ºC). Spread the flour evenly on a baking sheet. Bake for 5 minutes to eliminate any potential bacteria. Allow the flour to cool completely to room temperature before proceeding with the recipe.
- Prepare the Cookie Dough Base: Once the brown butter (if using) has solidified, remove it from the fridge. In a mixing bowl, combine the brown butter (or regular softened butter if skipping the browning step) with the brown sugar, heavy cream, vanilla extract, and salt. Mix with an electric mixer until well blended and creamy. Gradually stir in the cooled, heat-treated flour until just combined. Fold in the mini chocolate chips until evenly distributed throughout the dough.
- Shape and Chill: Using a tablespoon or a small cookie scoop, scoop out portions of the cookie dough and place them on a parchment-lined baking sheet. Chill these dough portions in the refrigerator for at least 30 minutes, or until firm. Once chilled, roll each portion into smooth, round balls between your palms. Return them to the parchment-lined baking sheet and chill again while you prepare the chocolate coating.
- Melt the Chocolate Wafers: Place the Ghirardelli Melting Wafers in a microwave-safe bowl. Melt according to the package directions, typically in 30-second intervals, stirring thoroughly after each interval, until the chocolate is smooth and completely melted. Alternatively, melt over a double boiler.
- Dip and Garnish: Take a chilled cookie dough ball and place it on a fork. Dip it into the melted chocolate, coating it completely. Gently tap the fork against the side of the bowl to remove any excess chocolate. Immediately transfer the truffle to the parchment-lined baking sheet. If desired, sprinkle with crushed Heath bars, festive sprinkles, or drizzle with a contrasting melted chocolate while the coating is still wet. Repeat with the remaining truffles.
- Set and Store: Allow the chocolate coating to set completely at room temperature or in the refrigerator. Once firm, store the finished truffles in an airtight container in the refrigerator.
Notes
*Butter Substitution: You do not have to use brown butter. Feel free to substitute 8 tablespoons (1 stick) of regular unsalted butter, softened, and skip the browning step. The truffles will still be delicious!
*Flour Preparation: The flour must be placed on a baking sheet and baked in a 350ºF (175ºC) oven for 5 minutes to kill any potential bacteria. It is crucial to cool the flour completely before incorporating it into the dough.
Recommended Products
As an Amazon Associate and member of other affiliate programs, I earn from qualifying purchases.
- 3 Pyrex Mixing Bowls
- OXO Good Grips Medium Cookie Scoop
- Ghirardelli Dark Melting Wafers
Nutrition Information:
Yield: 12 servings
Serving Size: 2 truffles
Amount Per Serving:
Calories: 338
Total Fat: 18g
Saturated Fat: 10g
Trans Fat: 0g
Unsaturated Fat: 6g
Cholesterol: 10mg
Sodium: 78mg
Carbohydrates: 45g
Fiber: 3g
Sugar: 38g
Protein: 3g
HOW MUCH DID YOU LOVE THIS RECIPE?
Please leave a comment on the blog or share a photo on Pinterest!
More Delectable Dessert Recipes You’ll Love:
- Peanut Butter Fudge from Saving Room for Dessert
- Easy Coconut Candy
- Oreo Balls
- Chocolate Frangelico Truffles
- Caramel Filled Chocolate Truffles
- Christmas Fudge
- Explore more of the Best Dessert Recipes
This recipe was first shared in October 2013. Photos and text were comprehensively updated in 2021 to enhance clarity, detail, and SEO.
