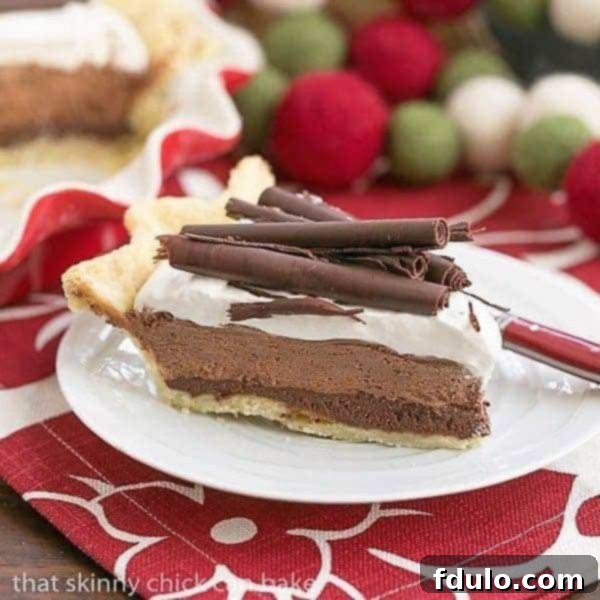
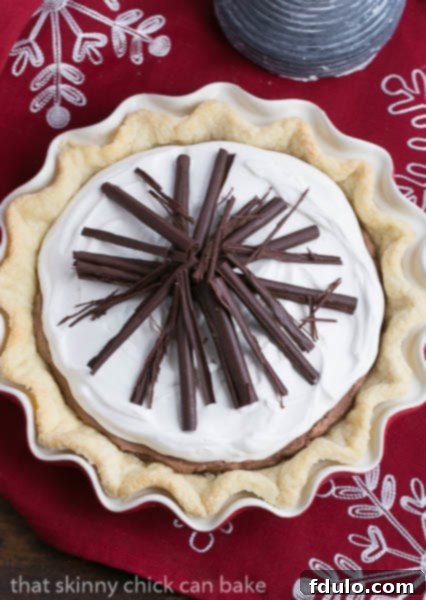
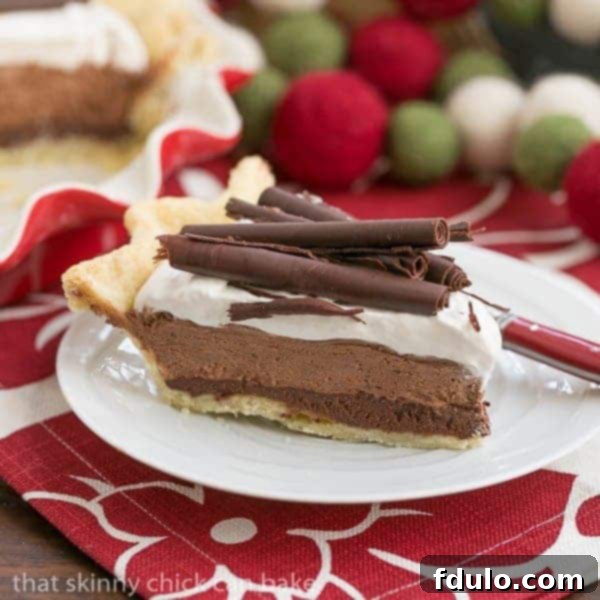
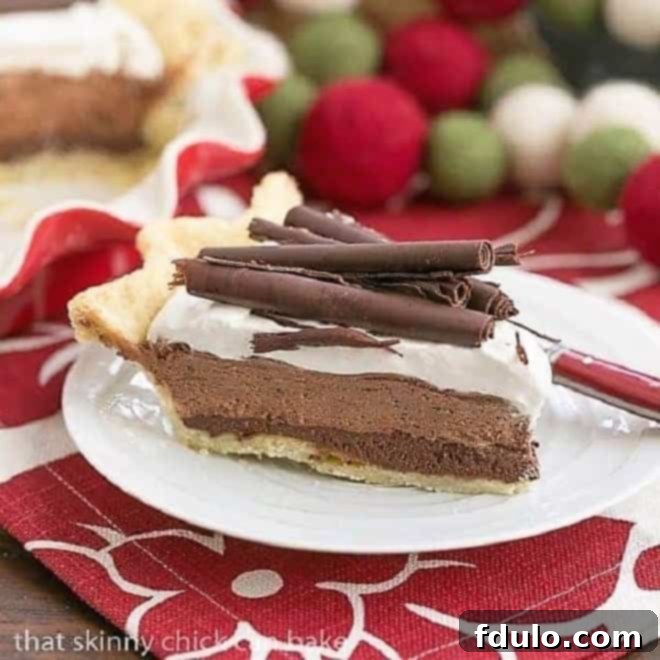
Prepare to be captivated by this dreamy Black Bottom Chocolate Mousse Pie. This show-stopping dessert boasts a perfectly baked pastry crust, rich layers of velvety chocolate ganache, airy chocolate mousse, and a cloud of whipped cream, elegantly finished with delicate homemade chocolate curls. It’s a true masterpiece of texture and flavor, promising an unforgettable experience.
My family unanimously declared this decadent Chocolate Pie Recipe a grand slam, and I couldn’t agree more. It’s not just a pie; it’s a celebration in every forkful, designed to impress and delight even the most discerning chocolate lovers.

Why This Black Bottom Chocolate Mousse Pie is a Must-Make Dessert
A delectable chocolate pie is a cherished tradition in our home, especially during the festive holiday season. While a classic French silk pie often graces our table, this year, I ventured slightly off the beaten path, filling the crisp pie crust with an exquisite chocolate mousse. But my culinary imagination didn’t stop there; I envisioned something even more spectacular.
- Triple Layer Chocolate Bliss: More chocolate is always a good idea, and this pie embodies that philosophy perfectly. By adding a luxurious layer of dark chocolate ganache beneath the light and airy mousse, this extraordinary Black Bottom Chocolate Mousse Pie was born. Every bite delivers not one, but three distinct and equally delicious layers of filling, creating a symphony of textures and intensities.
- A Feast for the Eyes and Palate: The combination of a firm, buttery crust, a dense, rich ganache, a cloud-like mousse, and a billowy whipped cream topping offers an unparalleled textural experience. This pie isn’t just incredibly tasty; it’s also visually stunning, making it an ideal centerpiece for any special occasion or holiday gathering.
- Elevate with Homemade Chocolate Curls: While delicious on its own, topping this pie with homemade chocolate curls transforms it into an unforgettable showstopper. These elegant garnishes add a touch of sophisticated flair and an extra burst of chocolate flavor that will leave a lasting impression on your guests. It’s a simple technique that yields impressive results, making your dessert look professionally crafted.
- Perfect for Special Occasions: Whether it’s a holiday dinner, a birthday celebration, or just a desire to treat yourself, this Decadent Chocolate Pie is always the right choice. It offers that indulgent, comforting yet sophisticated feel that elevates any meal.
Essential Ingredient Notes for Your Chocolate Mousse Pie
Crafting the perfect Black Bottom Chocolate Mousse Pie begins with selecting high-quality ingredients. Each component plays a crucial role in achieving the desired flavor and texture. Here’s a detailed look at what you’ll need and why:
- Kitchen Staples: Ensure you have basic baking necessities like unsalted butter, granulated sugar, powdered sugar, and a small amount of shortening on hand. These foundational ingredients are critical for the crust, ganache, and whipped topping.
- 9-inch Pie Crust, Baked and Cooled: The foundation of our pie! You can opt for a pre-baked, store-bought pie crust for convenience, or elevate your pie further with a homemade, flaky pastry crust. Whichever you choose, ensure it is fully baked and completely cooled before adding the fillings to prevent a soggy bottom.
- Heavy Cream (36% Milkfat): This is non-negotiable for achieving the richest ganache, the most stable mousse, and the fluffiest whipped cream. The higher fat content (36% milkfat) provides a luxurious mouthfeel and superior whipping ability compared to lighter creams.
- Semisweet Chocolate (Chopped): Quality matters significantly here. I highly recommend using a premium brand like Ghirardelli Bars for their consistent quality and excellent flavor. Chopping the chocolate finely ensures it melts smoothly and evenly, which is vital for both the ganache and the mousse.
- Pure Vanilla Extract: Always reach for real vanilla extract. Artificial vanilla flavoring simply cannot replicate the complex, aromatic notes that pure vanilla adds, enhancing the overall depth of chocolate flavor in your pie. Nielsen-Massey is a fantastic brand known for its superior quality.
- Kahlúa (or Coffee Liqueur): A touch of coffee liqueur like Kahlúa isn’t just for flavor; coffee is known to brilliantly accentuate and deepen the taste of chocolate in dessert recipes. If you prefer to avoid alcohol, you can substitute it with a strong, cooled espresso or omit it entirely, though it will subtly alter the flavor profile.
- Egg Whites (Room Temperature, Pasteurized): For maximum volume and stability when whipped, egg whites must be at room temperature. More importantly, when making a mousse that involves raw egg whites, using pasteurized eggs is crucial for food safety. I previously relied on Safest Choice Pasteurized Eggs (ensure no traces of yolk are present). If pasteurized eggs aren’t readily available, refer to the section below on how to pasteurize them at home. Cleanliness of your bowl and whisk is paramount for successful whipping.
- Shortening: This ingredient is specifically for creating those beautiful chocolate curls. Melting a small amount of shortening with your chocolate makes the chocolate more pliable and less prone to snapping when scraped, allowing for easier curl formation.

The Importance of Pasteurized Eggs in Mousse
When preparing any dessert that includes raw or lightly cooked egg whites, such as a chocolate mousse, the topic of pasteurized eggs becomes incredibly important for health and safety. The primary concern is the potential presence of Salmonella bacteria, which can cause severe foodborne illness.
I cannot stress enough the importance of using pasteurized eggs, especially when serving this pie to vulnerable individuals like my 87-year-old mother-in-law, or young children, and anyone with a compromised immune system. Taking this simple precaution significantly minimizes the risk of illness. In the past, brands like Davidson’s Safest Choice Pasteurized Eggs were a convenient option, often found at local markets. However, if commercially pasteurized eggs are difficult to locate, you can pasteurize eggs at home with a bit of care.
The home pasteurization process involves gently heating eggs in their shells. The goal is to maintain a water temperature of 140 degrees Fahrenheit (60 degrees Celsius) for exactly 3 minutes. It is crucial not to let the water temperature exceed 142 degrees Fahrenheit (61 degrees Celsius), as this can begin to cook the egg. This precise temperature range is sufficient to kill Salmonella bacteria without cooking the egg, keeping it liquid and suitable for whipping. For detailed instructions on how to pasteurize eggs at home, reliable culinary resources like Simply Recipes offer excellent step-by-step guides.
For the best results when whipping egg whites, separate them while they are cold, as cold eggs are easier to separate cleanly. Then, allow the egg whites to come to room temperature before whipping. Room temperature egg whites incorporate more air and achieve greater volume and stability. Be prepared to be patient, as pasteurized egg whites can take a little longer to reach firm peaks compared to unpasteurized ones. The key to successful whipping lies in ensuring your mixing bowl and whisk attachments are scrupulously clean and completely free of any grease or yolk traces. Even a minuscule amount of fat can prevent egg whites from whipping properly, as grease is the ultimate enemy of stiff, airy peaks.

Crafting Elegant Homemade Chocolate Curls
While a simple dusting of cocoa powder or a sprinkling of chocolate shavings makes a lovely garnish for this chocolate mousse pie, if you’re aiming for a truly show-stopping dessert, especially for the holidays, homemade chocolate curls are the way to go. I discovered an excellent technique on The Pioneer Woman’s blog, and while achieving perfectly uniform curls every single time can be a challenge, I find that a mix of full curls and partial shavings creates an equally exquisite and rustic presentation. The slight imperfections often add to the charm and homemade appeal.
The process is surprisingly straightforward and incredibly rewarding:
- Begin by gently melting 3 ounces of good quality semi-sweet chocolate with one tablespoon of shortening. The shortening is key here; it adds a touch of fat that makes the chocolate more pliable and less prone to breaking when scraped, resulting in smoother, more elegant curls.
- Once melted and smooth, spread this chocolate mixture very thinly and evenly across the back of a smooth, clean baking sheet. Aim for a consistent, thin layer for the best results.
- Carefully place the baking sheet in the freezer for approximately 3 minutes. The timing is crucial: you want the chocolate to firm up enough to be scraped, but not so hard that it shatters.
- After chilling, remove the sheet from the freezer. Using a bench scraper or a metal spatula held at a slight angle, push firmly and steadily across the chocolate surface. As you push, the chocolate will curl up, forming beautiful ribbons.
- Troubleshooting Tip: If the chocolate is too soft and simply smears, pop the baking sheet back into the freezer for another minute or two. If it’s too hard and breaks into small shards, let it warm up at room temperature for about a minute before trying again. Finding that perfect temperature takes a little practice but is well worth the effort.
For visual learners, Ree Drummond’s original post provides excellent step-by-step photos that can guide you through the process. I’ve also shared my experiences with this method in my post for Fluffy Chocolate Dessert. Regardless of whether you opt for these stunning chocolate curls, a sprinkle of shavings, or just a simple dusting of cocoa, this Black Bottom Chocolate Mousse Pie is a dessert guaranteed to dazzle anyone lucky enough to receive a slice!
More Decadent Chocolate Desserts You’ll Adore
If you’re a true chocolate enthusiast, your journey doesn’t have to end with this incredible pie. Explore these other fantastic chocolate creations that are sure to satisfy your cravings:
- Peanut Butter Chocolate Mousse Cake
- Triple Chocolate Mousse Pie
- Irish Chocolate Mousse Cake
- Flourless Chocolate Cake with Marshmallow Frosting
- Double Chocolate Cheesecake
- Easy Chocolate Mousse Bars
- Death by Chocolate Cake
- Discover more Chocolate Desserts on the blog!
Stay connected and share your culinary creations! Follow me on Instagram, Facebook, and Pinterest. Don’t forget to tag me when you try one of my recipes! If you love the results, please consider leaving a 5-star rating and a comment below.
Tips for Achieving the Perfect Black Bottom Chocolate Mousse Pie
Creating this layered masterpiece is straightforward, but a few expert tips can ensure your pie turns out perfectly every time:
- Cool the Crust Completely: Before adding any fillings, make sure your baked pie crust is completely cool. A warm crust can cause the ganache to melt or the mousse to set improperly, leading to a soggy bottom or uneven layers.
- Quality Chocolate Makes a Difference: Invest in good quality semi-sweet chocolate. Better chocolate melts more smoothly and provides a richer, more profound flavor, which is essential as chocolate is the star of this dessert.
- Don’t Overmix the Mousse: When folding the whipped cream and egg whites into the melted chocolate, be gentle and avoid overmixing. The goal is to retain as much air as possible in the mousse, giving it its signature light and airy texture. Overmixing can deflate the mousse, making it dense.
- Chill Time is Crucial: Allow ample time for each layer, especially the ganache and the finished pie, to chill and set properly in the refrigerator. Rushing this step will result in a messy, unset pie. A minimum of 2 hours for the final pie is recommended, but overnight chilling is even better for optimal firmness and flavor development.
- Clean Tools for Egg Whites: As mentioned, ensure your mixing bowl and whisk for the egg whites are impeccably clean and free of any fat or residue. Even a tiny trace can prevent the egg whites from whipping to stiff peaks.
- Serving Temperature: This pie is best served chilled. Remove it from the refrigerator about 15-20 minutes before serving to allow the flavors to soften slightly, but not so long that the mousse becomes too soft.
Storage Instructions for Your Decadent Pie
To enjoy your Black Bottom Chocolate Mousse Pie for days to come, proper storage is key:
- Refrigeration: The pie must be stored in the refrigerator due to its dairy and egg components. Cover it loosely with plastic wrap or aluminum foil to prevent it from absorbing odors from other foods and to keep the crust from becoming soggy.
- Shelf Life: When stored correctly in the refrigerator, the pie will remain fresh and delicious for 3-4 days. The texture of the mousse might soften slightly over time, but the flavors will still be excellent.
- Freezing: While possible, freezing may slightly alter the texture of the mousse and whipped cream, making them a bit icier or watery upon thawing. If you choose to freeze, wrap the pie tightly in plastic wrap and then in aluminum foil. It can be frozen for up to one month. Thaw overnight in the refrigerator before serving. For best results, it’s recommended to add the whipped cream topping and chocolate curls after thawing if you plan to freeze the pie.
Delicious Variations and Customizations
While the classic Black Bottom Chocolate Mousse Pie is perfect as is, feel free to get creative with these delightful variations:
- Liqueur Alternatives: Instead of Kahlúa, consider other spirits that pair well with chocolate, such as Grand Marnier (orange liqueur for a chocolate-orange twist), dark rum, or even a hint of peppermint schnapps for a festive holiday version.
- Crust Options: Experiment with different crusts. A crushed Oreo cookie crust or a graham cracker crust would both complement the chocolate layers beautifully and offer a different texture profile.
- Topping Enhancements: Beyond chocolate curls, consider fresh raspberries or sliced strawberries for a bright, fruity contrast. A sprinkle of sea salt flakes can enhance the chocolate’s richness, or a dusting of high-quality cocoa powder for a sophisticated finish.
- Nutty Crunch: Add a thin layer of finely chopped toasted nuts (like pecans or hazelnuts) between the ganache and mousse for an added layer of texture and flavor.
- White Chocolate Swirl: For an even more dramatic appearance, drizzle a thin layer of melted white chocolate over the ganache before adding the mousse, then swirl gently for a beautiful marble effect.

The Recipe:
Black Bottom Chocolate Mousse Pie
1 hour
1 hour
8 servings
A decadent chocolate pie worthy of any celebration!
Ingredients
- 1 9-inch pie crust, baked and cooled
For Ganache:
- ½ cup heavy cream
- 1 tablespoon unsalted butter
- 4 ounces semisweet chocolate, finely chopped
- ½ teaspoon pure vanilla extract
For Mousse:
- 5 ounces semisweet chocolate, finely chopped
- 1 cup heavy cream, divided
- 1 tablespoon Kahlua (or other coffee liqueur; see notes for substitutes)
- 3 large egg whites, at room temperature (pasteurized recommended for safety)
- 3 tablespoons granulated sugar
For Topping:
- 1 cup heavy cream, chilled
- ¼ cup powdered sugar
- 1 teaspoon pure vanilla extract
For Chocolate Curls (Optional Garnish):
- 3 ounces semisweet chocolate, chopped
- 1 tablespoon vegetable shortening
Instructions
- Prepare Ganache: In a medium-sized, heat-safe bowl, combine ½ cup heavy cream and butter. Heat in the microwave until hot but not boiling (about 30-60 seconds).
- Melt Chocolate for Ganache: Add the 4 ounces of chopped semisweet chocolate to the hot cream mixture. Let it rest for 2-3 minutes to melt, then stir until completely smooth and combined. Stir in ½ teaspoon vanilla extract.
- Assemble Ganache Layer: Pour the ganache into the prepared and cooled 9-inch pie crust, spreading evenly. Place the pie crust in the refrigerator while you prepare the mousse.
- Prepare Chocolate for Mousse: In a large, heat-safe bowl, combine 5 ounces of chopped semisweet chocolate with ¼ cup of the heavy cream. Gently heat in the microwave until the chocolate is very soft (about 1 minute), stirring occasionally. Stir with a rubber spatula until smooth. Mix in the Kahlua (if using) and set aside to cool slightly.
- Whip Egg Whites: Place egg whites into the bowl of a stand mixer fitted with the whisk attachment. Beat on high speed until stiff peaks form. If using pasteurized eggs, this may take longer than 5 minutes, so be patient. Ensure your bowl and whisk are impeccably clean and free of any yolk or grease.
- Whip Remaining Cream: In a separate clean bowl, add the remaining ¾ cup heavy cream and 3 tablespoons sugar. Whip until stiff peaks form.
- Fold Mousse: With a rubber spatula, gently fold half of the whipped cream into the cooled chocolate mixture until just combined. Then, carefully fold in the remaining whipped cream. Finally, gently fold in the whipped egg whites until just incorporated. Do not overmix, as this will deflate the mousse.
- Chill Pie: Spoon the airy mousse mixture over the chilled ganache layer in the pie crust. Smooth the top gently. Refrigerate the pie for at least 2 hours, or preferably longer, until firmly set.
- Prepare Topping & Serve: Before serving, prepare the topping by whipping 1 cup of chilled heavy cream with ¼ cup powdered sugar and 1 teaspoon vanilla extract to stiff peaks. Pile the whipped cream generously on top of the mousse layer. If desired, garnish with homemade chocolate curls (refer to the “How to Make Chocolate Curls” section for detailed instructions), chocolate shavings, or a light dusting of cocoa powder. Slice and serve chilled.
Notes
If serving this pie to very young children, the elderly, or individuals with compromised immune systems, it is highly recommended to use pasteurized eggs to eliminate the risk of salmonella. Alternatively, you can find instructions on how to pasteurize eggs at home on reputable cooking sites like Simply Recipes.
For a non-alcoholic version, replace Kahlua with an equal amount of strong, cooled espresso or omit it entirely. The espresso will enhance the chocolate flavor without adding alcohol.
Recommended Products
As an Amazon Associate and member of other affiliate programs, I earn from qualifying purchases.
- Egg separator
- Small Offset Spatula
- 9-inch Ceramic Deep Dish Pie Plate
Nutrition Information:
Yield: 8 servings
Serving Size: 1 slice
Amount Per Serving:
Calories: 639
Total Fat: 49g
Saturated Fat: 28g
Trans Fat: 1g
Unsaturated Fat: 18g
Cholesterol: 112mg
Sodium: 156mg
Carbohydrates: 49g
Fiber: 3g
Sugar: 35g
Protein: 7g
HOW MUCH DID YOU LOVE THIS RECIPE?
Please leave a comment on the blog or share a photo on Pinterest.
