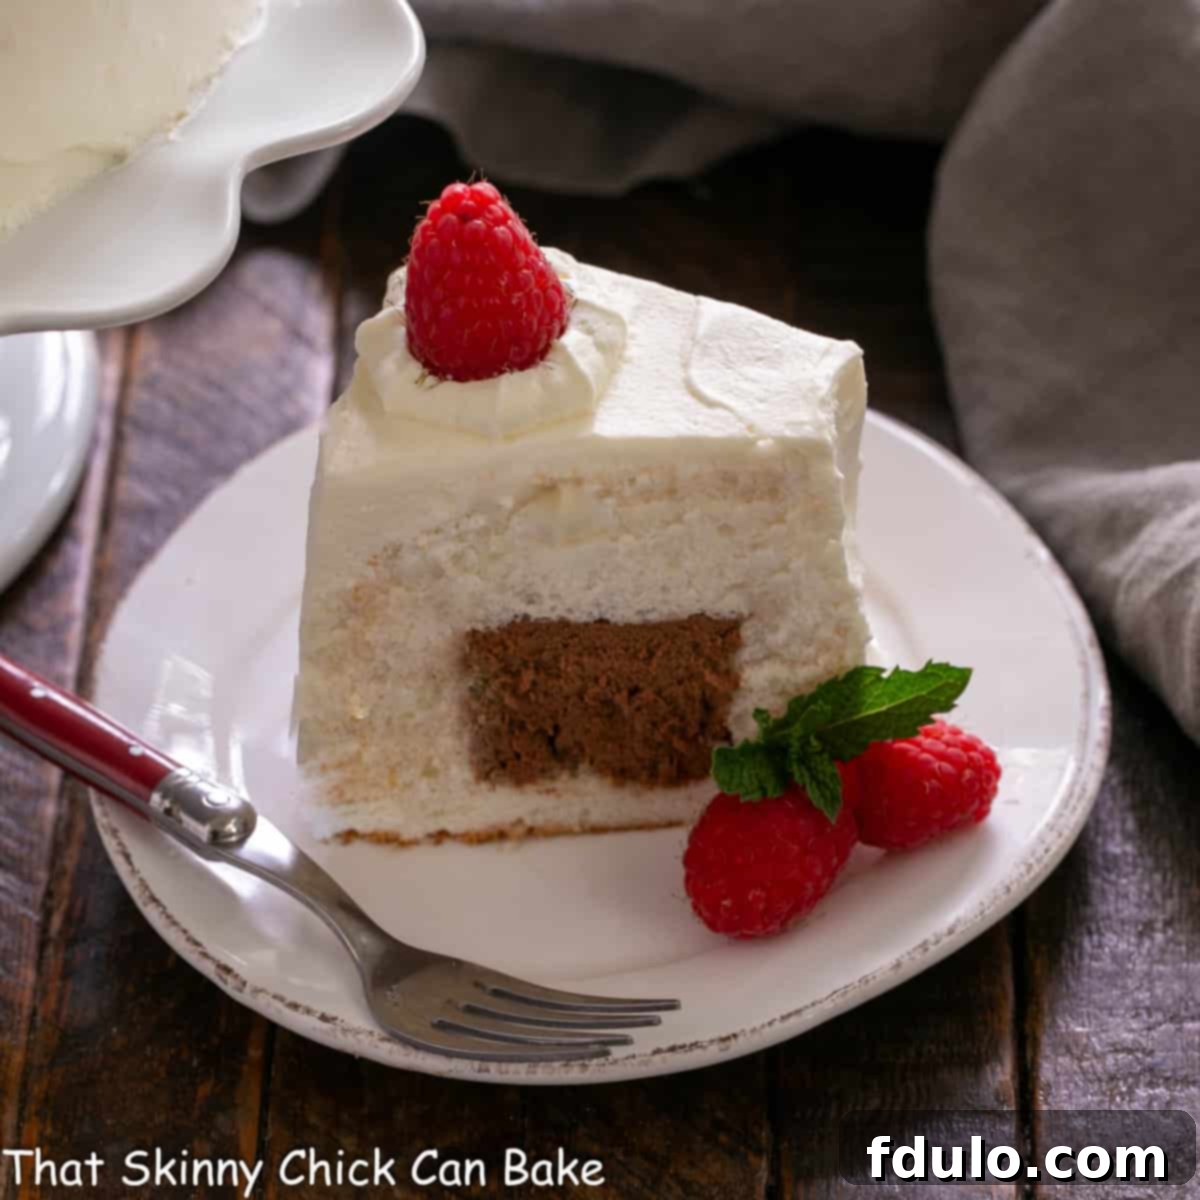
Prepare to be utterly delighted by this sensational Chocolate Mousse Filled Angel Food Cake! What begins as an elegant, classic Angel Food Cake transforms into an extraordinary dessert experience with a surprise creamy, luscious chocolate mousse core. Each slice reveals a hidden treasure, elevating this beloved light and airy cake to an unforgettable culinary masterpiece. It’s the perfect balance of delicate texture and rich, indulgent flavor, guaranteed to impress at any gathering.
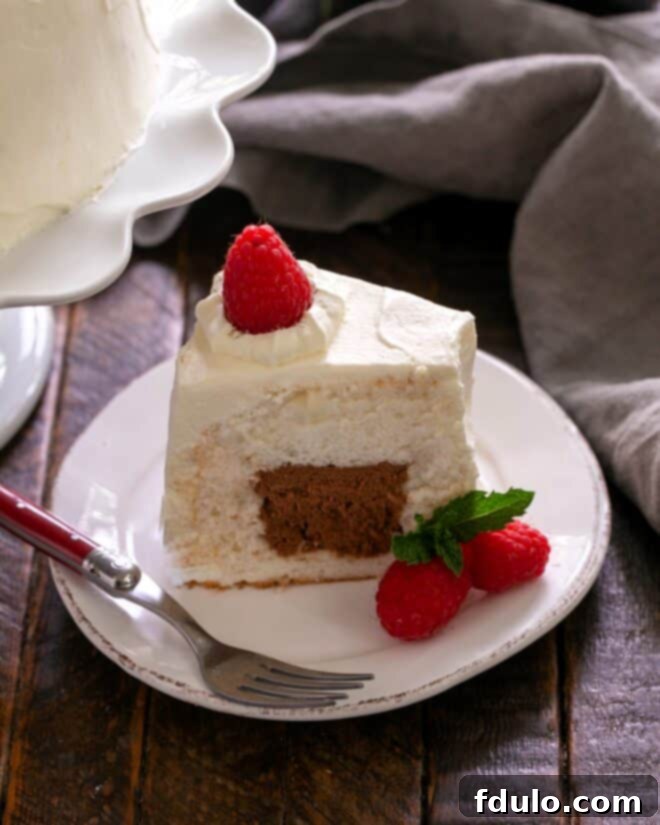
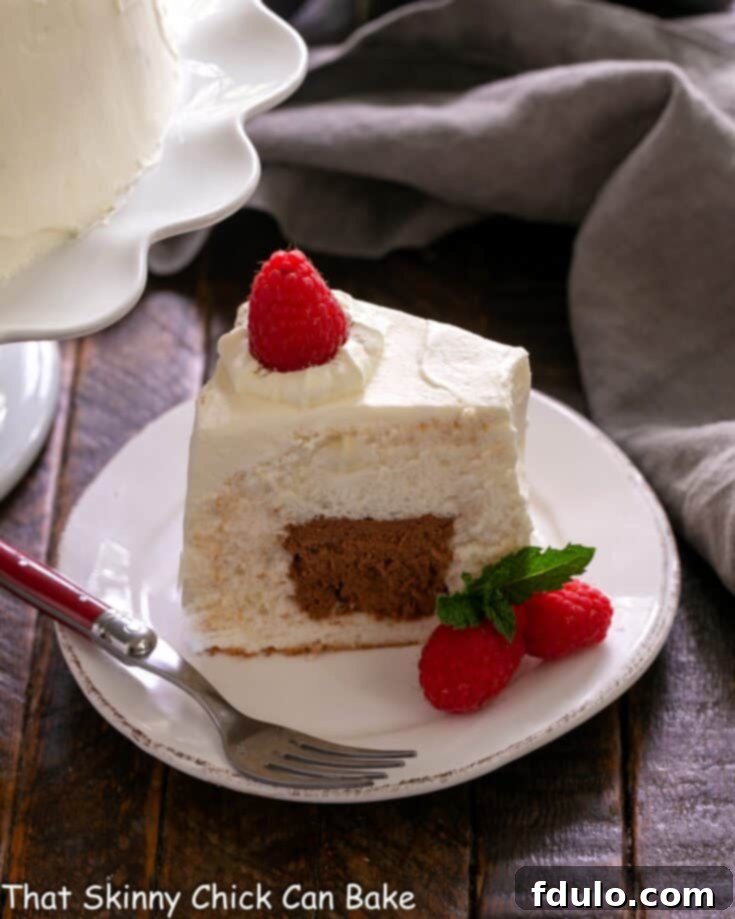
From the outside, this creation presents itself as a beautifully crafted, traditional Angel Food Cake, with its pristine white exterior promising a cloud-like texture. However, the true magic lies within: a velvety, egg-free chocolate mousse filling that steals the spotlight the moment you cut into it. This innovative twist turns a simple dessert into a showstopper, offering a delightful contrast between the delicate cake and the decadent, smooth chocolate center.
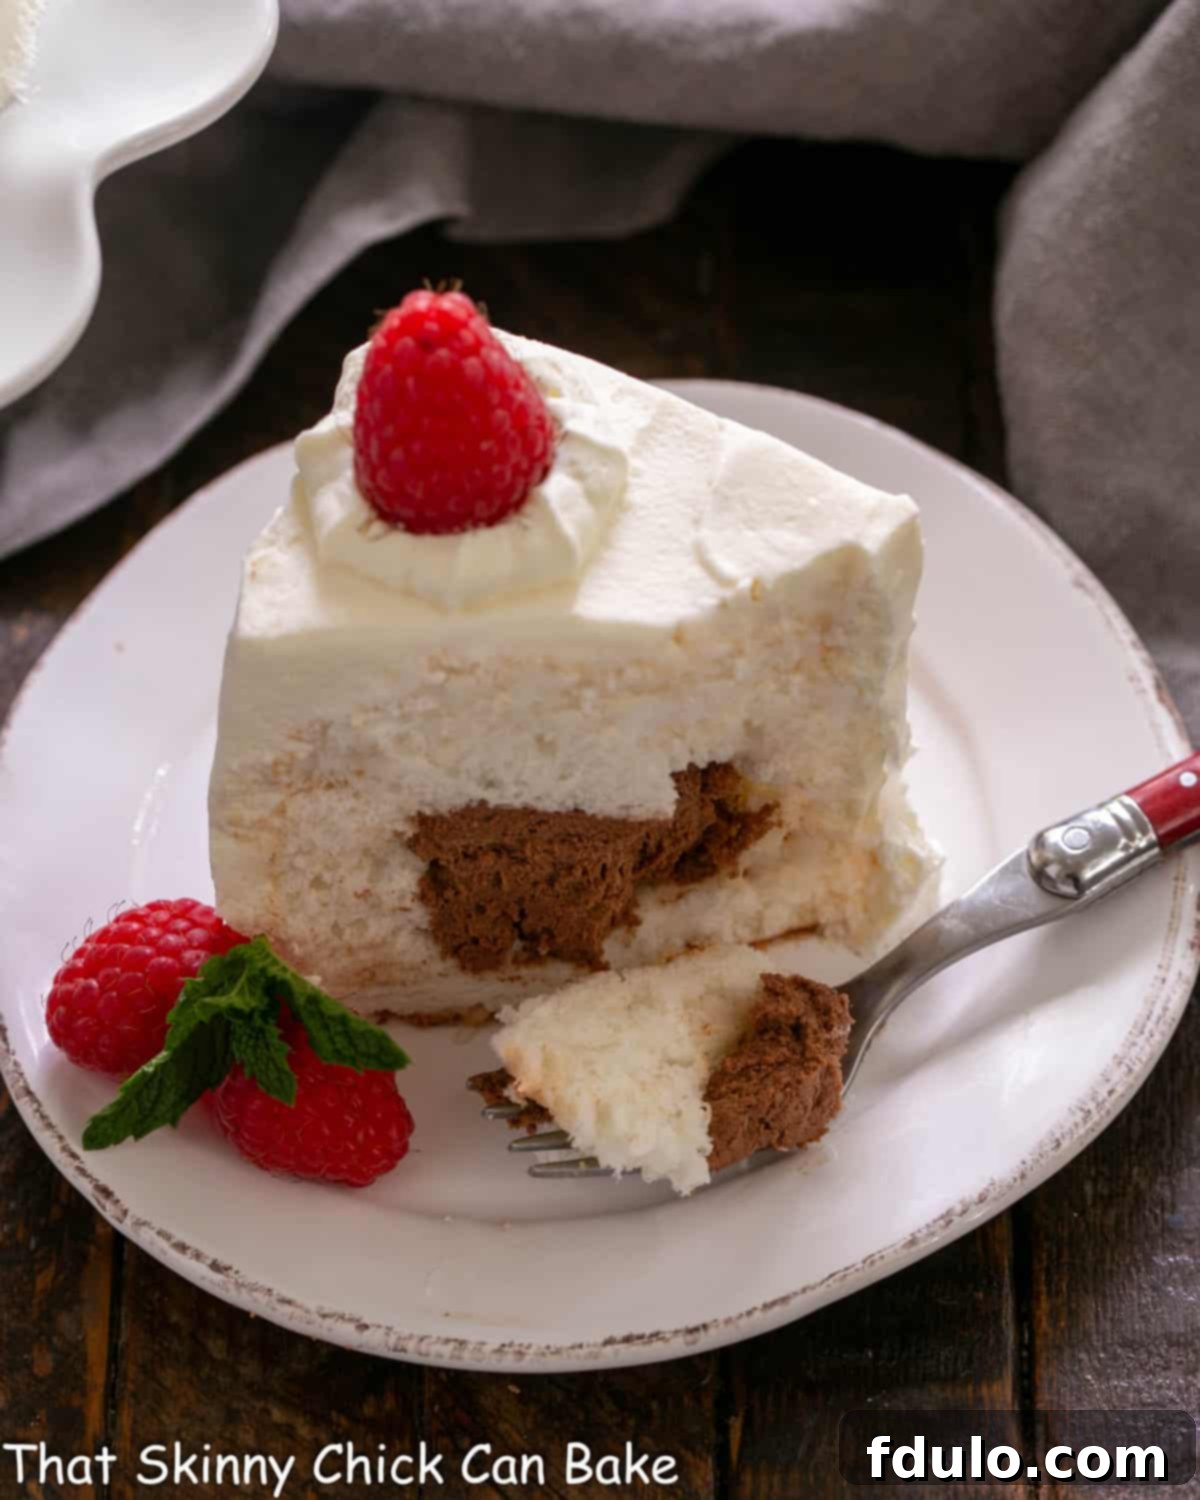
Mousse Filled Angel Food Cake: A Decadent Surprise
Welcome to the ultimate guide for creating a dessert that’s as beautiful as it is delicious: the Chocolate Mousse Filled Angel Food Cake. This recipe takes the classic, light, and airy Angel Food Cake and elevates it to new heights with a decadent, creamy chocolate mousse filling. Perfect for special occasions, holidays, or simply to treat yourself, this cake offers a delightful surprise with every slice.
Why This Chocolate Mousse Filled Angel Food Cake Is a Must-Try
This recipe holds a special place in my heart, a recreation of a beloved family favorite from years past. I first crafted this delightful dessert for my blog back in 2011, though it was a simpler version with just a few photos. Now, after rediscovering its immense appeal, I’m thrilled to share an updated, more detailed, and utterly irresistible rendition. If you’re wondering why this particular Angel Food Cake deserves a spot on your baking list, here’s why:
- A Delightful Twist for Angel Food Lovers: If your family adores the delicate, airy texture of traditional Angel Food Cake, this enhanced version will undoubtedly be a massive hit. The addition of a rich, creamy chocolate mousse introduces a layer of indulgence that complements the cake’s lightness perfectly, offering a familiar comfort with an exciting new dimension.
- Converts Even the Most Ardent Chocoholics: Typically, a plain Angel Food Cake might not excite a true chocoholic. However, this mousse-filled rendition is designed to win them over. The luscious, egg-free chocolate mousse center provides the deep, satisfying chocolate flavor that enthusiasts crave, making this a chocolate lover’s dream dessert disguised in an elegant package.
- Indulgence Without the Heaviness: Despite featuring both a whipped cream frosting and a rich chocolate mousse, this dessert remains surprisingly light compared to many other cake recipes. The inherent airiness of the Angel Food Cake itself balances the richness of the fillings, making it a perfect choice for those who desire an indulgent treat without feeling overly full. It’s a sophisticated dessert that feels luxurious yet refreshing.
- A Show-Stopping Presentation: The dramatic reveal of the chocolate mousse when the cake is sliced is a moment of pure culinary theatre. It’s a beautiful surprise that adds an element of excitement to your dessert table, making it ideal for entertaining and sure to garner compliments.
- Versatile for Any Occasion: Whether it’s a birthday celebration, a holiday feast, or simply a weekend gathering, this cake fits perfectly. Its elegant appearance and delightful flavors make it suitable for formal events, while its approachable deliciousness ensures it’s loved at casual get-togethers.
Essential Ingredient Notes for Perfection
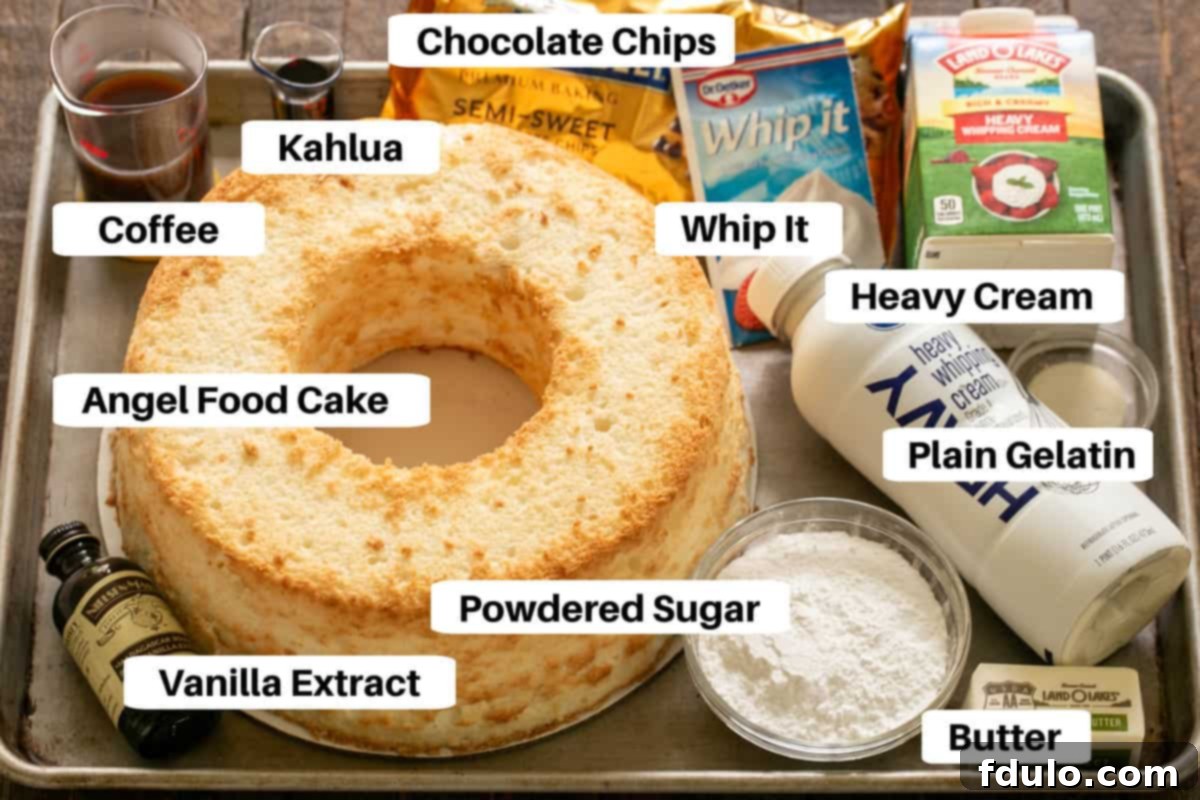
Crafting this magnificent cake requires careful attention to ingredients. Here’s a detailed look at what you’ll need and why each component is crucial for achieving the perfect Mousse Filled Angel Food Cake.
- Angel Food Cake: You’ll need a large cake for this recipe. A standard 10-inch Angel Food Cake, typically serving 10-12 people, is ideal. Using a smaller cake might leave you with an abundance of delicious mousse – which, while never a terrible predicament, means it won’t all fit inside the cake! You can opt for a high-quality store-bought cake (a bakery often offers larger versions) or bake one from scratch. If you choose the latter, be prepared with about 12 egg whites, as they are the foundation of this airy cake.
- Heavy Cream: This is a superstar ingredient, essential for both the rich chocolate mousse and the fluffy whipped cream frosting. Look for heavy cream with a minimum of 36% butterfat content. Higher fat content ensures a stable, luxurious whip that holds its shape beautifully and provides a rich mouthfeel.
- Semi-Sweet Chocolate: Whether you prefer semi-sweet chocolate chips or a finely chopped semi-sweet chocolate bar, both will work wonderfully for the mousse. The quality of your chocolate directly impacts the richness and depth of flavor in the mousse, so choose a brand you enjoy.
- Strong Coffee: Don’t skip this! A small amount of strong coffee or espresso is a secret weapon in chocolate desserts. It doesn’t make the mousse taste like coffee; instead, it deepens and accentuates the chocolate flavor, making it even more intense and complex.
- Kahlua (Coffee Liqueur): Similar to strong coffee, a touch of Kahlua or another coffee liqueur further enhances the chocolate’s complexity. It adds a subtle warmth and a hint of sophisticated flavor without overpowering the other ingredients. If you prefer to avoid alcohol, you can substitute it with an equal amount of strong coffee.
- Butter: I typically use salted butter for most of my baking, but unsalted butter is perfectly fine here. If you opt for unsalted, consider adding a tiny pinch of fine salt when you melt the butter with the chocolate. Salt acts as a flavor enhancer, balancing the sweetness and intensifying the chocolate notes.
- Plain Gelatin: This is the key to achieving the perfect, stable consistency for your chocolate mousse. Look for unflavored gelatin, such as the Knox brand, usually found in the baking aisle near flavored Jell-O. It helps the mousse set without being rubbery, ensuring that beautiful, creamy texture.
- Powdered Sugar: Used to sweeten and stabilize the whipped cream frosting. Always sift your powdered sugar to prevent any lumps from forming, ensuring a silky-smooth finish. The cornstarch naturally present in powdered sugar also aids in stabilizing the whipped cream, helping it hold its volume longer.
- Whip-It (Whipped Cream Stabilizer): This is an optional but highly recommended ingredient, especially if you plan to prepare the cake in advance or if it will sit out for a while. Dr. Oetker’s Whip-It is a popular brand, often found in the baking aisle. It significantly helps prevent the whipped cream from deflating or weeping, keeping your frosting looking fresh and fluffy for longer.
- Vanilla Extract: Always reach for pure vanilla extract. Its warm, aromatic notes complement both the chocolate and the cream beautifully. Artificial vanilla flavor is substandard and can detract from the overall quality of your dessert.
Step-by-Step Guide: Crafting Your Mousse Filled Angel Food Cake
Creating this impressive dessert is a surprisingly straightforward process. Follow these detailed steps to assemble your stunning Chocolate Mousse Filled Angel Food Cake.
Frequently Asked Questions About Angel Food Cake
Here are some common questions and expert answers to help you master your Angel Food Cake creation and ensure perfect results every time.
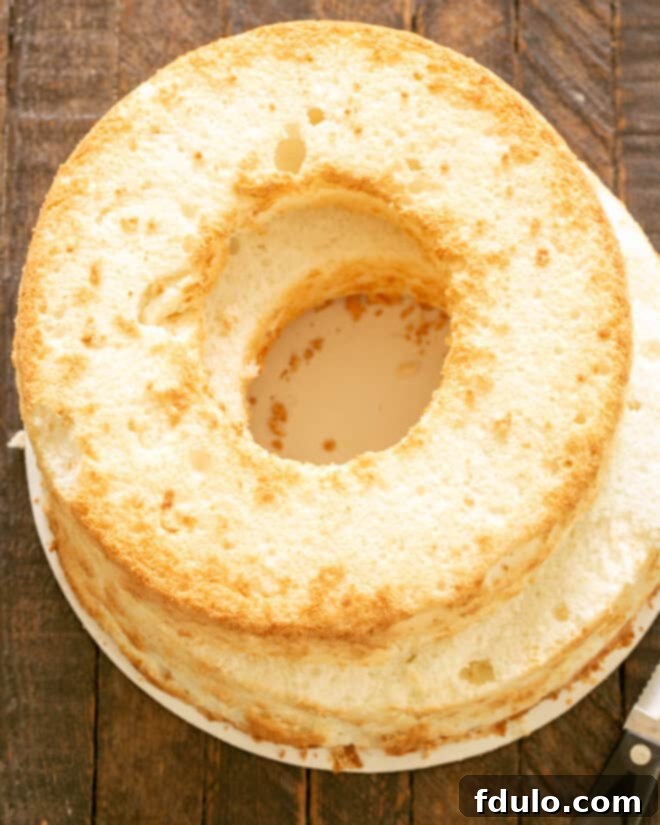
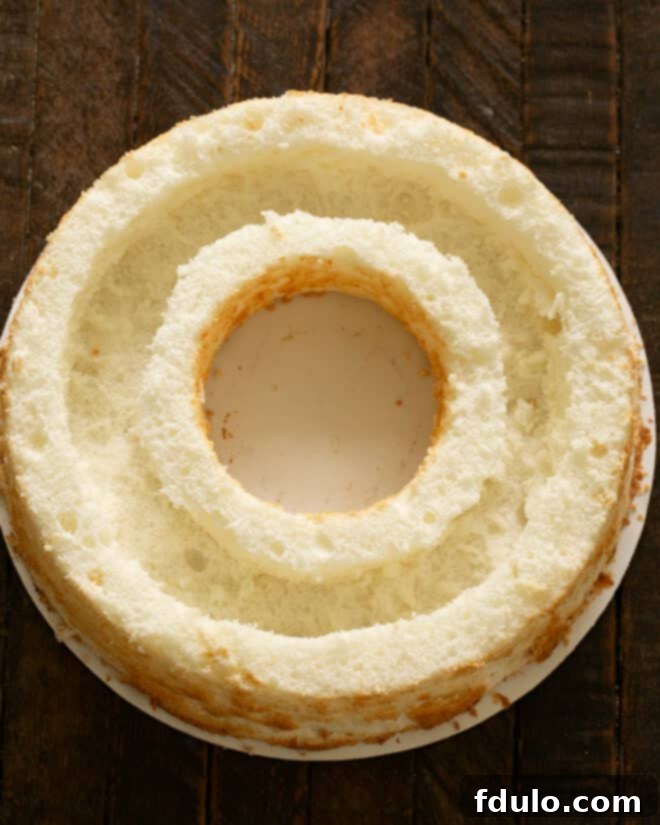
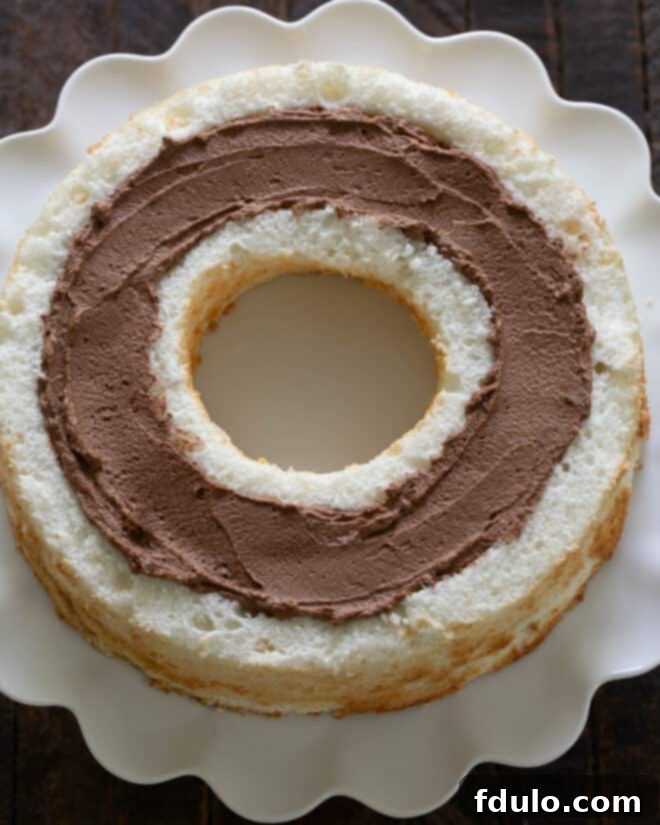
Filling an Angel Food Cake is a simple process that creates a wonderful surprise center. First, ensure your cake is completely cooled. Using a serrated knife, carefully slice a 1-inch thick layer off the very top of the cake, creating a lid. Set this cake lid aside. Next, use a smaller serrated knife or a spoon to gently scoop out the inner part of the cake, leaving a sturdy wall of cake around the perimeter and a solid bottom. Be careful not to break through the bottom or sides, as this will prevent your filling from escaping. Once your trench is formed, generously fill it with your desired mousse or other filling. Finally, carefully replace the reserved cake top, pressing gently to secure it. You can then frost the entire cake as usual.
Slicing an Angel Food Cake requires a specific technique to prevent it from squashing and tearing. The best tool for the job is a long, serrated knife. Instead of pressing straight down, use a gentle sawing motion back and forth as you work your way through the cake. The serrations will delicately cut through the airy, spongy texture without compressing it. A straight-edged knife, on the other hand, will likely flatten and tear the delicate crumb, resulting in a messy slice. For even cleaner slices, you can also try using an electric knife or even unflavored dental floss for a truly smooth cut.
The storage method for Angel Food Cake depends on whether it’s plain or filled/frosted.
A **plain angel food cake** can be loosely covered with plastic wrap and stored at room temperature for 2-3 days. If you need to keep it longer, it can be refrigerated for an additional 4 days. For extended storage, plain Angel Food Cake freezes exceptionally well. Wrap it tightly first in plastic wrap, then in a layer of aluminum foil, and it will stay fresh in the freezer for up to 3 months. Thaw at room temperature.
If your cake has **whipped cream frosting or a mousse filling**, it must be refrigerated due to the dairy content. For the best taste and texture, it’s ideal to consume it on the day it’s filled or frosted. However, it will remain safe and delicious for about 3 days in the refrigerator. To prevent plastic wrap from sticking to delicate frosting, insert a few toothpicks into the top of the cake before gently draping the plastic wrap over it; the toothpicks will create a barrier, keeping the wrap slightly above the frosting.
Expert Tips for a Flawless Angel Food Cake
Creating a perfect Angel Food Cake from scratch can seem daunting, but with these expert tips, you’ll achieve that coveted light and airy texture every time. These insights will help you avoid common pitfalls and ensure your cake is nothing short of magnificent, whether for filling or enjoying plain.
- PRO-Tip: Scrupulously Clean Equipment is Key! This is perhaps the most critical rule for Angel Food Cake. Any trace of oil, grease, or even a tiny speck of egg yolk on your mixing bowl or beaters will prevent the egg whites from whipping up properly. They simply won’t achieve the necessary volume and stiffness. Considering a typical homemade Angel Food Cake requires 12 egg whites, you absolutely want to get it right the first time! Wash your bowl and beaters thoroughly with hot, soapy water, then rinse well and dry completely before starting.
- Choose the Right Pan and Do Not Grease: Always use a two-piece Angel Food Cake pan, usually an aluminum tube pan with a removable bottom. Crucially, do not grease the pan. The cake batter needs to cling to the sides of the pan to climb and achieve its towering height and characteristic airy structure. Greasing it will cause the cake to deflate.
- PRO-Tip: Temperature Matters for Egg Separation and Whipping! Eggs separate best when they are cold, as the yolk is firmer and less likely to break. However, egg whites whip to their maximum volume much more easily when they are at a slightly warmer temperature, around 60°F (15-18°C), rather than straight out of the refrigerator.
- Master the 3-Bowl Egg Separation Technique: To ensure no yolk contaminates your precious egg whites, use three bowls. Separate each egg individually over a small ‘catch’ bowl, transferring the white to a larger ‘collection’ bowl only after confirming it’s yolk-free. The third bowl is for the yolks. This way, if one yolk breaks, it only contaminates one white, not your entire batch.
- PRO-Tip: Achieve Optimal Egg White Temperature: After separating, let your egg whites sit at room temperature for 30-60 minutes, aiming for a temperature around 60°F (15-18°C). This warmth allows the proteins in the whites to relax, making them more elastic and capable of trapping more air for maximum volume.
- Whip Egg Whites Gradually: Start whipping the egg whites on low speed until they become foamy. This gentle start creates small, even bubbles. Then, gradually increase the speed to medium while slowly adding your sugar. This slow addition of sugar helps stabilize the foam.
- Avoid Overbeating the Whites: Be careful not to overbeat your egg whites. They should be fluffy and hold soft to medium-firm peaks, but not look dry or crumbly. Overbeaten whites become brittle and won’t fold into the flour as smoothly, leading to a tougher cake.
- Use Cake Flour for Superior Texture: For the best Angel Food Cake, always use cake flour. It has a lower protein content than all-purpose flour, which means less gluten development. This results in a much more tender, delicate, and fine-crumbed cake, truly characteristic of Angel Food Cake.
- Add Sugar Slowly to the Whites: When adding sugar to the whipping egg whites, do so very slowly, a tablespoon at a time. This allows the sugar crystals to dissolve properly and integrate into the egg white structure, resulting in a more stable and glossy meringue.
- Achieve the Correct Batter Consistency: Once the flour is gently folded into the egg white mixture, the batter should be fluid and pourable, yet thick enough to feel substantial, like a soft, droopy cloud. It shouldn’t be stiff. With the help of a spatula, it should flow smoothly into the pan.
- Do Not Open the Oven Door During Baking: Resist the urge to peek! Opening the oven door, especially in the first 20-25 minutes of baking, can cause a sudden drop in temperature. This thermal shock can cause the delicate structure of the Angel Food Cake to collapse, leading to a dense, fallen cake. Maintain a consistent oven temperature.
- Test for Doneness by Tapping: Angel Food Cake is unique in its doneness test. Instead of a toothpick (which isn’t reliable here), gently tap the top of the cake with your fingertip. If the indentation springs back immediately, the cake is done. If the indentation remains, continue baking for a few more minutes and recheck.
- PRO-Tip: The Toothpick Test is Unreliable: Unlike most cakes, a toothpick inserted into an Angel Food Cake will not come out clean even when it’s fully baked, due to its moist, airy nature. Rely on the tapping test for accurate results.
- Cool Upside Down for Volume: This is crucial for maintaining the cake’s height and airy texture. Immediately after baking, invert the pan. Most Angel Food Cake pans have small “feet” to elevate them. If yours doesn’t, invert the pan over the neck of a glass soda or wine bottle. Cool completely for 2-3 hours before attempting to remove the cake from the pan. This prevents the delicate cake from collapsing under its own weight as it cools.
More Delicious Cake Recipes You’ll Love:
- Homemade Angel Food Cake (The perfect base recipe if you plan to bake your own!)
- Angel Cake Sandwiches
- Strawberry Angel Food Dessert
- Discover more of the Best Dessert Recipes
- Explore a variety of Best Cake Recipes
Stay connected for more delicious recipes and baking inspiration! Follow me on social media Instagram, Facebook, and Pinterest. Don’t forget to tag me when you whip up one of my creations! If you adore the results, please consider leaving a 5-star rating in the recipe card below.
Mousse Filled Angel Food Cake
30 minutes
1 hour
1 hour 30 minutes
12 Servings
A beautifully airy Angel Food Cake concealing a rich, creamy chocolate mousse center, crowned with a delicate whipped cream frosting. This elegant dessert offers a delightful surprise with every forkful.
Ingredients
- One Homemade Angel Food Cake or large bakery angel food cake (refer to the link in the post for my recommended homemade cake recipe)
For the Chocolate Mousse Filling:
- 1 ¾ cups heavy whipping cream
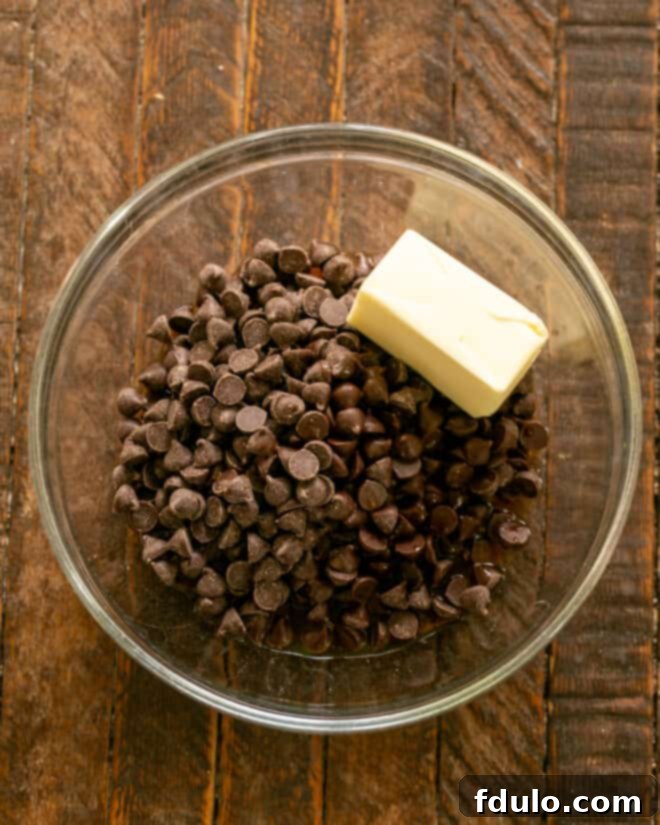
- 12 ounces semi-sweet chocolate chips (high quality recommended)
- 3 ounces strong brewed coffee (freshly brewed espresso works best)
- 1 tablespoon Kahlua (optional, can substitute with more strong coffee for non-alcoholic version)
- 4 tablespoons unsalted butter (or salted, adding a pinch of salt if unsalted)
- 1 teaspoon unflavored plain gelatin (such as Knox brand)
For the Whipped Cream Icing:
- 1 cup heavy whipping cream
- ½ cup powdered sugar, thoroughly sifted
- 1 envelope (approx. 0.35 oz) whipped cream stabilizer (like Dr. Oetker’s Whip It, optional but recommended for stability)
- 1 teaspoon pure vanilla extract
Instructions
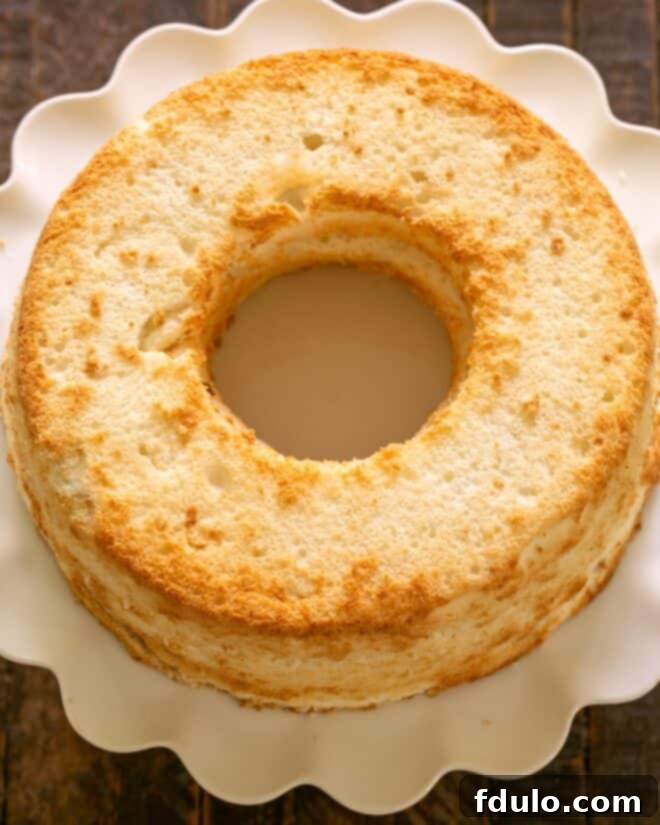
- Prepare the Cake: If you are baking your Angel Food Cake from scratch, ensure it is fully baked and completely cooled before proceeding with the filling process. A warm cake will melt the mousse.
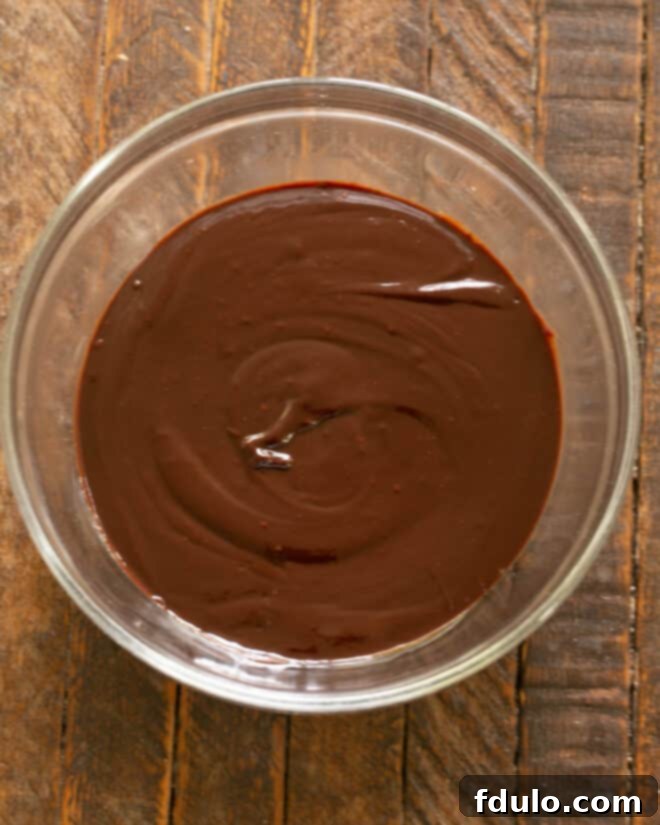
- Melt Chocolate Mixture: In a microwave-safe bowl, combine the semi-sweet chocolate chips, strong coffee, Kahlua (if using), and butter. Heat in the microwave in 30-second intervals, stirring thoroughly after each, until the mixture is smooth and fully melted. Allow this mixture to cool down until it is just slightly warm to the touch, not hot.
- Activate Gelatin: In a small separate bowl, sprinkle the plain gelatin evenly over ¼ cup of the heavy cream. Let it sit undisturbed for at least 5 minutes to allow the gelatin to bloom and soften.
- Combine Gelatin with Chocolate: Once the chocolate mixture has cooled to lukewarm, add the bloomed gelatin mixture to it. Stir well until the gelatin is fully dissolved and incorporated into the chocolate.
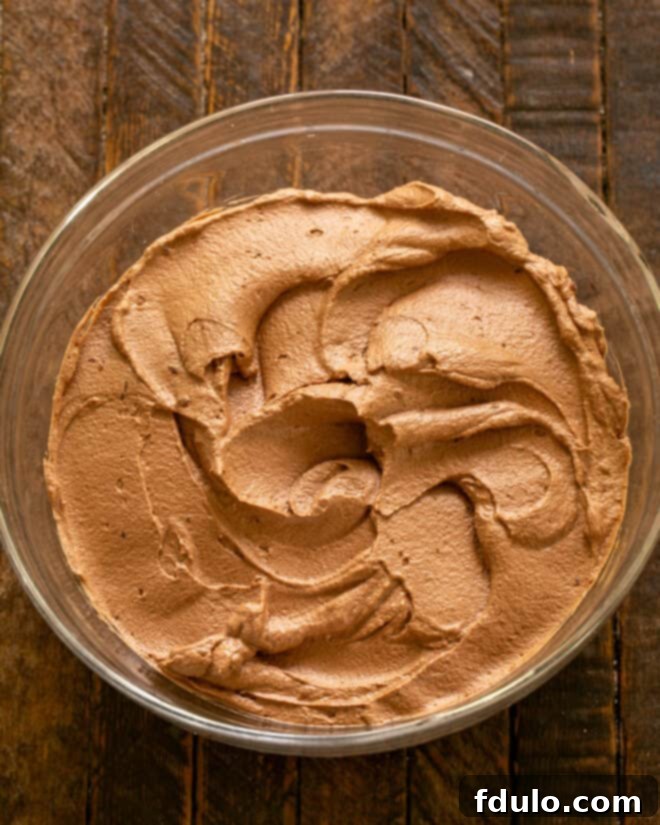
- Prepare Mousse Base: In a large, clean mixing bowl, whip the remaining 1½ cups of heavy cream until soft peaks begin to form. Carefully fold about ¼ cup of the whipped cream into the cooled chocolate mixture to lighten it. Then, gently fold in half of the remaining whipped cream, followed by the last half, until no streaks remain and the mousse is uniform. Be careful not to deflate the cream. Refrigerate the chocolate mousse for approximately an hour to allow it to set slightly.
- Prepare the Cake for Filling: To assemble your Angel Food Cake, place the cooled cake on a sturdy work surface. Using a long serrated knife, carefully slice off the top 1-inch thick layer of the cake. Set this round cake top aside. Next, using the same serrated knife or a spoon, gently cut and scoop out the interior of the bottom cake section, creating a trench or cavity. Ensure you leave a sturdy wall about 1-inch thick around the edges and a solid bottom, so the mousse is contained. Any removed cake pieces can be saved for snacking!
- Fill and Cap the Cake: Spoon the chilled chocolate mousse generously into the trench you’ve created in the bottom cake layer, smoothing the top. Carefully replace the reserved cake top, gently pressing it down to secure it over the mousse.
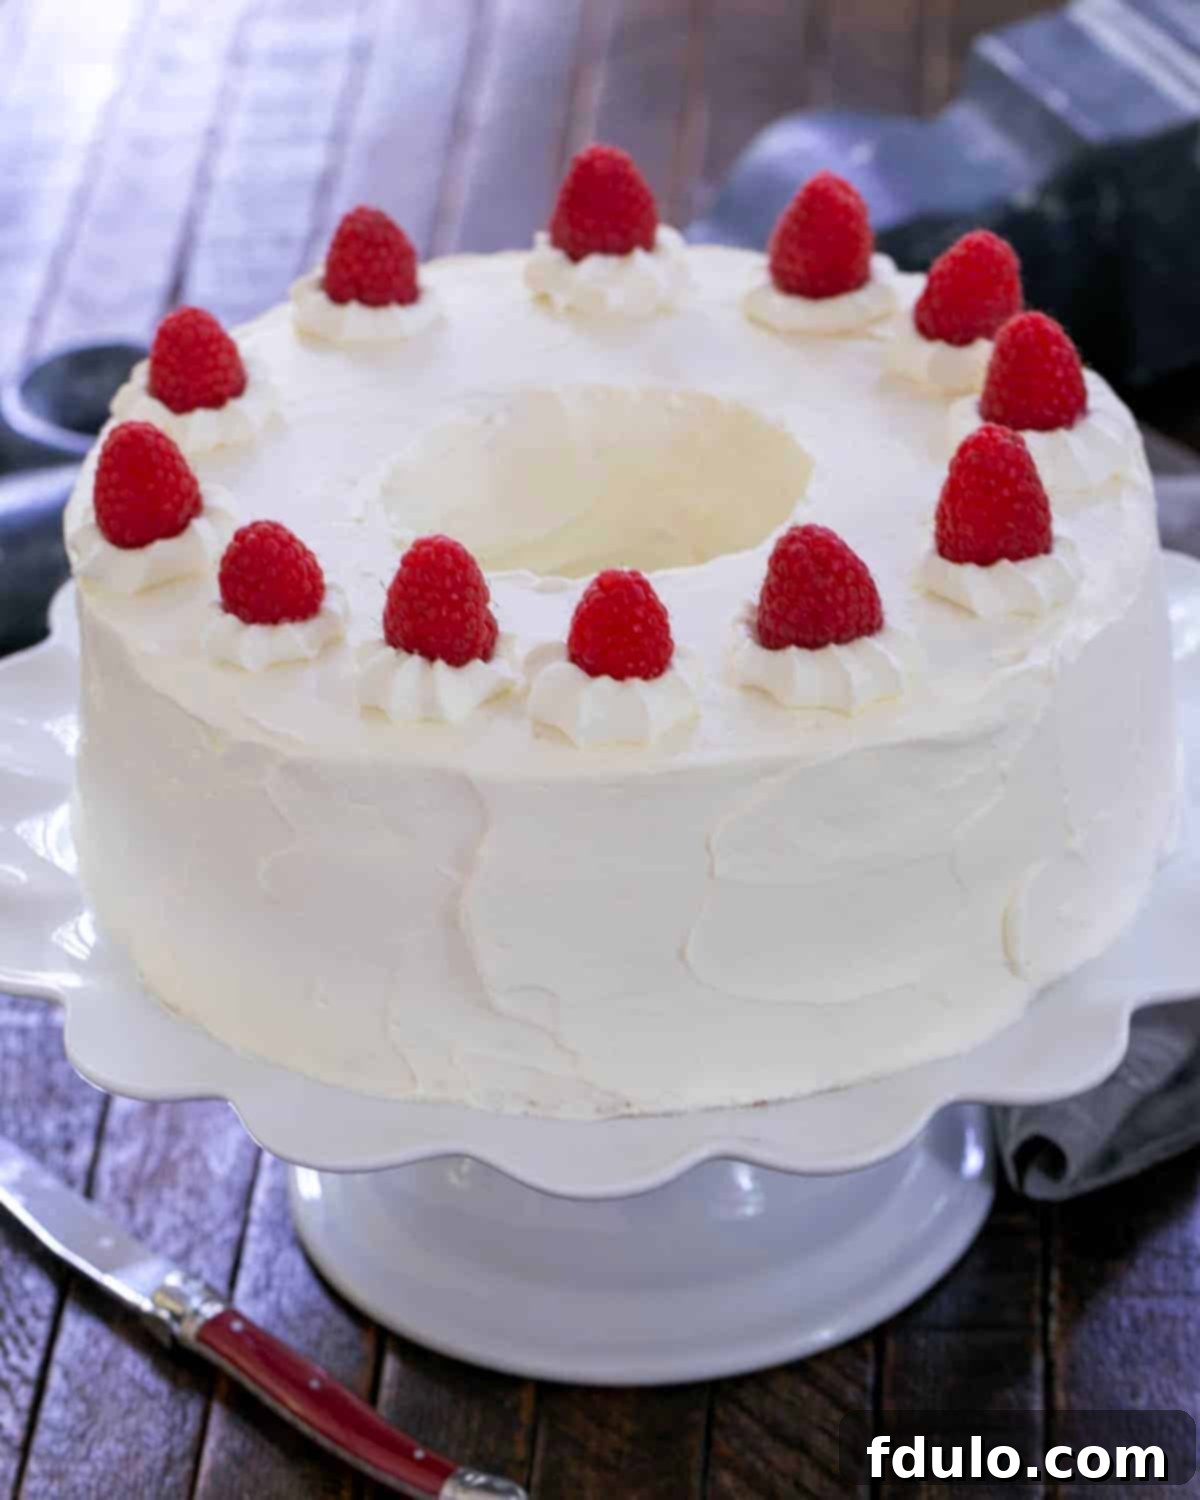
- Frost the Cake: To make the icing, in a clean mixing bowl, whip the remaining 1 cup of heavy cream with the sifted powdered sugar, whipped cream stabilizer (if using), and vanilla extract until medium-firm peaks form. Frost the entire filled cake with this fluffy whipped cream icing.
- Chill Before Serving: For best results and to allow the mousse to firm up completely and the flavors to meld, chill the cake in the refrigerator for at least 2-3 hours before slicing and serving. Garnish with fresh berries, chocolate shavings, or a dusting of cocoa powder, if desired.
Recipe Notes
Store-bought angel food cakes can vary in size; often, they are slightly smaller than a homemade cake. If you choose to use a purchased cake, you might find yourself with a delightful amount of extra chocolate mousse filling. Don’t let it go to waste! This leftover mousse can be served beautifully in small bowls, perhaps with a dollop of whipped cream and a sprinkle of chocolate shavings, for an additional, elegant dessert.
Recommended Baking Tools & Products
As an Amazon Associate and member of other affiliate programs, I earn from qualifying purchases, helping to support this blog at no extra cost to you.
- KitchenAid 9-Speed Digital Hand Mixer
- Whip It Whipped Cream Stabilizer
- Unflavored Knox Gelatin
Nutrition Information:
Yield:
12 Servings
Serving Size:
1 Slice
Approximate Amount Per Serving:
Calories: 393Total Fat: 32gSaturated Fat: 20gTrans Fat: 1gUnsaturated Fat: 10gCholesterol: 72mgSodium: 84mgCarbohydrates: 27gFiber: 2gSugar: 22gProtein: 3g
This nutritional information is an estimate only, provided as a courtesy. Figures may vary based on specific ingredients, brands, and preparation methods. To obtain the most accurate nutritional data, we recommend calculating it with the exact ingredients you use.
HOW MUCH DID YOU LOVE THIS RECIPE?
Please share your thoughts and photos! Leave a comment on the blog or share a picture on Pinterest – your feedback makes my day!
