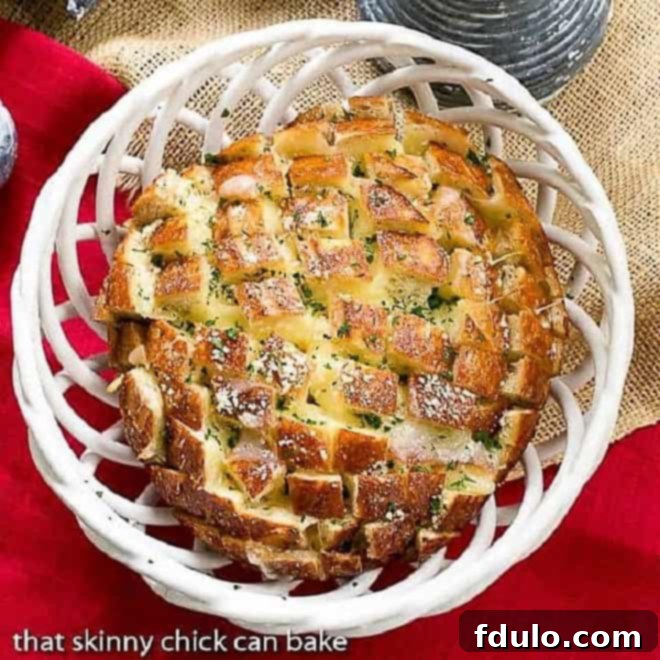
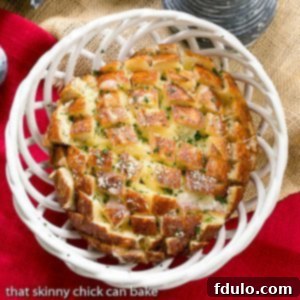
Prepare to elevate your dinner table with the ultimate **Cheesy Garlic Bread** – a dish so irresistible it often steals the show! This isn’t just any garlic bread; it’s a culinary masterpiece, generously stuffed with a harmonious blend of creamy mozzarella, fresh parsley, and potent garlic, all lovingly drizzled with melted butter. The secret to its gooey perfection lies in cutting a rustic round loaf with a strategic cross-hatch pattern, creating an abundance of crevices ready to be filled with glorious cheese and flavor. Each pull-apart piece promises a molten, aromatic delight that will have everyone reaching for more.
There’s a universally acknowledged truth: few things excite a family quite like the aroma of freshly baked garlic bread wafting from the kitchen. But when you introduce generous quantities of bubbling mozzarella, transforming it into a luxurious **homemade garlic bread** experience, you create something truly extraordinary. This recipe takes a beloved classic and reimagines it, turning a simple side dish into an unforgettable culinary event. Forget dry, uninspired store-bought versions; this deeply flavorful, wonderfully interactive cheesy loaf is designed to captivate your senses and leave a lasting impression.
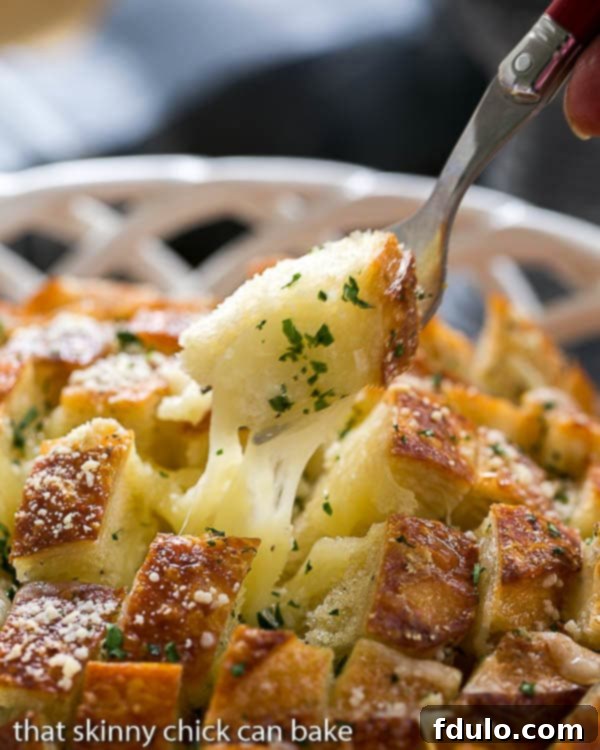
Why You Must Make This Irresistible Cheesy Garlic Bread
If you’ve ever settled for mediocre garlic bread, prepare for a revelation. This recipe isn’t just about feeding your family; it’s about creating a moment of pure culinary bliss. Here’s why this **stuffed garlic bread** deserves a prime spot in your recipe collection:
- Unmatched Flavor and Texture: By starting with a robust, artisan bakery loaf and layering it with copious amounts of high-quality, melt-in-your-mouth cheese, fresh garlic, and fragrant herbs, you achieve a depth of flavor and a satisfying texture that simply cannot be replicated by any store-bought, premade garlic bread. The crust becomes wonderfully crisp, while the interior remains soft and impossibly gooey.
- A Truly Interactive Culinary Experience: This isn’t just a side dish; it’s an event. The unique cross-hatch cut transforms the loaf into a delicious puzzle, encouraging everyone at the table to dive in and pull apart their own warm, cheesy piece. It sparks conversation, laughter, and a shared joy over exceptional food, making every meal more memorable.
- A Unique Twist on a Classic: Unlike traditional garlic bread where butter and garlic are simply spread on the surface, our recipe ingeniously stuffs the bread. The rich mixture of cheese, bright herbs, and pungent garlic is tucked deep within the bread’s crevices, ensuring every bite is bursting with flavor. Dousing it with melted butter then allows that golden goodness to permeate throughout, guaranteeing a truly decadent experience.
- Simple Yet Sophisticated: Despite its impressive appearance and gourmet taste, this **garlic cheese bread** is surprisingly straightforward to prepare. The steps are easy to follow, making it accessible for home cooks of all skill levels, while the end result looks and tastes like something from a five-star restaurant. It’s the perfect dish for elevating weeknight dinners or impressing guests at a special gathering.
- Versatile Pairing Potential: While utterly delicious on its own, this cheesy garlic bread serves as an outstanding accompaniment to a vast array of dishes. Pair it with your favorite pasta, a hearty soup, a crisp salad, or even alongside grilled meats for a complete and satisfying meal. For an extra garlic kick, consider dipping it into a rich Garlic Parmesan Sauce – a truly divine combination!
Ingredient Notes: For the Perfect Cheesy Garlic Bread
Quality ingredients are the cornerstone of any outstanding dish, and this **homemade garlic bread** is no exception. Here’s a closer look at what you’ll need and why each component is vital:
- Round Loaf of Sturdy Bread: The foundation of our garlic bread. Opt for a rustic, artisan-style round loaf with a good, firm crust – a country loaf, sourdough boule, or Italian round are excellent choices. A robust crust is crucial as it helps the bread maintain its shape during the cross-hatch cutting and baking, preventing it from collapsing under the weight of the cheese and butter. Avoid soft, sandwich-style loaves, which will be difficult to cut and may become soggy.
- Shredded Mozzarella: The star of the show for that irresistible, stringy pull. While any favorite melty cheese will work beautifully (Monterey Jack or Gouda are fantastic alternatives), mozzarella is prized for its excellent melting properties and mild flavor that allows the garlic and herbs to shine. You can grate your own cheese for superior texture and flavor, but pre-shredded mozzarella is perfectly convenient and easier to get into all the nooks and crannies of the loaf.
- Fresh Garlic Cloves: This is non-negotiable for the best flavor. Freshly minced garlic provides a vibrant, pungent aroma and taste that dried garlic powder simply cannot replicate. Aim for finely minced cloves to ensure even distribution and intense garlicky goodness throughout the bread. The robust flavor of fresh garlic is what truly defines **garlic bread**.
- Minced Fresh Parsley: Beyond just adding a beautiful pop of color, fresh parsley contributes a subtle, bright, herbaceous note that cuts through the richness of the cheese and butter. It elevates the overall flavor profile, adding a touch of freshness that balances the dish. Flat-leaf (Italian) parsley is generally preferred for its stronger flavor compared to curly parsley.
- Kosher Salt: A fundamental flavor enhancer. Kosher salt has larger crystals that dissolve slower, providing a more balanced seasoning. It works to bring out the natural flavors of the bread, cheese, and garlic, making every ingredient taste its best. Adjust to your preference, but don’t skip it!
- Unsalted or Salted Butter: The glorious vehicle for flavor and richness. Melted butter is essential for permeating the bread, creating a tender crumb and a golden-brown crust. If using salted butter, you might slightly reduce the added kosher salt. If using unsalted butter, you’ll want to ensure you add enough salt to taste. The butter not only adds richness but also helps the cheese mixture adhere to the bread and crisp up beautifully.
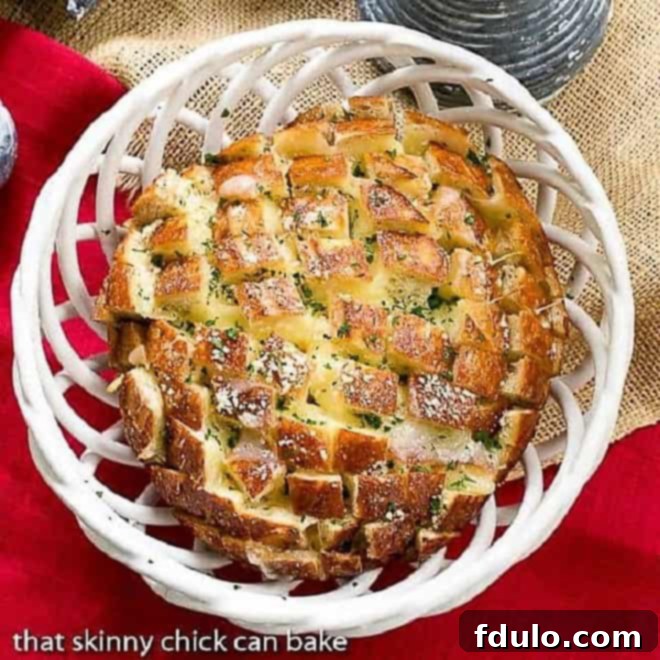
Expert Tips for Mastering Your Cheesy Garlic Bread
Crafting the perfect **cheesy garlic bread** is an art, and a few key techniques can elevate your results from good to absolutely phenomenal. Follow these expert tips for a truly unforgettable loaf:
- The Art of the Cross-Hatch Cut: This is arguably the most crucial step. Use a long, sharp serrated knife, like a bread knife, to make deep cuts across the loaf, first in one direction, then perpendicular to create a checkerboard or cross-hatch pattern. The goal is to cut almost, but not entirely, through the bottom crust. Leave about a quarter to half an inch at the base to keep the loaf intact. This intricate pattern maximizes the surface area for stuffing with cheese and garlic butter, ensuring every segment is loaded with flavor and pulls apart easily after baking. A sturdy loaf will make this process much easier without compressing the bread.
- Strategic Butter Application: While melted butter is key to moistness and flavor, moderation is important to avoid a soggy loaf. You may not need all the melted butter, depending on the size and density of your bread. The objective is to generously coat as much of the exposed surface area as possible – drizzling it over the cheese and into the cuts – without saturating the bread to the point of grease. The butter should enhance, not overpower, the other flavors.
- Choosing the Perfect Loaf: As mentioned in ingredients, the bread choice is paramount. Seek out a sturdy, rustic loaf from a good bakery or the artisan section of your supermarket. A strong, chewy crust and a dense crumb are ideal. A soft, flimsy loaf will be challenging to cut and may not hold up to the stuffing process, resulting in a less impressive final product. Experiment with different types like sourdough, ciabatta, or even a dense French boule to find your favorite.
- Embrace Cheese Creativity: While gooey mozzarella is undeniably wonderful for its melty stretch, don’t limit yourself! This recipe is incredibly adaptable to different cheeses. Consider blends of cheeses for more complex flavors – Monterey Jack for a creamy texture, Gruyere or Gouda for nutty notes, or even a hint of sharp cheddar for a bolder taste. Just ensure your chosen cheese melts well for that coveted gooey factor.
- Serving and Indulging: The best way to enjoy this heavenly **gooey mozzarella bread** is warm, straight from the oven. Encourage everyone to use a fork or their fingers to pull apart the individual, cheese-filled sections. The interactive nature of serving makes it perfect for family meals or casual gatherings. Don’t be afraid to get a little messy – that’s part of the fun!
- Make-Ahead & Storage Solutions: To save time, you can prepare the cheese and garlic mixture in advance and store it in the refrigerator. You can also stuff the entire loaf, wrap it tightly in foil, and refrigerate it for up to 24 hours before baking. This makes it a fantastic option for entertaining. Leftovers (if any!) can be stored wrapped in foil at room temperature for a day or two, or in the fridge for up to 3-4 days. Reheat gently in the oven or air fryer for best results.
- Fresh Herbs for Brilliance: While parsley is recommended for its freshness and color, feel free to experiment with other fresh herbs. A touch of finely chopped chives, oregano, or a hint of thyme can add different dimensions to the flavor profile, complementing the garlic and cheese beautifully.
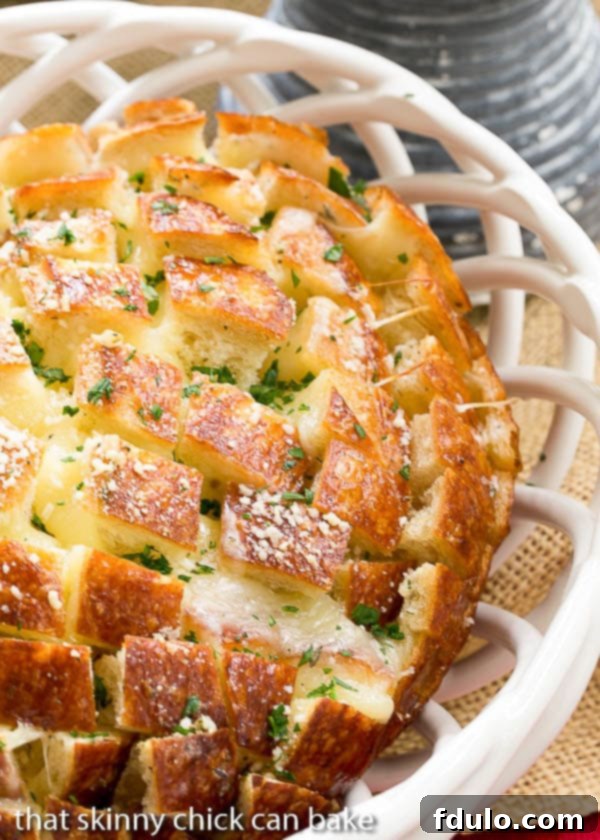
How to Make Homemade Garlic Bread: Step-by-Step
Creating this irresistible **stuffed cheesy garlic bread** is surprisingly simple. Follow these detailed steps to bring this culinary delight to your table:
- Prepare Your Oven: Begin by preheating your oven to 350ºF (175ºC). This ensures the oven is at the correct temperature when your bread is ready to bake, leading to even cooking and perfectly melted cheese.
- Master the Cross-Hatch Cut: Place your sturdy round loaf on a clean cutting board. Using a sharp serrated knife, carefully cut a cross-hatch or checkerboard pattern across the top of the loaf. Make sure your slices go almost all the way through to the bottom crust, leaving about a ½-inch base intact. This creates pockets for the cheese and butter without entirely separating the bread. Be gentle to avoid tearing the bread.
- Craft the Flavorful Filling: In a medium bowl, combine the shredded mozzarella cheese, finely minced fresh garlic, minced fresh parsley, and kosher salt. Toss gently to ensure all ingredients are well distributed. This mixture forms the heart of your **garlic cheese bread**.
- Stuff the Loaf with Cheese: Carefully spread open the cuts in the bread, working one section at a time, without breaking through the bottom crust. Generously fill these slots and crevices with the prepared cheese mixture. Use your fingers or a small spoon to push the mixture deep into the cuts, ensuring every nook and cranny is packed with cheesy goodness.
- Drizzle with Melted Butter: Once the cheese mixture is in place, gently spread open the bread again. Drizzle the melted butter over the cheese and down into the cuts, allowing it to soak into the bread. Ensure good coverage without making the bread overly soggy. The butter carries the flavors and helps crisp the crust.
- Prepare for Baking: Carefully wrap the entire stuffed loaf in aluminum foil. This step is crucial for trapping moisture and allowing the bread to warm through evenly and the cheese to melt perfectly without burning the crust. Place the foil-wrapped loaf on a baking sheet.
- Bake to Golden Perfection: Place the baking sheet with the wrapped loaf into your preheated oven. Bake for 15-20 minutes, or until the cheese inside is fully melted and gooey. The foil keeps the bread soft and steamy. For a crispy top, carefully open the foil and bake for an additional 5-10 minutes, or until the exposed cheese is bubbly and slightly golden brown. Keep a close eye on it to prevent burning.
- Serve Warm and Enjoy: Remove the **homemade garlic bread** from the oven. Carefully unwrap it, being mindful of the steam. Transfer it to a serving platter or leave it in its foil on the baking sheet to keep warm. Serve immediately while the cheese is still wonderfully molten and stretchy.
Frequently Asked Questions about Cheesy Garlic Bread
Garlic bread, as we know it today, emerged from the late 1940s and 1950s with the rise of Italian American restaurants across the United States. It’s an adaptation of bruschetta, an older Italian dish, but with a more generous application of garlic butter and typically using Italian or French bread. Its popularity soared as a ubiquitous appetizer and side dish, becoming a staple in American cuisine for its comforting and flavorful profile.
The beauty of garlic bread lies in its versatility! Beyond this cheesy, stuffed version, you can explore numerous variations. You can bake it wrapped in foil for a softer texture or broil it uncovered for an extra crispy crust. Experiment with different melty cheeses like provolone, Swiss, or a blend of Italian cheeses. Incorporate various fresh herbs such as basil, oregano, or chives. For a dairy-free option, skip the melty cheese and just sprinkle with a good quality vegan Parmesan. For an extra kick, add minced sundried tomatoes, red pepper flakes, or a pinch of onion powder to your garlic butter mixture. The type of bread also makes a huge difference – from baguettes and ciabattas to thick slices of Texas toast.
Baking time can vary based on your oven, the size, and density of your bread, and how deeply you’ve cut it. For a large, round loaf like the one used in this recipe, wrapped in foil at 350 degrees Fahrenheit (175ºC), it typically takes about 15-20 minutes for the bread to warm through and the cheese to melt into gooey perfection. If you want a crispy, golden-brown top, remove the foil and bake for an additional 5-10 minutes. Smaller loaves or those with a softer crust may require slightly less time, so always keep an eye on it to prevent over-baking.
Absolutely! This is a fantastic make-ahead dish. You can prepare the cheese and garlic mixture a day in advance and store it covered in the refrigerator. For maximum convenience, you can even fully assemble and stuff the entire loaf, wrap it tightly in aluminum foil, and refrigerate it for up to 24 hours before baking. Just add an extra 5-10 minutes to the initial baking time if baking directly from the fridge, to ensure the bread is thoroughly heated through.
If you happen to have any leftovers, allow the bread to cool completely before storing. Wrap it tightly in aluminum foil or plastic wrap, or place it in an airtight container. It can be kept at room temperature for up to 2 days, or refrigerated for up to 3-4 days. To reheat, the best method is to wrap it loosely in foil and warm it in a preheated oven at 300-325°F (150-160°C) for about 10-15 minutes, or until the cheese is melted and the bread is heated through. An air fryer can also work wonders for smaller pieces, crisping them up beautifully in just a few minutes.
You May Also Like: Other Delicious Bread Recipes
If this Cheesy Garlic Bread has sparked your love for homemade bread and delightful savory bakes, you’ll surely enjoy exploring these other fantastic recipes:
- French Onion Cheese Bread from Foodie Crush: A savory bread inspired by classic French onion soup, loaded with caramelized onions and melty cheese.
- Pão de Queijo AKA Brazilian Cheese Bread: Gluten-free, chewy, and irresistibly cheesy, these little rolls are perfect as a snack or side.
- Sour Cream Pear Bread: A wonderfully moist and tender sweet bread, perfect for breakfast or dessert.
- Herb Garlic Bread: A classic take on garlic bread, infused with a medley of aromatic herbs.
- Brown Sugar Apple Bread: A comforting, spiced sweet bread bursting with apples and brown sugar.
- Whole Wheat Country Bread: A hearty and wholesome loaf, perfect for sandwiches or as a rustic accompaniment to any meal.
- Classic Banana Walnut Bread: A timeless favorite, moist and flavorful with crunchy walnuts.
- More Homemade Bread Recipes: Discover a wide variety of delightful bread creations to suit every taste and occasion.
Stay connected and share your culinary creations with us! Follow @thatskinnychickcanbake on Instagram, Facebook, and Pinterest. Don’t forget to tag us when you try one of our recipes! And if you absolutely love the results, please consider leaving a 5-star rating in the recipe card below – your feedback helps us grow!
Ultimate Cheesy Garlic Bread
20 minutes
25 minutes
45 minutes
1 loaf (serves 8-12)
This ultimate stuffed Cheesy Garlic Bread is a delightful twist on the classic, featuring a buttery, garlicky, and gooey mozzarella filling baked to golden perfection. Perfect as a show-stopping side dish!
Ingredients
- 1 large round loaf of sturdy bread (e.g., country loaf, sourdough boule)
- 2 cups shredded mozzarella cheese (or your favorite melty cheese)
- 2 cloves fresh garlic, very finely minced (about 2 teaspoons)
- 2 tablespoons fresh parsley, finely minced
- ¼ teaspoon kosher salt (adjust to taste, especially if using salted butter)
- ½ cup unsalted butter, melted (you may not use it all depending on loaf size)
Instructions
- Preheat your oven to 350ºF (175ºC).
- On a cutting board, carefully cut a deep cross-hatch or checkerboard pattern into your loaf. Ensure cuts go almost all the way through, leaving about ½-inch at the bottom to keep the loaf intact. Set aside.
- In a medium bowl, combine the shredded mozzarella, minced garlic, minced parsley, and kosher salt. Toss gently to mix thoroughly.
- Gently spread open the bread’s cuts without breaking the bottom crust. Using your fingers or a small spoon, fill each slot and crevice generously with the cheese mixture. Push it deep into the cuts for maximum flavor.
- Once the cheese is distributed, gently spread open the bread again and drizzle the melted butter over the cheese and down into the cuts. Ensure the butter permeates the bread.
- Wrap the entire stuffed loaf tightly in aluminum foil and place it on a baking sheet.
- Bake in the preheated oven for 15-20 minutes, or until the cheese is completely melted and gooey.
- For a golden, crispy top, carefully remove the foil and continue to bake for an additional 5-10 minutes, or until the exposed cheese is bubbling and lightly browned. Watch carefully to prevent burning.
- Remove from oven and serve warm immediately. Encourage guests to pull apart the delicious cheesy sections.
Notes
Depending on the specific size, density, and depth of cuts in your loaf, you might not use all of the melted butter. Adjust the amount as needed to ensure good coverage without saturating the bread.
Baking times are approximate and will vary based on the specifics of your bread loaf and the calibration of your oven. Always monitor the bread closely, especially during the final unwrapped baking stage, to achieve your desired level of crispiness and cheese melt.
Nutrition Information:
Yield:
12 servings
Serving Size:
1/12 loaf
Amount Per Serving:
Calories: 280Total Fat: 13gSaturated Fat: 7gTrans Fat: 0gUnsaturated Fat: 5gCholesterol: 30mgSodium: 511mgCarbohydrates: 32gFiber: 2gSugar: 4gProtein: 9g
How much did you love this recipe?
Please leave a comment on the blog or share a photo on Pinterest
