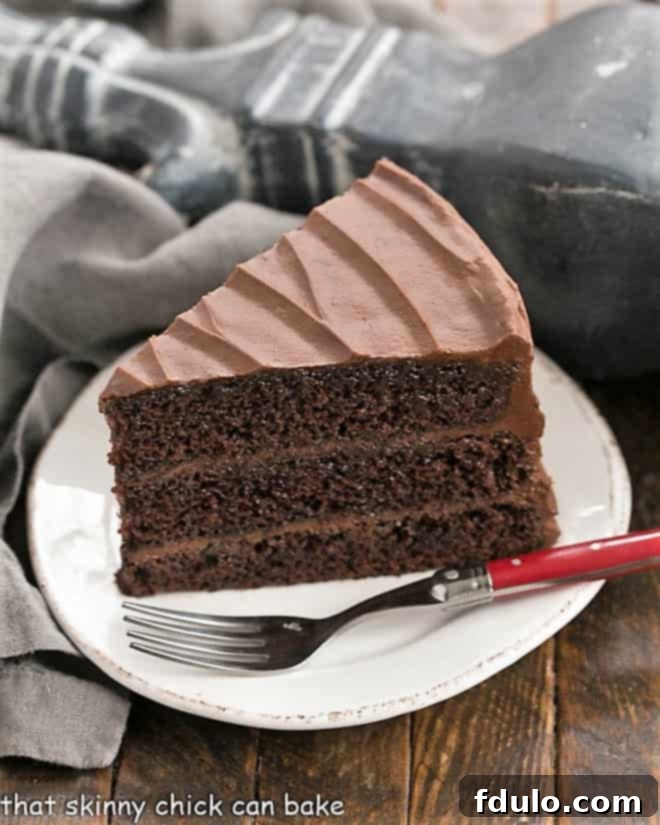
The Ultimate Best Moist Chocolate Cake Recipe with Decadent Buttercream Frosting
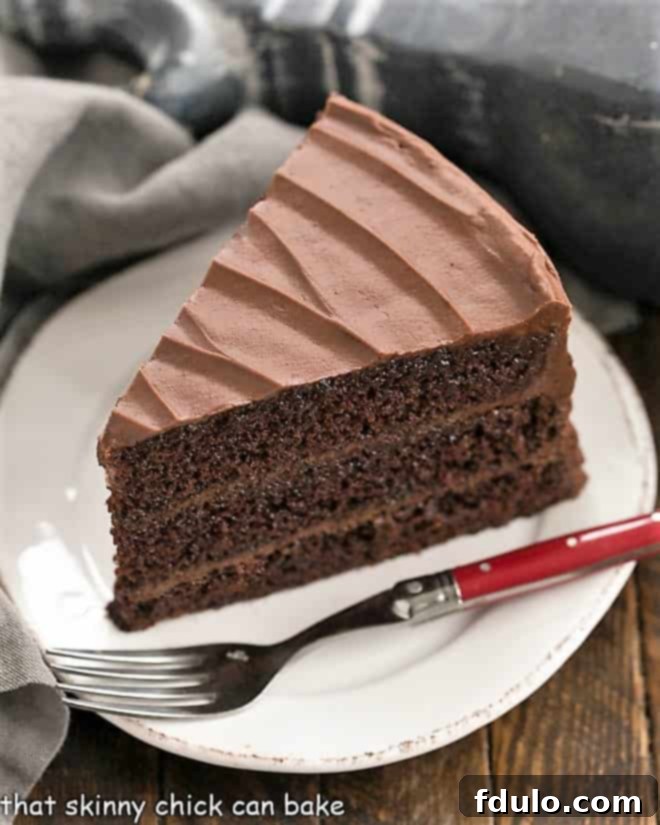
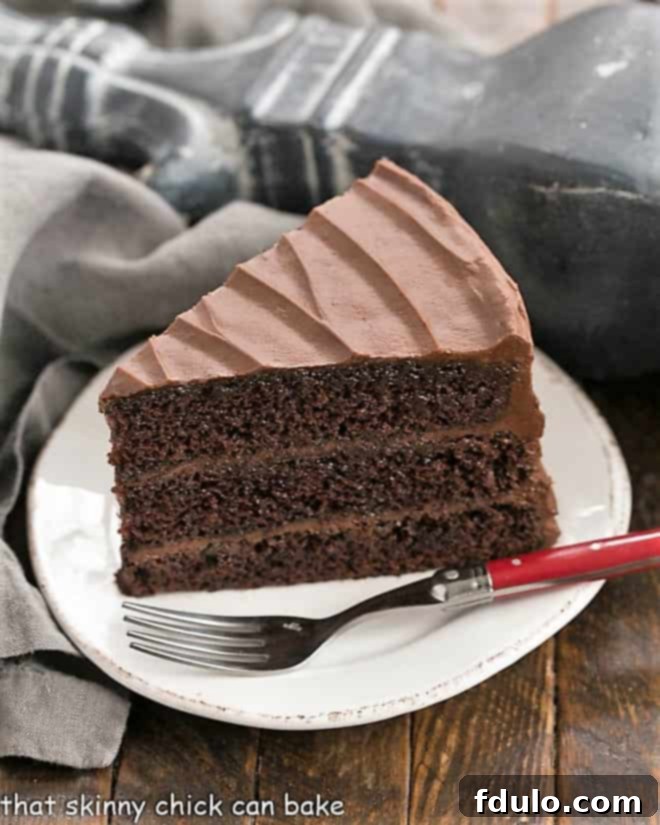
Prepare to bake what will undeniably become your new go-to for the Best Chocolate Cake Recipe! This spectacular creation features three incredibly moist and tender layers, generously frosted with a rich, velvety, and utterly decadent Chocolate Buttercream Frosting. For any true chocolate lover, a glorious symphony of chocolate on chocolate is always a resounding success, and this cake is no exception. It’s a guaranteed crowd-pleaser that will leave everyone asking for a second slice, making it an instant classic for your recipe collection.
This magnificent Chocolate Layer Cake is more than just a dessert; it’s a celebration in itself. Whether you’re marking a special holiday, a cherished birthday, or simply want to indulge a chocoholic with an unforgettable treat, this homemade masterpiece fits every occasion perfectly. Its impressive height and luscious flavor make it the star of any dessert table, promising to create lasting memories with every bite.
Why This Decadent Chocolate Cake Is a Must-Bake
Among countless chocolate cake recipes, this one stands out for several compelling reasons. It’s not just a cake; it’s an experience that delivers on taste, presentation, and pure enjoyment. Once you try this recipe, you’ll understand why it’s become a favorite for so many.
A Trusted, Time-Tested Classic
This exquisite recipe is a decades-old gem, originating from the iconic Hershey’s company. When a cocoa company with a legacy of chocolate expertise creates a chocolate cake recipe, you can trust it to be nothing short of exceptional. It’s a testament to classic baking principles, reliable instructions, and an unwavering commitment to rich chocolate flavor. You’re baking a piece of confectionery history.
Visually Stunning Three-Layer Presentation
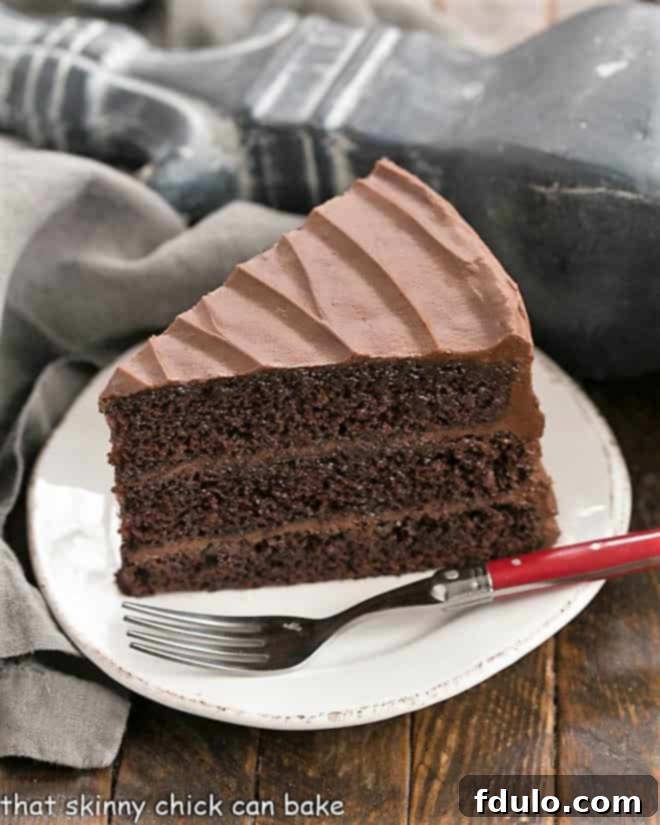
Elevate any event with the grandeur of a three-layer cake. The impressive height and beautifully stacked tiers create a show-stopping centerpiece that makes a truly elegant and memorable statement. It transforms a simple dessert into a spectacular focal point, perfect for those moments when you want to impress guests or simply treat your family to something extraordinary. The generous layers provide ample space for that rich buttercream, too!
Versatile for Every Celebration
From festive holiday gatherings to joyous birthday parties and intimate family dinners, this cake is perfectly suited for any special occasion. Its universal appeal makes it a reliable choice that everyone, from children to adults, will adore. It’s robust enough for a party, yet comforting enough for a quiet indulgence, ensuring it can adapt to any celebratory mood or casual craving.
I once believed I had discovered the absolute best chocolate cake with my Triple Layer Cocoa Cake, but the joy of baking lies in exploration! Variety is indeed the spice of life (and baking!). So, when my dear friend Sandra made this recipe and shared a photo of a breathtakingly decadent slice, I instantly knew I had found the perfect birthday cake for my son, Nick. He was adamant about a homemade chocolate cake for his special day, and as we all know, the birthday child’s wishes are paramount! This recipe delivered beyond expectations, solidifying its place as a cherished family favorite and proving that sometimes, the best recipes are those shared by friends.
Essential Ingredient Notes for the Perfect Chocolate Cake
Crafting a truly exceptional chocolate cake begins with understanding the role each ingredient plays and selecting the best quality available. Here’s a detailed look at the key components and how to get the most out of them for a perfectly moist and flavorful cake:
- Kitchen Staples: You’ll need fundamental baking ingredients like granulated sugar, all-purpose flour, baking soda, salt, and eggs. For optimal results in baking, always ensure your eggs are at room temperature. This allows them to incorporate more evenly into the batter, creating a smoother emulsion and a finer crumb in the finished cake.
- High-Quality Unsweetened Cocoa Powder: This recipe calls for unsweetened cocoa powder, specifically differentiating it from sweetened hot cocoa mix. The quality of your cocoa powder profoundly impacts the cake’s depth of chocolate flavor. For a truly rich taste, opt for a reputable brand like Hershey’s (natural cocoa) or Ghirardelli (often Dutch-processed). This recipe utilizes both baking powder and baking soda, indicating it’s formulated to work with natural cocoa powder, which is acidic and reacts with the baking soda to provide lift.
- Fresh Baking Powder: Baking powder is a critical leavening agent that helps the cake rise, but it loses its potency over time. Always check the expiration date on your container, and if it’s past its prime or you’re unsure, it’s best to replace it. To test its activity, place a spoonful into a glass of very hot water; it should bubble vigorously if it’s still active and effective.
- The Magic of Buttermilk: Buttermilk is the unsung hero that makes this cake incredibly moist and tender. Its acidity reacts with the baking soda, contributing significantly to the cake’s rise and creating a light, airy crumb. While store-bought buttermilk is always ideal for consistent results, if you don’t have it on hand, a simple homemade substitution works well: pour 1 tablespoon of fresh lemon juice or neutral-colored vinegar (like white vinegar or apple cider vinegar) into a 1-cup liquid measuring cup. Then, fill the rest of the cup with regular milk (dairy or non-dairy works). Stir gently and let it sit for 5-10 minutes until it slightly curdles and thickens before incorporating it into your batter.
- Butter (Melted for Cake, Room Temperature for Frosting): For the cake batter, melted butter provides richness and moisture. For the frosting, room temperature butter is absolutely essential for achieving a smooth, creamy texture. I personally use salted butter in my baking as a touch of salt enhances and balances the sweetness in desserts, preventing them from tasting overly sweet and instead highlighting the chocolate notes. The minimal amount of salt in butter is insufficient to make the cake taste savory; rather, it amplifies the overall flavor profile. If you use unsalted butter, you might consider adding an extra pinch of salt to the cake batter.
- Pure Vanilla Extract: Always reach for real vanilla extract, not artificially flavored vanilla essence. The difference in flavor is substantial. Pure vanilla extract adds a complex, warm, and aromatic depth that complements and elevates the rich chocolate notes. Artificial versions, by contrast, can taste flat, one-dimensional, or even chemical-like, detracting from the overall quality of your decadent chocolate cake.
- Hot Coffee (The Secret Weapon for Chocolate Flavor): While it might seem unconventional, the hot coffee in this recipe is a pivotal ingredient. Rest assured, it doesn’t make the cake taste like coffee; instead, it profoundly amplifies and deepens the chocolate flavor. Coffee naturally enhances the bitterness and complexity of cocoa, making the chocolate taste richer and more profound. This is a pro-tip you should definitely not skip if you want the most intensely chocolatey cake possible.
Step-by-Step Guide: How to Bake This Magnificent Chocolate Cake
While a doctored chocolate cake mix can certainly save time, there’s an unparalleled satisfaction and a superior, homemade flavor that comes from baking a cake entirely from scratch. And when you add that third layer, the sense of accomplishment and celebratory feel intensifies, creating a true showstopper! This recipe thoughtfully uses the classic Hershey’s Chocolate Cake framework, expertly divided into three pans to create its impressive height. Remember, the buttermilk in the batter is the secret ingredient that ensures a truly unforgettable moistness and tender crumb, setting this cake apart from the rest.
- Gather and Prepare Ingredients: Begin by gathering all your ingredients and ensuring they are ready. Critically, make sure that the eggs for the cake and the butter for the frosting are at room temperature. This crucial step allows for easier incorporation and creates a smoother batter and a much creamier, lump-free frosting. This preparation step sets you up for success.
- Pan Preparation and Oven Preheat: Liberally grease and flour three 9-inch round cake pans. For an extra measure of confidence and to guarantee easy release, line the bottom of each pan with a round of parchment paper, then grease the parchment as well. Preheat your oven to 350°F (175°C) so it reaches the correct temperature by the time your batter is ready to bake, ensuring an even rise.
- Combine Dry Ingredients: In a large mixing bowl (or the bowl of your stand mixer), thoroughly whisk together all the dry ingredients: granulated sugar, all-purpose flour, unsweetened cocoa powder, baking powder, baking soda, and salt. This ensures that the leavening agents and flavorings are perfectly and evenly distributed throughout the cake batter, preventing any pockets of unmixed ingredients.
- Mix Wet Ingredients into Dry: To the bowl with your dry mixture, add the room temperature eggs, buttermilk, melted butter, and pure vanilla extract. Beat on medium speed for about 2 minutes, making sure to stop and scrape down the sides of the bowl at least once. This ensures that all ingredients are thoroughly combined and incorporated, leading to a homogenous batter.
- Incorporate Hot Coffee: Gently and carefully stir in the hot coffee until it is just combined. Do not overmix at this stage. The batter will be quite thin, which is perfectly normal for this recipe and contributes to the cake’s signature moistness.
- Evenly Divide Batter: Precision is key for achieving perfectly even layers, which is essential for a beautiful, stable stacked cake. Divide the thin batter evenly among the three prepared cake pans. For the most accurate results and uniformly level cakes, use a kitchen scale to measure the exact weight of batter in each pan. This eliminates guesswork.
- Bake to Perfection: Transfer the filled cake pans to your preheated oven and bake for 30-35 minutes. To test for doneness, insert a wooden skewer or toothpick into the center of a cake; it should come out clean or with a few moist crumbs attached, but without any wet batter. Overbaking can lead to a dry cake.
- Initial Cooling in Pans: Once baked, remove the cakes from the oven and let them cool in their pans on a wire rack for approximately 10 minutes. This initial cooling period is crucial as it allows the cake structure to firm up slightly, making them less prone to breaking when handled.
- Release and Full Cool: After 10 minutes, carefully run a thin knife around the edges of each pan to loosen the cakes. Invert them onto a wire rack to cool completely. Gently peel off the parchment paper rounds from the bottoms. It is absolutely crucial that the cake layers are completely cooled to room temperature before you even think about frosting them. Attempting to frost warm cakes will cause your beautiful buttercream to melt and slide off, creating a messy instead of magnificent result!
- Prepare the Decadent Frosting: While the cake layers are cooling, begin preparing your rich chocolate buttercream. In a clean mixing bowl, cream the room-temperature butter with an electric mixer until it is light, fluffy, and pale in color. This process incorporates air, making the frosting airy and smooth.
- Build the Buttercream Consistency: Gradually add the unsweetened cocoa powder and sifted powdered sugar, alternating with small splashes of milk. Beat well after each addition, ensuring all ingredients are fully incorporated. Sifting the powdered sugar beforehand is key to avoiding lumps.
- Finalize and Frost: Continue beating until the frosting reaches a smooth, luscious, and spreadable consistency. If the frosting seems too thick, add a tiny bit more milk (half a teaspoon at a time). If it’s too thin, incorporate a bit more sifted powdered sugar. Stir in the vanilla extract for added depth of flavor. Once your cake layers are completely cool, assemble and frost your magnificent three-layer chocolate cake with this decadent buttercream.
- Serve and Enjoy: Once frosted, slice into your beautifully crafted chocolate cake and prepare for a chorus of compliments and satisfied smiles! This is a moment to savor.
Expert Tips for Baking the Best Chocolate Cake Ever
Achieving a bakery-worthy chocolate cake at home is entirely possible with a few insider tricks and careful attention to detail. These expert tips will guide you to baking perfection, ensuring your cake is consistently moist, flavorful, and beautifully presented:
- The Buttermilk Advantage is Key: As we’ve emphasized, buttermilk is truly a game-changer for this recipe. Its natural acidity reacts with the baking soda to produce carbon dioxide gas, which not only helps the cake rise but also contributes to an incredibly tender and moist crumb. This chemical reaction breaks down gluten, resulting in a softer texture. Don’t underestimate its power; it’s fundamental to this cake’s signature texture and flavor profile.
- Thorough Dry Ingredient Mixing: Before introducing any liquids, take the crucial time to thoroughly whisk together all the dry ingredients – flour, sugar, cocoa powder, baking soda, baking powder, and salt. This step is vital because it ensures that the leavening agents and flavorings are evenly dispersed throughout the mixture. Proper distribution prevents pockets of unmixed ingredients, guaranteeing a uniform rise and consistent flavor in every single bite of your cake.
- Pre-emptive Preparation (Preheat & Pans): Always preheat your oven to the correct temperature *before* you start mixing your batter. Baking in a cold oven can negatively impact the cake’s rise, texture, and overall baking time. Similarly, ensure your cake pans are meticulously prepared (greased, floured, and lined with parchment paper) beforehand. I highly recommend using a baking spray like Baker’s Joy for its convenience and effectiveness, or meticulously buttering and flouring your pans. For ultimate non-stick assurance, lining the bottom of each pan with a round of parchment paper, and then greasing the parchment, guarantees the cakes release perfectly every time.
- The Coffee Secret Weapon for Enhanced Chocolate: This is a pro tip you absolutely shouldn’t skip if you want the deepest chocolate flavor. Adding hot coffee to your chocolate cake batter doesn’t make it taste like coffee; instead, it dramatically enhances and deepens the chocolate flavor. Coffee is a natural flavor enhancer for chocolate, bringing out its richness and complexity without imparting an overt coffee taste. The hot liquid also helps to bloom the cocoa powder, releasing its full aromatic potential.
- Room Temperature Butter for Creamy Frosting: For the silkiest, most luscious, and creamiest chocolate buttercream, your butter must be at true room temperature. This means it should be soft enough to easily indent with your finger, but not melted or greasy. Cold butter won’t cream properly, leading to a lumpy, stiff frosting, while overly warm or melted butter can result in a greasy, unstable frosting that won’t hold its shape. Plan ahead and pull it out of the refrigerator a few hours in advance.
- Sift Your Powdered Sugar: Powdered sugar (also known as confectioners’ sugar) is notorious for forming small, hard clumps, especially when stored. Sifting it before adding it to your buttercream is a crucial, non-negotiable step for achieving a perfectly smooth, lump-free frosting. This small effort makes a significant difference in the final, luxurious texture of your buttercream, ensuring a professional finish.
- Proper Cake Cooling Technique is Essential: After baking, let your cake layers cool in their pans on a wire rack for about 10-15 minutes. This crucial period allows the cake’s delicate structure to firm up slightly. If you try to remove them too soon, they might stick, tear, or break apart. After this initial cooling, gently run a thin knife around the perimeter of each pan to loosen the edges, then invert the cakes onto the wire rack to cool completely. Ensure they are *fully* cooled to room temperature before attempting to frost. Any residual warmth will cause your buttercream to melt and slide off, creating a messy rather than magnificent cake. Patience here is a virtue!
- Achieving Even Layer Distribution: For a professional-looking, stable stacked cake, ensuring your batter is evenly distributed among the pans is paramount. A kitchen scale is your absolute best friend here. Weigh each empty pan, then place it on the scale as you add batter. Weigh again after each addition until all pans contain the exact same weight of batter. This ensures all layers bake uniformly, are of equal height, and contribute to a beautifully balanced finished product.
Frequently Asked Questions About Baking Chocolate Cake
What Does Buttermilk Do for a Cake Recipe?
Buttermilk plays a multi-faceted and vital role in creating a tender and moist cake. Primarily, its acidity reacts with baking soda (a common leavening agent) to produce carbon dioxide gas. This gas helps leaven the cake, contributing significantly to its light, airy, and fluffy texture. Beyond leavening, the acidity in buttermilk also helps to gently break down gluten fibers in the flour. Gluten, a protein network formed when flour mixes with liquid, gives baked goods their strength and chewiness. For a tender cake, especially when using all-purpose flour (which has more protein content than cake flour), buttermilk effectively deactivates some of the gluten’s strength, resulting in a softer, more delicate crumb that truly melts in your mouth.
How Do You Bake Even Cake Layers?
Achieving perfectly even cake layers is a hallmark of a professional-looking and stable stacked cake. Here are two highly effective methods to ensure uniformity:
- The Toothpick Method: After pouring batter into your pans, use a clean toothpick or a small ruler to check the depth of the batter in each. Start by adding a conservative amount to each pan, then incrementally add more batter to those with less, continuously checking the depth until all pans appear to have a consistent amount. This method requires a good eye and a bit of patience but is effective for making small, visual adjustments.
- The Kitchen Scale Method (Highly Recommended for Accuracy): This is the most accurate and efficient method. If you have multiple cake pans of the same brand and type, they should weigh approximately the same when empty. Weigh each empty pan, then place it on the scale as you add batter. Distribute the batter between the pans, aiming for an identical total weight (the weight of the pan plus the batter) for each. This ensures precisely equal amounts of batter in each pan, leading to uniformly baked, level, and equally sized layers every single time.
How Do You Bake a Flat-Topped Cake?
To prevent your cake from doming excessively in the center and to achieve beautifully flat tops, specialized cake strips are your best friend. These fabric strips are moistened with water and then securely wrapped around the outside of your cake pans before baking. The moisture in these strips helps to insulate the edges of the cake, causing them to heat up more slowly than the center. This encourages the entire cake to bake at a more even rate from edge to center, resulting in a perfectly flat top instead of a common dome shape. You can either purchase commercial cake strips (such as those made by Wilton, widely available at craft stores like Michaels and JoAnn Fabrics) or easily make your own at home. To create effective DIY strips, simply cut old towels or thick fabric into strips that are the height of your cake pans and long enough to wrap around the exterior with a slight overlap. Wet the towel strips thoroughly, squeeze out any excess moisture, wrap them around your pans, and secure them with safety pins. Bake as directed, and you’ll be delighted with perfectly level cake layers that are a dream to stack and frost!
Discover More Irresistible Cake Recipes
If you’ve loved baking this ultimate chocolate cake, you’re in for an even greater treat! Explore more delightful and diverse cake creations from our expansive collection. Each recipe is designed to bring joy and deliciousness to your kitchen:
- Vegan Chocolate Wacky Cake from Namely Marly
- Devil’s Food Cake
- Coca Cola Cake
- One Layer Fudge Cake
- Chocolate Cake with Vanilla Buttercream Filling
- Chocolate Sour Cream Bundt Cake
- Browse our full collection of Cake Recipes for endless baking inspiration!
Stay connected and share your baking adventures with us! Find us on Instagram, Facebook, and Pinterest. Don’t forget to tag us when you try one of our recipes! We absolutely love seeing your delicious creations. If you adore the results of this recipe, please consider leaving a 5-star rating and a heartfelt comment below – your feedback means the world to us!
The Recipe:
Moist Chocolate Cake Recipe with Chocolate Buttercream Frosting
30 minutes
35 minutes
1 hour 5 minutes
12 servings
A classic, old-fashioned chocolate cake with rich chocolate frosting! This recipe delivers a supremely moist and flavorful cake, perfect for birthdays, holidays, and any special occasion where a truly decadent dessert is desired.
Rating: 5 out of 5 stars (Based on 42 glowing reviews)
Ingredients
For the Moist Chocolate Cake Layers:
- 2 cups granulated sugar
- 1 ¾ cups all-purpose flour
- ¾ cup unsweetened cocoa powder (natural, not Dutch-processed, for best reaction with baking soda)
- 1 ½ teaspoons baking powder
- 1 ½ teaspoons baking soda
- 1 teaspoon fine sea salt
- 2 large eggs, at room temperature
- 1 cup buttermilk, at room temperature (or homemade substitute)
- ½ cup (1 stick) unsalted butter, melted and slightly cooled
- 1 tablespoon pure vanilla extract
- 1 cup hot brewed coffee (or 1 cup boiling water with 2 teaspoons instant coffee powder)
For the Decadent Chocolate Buttercream Frosting:
- 12 tablespoons (1 ½ sticks) unsalted butter, softened to true room temperature
- 1 cup unsweetened cocoa powder, sifted
- 5 ⅓ cups powdered sugar (confectioners’ sugar), thoroughly sifted
- ⅔ cup whole milk (or heavy cream for an extra rich frosting)
- 2 teaspoons pure vanilla extract
Instructions
- Preheat Oven and Prepare Pans: Preheat your oven to 350°F (175°C). Grease and flour three 9-inch round cake pans. For an extra layer of non-stick assurance, line the bottom of each pan with a parchment paper round and grease the parchment as well.
- Combine Dry Ingredients: In the large bowl of a stand mixer fitted with the paddle attachment (or using a large mixing bowl with a hand mixer), combine the granulated sugar, all-purpose flour, cocoa powder, baking powder, baking soda, and salt. Mix on low speed for about 30 seconds until all dry ingredients are thoroughly combined.
- Add Wet Ingredients: To the dry ingredients, add the room temperature eggs, buttermilk, melted butter, and pure vanilla extract. Beat on medium speed for about 2 minutes, stopping once or twice to scrape down the sides of the bowl with a rubber spatula, ensuring all ingredients are well incorporated and the batter is smooth.
- Incorporate Hot Coffee: Carefully pour the hot coffee into the batter. Mix on low speed until just combined. The batter will be quite thin at this stage, which is characteristic of this recipe and contributes to the cake’s ultimate moistness. Do not overmix.
- Divide Batter Evenly: Divide the thin batter evenly among the three prepared cake pans. For perfectly uniform layers, use a kitchen scale to ensure each pan holds the exact same weight of batter. This prevents uneven baking and ensures a level cake.
- Bake Cake Layers: Transfer the filled cake pans to the preheated oven. Bake for 30-35 minutes, or until a wooden skewer or toothpick inserted into the center of a cake comes out clean or with only a few moist crumbs attached. Avoid overbaking.
- Initial Cooling in Pans: Once baked, remove the cakes from the oven and place them on a wire rack to cool in their pans for about 10-15 minutes. This allows the cake’s delicate structure to set and firm up before handling.
- Release and Cool Completely: After the initial cooling, gently run a thin knife around the edges of each cake pan to loosen. Invert the cakes onto the wire rack, carefully remove the pans, and gently peel off the parchment paper rounds from the bottoms. Allow the cake layers to cool completely to room temperature before attempting to frost. This step is critical; frosting a warm cake will cause the buttercream to melt.
- Prepare Buttercream Frosting: While the cake layers are cooling, begin preparing your chocolate buttercream. In a clean mixing bowl, cream the room-temperature butter with an electric mixer on medium-high speed until it is light, fluffy, and pale in color, typically for 2-3 minutes.
- Build the Frosting: Gradually add the sifted cocoa powder and sifted powdered sugar to the creamed butter, alternating with small splashes of milk. Begin on low speed to avoid a cloud of sugar, then increase to medium. Beat well after each addition, ensuring all ingredients are fully incorporated and the frosting begins to become smooth.
- Finish Frosting Consistency: Mix in the pure vanilla extract. Continue beating on medium-high speed for another 2-3 minutes until the frosting is light, airy, and reaches a smooth, luscious, and spreadable consistency. If the frosting is too thick, add a tiny bit more milk (½ teaspoon at a time) until desired consistency is reached. If it’s too thin, add a bit more sifted powdered sugar.
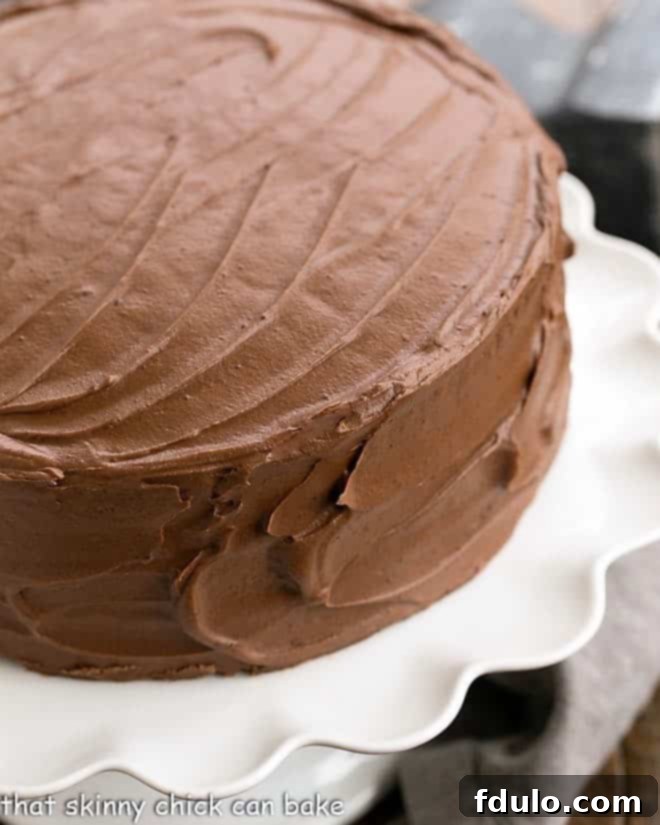
- Assemble and Frost: Once the cake layers are completely cool, carefully assemble your three-layer chocolate cake. Spread an even layer of the decadent chocolate buttercream frosting between each cake layer, and then frost the top and sides of the entire cake.
- Serve and Enjoy: Slice into your beautifully crafted and frosted chocolate cake. Serve immediately and prepare to enjoy a truly unforgettable homemade dessert!
Recipe Notes
This ultimate chocolate cake recipe has been thoughtfully adapted and refined from beloved classic Hershey’s recipes and other reliable baking sources, ensuring a consistently delicious and highly satisfying outcome.
Buttermilk Substitution: If you find yourself without buttermilk on hand, a simple and effective homemade substitute can be easily prepared. To create 1 cup of buttermilk substitute, add 1 tablespoon of white vinegar or fresh lemon juice to a 1-cup liquid measuring cup. Then, fill the remainder of the cup with regular milk (dairy or non-dairy options work well) up to the 1-cup mark. Stir the mixture gently and let it sit undisturbed for 5-10 minutes. During this time, the milk will slightly curdle and thicken, becoming an excellent and functional buttermilk substitute for your recipe.
Recommended Baking Products
As an Amazon Associate and member of other affiliate programs, I earn from qualifying purchases, helping to support this blog at no extra cost to you.
- 9-inch USA Pan Bakeware Round Cake Pan
- 4-Piece Bake Even Strips for Cake Pans
- Nicewell Food Scale (Digital Kitchen Scale)
Nutrition Information:
Yield: 12 servings
Serving Size: 1 slice
Approximate Amount Per Serving:
- Calories: 568
- Total Fat: 14g
- Saturated Fat: 8g
- Trans Fat: 0g
- Unsaturated Fat: 4g
- Cholesterol: 63mg
- Sodium: 546mg
- Carbohydrates: 105g
- Fiber: 3g
- Sugar: 82g
- Protein: 7g
*Nutrition information is an estimate and will vary based on specific ingredients and preparation methods.
