Decadent Strawberry Chocolate Tart: An Effortlessly Elegant Dessert Recipe
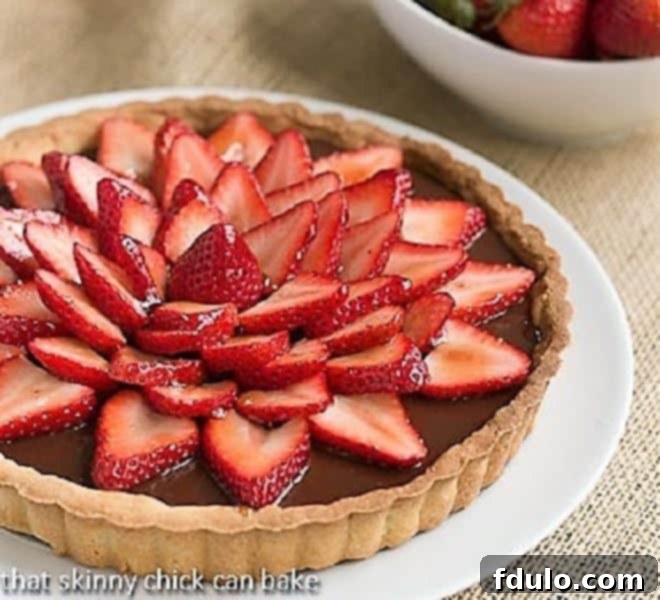
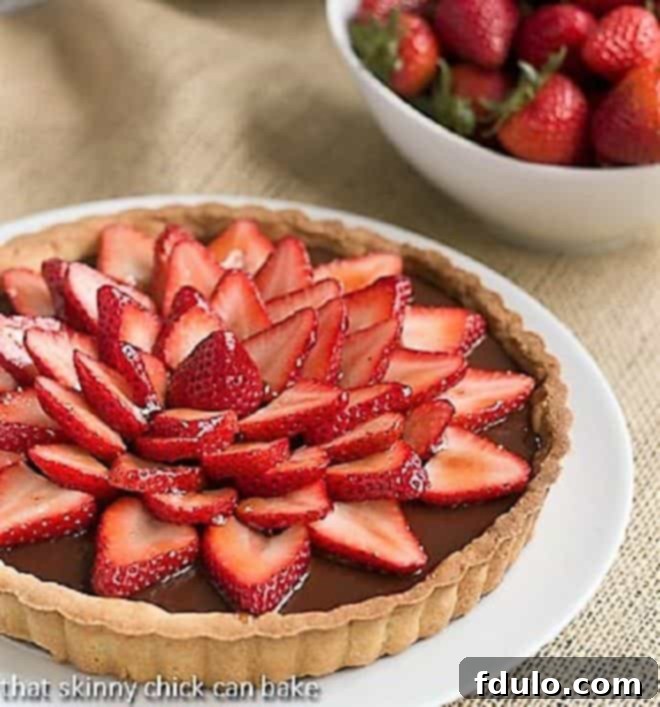
Prepare to impress with our luscious Strawberry Topped Chocolate Tart – a truly irresistible dessert that marries the rich indulgence of chocolate with the fresh vibrancy of ripe strawberries. This isn’t just a dessert; it’s a masterpiece of flavor and presentation, surprisingly simple to create even for novice bakers. Imagine a silky-smooth chocolate ganache nestled within a crisp, buttery tart shell, crowned with an artful arrangement of glistening, ruby-red strawberry slices. It’s a feast for both the eyes and the palate, promising to be the star of any gathering.
Our comprehensive guide will walk you through every step, from mastering the velvety ganache to crafting a stunning strawberry “flower” arrangement. We’ll share expert tips and tricks to ensure your tart looks as good as it tastes, offering that gourmet bakery finish right from your own kitchen. Get ready to bake a showstopper that tastes incredibly delicious and looks absolutely magnificent!
Mastering the Easy Chocolate Tart: A Step-by-Step Guide
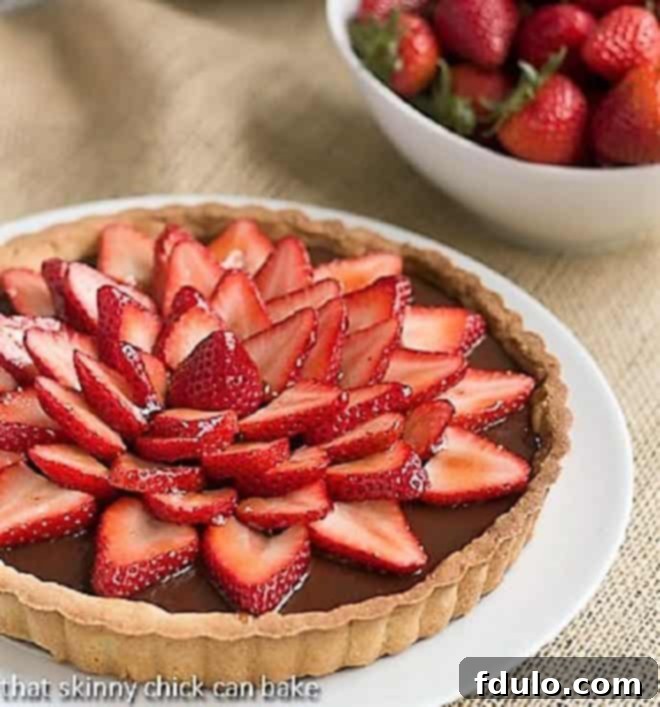
Creating a truly magnificent chocolate tart might seem intimidating, but this recipe simplifies the process without compromising on flavor or elegance. Our secret lies in a remarkably easy-to-make, three-ingredient chocolate ganache filling, which forms the decadent heart of this dessert. When adorned with fragrant, ripe strawberries, it transforms into an exquisite treat that looks incredibly sophisticated yet requires minimal effort.
Effortless Elegance with a Simple Ganache
- The core of this tart is a luxurious chocolate ganache, needing just three ingredients: quality chocolate, heavy cream, and a touch of vanilla. This rich, smooth filling sets beautifully, offering a melt-in-your-mouth experience that perfectly complements the tart crust and fresh fruit. We’ll delve into the secrets of achieving that perfect ganache consistency later in our ingredient spotlight.
Streamline Your Baking with Smart Crust Choices
- To make your Strawberry Topped Chocolate Tart even more convenient, consider using a pre-made pie crust. These are readily available in most grocery stores, either in a foil tin or as a rolled sheet that you can fit into your own tart pan. Simply follow the package instructions for baking, and you’ve already completed the foundational step. This saves significant time and effort, making this elegant dessert accessible on even the busiest days.
- For those who enjoy the satisfaction of a homemade crust, we highly recommend Dorie Greenspan’s Sweet Tart Crust recipe. It yields a wonderfully tender and flavorful crust that serves as the perfect vessel for our rich chocolate filling. Whichever option you choose, ensuring your crust is perfectly baked and cooled is key to a superior tart.
Beyond Strawberries: Versatile Fruit Toppings
- While strawberries are the star of this particular tart, the beauty of this recipe lies in its adaptability. Once your chocolate ganache is firm, you can top it with virtually any fruit you desire. Beyond luscious strawberries, imagine the vibrant appeal and exquisite taste of thinly sliced bananas, or the jewel-like sheen of plump red raspberries. Each fruit brings its unique flavor profile, allowing you to customize your tart for different seasons or preferences.
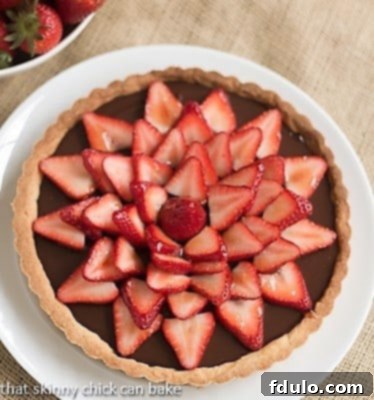
- If the intricate berry “flower” design seems daunting, don’t fret! A simpler yet equally stunning approach is to just slice off the stem ends of your strawberries and arrange them flat-side down in concentric circles. This creates a beautiful, mosaic-like pattern. While slightly trickier to slice when serving, the visual impact is undeniably striking.
Expert Tips for Assembling and Serving Your Perfect Fruit Tart
The timing of your tart assembly can make all the difference in achieving that pristine, fresh-from-the-bakery look and taste. While it’s tempting to get everything done ahead of time, a few strategic steps can prevent common fruit tart issues, like berries releasing excess liquid.
Timing is Everything: Preventing Moisture Release
- I once assembled my tart the day before serving and found myself needing to blot some liquid from the berries before slicing. While not a major inconvenience, this slight dampness can be easily avoided. The best practice is to top and glaze your tart on the same day you plan to indulge.
- You can certainly prepare the chocolate tart shell and ganache filling a day in advance, allowing the ganache to firm up beautifully in the refrigerator overnight. However, hold off on arranging the fresh fruit and applying the glaze until a few hours before you intend to serve it. This simple adjustment ensures your berries remain fresh, firm, and vibrant, and your glaze maintains its exquisite sheen without any “damage control” necessary. This fresh assembly approach is key to an aesthetically perfect and deliciously fresh fruit tart.
Crust Alternatives for Every Preference
- Beyond traditional pastry, consider creative crust alternatives that add another layer of flavor and texture to your chocolate tart. For a delightful change, a graham cracker crust or a chocolate cookie crust (think crushed Oreos!) provides a wonderful crunch and a complementary flavor profile. These no-bake crusts are incredibly easy to make, typically requiring just crushed cookies or crackers mixed with melted butter, then pressed into the tart pan and chilled. They offer a fantastic option for those who prefer a less traditional base or want to avoid baking a pastry crust.
Selecting and Glazing Your Fruit
- Always prioritize the quality of your fruit. If strawberries at the grocery store appear lackluster, soft, or out of season, don’t hesitate to substitute them with other fresh berries. Plump, juicy raspberries, blackberries, or a mix of seasonal fruits can create an equally stunning and delicious tart. The goal is vibrant, flavorful fruit that will shine atop the rich chocolate ganache.
- The final touch that elevates a fruit tart from homemade to gourmet is a beautiful glaze. I personally love using red currant jelly to glaze red-colored fruits like strawberries and raspberries. Its delicate sweetness doesn’t overpower the fruit, and it provides a magnificent, clear, high-gloss sheen that makes your tart look like it just came from a fine patisserie. Any red-colored jelly, such as apricot or even a lightly thinned strawberry jam, can work wonders. Simply melt the jelly gently, whisk until smooth, allow it to cool slightly, and then brush it carefully over the fruit. This creates a protective layer, enhances the color, and adds that professional sparkle.
I recently brought this Strawberry Topped Chocolate Tart to a family gathering, and it vanished in a flash! It’s so approachable that I know both my sisters-in-law could easily whip this one up in their kitchens. I eagerly anticipate hearing their success stories soon – because a delicious dessert shared is a joy multiplied!
Ingredient Spotlight: Achieving Perfection with Every Component
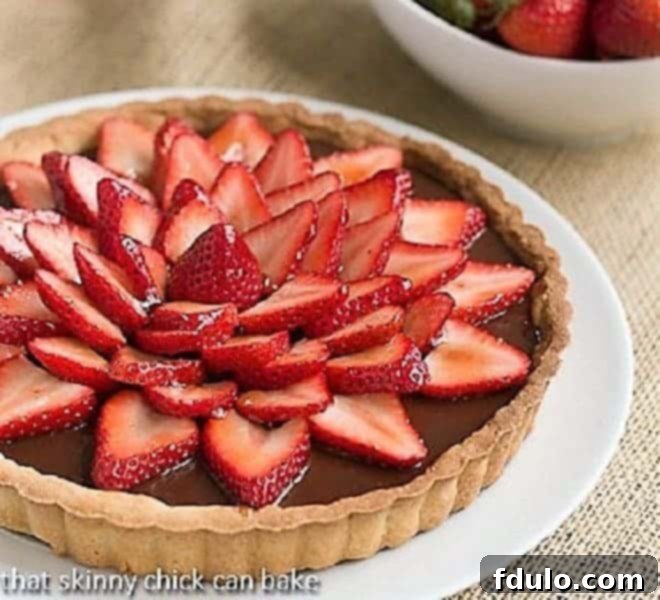
The success of any exceptional dessert hinges on the quality of its ingredients. For our Strawberry Topped Chocolate Tart, each component plays a crucial role in building layers of flavor and texture. Understanding these elements will help you create a truly outstanding dessert.
The Foundation: Your Tart Shell
- Baked 9-inch Tart Shell: This is the canvas for your chocolate masterpiece. You have flexibility here:
- Homemade Excellence: If you enjoy baking from scratch, use your favorite tart crust recipe. For a consistently excellent result, we’ve linked to Dorie Greenspan’s Sweet Tart Crust above, known for its buttery flavor and perfect texture. When making your own, ensure it’s blind-baked to a golden perfection to prevent a soggy bottom once filled.
- Convenience First: Opt for a good quality premade pie shell or a rolled tart dough. These are fantastic time-savers that still yield a delicious result. Simply follow the package instructions for baking.
The Heart of the Tart: Rich Chocolate Ganache
- Semi-sweet Chocolate: The quality of your chocolate directly impacts the flavor of your ganache. We recommend using high-quality chocolate bars, such as Ghirardelli, and chopping them finely to ensure even melting. If you prefer a more intense, deep, dark chocolate flavor, feel free to substitute with a good quality bittersweet chocolate (typically 70% cacao or higher). Avoid chocolate chips as they contain stabilizers that prevent them from melting as smoothly as baking bars.
- Heavy Cream: This is essential for achieving that luxuriously smooth and stable ganache. Ensure your heavy cream has at least 36% butterfat content. The fat content is crucial for the ganache to emulsify properly and set with that perfect, velvety texture. Using a lighter cream will result in a runnier ganache that may not set as desired.
- Real Vanilla Extract: A touch of pure vanilla extract elevates the chocolate flavor, adding warmth and depth. Always opt for real vanilla extract over imitation vanilla; the difference in aroma and taste is significant and contributes to a superior finished product.
The Crown Jewel: Fresh Fruit and Garnish
- Ripe Strawberries: The star topping! Select strawberries that are bright red, plump, and fragrant, indicating ripeness and sweetness. Wash them gently and dry them thoroughly before slicing. While strawberries are ideal, other berries like raspberries, blueberries, or even thinly sliced kiwi can make beautiful and delicious alternatives, depending on the season and your preference.
- Red Currant Jelly: This is our preferred choice for glazing berries. It’s not overly sweet, allowing the natural flavor of the fruit to shine through, and it imparts a beautiful, glossy red sheen. If red currant jelly isn’t available, a good quality apricot jelly (strained for smoothness) or even a clear apple jelly can work as a substitute, offering a similar professional finish.
Step-by-Step Guide to Crafting Your Chocolate Strawberry Tart
Let’s bring all these exquisite ingredients together to create your stunning chocolate strawberry tart. Follow these detailed instructions for a perfect outcome.
1. Prepare Your Tart Shell
- Ensure your 9-inch tart shell is fully baked and completely cooled. If using a homemade crust, blind-bake it according to your recipe’s instructions and let it cool on a wire rack. For a store-bought shell, bake as directed on the package and cool. A fully cooled crust is essential to prevent the ganache from melting or creating a soggy bottom.
2. Craft the Silky Chocolate Ganache
- Prepare the Chocolate: Place the finely chopped semi-sweet chocolate in a heat-proof bowl. Using good quality chocolate and chopping it uniformly will help it melt evenly.
- Heat the Cream: In a small saucepan, gently heat the heavy cream over medium heat until it just begins to simmer around the edges. Do not bring it to a rolling boil.
- Combine and Melt: Carefully pour the hot cream over the chopped chocolate in the bowl. Let it sit undisturbed for about 3-5 minutes. This allows the heat from the cream to begin melting the chocolate.
- Whisk to Perfection: After a few minutes, gently whisk the mixture starting from the center and slowly expanding outwards. Continue whisking until the chocolate is completely smooth, glossy, and fully melted into a beautiful ganache.
- Add Vanilla: Stir in the real vanilla extract.
- Fill the Tart: Pour the warm ganache into your cooled tart shell, spreading it evenly with an offset spatula if necessary.
- Chill: Refrigerate the tart for at least 2-4 hours, or until the chocolate filling is firm to the touch. This chilling time is crucial for the ganache to set properly.
3. Prepare and Arrange Your Strawberries
- Wash and Slice: About an hour or two before you plan to serve, gently wash your ripe strawberries under cool water and pat them thoroughly dry with paper towels. Remove the green stems. For the “flower” arrangement, carefully slice the strawberries lengthwise into uniform pieces, about 1/4 inch thick.
- Create the Design: Remove the chilled chocolate tart from the refrigerator. Starting from the outside edge of the tart, arrange the sliced berries in concentric circles, slightly overlapping each slice. Work your way towards the center, creating a beautiful floral pattern. You can experiment with different sizes of slices for the inner circles to achieve a more natural look.
4. Glaze for That Professional Shine
- Melt the Jelly: Place the red currant jelly (or your chosen glaze) in a microwave-safe bowl. Heat it in the microwave in short bursts (15-30 seconds), stirring after each burst, until it is melted and smooth. Alternatively, you can melt it gently in a small saucepan over low heat.
- Cool Slightly: Allow the melted jelly to cool for about 5-10 minutes. It should still be warm and liquid, but not hot, to prevent it from running off the berries or cooking them.
- Apply the Glaze: Using a pastry brush, carefully and evenly brush the glaze over the arranged strawberries. Ensure each berry slice is coated for that brilliant shine.
5. Final Chill and Serve
- Refrigerate: Once glazed, return the tart to the refrigerator for a final chill for at least 30 minutes to allow the glaze to set.
- Serve: Take the tart out of the refrigerator 15-20 minutes before serving to allow the chocolate to soften slightly for easier slicing. Slice with a sharp, thin knife and enjoy!
Why This Chocolate Strawberry Tart is a Must-Try Dessert
This Strawberry Topped Chocolate Tart is more than just a recipe; it’s an invitation to create something truly special and memorable in your kitchen. Its blend of ease and elegance makes it an absolute must-try for any occasion.
Effortless Elegance for Any Occasion
Whether you’re hosting a sophisticated dinner party, bringing a dish to a casual potluck, or simply craving a luxurious treat at home, this tart fits the bill perfectly. Its stunning appearance will undoubtedly garner compliments, while the straightforward preparation means you won’t be stressed in the kitchen. It’s the ideal solution for those who want to serve a gourmet-level dessert without spending hours on intricate techniques.
A Symphony of Flavors and Textures
The magic of this tart lies in the exquisite contrast between its components: the crisp, buttery tart crust provides a delightful crunch; the smooth, rich, and slightly bittersweet chocolate ganache offers a deeply satisfying indulgence; and the fresh, juicy strawberries burst with bright, sweet-tart flavor. The glossy glaze ties it all together, adding visual appeal and a subtle sweetness that completes the experience. Every bite is a harmonious blend of textures and tastes.
Unleash Your Inner Pastry Chef with Customization
This recipe also offers wonderful versatility. Feel free to experiment with different types of chocolate – milk chocolate for a sweeter profile, or extra dark for an intense cocoa hit. Explore seasonal fruits beyond strawberries, such as vibrant kiwis, tart raspberries, or even caramelized bananas for a different twist. You can also vary the crust, opting for a gluten-free version or a nutty shortbread. This tart is a fantastic canvas for your culinary creativity.
So, why wait? Dive into this recipe and discover the joy of creating a dessert that looks like it came from a high-end patisserie but is entirely achievable in your own kitchen. Your friends and family will thank you!
More Irresistible Strawberry Desserts You’ll Love:
- Fresh Strawberry Tartlets
- Cream Cheese Strawberry Pie
- Strawberry Cheesecake Bars
- Strawberry Lemon Tart
- Mile High Strawberry Pie
- Strawberry Angel Food Dessert
- No Bake Strawberry Cheesecake
- Classic Strawberry Pie Dessert
- Explore more Best Dessert Recipes
Strawberry Topped Chocolate Tart Recipe
20 minutes
3 minutes
23 minutes
8 servings
A lovely chocolate tart topped with luscious, ripe strawberry slices, perfect for any occasion.
Ingredients
- Baked 9-inch tart shell (use your favorite crust recipe or buy a premade pie shell)
- 8 ounces semi-sweet chocolate, chopped
- 1 cup heavy cream
- 1 teaspoon vanilla extract
- 16 ounces ripe strawberries*, sliced (I saved the outer slices for a fruit salad)
- 1/2 cup red currant jelly
Instructions
- Place the chopped chocolate in a heat-proof bowl.
- Heat the heavy cream until it just starts to simmer. Pour the hot cream over the chocolate and let it sit for a few minutes. Stir until the chocolate is smooth and melted, creating a rich ganache.
- Mix in the vanilla extract. Pour the ganache into the cooled tart shell and refrigerate until the filling is firm (about 2-4 hours).
- An hour or two before serving, arrange the sliced berries beautifully in concentric circles, starting from the outside edge of the tart and working your way in.
- Melt the red currant jelly in the microwave (or a small saucepan), then whisk until smooth. Cool for about 10 minutes to a workable temperature, then brush evenly over the berries to glaze, creating a beautiful shine.
- Keep the tart refrigerated until ready to serve.
Notes
Total time listed does not include the time required for baking your tart shell or the essential chilling time for the ganache to firm up. Plan accordingly for these steps.
Nutrition Information:
Yield:
8
Serving Size:
1 slice
Amount Per Serving:
Calories: 340Total Fat: 22gSaturated Fat: 13gTrans Fat: 0gUnsaturated Fat: 7gCholesterol: 39mgSodium: 30mgCarbohydrates: 38gFiber: 4gSugar: 26gProtein: 4g
Thatskinnychickcanbake.com occasionally offers nutritional information for recipes contained on this site. This information is provided as a courtesy and is an estimate only. This information comes from online calculators. Although thatskinnychickcanbake.com attempts to provide accurate nutritional information, these figures are only estimates. Varying factors such as product types or brands purchased can change the nutritional information in any given recipe. Also, many recipes on thatskinnychickcanbake.com recommend toppings, which may or may not be listed as optional and nutritional information for these added toppings is not listed. Other factors may change the nutritional information such as when the salt amount is listed “to taste,” it is not calculated into the recipe as the amount will vary. Also, different online calculators can provide different results. To obtain the most accurate representation of the nutritional information in any given recipe, you should calculate the nutritional information with the actual ingredients used in your recipe. You are solely responsible for ensuring that any nutritional information obtained is accurate.
HOW MUCH DID YOU LOVE THIS RECIPE?
Please leave a comment on the blog or share a photo on Pinterest
