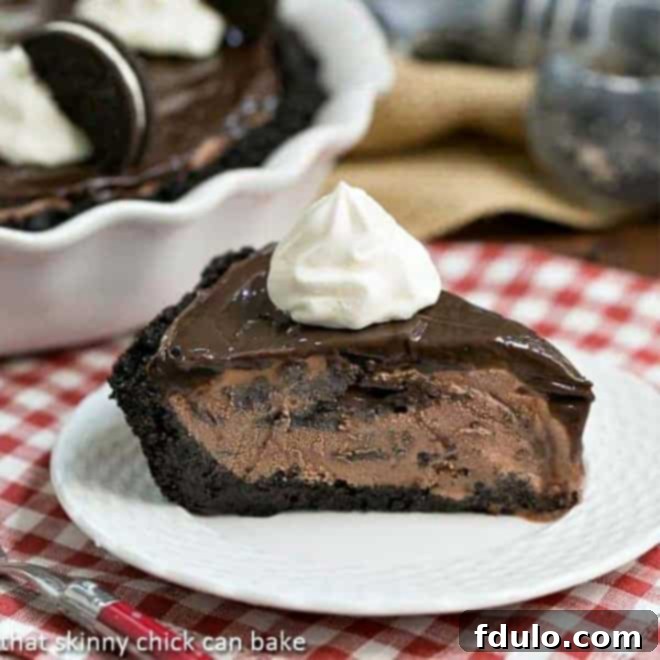
Welcome to a dessert that has delighted my family and friends for decades: the incredible Fudge-Topped Chocolate Ice Cream Pie. This decadent, no-bake masterpiece is a true crowd-pleaser, delivering layers of rich chocolate flavor in every bite. Whether you’re a novice in the kitchen or a seasoned baker, this recipe is designed to be effortlessly simple yet impressively elegant, making it perfect for both casual family dinners and special occasions.
My journey with this beloved frozen dessert began shortly after I was married, when I discovered a recipe for “Mississippi Mud Pie” in a wedding shower cookbook. It featured a simple cookie crust, a luscious chocolate ice cream filling, and a generous topping of fudge sauce. Over the years, I’ve refined the original, adding a splash of Kahlúa and a hint of brandy to deepen the chocolate notes and enhance the pie’s luxurious texture. The result is a spectacular chocolate ice cream pie that has become a cherished tradition in our home, loved by everyone from day one.

Why This Fudge-Topped Chocolate Ice Cream Pie is a Must-Make
For years, this Fudge-Topped Chocolate Ice Cream Pie has been a staple on our summer menu, cherished for its irresistible flavor and ease of preparation. While my initial versions were delicious, adding the rich fudge topping transformed it into an unforgettable dessert that quickly became a family favorite. Once you try this upgraded version, there’s truly no turning back.
- Effortlessly Easy & No-Bake: This recipe is incredibly simple, requiring no oven time. It’s the perfect solution for dessert cravings, especially on warm days when you want to avoid heating up your kitchen. The crust comes together in minutes, and the rest is assembly and freezing.
- Ideal for Summer Entertaining: Ice cream desserts are the quintessential summer treat. They’re refreshing, make-ahead friendly, and universally loved. This pie is particularly fantastic for entertaining as it frees up your oven and allows you to prepare it days in advance, reducing stress on event day.
- Customizable Decadence: Whether you prefer a simple, understated dessert or a show-stopping grand finale, this pie offers versatility. A few swirls of sweetened whipped cream and some halved chocolate sandwich cookies can effortlessly elevate it to company-worthy status. For those who love a variety of frozen treats, my Grasshopper Pie is another family-favorite that promises similar delightful experiences.
- Perfect for Any Chocolate Lover: With a chocolate cookie crust, creamy chocolate ice cream, and a generous layer of fudge, this pie is a triple threat for anyone who adores chocolate. It’s a dessert that truly satisfies deep chocolate cravings.
- A Touch of Sophistication: The optional additions of Kahlúa and brandy not only enhance the chocolate flavor but also contribute to a smoother, easier-to-slice texture, adding a subtle touch of adult sophistication without being overpowering.
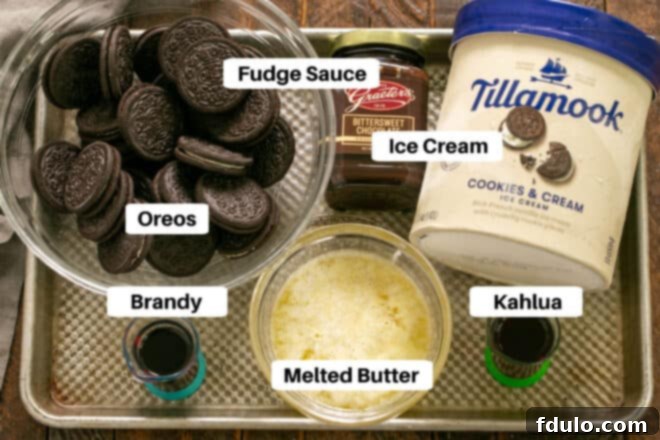
Essential Ingredients for Your Decadent Fudge-Topped Chocolate Ice Cream Pie
Crafting this delicious chocolate ice cream pie requires a few simple, yet high-quality ingredients. Each component plays a crucial role in creating the perfect balance of flavor and texture, making every bite a delight.
- Chocolate Wafer Cookies or Oreos (Chocolate Sandwich Cookies): These form the base of our irresistible no-bake crust. Chocolate wafer cookies provide a deep, intense chocolate flavor and a crisp texture. If using Oreos, their cream filling adds a touch more sweetness and richness, meaning you might omit the extra sugar in the crust.
- Butter (Salted is Fine): Melted butter binds the cookie crumbs together, creating a sturdy and flavorful crust. Salted butter can actually enhance the overall flavor by balancing the sweetness of the chocolate.
- Sugar: A small amount of sugar is typically added to the crust mixture if using plain chocolate wafer cookies to ensure it’s perfectly sweetened. If opting for chocolate sandwich cookies like Oreos, you can usually skip this as they are already sweet enough.
- Premium Chocolate Ice Cream: The heart of this pie! Choose a high-quality chocolate ice cream, perhaps one with chocolate chips or fudge swirls, for the most decadent experience. The richer the ice cream, the more luxurious your pie will taste.
- Brandy: While optional, brandy adds depth to the chocolate flavor and, crucially, helps keep the ice cream softer and easier to slice once refrozen. The alcohol lowers the freezing point, preventing it from becoming rock-hard.
- Kahlúa or Other Coffee Liqueur: Coffee is a well-known secret ingredient for enhancing chocolate, and Kahlúa does this beautifully. It intensifies the chocolate notes without imparting a strong coffee flavor, making it agreeable even to those who aren’t typically coffee lovers. Like brandy, it also aids in maintaining a smooth, sliceable ice cream consistency.
- Good Quality Fudge Sauce: The crowning glory of this pie! A high-quality fudge sauce, like Graeter’s or Mrs. Richardson’s, makes all the difference. While homemade fudge is wonderful, using a store-bought gourmet sauce saves time and ensures a consistently rich, glossy topping.
Pro Tips for Crafting the Perfect No-Bake Chocolate Ice Cream Pie
No-bake desserts are summer superstars, and this chocolate ice cream pie is bound to become a family favorite. To ensure your pie-making process is as smooth and successful as possible, here are some expert tips honed over years of perfecting this recipe.
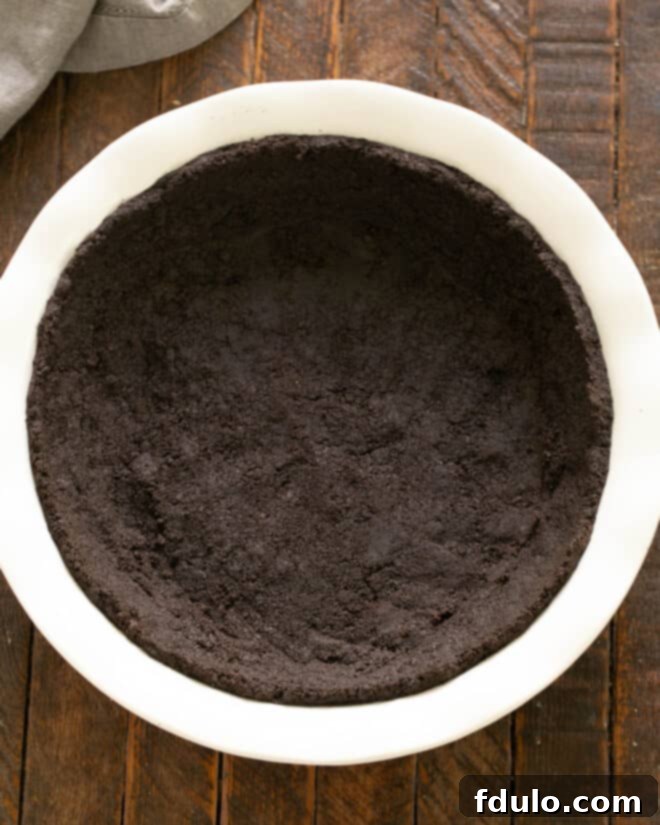
- The No-Bake Crust Perfection: The foundation of this pie is its simple, no-bake crust. To create it, you’ll combine finely crushed chocolate wafer cookies (or Oreos for extra richness), melted butter, and a hint of sugar. This mixture is then pressed firmly into a greased 9-inch pie plate. Once formed, pop it into the freezer to chill while you prepare your ice cream filling. This freezing step is crucial as it helps set the crust and prevents it from crumbling when sliced.
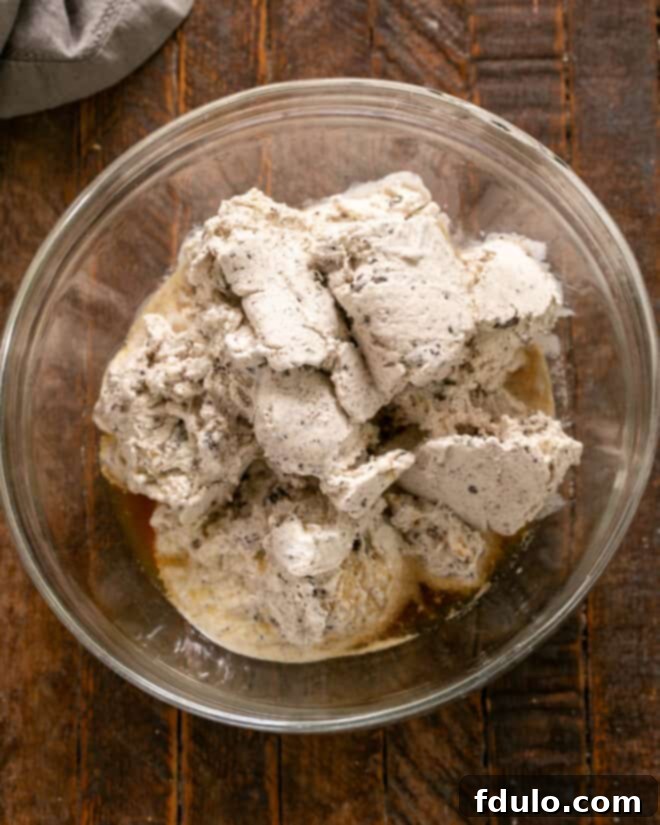
- Infusing Flavor and Texture with Alcohol: I often incorporate a small amount of Kahlúa and brandy into the premium chocolate ice cream. This isn’t just about adding a boozy kick; it’s a strategic move to enhance both flavor and texture. A little bit of coffee liqueur, like Kahlúa, miraculously intensifies the chocolate flavor, making it taste even richer. Even those who claim not to like coffee or mocha flavors often don’t detect the coffee liqueur directly, only the amplified chocolate. The brandy adds another layer of depth.
- The Alcohol’s Secret Role: The addition of alcohol, even in small quantities, significantly lowers the freezing point of the ice cream. This means your pie won’t turn into a rock-hard block in the freezer, making it much easier to scoop and slice cleanly. It’s a professional secret for perfectly scoopable homemade frozen desserts. Remember, the alcohol can be omitted if you prefer, but it will result in a firmer pie that requires a bit more thawing time before slicing.
- Selecting Your Fudge Topping: While homemade fudge sauce is undeniably delicious, for a stress-free summer dessert, I highly recommend using a high-quality store-bought fudge sauce. Look for brands known for their rich, decadent flavor. Slightly warming the jar (not hot, just enough to make it pourable) will make it much easier to spread evenly over the frozen ice cream layer.
- Mastering the Fudge Layer: Spreading the fudge sauce evenly can be the trickiest part of this recipe. PRO-Tip: The key to success is ensuring your ice cream pie is absolutely frozen solid before you even think about adding the fudge. This often means starting the pie a day or two before you plan to serve it, allowing ample freezing time. When you’re ready to add the fudge, work quickly. Drop small spoonfuls of slightly warmed fudge sauce all over the surface of the hardened ice cream, then use an offset spatula or the back of a spoon to gently and rapidly smooth it out. If the ice cream starts to melt and the fudge begins to break through, immediately stop, return the pie to the freezer to re-harden, and then continue when it’s firm again. Patience here will yield a beautifully smooth, unmarred fudge topping.
Step-by-Step Guide: How to Make Your Fudge-Topped Chocolate Ice Cream Pie
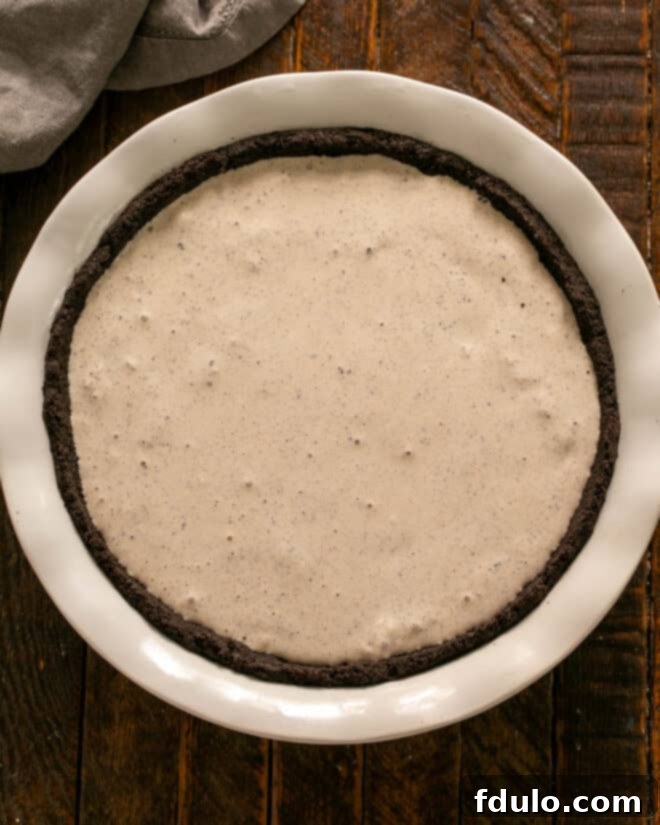
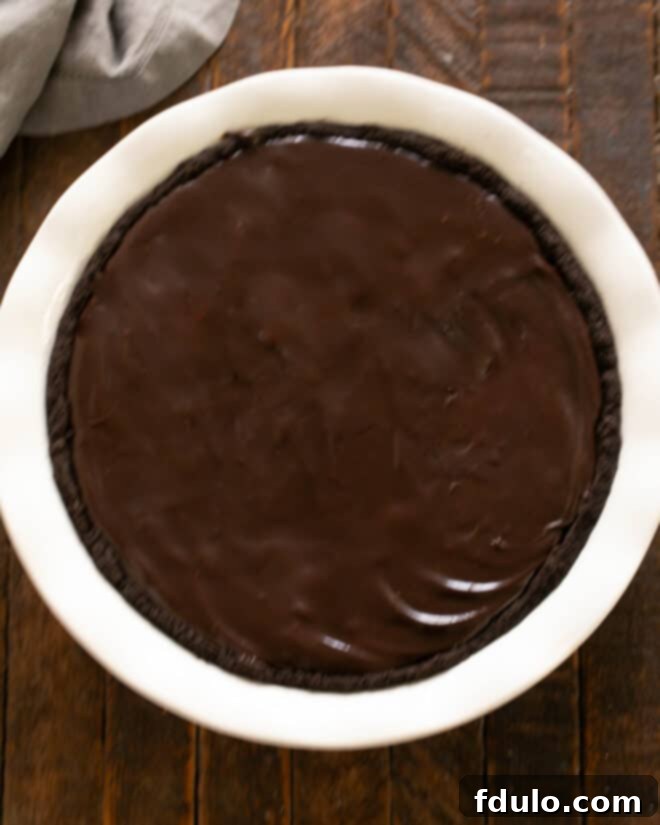
Creating this show-stopping Fudge-Topped Chocolate Ice Cream Pie is a straightforward process, thanks to its no-bake nature. Follow these simple steps to assemble your decadent frozen dessert. Refer to the visual guide below for each stage of preparation.
Serving Your Fudge-Topped Chocolate Ice Cream Pie with Style
Once your decadent chocolate ice cream pie is perfectly frozen, the next step is to serve it in a way that truly highlights its deliciousness. From mastering the perfect slice to adding elegant garnishes, these tips will ensure your dessert is a memorable one.
Mastering the Slice: How to Cut a Frozen Ice Cream Pie
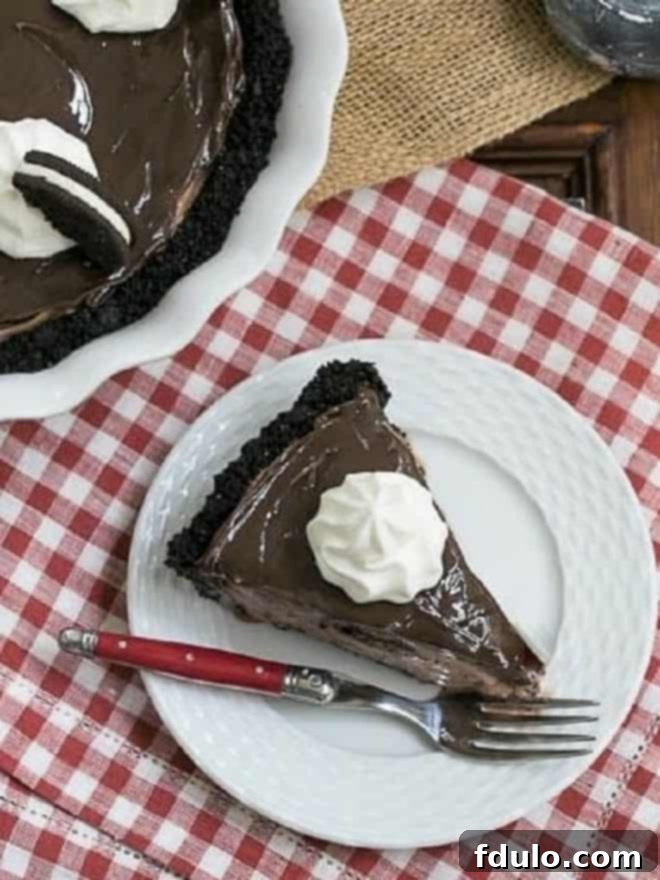
- For Fudge-Topped Pies: When dealing with a fudge topping, it is absolutely essential that your pie is thoroughly frozen before attempting to slice. A firm pie prevents the fudge layer from cracking or sliding off and ensures clean, beautiful slices.
- For Pies Without Sticky Toppings: If you’re serving an ice cream pie without a sticky topping (like a simple fruit or whipped cream topping), you might want to transfer it to the refrigerator for about 10-15 minutes before cutting. This slight softening will make the ice cream easier to slice without a hot knife.
- PRO-Tip: The Hot Dry Knife Technique: This is the secret to perfectly smooth, clean slices for any frozen pie, especially one with a fudge topping. Run a long, sharp knife (a serrated knife, like a bread knife, works exceptionally well due to its saw-like teeth) under very hot water. Make sure the blade is thoroughly warmed. Then, immediately dry the knife completely with a paper towel. The heat helps the blade glide through the frozen layers, and drying prevents any ice crystals or stickiness. Repeat this process for each slice as needed.
- Why Paper Towels? I prefer using a paper towel to dry the hot knife. This is because chocolate stains can be quite stubborn and difficult to remove from patterned cloth dish towels, whereas a paper towel can simply be discarded after use.
Elevate Your Dessert: Creative Garnishing Ideas for Ice Cream Pie
If you’re serving this easy, no-bake chocolate ice cream pie to guests, a thoughtful garnish can transform it from a simple treat into a restaurant-worthy dessert with minimal effort. Here’s how to make your pie truly shine:
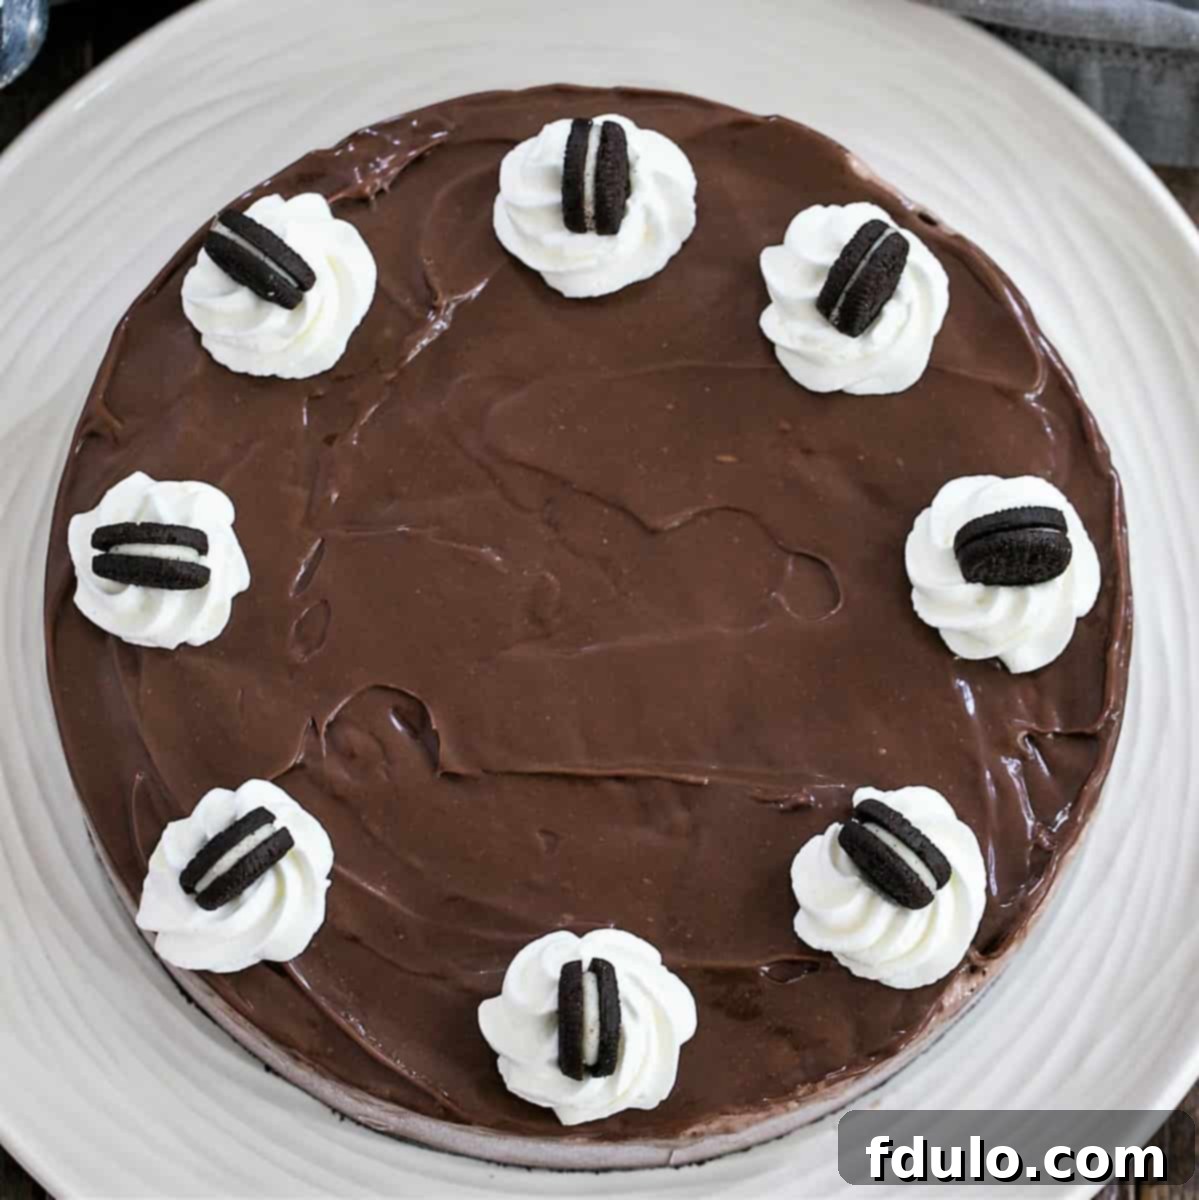
I love to pipe eight elegant dollops of sweetened whipped cream evenly around the perimeter of the pie, aligning them with where each slice will be. Into each mound of whipped cream, I then gently insert a halved chocolate sandwich cookie (like an Oreo). This should be done right before serving to ensure the whipped cream remains fresh and doesn’t freeze solid, maintaining its soft texture.
Since this recipe typically yields eight slices, each portion will emerge beautifully garnished, creating an impressive presentation without requiring extensive culinary skills. For piping the whipped cream, a piping bag fitted with an open star tip works wonderfully, or you can use a handy tool like a Pampered Chef Easy Decorator (affiliate link).
This garnishing technique is versatile and can be adapted for other flavors of ice cream pies. Simply take inspiration from the pie’s ingredients when choosing what to insert into your whipped cream. Malted milk balls, different types of cookies, or various candies would all make excellent additions. However, be cautious with candies like M&M’s, as their colors can bleed when exposed to moisture, potentially marring your beautiful presentation. Stick to solid chocolate or cream-filled options for best results.
Scaling Up: Making a Larger Chocolate Ice Cream Pie for Crowds
For larger gatherings or special celebrations, scaling up this recipe is remarkably simple. This past Fourth of July, I successfully made a larger version of this ice cream pie in a 9-inch springform pan, which offers a taller, more dramatic presentation. The basic procedure remains the same, but with a few adjustments to the quantities.
Instead of the standard amount, I used three pints of chocolate brownie ice cream for the filling, which provided a more substantial and even richer layer of frozen goodness. You might also want to purchase two jars of fudge sauce, just in case you need a little extra for full, luscious coverage, especially if you want a thicker fudge layer or if your springform pan has taller sides. The springform pan makes it incredibly easy to release the pie for serving, revealing clean, elegant edges. Simply press the cookie crumbs onto the bottom of the pan, omitting them from the sides, for a classic, easy-to-slice base.
Your Top Questions Answered: Fudge-Topped Chocolate Ice Cream Pie FAQ
The creation of the original Mud Pie is widely credited to restaurateur Joanna Droeger. She introduced this now-iconic dessert to her San Francisco restaurant in 1957. Her pioneering version featured a delightful Oreo crust, a creamy coffee ice cream filling, and was generously crowned with a rich homemade fudge topping. This combination set the standard for the many variations of mud pie enjoyed today.
The name “Mississippi Mud Pie” is wonderfully evocative and is said to originate from the dessert’s striking resemblance to the dark, rich, and often thick mud found along the banks of the mighty Mississippi River. The deep brown layers of chocolate, ice cream, and fudge conjure images of the riverbed, giving this decadent dessert its distinctive and memorable name.
While my recipe stays true to the traditional spirit with a cookie crust, chocolate ice cream, and fudge sauce, the concept of a “mud pie” has evolved to include various delightful ingredients. Beyond the classic components, other versions of mud pies might incorporate chocolate pudding, layers of chocolate cake, marshmallows, or different liqueurs, all typically nestled within a crumbly cookie crust. The core idea, however, remains a rich, multi-layered chocolate dessert.
Spreading the fudge topping can indeed be a bit tricky, as the cold ice cream tends to melt quickly, making the fudge difficult to handle. To achieve a perfectly smooth topping, begin by warming your jar of fudge sauce ever so slightly. It should be warm enough to be easily spreadable but not hot, as excessive heat will melt the ice cream too rapidly. Remove your thoroughly frozen pie from the freezer and work swiftly. Drop small, even spoonfuls of the warmed fudge all over the surface of the ice cream. Then, using a knife or an offset spatula, immediately and gently smooth the fudge, joining all the dollops to create an even, luscious layer. If you notice the ice cream starting to melt significantly, immediately return the pie to the freezer to firm up again before continuing. Patience and speed are your allies in achieving that perfect, glossy fudge finish!
More Decadent Frozen Dessert Recipes You’ll Love
If you’re a fan of this Fudge-Topped Chocolate Ice Cream Pie, you’re sure to enjoy these other delightful frozen dessert recipes. Perfect for any occasion, they offer a variety of flavors and textures to satisfy your sweet tooth!
- Peanut Butter Cup No-Churn Ice Cream Cake from Cupcakes and Kale Chips
- Layered Ice Cream Pie with Chocolate Cookie Crust
- Refreshing Homemade Peach Ice Cream
- Irresistible Vanilla Caramel Swirl Ice Cream
- Creamy Cheesecake Ice Cream with Strawberry Sauce
- Discover more of my Best Dessert Recipes for every craving!
Stay connected and get more delicious recipe ideas by following me on Instagram, Facebook, and Pinterest. Don’t forget to tag me when you whip up one of my recipes! If you love the results, please consider leaving a 5-star rating in the recipe card below – your feedback means the world to me!
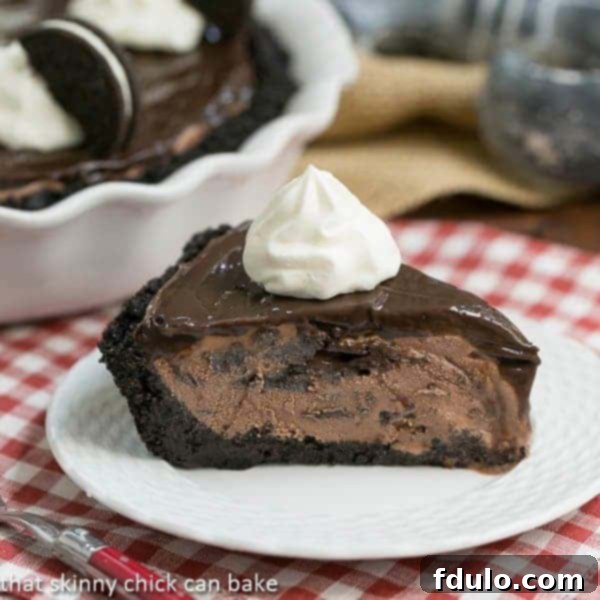
Fudge Topped Chocolate Ice Cream Pie Recipe
30 minutes
30 minutes
8 servings
An easy peasy ice cream pie with 3 layers of decadent chocolate deliciousness!
Ingredients
- 1 (9-ounce) package of chocolate wafer cookies (or 22 chocolate sandwich cookies), processed or crushed into fine crumbs
- 6 tablespoons melted butter
- 2 tablespoons sugar (omit if using chocolate sandwich cookies)
- 1 quart premium chocolate-chocolate chip ice cream (or another favorite variety of chocolate ice cream)
- 2 tablespoons brandy
- 2 tablespoons Kahlúa or other coffee liqueur
- 1 jar good quality fudge sauce (approx. 12.25 ounces)
- Sweetened whipped cream and halved chocolate sandwich cookies for garnish (optional)
Instructions
- In a medium bowl, combine cookie crumbs, melted butter, and sugar (if using). Press this mixture firmly into a greased 9-inch pie plate to form the crust. Place the crust in the freezer to chill and firm up.
- While the crust is freezing, take the chocolate ice cream out of the freezer and let it soften slightly at room temperature until it’s pliable.
- In a bowl, mix the softened ice cream with the brandy and Kahlúa (or coffee liqueur). Pour this mixture into the center of the frozen pie crust. Use an offset spatula or the back of a spoon to gently smooth the top surface of the ice cream. Return the pie to the freezer and freeze until solid, typically a few hours or overnight.
- Once the pie is completely frozen solid, gently warm the fudge sauce until it’s pourable but not hot. Drop medium spoonfuls of fudge sauce all over the top of the frozen ice cream. Working quickly, use an offset spatula to spread the fudge sauce evenly, covering the entire ice cream layer. If the ice cream begins to melt or the fudge breaks through, immediately place the pie back in the freezer to reharden before continuing.
- Before serving, if desired, whip cream and pipe small decorative swirls around the perimeter of the pie. Place a half chocolate sandwich cookie or a mini Oreo onto each whipped cream swirl for an elegant garnish.
Notes
Use a hot, dry knife for clean slices. Reheat and wipe the knife as often as needed for best results.
To prepare a larger version in a 9-inch springform pan instead of a pie plate, increase the amount of ice cream to 3 quarts. For this method, press the cookie crumbs only onto the bottom of the springform pan, not up the sides.
Recommended Products
As an Amazon Associate and member of other affiliate programs, I earn from qualifying purchases.
- Small Offset Spatula
- Set of Glass Mixing Bowls
- Ceramic pie plate
Nutrition Information:
Yield:
8
Serving Size:
1 slice
Amount Per Serving:
Calories: 852Total Fat: 44gSaturated Fat: 26gTrans Fat: 0gUnsaturated Fat: 15gCholesterol: 55mgSodium: 419mgCarbohydrates: 98gFiber: 5gSugar: 73gProtein: 11g
HOW MUCH DID YOU LOVE THIS RECIPE?
Please leave a comment on the blog or share a photo on Pinterest
