Homemade Chocolate Truffles: An Irresistibly Simple Recipe for Gourmet Delights

There’s something uniquely magical about chocolate, especially during the holidays. Few treats evoke such warmth, luxury, and pure indulgence as a beautifully crafted chocolate truffle. In many families, including mine, the answer to “Can you ever have too many chocolate treats?” is a resounding NO! The holiday season, with its vibrant array of gatherings and gift-giving traditions, is the perfect time to share these edible masterpieces. This particular recipe, adapted from the trusted pages of Cook’s Illustrated, promises a simple yet utterly delightful path to creating gourmet truffles right in your own kitchen.
What makes homemade truffles truly special? It’s the blend of fresh ingredients, the personal touch, and the incredible satisfaction of watching loved ones savor your culinary creation. This recipe doesn’t just promise deliciousness; it delivers an experience. Imagine rich, velvety ganache, rolled into perfect spheres and dusted with fine cocoa powder – a luxurious bite that tastes far more complex than its preparation suggests. Whether you’re looking for an impressive dessert for a dinner party, a thoughtful homemade gift, or simply a treat to elevate your own afternoon, these chocolate truffles are a fantastic choice.
Why Homemade Truffles Are a Must-Try
Beyond the sheer enjoyment of eating them, making your own chocolate truffles offers several compelling advantages:
- Unmatched Freshness: Store-bought truffles, no matter how premium, can’t compete with the fresh, vibrant flavors of truffles made moments before.
- Customization Options: From the type of chocolate to the flavorings and coatings, you have complete control. Want a hint of chili? A splash of your favorite liqueur? The possibilities are endless.
- Cost-Effective Luxury: High-quality chocolate truffles can be quite expensive. Making them at home allows you to enjoy gourmet indulgence without the hefty price tag.
- A Rewarding Experience: The process itself is surprisingly therapeutic and enjoyable, culminating in a product that looks and tastes incredibly professional.
- Perfect for Gifting: Elegantly packaged, homemade truffles make an exceptional and personal gift for friends, family, teachers, or hosts.
This recipe focuses on simplicity without compromising on flavor or texture, making it accessible even for novice confectioners. It starts with a perfectly balanced ganache – the heart of any great truffle – and guides you through each step to ensure success.
The Heart of the Truffle: Masterful Ganache
At the core of these exquisite chocolate truffles lies ganache – a classic French preparation made from chocolate and cream. The quality of your ingredients directly impacts the final product, so choose wisely. For this recipe, we opt for semi-sweet chocolate, which provides a rich, balanced flavor that’s not overly bitter or sweet. Combining it with heavy cream, a touch of corn syrup for a silky texture, and a hint of vanilla or liqueur creates a luxurious base that is both stable and incredibly flavorful.
Ingredients You’ll Need:
- 12 ounces semi-sweet chocolate, finely chopped: Chopping ensures even melting. High-quality chocolate will make a noticeable difference.
- 1/2 cup heavy cream: Essential for the rich, smooth texture.
- 2 tablespoons light corn syrup: This acts as an invert sugar, preventing crystallization and giving the truffles a wonderfully smooth, melt-in-your-mouth consistency.
- 1/2 teaspoon vanilla extract (or 2 tablespoons of your favorite liqueur): Vanilla adds a classic warmth, while liqueurs like Grand Marnier, Kahlúa, or rum can introduce sophisticated flavor notes.
- 1 1/2 tablespoons unsalted butter, at room temperature and cut into small pieces: Butter contributes to the truffle’s richness, shine, and improves its overall texture.
For Coating:
- 1 cup unsweetened cocoa powder: Provides the classic slightly bitter contrast to the sweet interior.
- 1/4 cup powdered sugar: Adds a touch of sweetness to the cocoa coating and helps prevent clumping.
Step-by-Step Guide to Crafting Your Truffles
Patience and attention to detail are key to perfect truffles. Follow these instructions carefully, and you’ll be rewarded with a batch of beautiful, delicious confections.
Preparation is Key:
- Prepare Your Pan: Line an 8-inch square pan with aluminum foil, ensuring the foil overhangs the sides. This overhang will serve as handles to easily lift the chilled ganache later. Set aside.
Creating the Silky Ganache:
- Melt the Chocolate: Place the finely chopped semi-sweet chocolate in a medium, microwave-safe bowl. Microwave on medium power, stopping and stirring at 30-second intervals. Continue until the chocolate is almost completely melted and smooth. Be careful not to overheat it, as chocolate can scorch easily.
- Warm the Cream: In a separate microwave-safe measuring cup, heat the heavy cream for about 30 seconds, or until it is warm but not boiling. Boiling the cream can negatively affect the ganache texture.
- Combine Wet Ingredients: Stir the light corn syrup and vanilla extract (or your chosen liqueur) into the warm cream until well combined.
- Marry Chocolate and Cream: Pour the warm cream mixture over the melted chocolate. Do not stir immediately. Cover the bowl with plastic wrap and let it sit undisturbed for a few minutes. This allows the heat from the cream to gently melt any remaining chocolate pieces.
- Emulsify the Ganache: After a few minutes, remove the plastic wrap and stir the mixture gently from the center outwards, gradually incorporating all the chocolate until the ganache is uniform, smooth, and glossy. It should have a beautiful, cohesive texture.
- Add the Butter: Add the small pieces of room-temperature butter to the ganache. Continue stirring gently until the butter is fully incorporated and the ganache is impeccably smooth and shiny. This final addition enhances the texture and adds a lovely sheen.
Chilling and Shaping:
- Chill the Ganache: Spread the chocolate ganache evenly into the prepared foil-lined pan. Allow it to cool at room temperature for at least 2 hours. This initial cooling helps it set slightly.
- Refrigerate for Firmness: Once cooled at room temperature, cover the pan with plastic wrap and transfer it to the refrigerator. Chill for at least another 2 hours, or preferably overnight, until the ganache is firm enough to cut and handle. Proper chilling is crucial for shaping.
- Prepare the Coating: While the ganache chills, prepare your coating. Sift together the cocoa powder and powdered sugar into a flat pan or shallow dish. Sift it again to ensure there are absolutely no lumps. This double sifting creates a truly fine, even coating.
Cutting, Rolling, and Finishing:
- Remove and Cut Ganache: Once thoroughly chilled, remove the ganache from the refrigerator. Use the foil overhang to lift the ganache slab out of the pan. Gently peel off the foil and place the ganache on a clean cutting board. Let it warm up for just a couple of minutes – too cold and it will crack, too warm and it will be too soft to handle.
- Portioning Truffles: To achieve 64 equal-sized squares, start by cutting the large square into 4 even parts. Then, cut each of those 4 squares into 4 even parts. Repeat this process twice more until you have 64 small, uniform squares. Precision here helps with consistent truffle size.
- Roll into Balls: Lightly dust your hands with a small amount of the cocoa powder mixture. Take one ganache square at a time and gently roll it between your palms to form a smooth ball. Try to work quickly to prevent the ganache from melting too much from the warmth of your hands.
- Coat the Truffles: Place the rolled truffle balls into the pan with the sifted cocoa mix. Roll them gently to coat them completely. Shake off any excess coating by gently tapping the truffle or rolling it between your hands.
- Store and Serve: Place the finished truffles in an airtight container. Store them in the refrigerator. For the best flavor and texture, allow the truffles to come to room temperature for about 15-30 minutes before serving. This allows them to soften slightly, enhancing their melt-in-your-mouth quality.
This recipe yields approximately 64 exquisite chocolate truffles, perfect for sharing, gifting, or indulging yourself.
Tips for Truffle Perfection
Achieving bakery-quality truffles at home is easier than you think with these expert tips:
- Quality Ingredients Matter: Invest in good quality semi-sweet chocolate. It will significantly impact the flavor profile of your truffles.
- Mind the Temperature: Overheated chocolate or cream can cause the ganache to seize or become grainy. Gentle heat is always best. Similarly, ensuring the ganache is properly chilled is crucial for easy handling.
- Work Clean and Quickly: When rolling, keep your hands lightly dusted with cocoa and work efficiently to prevent the ganache from becoming too sticky.
- Experiment with Flavor: Don’t be afraid to try different liqueurs (rum, brandy, coffee liqueur) or extracts (peppermint, almond, orange) to customize your truffles.
- Consider Wearing Gloves: For a cleaner process and to minimize melting, wear thin food-safe gloves when rolling the truffles.
Endless Flavor Variations and Coatings
While the classic cocoa-dusted truffle is undeniably delicious, this recipe is a fantastic canvas for creativity. Explore these ideas to personalize your batch:
- Nutty Crunch: Roll truffles in finely chopped toasted nuts like almonds, pistachios, or hazelnuts.
- Coconut Dream: Coat them in toasted shredded coconut for a tropical twist.
- Sprinkle Fun: Use colorful sprinkles for a festive look, especially appealing to children.
- Double Chocolate: Melt additional chocolate and dip the cocoa-dusted truffles, allowing them to set for a crisp outer shell. You can also drizzle melted chocolate for an artistic touch.
- Spicy Kick: Add a pinch of cayenne pepper or chili powder to the ganache mixture for an unexpected heat.
- Zesty Brightness: Incorporate finely grated orange or lemon zest into the ganache.
- Espresso Boost: Mix a teaspoon of instant espresso powder into the warm cream for a coffee-infused treat.
- Matcha Magic: For a unique flavor and vibrant color, roll truffles in matcha green tea powder.
Storage and Gifting Ideas
Proper storage is essential to keep your truffles fresh and delicious. Always store them in an airtight container in the refrigerator. When stored correctly, these homemade chocolate truffles will remain fresh for up to 2-3 weeks. Remember to let them come to room temperature before serving to allow their flavors and textures to fully develop.
These beautiful truffles are not just a dessert; they are a perfect homemade gift. Here are some presentation ideas:
- Elegant Gift Boxes: Arrange truffles in small, decorative confectionery boxes, perhaps separating layers with parchment paper.
- Mason Jars: Layer truffles in a clean mason jar, tying a festive ribbon around the lid.
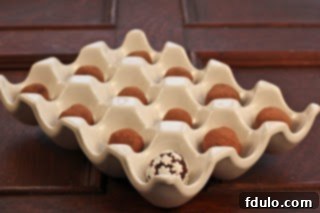
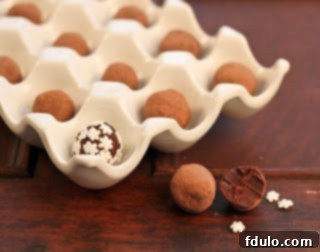
- Creative Displays: As seen in the images, an antique or ceramic egg crate can make a charming and unique presentation for a smaller batch, adding a rustic yet refined touch.
- Personalized Touch: Add a handwritten tag with the flavor profile or a sweet message to make your gift extra special.
