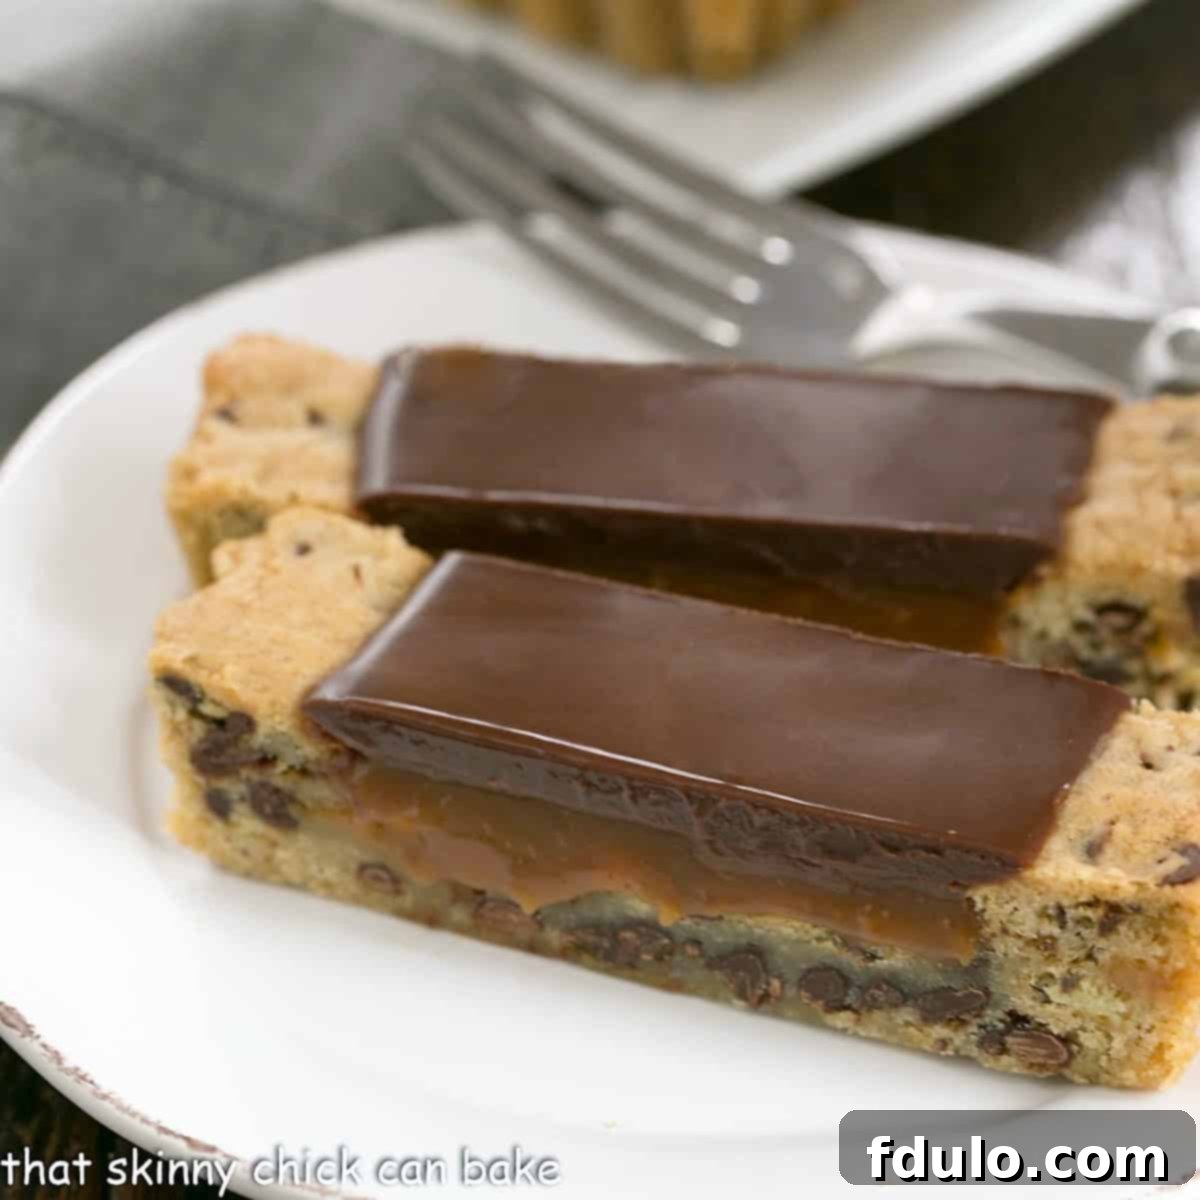
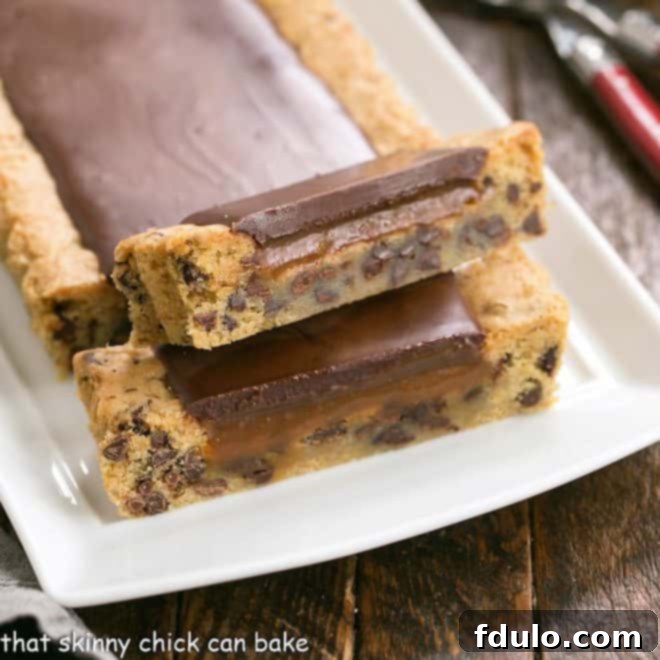
Indulge in the ultimate dessert experience with this exquisite Chocolate Chip Cookie Tart, adorned with luscious caramel and a shimmering chocolate glaze. This masterpiece seamlessly blends the comforting familiarity of a classic chocolate chip cookie with the sophisticated allure of a gourmet tart, promising to satisfy every sweet craving. It’s more than just a dessert; it’s a celebration of flavors, an artful combination that delivers pure bliss in every single bite.
Prepare to be captivated by these loaded Chocolate Chip Cookie Bars, truly the stuff dessert dreams are made of. Imagine a buttery, chewy cookie crust, generously filled with rich, velvety caramel, and crowned with a glossy chocolate glaze. This isn’t just a treat; it’s an unforgettable culinary journey that will have your family and friends raving after their very first taste. Perfect for special occasions or simply elevating an ordinary day, this tart is designed to impress and delight.
Why You Must Make This Decadent Chocolate Chip Cookie Tart
This isn’t just another dessert recipe; it’s an invitation to create something truly extraordinary in your kitchen. Here’s why this Chocolate Chip Cookie Tart with Caramel and Chocolate Glaze deserves a prime spot in your baking repertoire:
- A Recipe Born from Friendship and Passion: This exceptional recipe comes from my dear blogger friend, Danielle, renowned for her amazing dessert creations. Her expertise shines through in every layer, ensuring a foolproof and truly delicious result that has been tested and perfected. It’s a testament to the joy of sharing great food and the magic that happens when passionate bakers share their secrets.
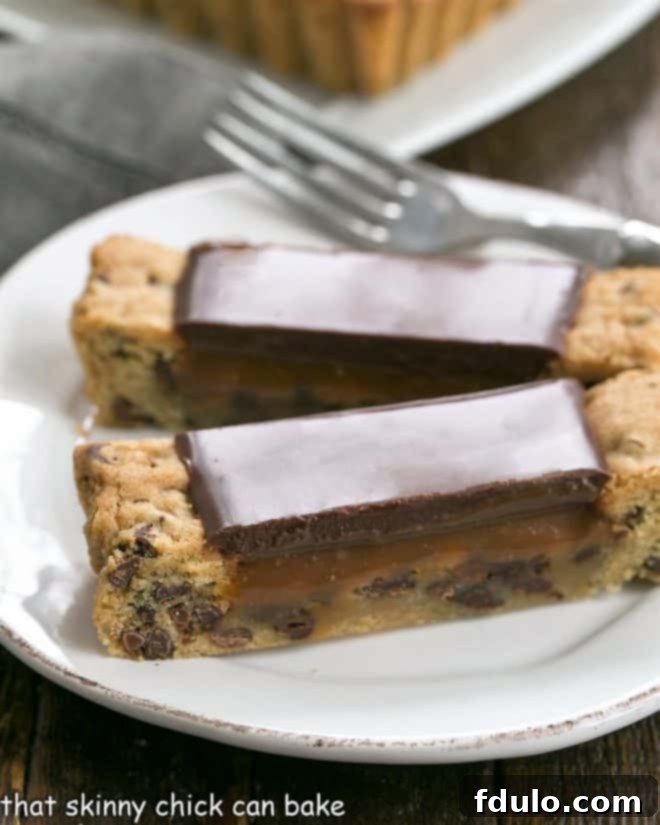
- A Symphony of Flavors and Textures: At its heart, this tart features a perfectly baked chocolate chip cookie shell that’s both tender and chewy. This delightful base cradles a generous layer of rich, homemade caramel – buttery, sweet, and utterly irresistible. To complete this luxurious experience, it’s finished with an exquisite chocolate glaze that adds a hint of bitterness and a beautiful shine.
- Decadence in Every Bite: This harmonious trio of decadent components works together seamlessly. Each forkful delivers a delightful contrast: the chewiness of the cookie, the gooey richness of the caramel, and the smooth snap of the chocolate glaze. It’s a sensory experience that tantalizes the taste buds, making it impossible to stop at just one slice. Whether you’re a chocolate lover, a caramel enthusiast, or simply someone who appreciates a well-crafted dessert, this tart will exceed your expectations.
- Impressive Yet Approachable: While this tart looks incredibly sophisticated, the process of making it is surprisingly straightforward. With clear instructions and helpful tips, even novice bakers can achieve stunning, bakery-quality results. It’s the perfect dessert to showcase your baking skills and impress guests at any gathering, from casual potlucks to elegant dinner parties.
Expert Baking Tips for a Perfect Chocolate Chip Cookie Tart
Achieving bakery-quality results at home is easier than you think with these professional insights. Follow these expert tips to ensure your Chocolate Chip Cookie Tart turns out absolutely flawless every time:
- Choosing the Right Tart Pan: For perfectly shaped bars, use a 13 x 4 inch rectangular tart pan. A pan with a removable bottom is highly recommended as it significantly eases the process of releasing the tart without damaging its delicate structure. While the linked option is a close match, a non-stick version would be even better for a seamless release. If you can’t find these exact dimensions, a similar rectangular pan will work, just be mindful of adjusting baking times slightly.
- Always Grease Your Pan: Regardless of whether your pan is non-stick, a light greasing will provide an extra layer of insurance for easy removal. This prevents any sticking and ensures your beautiful tart slides out effortlessly, preserving its pristine edges.
- PRO-Tip: Chill Your Cookie Dough for Structure: After pressing the cookie dough into the tart pan, it’s crucial to chill it. Place the pan in the refrigerator for about 30 minutes, or in the freezer for approximately 10 minutes. This chilling period helps the butter solidify, preventing the dough from spreading excessively during baking and ensuring it holds its shape. While baking, the cookie crust will puff up; don’t worry, this is normal! Immediately after removing it from the oven, gently press the middle down with the back of a spoon to create a neat well for the caramel filling. This step is key for a well-defined tart.
- PRO-Tip: Invest in a Heavy-Duty Pot for Caramel: When making homemade caramel, the quality of your cookware matters. Using a heavy-bottomed, thick-walled pot helps distribute heat evenly and prevents hot spots, drastically reducing the risk of your sugar burning. Thin or inexpensive pans are prone to uneven heating, which can lead to scorched caramel. This small investment will make a big difference in the success of your caramel.
- Customize Your Caramel: This recipe allows for versatility in your caramel choice. My version features a classic, unsalted caramel, which my family prefers (we’re slow adopters of new food trends!). However, if you enjoy the sophisticated balance of sweet and savory, simply add ⅜ teaspoon of good quality salt (like fleur de sel or sea salt) to your caramel for a delicious salted caramel variation. Taste and adjust to your preference.
- Storing Your Tart: If your caramel filling seems a bit on the runnier side, don’t fret. Simply cover the tart tightly and refrigerate it. The cold will help the caramel set firm. For the best serving experience, slice the chilled tart and then allow it to warm up slightly at room temperature before serving. This brings out the flavors and softens the textures perfectly.
- Chocolate Variations: Feel free to customize the chocolate elements to your liking. Instead of semisweet chips, you could use bittersweet chocolate for a more intense flavor or even white chocolate for a sweeter, creamier profile. For the chips, consider chopping a high-quality Ghirardelli bar to create custom-sized pieces. The same goes for the glaze – experiment with different types of chocolate to find your favorite combination.
By following these detailed tips, you’re not just making a dessert; you’re mastering the art of the Chocolate Chip Cookie Tart, ensuring a delightful and professional-looking treat every single time.
Frequently Asked Questions About Caramel and Baking This Tart
Crystallization is a common challenge when making caramel. The key to preventing grainy caramel is to introduce an “inert sugar” like corn syrup or an acid such as lemon juice. These ingredients interfere with the sugar crystals’ ability to bond together, keeping your caramel smooth and fluid. Stirring minimally once the sugar starts to melt, and avoiding introducing any sugar crystals from the sides of the pan back into the melting sugar, also helps immensely.
Visual cues are your best friend here. Watch closely for a distinct color change in your caramel. It’s ready when it transforms into a beautiful, dark amber hue, reminiscent of classic caramel candies or sauce. This color indicates the sugar has caramelized to perfection, developing its deep, complex flavor. Remember, caramel continues to cook and darken even after it’s removed from the heat due to residual heat, so it’s often best to pull it off just slightly before it reaches your desired shade to prevent it from becoming too dark or developing a burnt taste.
To maintain its freshness and structural integrity, especially with the caramel filling, it’s best to store your Chocolate Chip Cookie Tart in an airtight container in the refrigerator. It will keep well for 3-5 days. For optimal flavor and texture, allow slices to come to room temperature for about 15-20 minutes before serving.
Absolutely! The cookie dough can be made a day or two in advance and kept refrigerated, wrapped tightly. You can also bake the cookie crust shell completely and store it at room temperature for up to a day, or freeze it for longer. The homemade caramel can be prepared ahead of time and stored in an airtight container in the fridge for up to a week; gently reheat it to a pourable consistency when ready to assemble. This makes assembling the final tart a breeze!
You May Also Like: More Irresistible Desserts
If you’ve fallen in love with the indulgent layers of this Chocolate Chip Cookie Tart, you’re sure to adore these other fantastic recipes. Inspired by delightful combinations of chocolate, caramel, and classic cookie flavors, they offer even more ways to satisfy your sweet tooth:
- Brown Butter Chocolate Chunk Bars – A true delight for any chocolate chip cookie aficionado! These bars take the classic to new heights, featuring the nutty depth of brown butter and an irresistible blend of three kinds of chocolate chunks. They offer a rich, complex flavor that’s both familiar and exciting.
- Homemade Twix Bars – Recreate your favorite candy bar at home with these irresistible homemade Twix bars. Layers of delicate shortbread, chewy caramel, and smooth chocolate come together in a symphony of textures and tastes. They’re dangerously addictive and perfect for sharing (or not!).
- Death by Chocolate Cookies – For the ultimate chocolate lovers, these cookies are a dream come true. Packed with intense chocolate flavor and various chocolate components, they offer a deeply satisfying and rich experience. Prepare for a blissful chocolate overdose!
- Plus, explore more of the Best Bar Cookies from the blog – a curated collection of easy-to-make and incredibly delicious bar cookie recipes perfect for any occasion.
Stay connected and share your baking journey with us on social media! Find us @ Instagram, Facebook, and Pinterest. Don’t forget to tag us when you try one of our recipes! We love seeing your delicious creations. And if you’re thrilled with the results, please consider leaving a 5-star rating in the recipe card below – your feedback helps other bakers discover these fantastic treats!
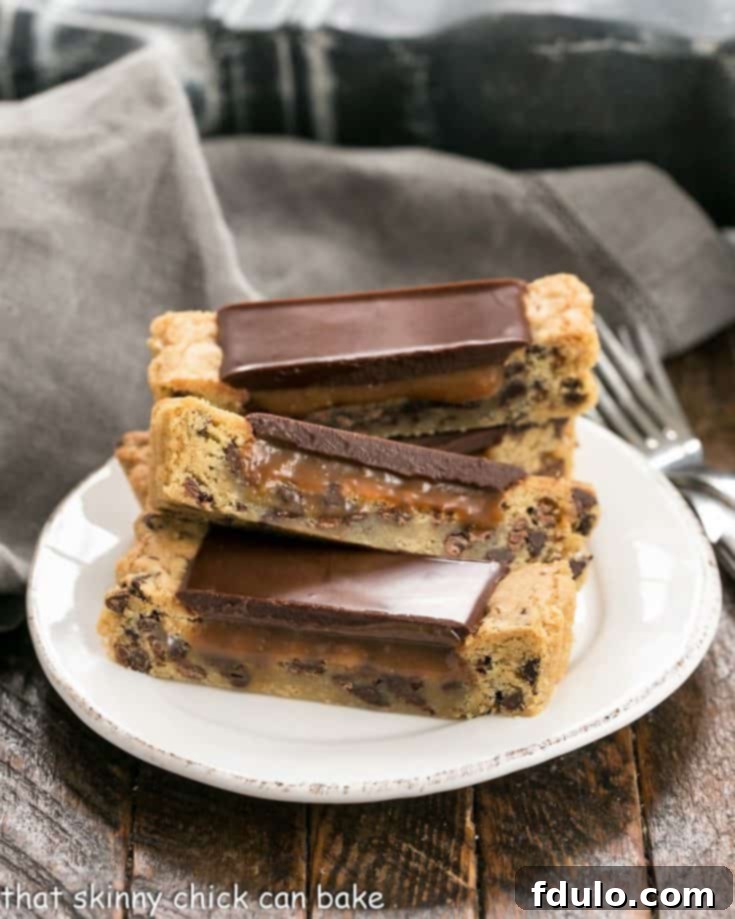
Chocolate Chip Cookie Tart with Caramel & Chocolate Glaze
20 minutes
35 minutes
55 minutes
12 servings
A show-stopping dessert featuring a buttery chocolate chip cookie crust, a luscious homemade caramel filling, and a decadent chocolate glaze. This tart is a dream come true for chocolate and caramel lovers!
Ingredients
For the Cookie Dough Crust:
- 1 cup plus 2 tablespoons (about 140g) all-purpose flour
- ¼ tsp. kosher salt
- ¼ tsp. baking soda
- 6 Tablespoons (85g) unsalted butter, softened to room temperature
- ½ cup (100g) light brown sugar, packed
- ¼ cup (50g) granulated sugar
- 1 teaspoon pure vanilla extract
- 1 large egg
- 1 cup (170g) mini semisweet chocolate chips
For the Homemade Caramel (yields more than needed for the tart, perfect for other uses!):
- 1 cup (200g) granulated sugar
- ½ cup plus ⅓ cup (about 200ml) heavy cream, gently warmed in the microwave or a small saucepan
- 1 tablespoon (14g) salted butter (or unsalted butter + a pinch of salt)
For the Decadent Chocolate Glaze (yields more than needed, great for drizzling!):
- 4 ounces (113g) unsalted butter
- 8 ounces (226g) semisweet chocolate chips (or finely chopped chocolate)
- 1 tablespoon light corn syrup (helps with shine and smoothness)
- Fleur de sel, optional (for garnish)
Instructions
- Prepare the Cookie Dough: Preheat your oven to 350ºF (175ºC). In a large mixing bowl, cream together the softened butter, light brown sugar, and granulated sugar until the mixture is light and fluffy. This aeration is key for a tender cookie crust. Beat in the egg and vanilla extract until well combined and smooth. In a separate bowl, whisk together the flour, kosher salt, and baking soda. Gradually add the dry ingredients to the wet ingredients, mixing on low speed until just combined. Be careful not to overmix. Finally, gently fold in the mini semisweet chocolate chips until evenly distributed throughout the dough.
- Chill the Dough: For best results, especially if your kitchen is warm, chill the cookie dough for about an hour before using. This firms up the butter, making the dough easier to handle and helping the crust maintain its shape during baking.
- Form the Tart Crust: Lightly grease a 13 x 4-inch rectangular tart pan (preferably with a removable bottom). Press the chilled cookie dough evenly into the bottom and up the sides of the prepared tart pan. Aim to make the bottom layer slightly thinner than the sides for optimal texture and balance. Ensure the dough is pressed firmly to avoid cracks.
- Bake the Crust: Bake the cookie crust for about 25 minutes, or until it’s beautifully golden brown around the edges and set in the center. Don’t be alarmed if it puffs up significantly and appears to fill the pan – this is completely normal.
- Create the Caramel Well: As soon as you remove the hot tart crust from the oven, immediately and gently press the bottom flat with the back of a spoon or a small measuring cup. This crucial step creates a neat indentation, forming the perfect well to hold the luscious caramel filling. Allow the cookie crust to cool completely in the pan on a wire rack before proceeding.
- Start the Caramel: To make the homemade caramel, spread the granulated sugar in an even layer across the bottom of a large, heavy-bottomed saucepan. Set the pan over moderate heat and begin cooking without stirring. Watch carefully as the sugar near the edges starts to liquefy and turn amber.
- Stir and Continue Cooking Caramel: Once the edges begin to melt, use a wooden spoon or heat-proof spatula to gently stir, encouraging the melted sugar from the edges towards the center. Carefully incorporate any melting sugar from the bottom. The sugar may initially clump and look “pebbly” – this is normal, keep going! Continue cooking and stirring until all the sugar has completely melted and transformed into a smooth, dark amber-colored liquid. Be patient, as this process takes time and careful attention.
- Adjust Heat if Needed: If you notice the sugar browning too quickly at any point, immediately lower the heat and continue stirring to ensure even caramelization and prevent burning.
- Finish Caramelizing: Continue to cook until the sugar reaches that beautiful, deep amber color. Once it’s achieved the desired hue, promptly remove the pan from the heat to prevent it from burning.
- Incorporate Cream and Butter: Very slowly and carefully, begin adding the warmed heavy cream to the hot caramel, just a few drops at a time, while continuously stirring. This slow addition is vital to prevent the caramel from seizing (hardening into a solid mass). Be patient and continue adding a few drops at a time, stirring until all the cream is smoothly incorporated. Once the mixture is smooth, stir in the salted butter until it’s fully melted and combined. Let the caramel cool slightly before using; it will thicken as it cools.
- Fill with Caramel and Chill: Pour approximately ½ cup of the prepared caramel (you will likely have some leftover for other treats!) into the cooled cookie tart crust, spreading it evenly across the bottom. Place the tart in the refrigerator and chill until the caramel is firm, typically about 30-60 minutes.
- Prepare the Chocolate Glaze: While the caramel chills, make the chocolate glaze. In a microwave-safe bowl, combine the butter and chocolate chips. Microwave in 30-second intervals, stirring well after each, until the mixture is completely smooth and melted. Stir in the light corn syrup; this adds a lovely sheen and helps achieve that perfect pourable consistency. Let the glaze sit for a few minutes to thicken slightly. Once the caramel layer in the tart is firm and cold, carefully pour the chocolate glaze over it, spreading it evenly to fill the remaining empty space in the tart shell.
- Final Touches: If desired, sprinkle a delicate pinch of fleur de sel over the chocolate glaze while it’s still wet. This adds a beautiful touch and a subtle hint of savory contrast. Chill the entire tart again until the chocolate glaze is set, about 1-2 hours. Once firm, remove from the tart pan (using the removable bottom if applicable), slice, and serve.
Notes
This irresistible recipe has been lovingly adapted from the wonderful creators at Hugs & Cookies XOXO. Their original inspiration led to this magnificent dessert!
Make-Ahead Tip: The cookie dough can be prepared up to 2 days in advance and stored in the refrigerator. The caramel sauce can also be made a week ahead and stored in the fridge, then gently reheated. This makes assembly on the day of serving quick and easy.
Serving Suggestions: For an extra special touch, serve slices of this tart with a scoop of vanilla bean ice cream or a dollop of fresh whipped cream. A light dusting of cocoa powder or a drizzle of extra caramel sauce can also elevate the presentation.
Recommended Products
As an Amazon Associate and member of other affiliate programs, I earn from qualifying purchases.
- Mini Semisweet Chocolate Chips
- KitchenAid 9-Speed Digital Hand Mixer
- Rectangular Tart Pan (13×4 inch)
Nutrition Information:
Yield:
12
Serving Size:
1
Amount Per Serving:
Calories: 380Total Fat: 23gSaturated Fat: 14gTrans Fat: 1gUnsaturated Fat: 8gCholesterol: 57mgSodium: 226mgCarbohydrates: 45gFiber: 1gSugar: 40gProtein: 2g
HOW MUCH DID YOU LOVE THIS RECIPE?
Please leave a comment on the blog or share a photo on Pinterest
