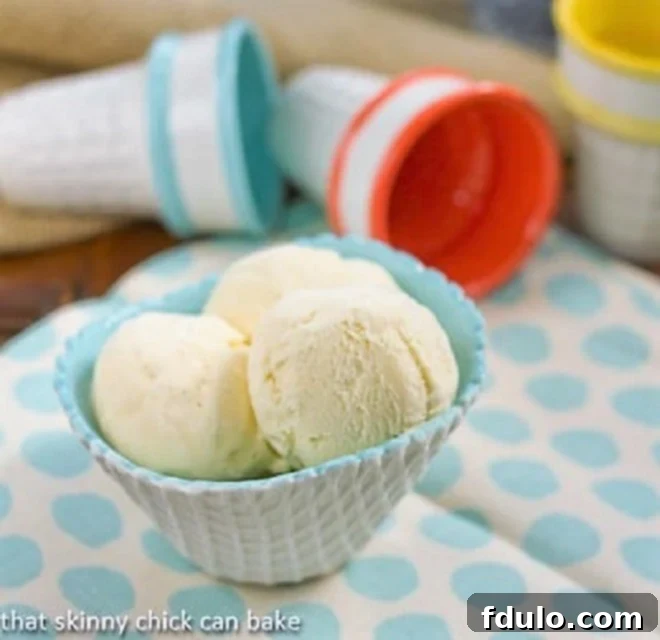
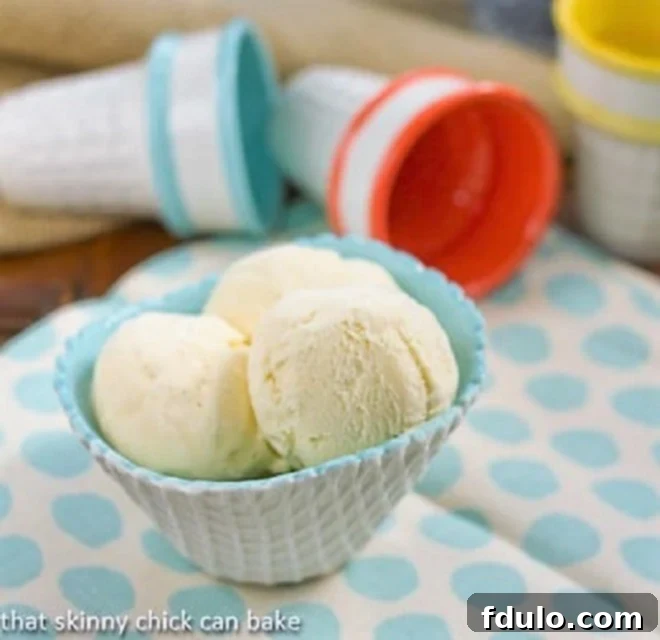
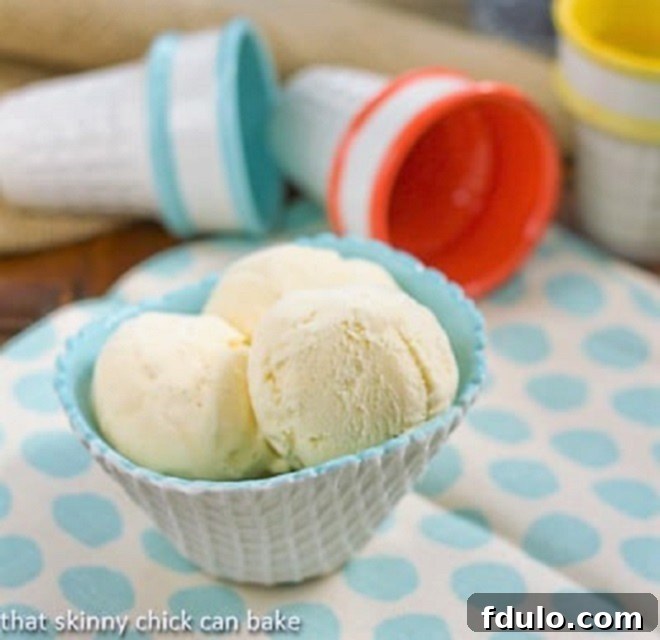
Indulge in the unparalleled richness and exquisite flavor of homemade Vanilla Bean Ice Cream, crafted with real vanilla bean paste and luxurious heavy cream. This recipe promises an irresistibly creamy texture and a taste far superior to anything store-bought. Discover how easy it is to create this timeless frozen dessert in your own kitchen!
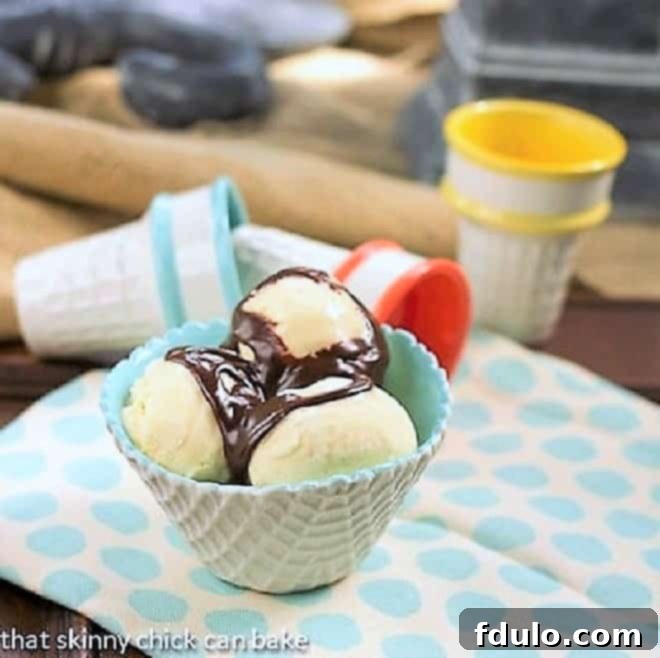
There’s nothing quite like a scoop of perfectly churned vanilla ice cream. Its versatile nature makes it an ideal accompaniment for a myriad of desserts, from warm fruit pies and crumbles to decadent brownies. Serve it simply adorned with fresh berries or a luscious hot fudge sauce, and prepare to delight everyone at your table. This isn’t just any vanilla ice cream; it’s an experience in every spoonful, delivering a truly classic and comforting taste.

Why Homemade Vanilla Bean Ice Cream Is a Must-Try
As the days grow longer and temperatures rise, reaching for a cool, refreshing treat becomes second nature. While store-bought options are convenient, nothing compares to the pure bliss of homemade ice cream, especially when it’s as exceptional as this Vanilla Bean Ice Cream recipe. Here’s why you absolutely need to make it a staple in your summer (or year-round!) dessert rotation:
- Unmatched Flavor and Texture: This isn’t your average vanilla. By using real vanilla bean paste, we infuse an incredible depth of flavor that extract alone can’t achieve. You’ll notice the distinct, aromatic notes and the charming speckles of actual vanilla bean. Paired with generous amounts of heavy cream, the result is an ultra-rich, velvety smooth, and delightfully cold ice cream that melts in your mouth, leaving a lingering, sophisticated vanilla essence that truly satisfies. Its luxurious mouthfeel is a testament to the quality ingredients and traditional churning method.
- The Ultimate Versatile Dessert: Vanilla is the quintessential base flavor, making it incredibly adaptable. Whether you’re a chocoholic craving a rich hot fudge sauce, a caramel aficionado desiring a gooey drizzle, or someone who loves the freshness of sweetened berries, this simple yet profound flavor will complement every topping imaginable. It’s perfect on its own, served alongside warm fruit pies, crisps, cobblers, or even as the star component of an elaborate sundae. Its neutrality allows other flavors to shine while providing a comforting, familiar foundation.
- A Fun Family Activity: Beyond just opening a carton, making ice cream at home is a wonderful opportunity to create lasting memories. Involve your kids in the process – from whisking ingredients and measuring sugar to watching the magic unfold in the ice cream maker. It’s a delightful way to teach them about cooking, the science behind freezing, and the rewarding satisfaction of creating something delicious from scratch. The anticipation of that first scoop adds to the joy!
- Inspired by an Ice Cream Guru: This recipe draws inspiration from the renowned David Lebovitz, a true authority in the world of frozen desserts. By adopting his core ingredients and a streamlined technique, we ensure a professional-quality result that’s accessible for home cooks. You’re not just making ice cream; you’re crafting a masterpiece informed by the best in the business, promising a reliable and delicious outcome every time.
- Perfect for Any Occasion: From casual summer gatherings and backyard barbecues to festive holiday meals and quiet evenings at home, a batch of homemade vanilla bean ice cream always hits the spot. Its classic appeal and comforting familiarity make it a crowd-pleaser for all ages and tastes, suitable for any celebration or simple indulgence.

The Magic of Vanilla: Understanding Your Flavor Choice
Vanilla is far from a “plain” flavor; it is complex, aromatic, and deeply satisfying. When making homemade ice cream, the choice of vanilla significantly impacts the final taste. For this recipe, we opt for vanilla bean paste for several compelling reasons, balancing authentic flavor with practical ease:
- Real Vanilla Flavor: Vanilla bean paste is made from real vanilla beans, often containing concentrated vanilla extract and those distinctive tiny specks that signify authentic vanilla. This provides a more robust, full-bodied, and nuanced vanilla flavor compared to simple extract alone, bridging the gap between extract and whole beans.
- Aesthetic Appeal: Those beautiful little black flecks of vanilla bean visibly suspended in the creamy base add a sophisticated visual appeal. They instantly signal to anyone enjoying a scoop that this is not just ordinary vanilla ice cream, but a premium, homemade treat made with genuine vanilla beans.
- Convenience and Potency: While whole vanilla beans offer incredible flavor, paste provides a convenient and highly effective alternative that still delivers intense aroma and taste without the need to painstakingly split and scrape beans. It’s an easy way to elevate your dessert.
The gentle steeping of the vanilla bean paste in the warmed milk base allows its complex flavors and aromas to fully infuse, creating a fragrant and delicious foundation for the rich custard. This initial step is crucial for achieving that signature depth of vanilla that defines truly exceptional homemade ice cream.
How to Make Homemade Vanilla Custard Ice Cream: A Step-by-Step Guide
Making homemade ice cream might seem intimidating, but with the right guidance, it’s a rewarding process that yields incredible results. There are generally two popular methods for making ice cream: the no-churn method, which typically uses sweetened condensed milk and a mixer, and the more traditional churn method, which relies on a rich custard base and an ice cream maker. This recipe employs the classic, custard-based technique, often referred to as French-style ice cream, renowned for producing the silkiest, most luxurious ice cream with a dense and creamy texture.
- Infuse the Milk Base: Begin by gently heating whole milk, granulated sugar, and a pinch of salt in a large, heavy-bottomed saucepan over medium heat. Stir occasionally until the sugar dissolves and the mixture just comes to a simmer (small bubbles forming around the edges). Remove the saucepan from the heat immediately and stir in the vanilla bean paste. Allowing the vanilla to steep for a few minutes (or even up to an hour for maximum flavor, as noted in the recipe tips below) will infuse the milk with its aromatic essence, creating the fragrant foundation of our incredible vanilla flavor.
- Prepare the Egg Yolks: While the vanilla-infused milk mixture steeps, whisk your egg yolks thoroughly in a heatproof liquid measuring cup, preferably one with a spout for easy pouring and precise handling. PRO-Tip: A durable Pyrex glass measuring cup is ideal for this step as it can safely withstand heat and its spout simplifies the pouring of hot liquid, making the subsequent tempering process much smoother and more controlled than using a standard mixing bowl.
- Temper the Eggs: This is arguably the most critical step to prevent the egg yolks from scrambling when introduced to the hot milk. Slowly and gradually, drizzle a small amount (about a quarter to half a cup) of the hot vanilla-infused milk into the whisked egg yolks, whisking continuously and vigorously. This process slowly warms the egg yolks to the temperature of the milk without cooking them. If you add the hot milk too quickly, the sudden temperature change will cause the egg proteins to seize, resulting in bits of scrambled egg in your custard, which is certainly not ideal for a smooth, creamy ice cream!
- Combine and Thicken the Custard: Once the eggs are tempered and warmed, slowly add the remaining hot milk mixture to the egg-milk blend in the measuring cup, continuing to whisk as you pour. Then, return this entire combined mixture to the original saucepan. Cook over medium-low heat, stirring constantly with a wooden spoon or heatproof spatula. Continue stirring, ensuring you scrape the bottom and sides of the pan, until the custard thickens sufficiently. It should be thick enough to generously coat the back of a spoon. PRO-Tip: To test for readiness, dip a spoon into the custard, remove it, and draw your finger across the back of the spoon. If a clear path remains and the custard doesn’t immediately flow back together, it has reached the perfect consistency.
- Strain and Combine with Cream: Wash your Pyrex measuring cup thoroughly and pour the cold heavy cream into it. Carefully strain the thickened custard mixture through a fine-mesh sieve directly into the cup containing the cream. This step is crucial for ensuring an impeccably silky-smooth texture, as it removes any minuscule cooked egg particles, vanilla bean clumps, or other impurities. Stir in the vanilla extract at this stage for an extra boost of pure vanilla flavor, then mix everything thoroughly until well combined.
- Cool and Refrigerate: Allow the combined custard base to cool completely at room temperature, stirring occasionally to prevent a skin from forming. Once cooled, transfer the custard to an airtight container. Refrigerate the custard overnight, or for a minimum of 6-8 hours. This extensive chilling period is vital for two key reasons: it not only allows the flavors to fully develop, meld, and deepen, but also ensures the custard is thoroughly cold, which is absolutely essential for proper churning and achieving the perfect ice cream texture.
- Churn the Ice Cream: The next day, it’s time for the magic to happen! Assemble your ice cream maker according to the manufacturer’s instructions. PRO-Tip: It is paramount that your ice cream maker’s freezer bowl insert has been in the freezer for the recommended time (typically 12-24 hours) and is intensely cold, almost frosty. If the insert isn’t adequately frozen, your ice cream may not firm up properly during churning, resulting in a soft, grainy, or overly icy texture rather than the desired creamy consistency. Pour the thoroughly chilled custard into the machine and churn according to instructions, usually for 20-30 minutes, until it reaches a thick, soft-serve consistency.
- Ripen (Freeze) for Firmness: Once churned, your ice cream will be quite soft, similar to soft-serve. For a firmer, scoopable consistency, transfer the freshly churned ice cream to an airtight container. Press plastic wrap directly onto the surface of the ice cream to minimize air exposure, then cover with a lid. Freeze for at least 2-4 hours, or until it reaches your desired firmness. This “ripening” stage is where the ice cream truly develops its final structure and allows the flavors to further settle.
Essential Recipe Tips for Perfect Homemade Vanilla Ice Cream
Achieving that dreamily creamy and intensely flavored vanilla ice cream is within your reach with these expert tips and considerations:
- Maximize Vanilla Infusion: While vanilla bean paste offers excellent convenience, giving it ample time to steep in the hot milk base is key to unlocking its full aromatic potential. The original recipe, if using a whole vanilla bean, recommended an hour of infusion. If time permits, allowing your vanilla bean paste to steep for at least 30 minutes to an hour will significantly deepen the vanilla notes, resulting in a more pronounced and aromatic flavor profile. Don’t rush this step if you can help it, as patience here pays off in taste!
- Don’t Skimp on the Cream: The addition of two full cups of heavy cream is absolutely non-negotiable for achieving that silky, decadent mouthfeel that distinguishes premium ice cream. Heavy cream provides the high fat content necessary for a truly rich and smooth ice cream, effectively preventing the formation of large, undesirable ice crystals and ensuring an incredibly luxurious texture. Resist the temptation to substitute with half-and-half, milk, or lighter dairy products if you desire the absolute best results. If calorie counting is a concern, simply enjoy a smaller, more satisfying serving of this exquisite treat.
- Embrace the Overnight Chill: As with all the finest custard-based ice cream recipes, an overnight rest in the refrigerator for your custard base is essential, not just recommended. This crucial chilling period serves two main purposes: first, it allows the flavors to fully develop and meld, creating a more complex and harmonious taste profile; second, and equally important, it ensures the custard is thoroughly cold, which is vital for efficient churning and achieving the perfect, smooth texture. Plan ahead and make your custard the day before you intend to churn and indulge.
- Master the Tempering Process: As detailed in the step-by-step instructions, tempering your egg yolks slowly and steadily is paramount. Rushing this step or adding hot liquid too quickly can easily lead to scrambled eggs in your custard, which will undeniably compromise the smoothness and overall quality of your ice cream. Take your time, drizzle slowly, and whisk constantly until the yolks are gradually warmed and integrated seamlessly into the mixture.
- Proper Storage Matters: Once churned and firm, the way you store your homemade vanilla bean ice cream significantly impacts its longevity and texture. Transfer it to a shallow, airtight freezer-safe container. To further prevent freezer burn and maintain its creamy texture, press a piece of plastic wrap directly onto the surface of the ice cream before securing the lid. For the best flavor and consistency, try to consume it within 1-2 weeks.
- Elevate Your Serving Experience: This exquisite homemade vanilla ice cream is a star on its own, but it truly shines when paired with thoughtful accompaniments. For the chocolate lovers, warm, homemade hot fudge sauce is an absolute game-changer, transforming a simple scoop into a gourmet delight. Consider using it as the foundation for elegant Brownie Sundaes, topping warm fruit cobblers, apple pies, or even alongside a slice of moist pound cake. The possibilities are endless for creating the perfect summer treat or a comforting dessert any time of year!
Frequently Asked Questions About Homemade Vanilla Bean Ice Cream
Traditional vanilla ice cream, particularly the rich custard-based (French-style) variety, is typically made with heavy cream, whole milk, granulated sugar, egg yolks, and a high-quality vanilla flavoring (such as pure vanilla extract, potent vanilla bean paste, or whole vanilla beans), along with a pinch of salt to enhance and balance the sweetness. No-churn versions often substitute eggs and some dairy with sweetened condensed milk and rely on whipped cream for texture, making them a simpler, albeit different, frozen dessert.
The classic method for making ice cream involves first preparing a creamy custard base using dairy (milk and heavy cream), sugar, and egg yolks, infused with vanilla. This custard is then thoroughly chilled, usually overnight, to allow flavors to meld and the mixture to cool completely. Finally, it’s poured into an ice cream maker and churned, which incorporates air and freezes the mixture until it reaches a soft-serve consistency. After churning, it’s transferred to a freezer to “ripen” and firm up to a scoopable texture.
No, not all vanilla ice creams contain eggs, but traditionally made “French-style” or custard-based vanilla ice cream, like this recipe, absolutely does. Eggs (specifically the yolks) are essential for creating the rich, smooth custard that forms the base of this type of ice cream, contributing significantly to its luxurious texture, density, and mouthfeel. “Philadelphia-style” ice cream, on the other hand, is an egg-free version that relies solely on cream, milk, and sugar. No-churn recipes also typically skip the eggs, using sweetened condensed milk and whipped cream instead.
Custard ice cream, often referred to as French-style ice cream, is distinguished by its cooked egg yolk base. This base is essentially a sweet, thickened mixture of milk, cream, sugar, and egg yolks, much like a rich, pourable pudding. The egg yolks act as an emulsifier and thickener, contributing to an incredibly smooth, dense, and rich texture that is less prone to forming ice crystals. This results in a superior, gourmet ice cream experience with a distinctively luxurious quality.
The most important tip is to always thoroughly read and follow your specific appliance’s manufacturer’s instructions, as models can vary significantly. For most electric ice cream makers that utilize a freezer bowl insert, the key is ensuring that insert is *very* cold – typically stored in the freezer for a full 12-24 hours prior to use. A well-chilled bowl is absolutely crucial for the ice cream to freeze correctly and achieve the right consistency. For older manual ice cream makers, they usually utilize a combination of rock salt and ice in an outer bucket to freeze the mixture, while a hand crank provides the necessary churning action. Modern versions of these old-fashioned machines are often adapted with electric motors for convenience.
While a tiny lick might not cause immediate harm, it’s generally best to avoid feeding vanilla ice cream to dogs and cats. Many dogs have difficulty digesting lactose, a sugar found in dairy products, which can lead to digestive upset like diarrhea, gas, or vomiting. Furthermore, common ice cream ingredients like sugar are unhealthy for pets in large quantities. Absolutely avoid any ice cream containing chocolate, as chocolate is highly toxic to dogs. Similarly, the dairy and sugar in ice cream can cause stomach issues in cats, making it an unsuitable treat for them as well. Always consult your vet for dietary advice regarding your pets’ specific needs.
Several factors contribute to icy ice cream. Ensure your custard is rich in fat (don’t skimp on heavy cream) and sugar, as both ingredients help to lower the freezing point of the mixture, inhibiting crystal formation. Thoroughly chilling your base overnight is also vital. Churning the mixture thoroughly and relatively quickly is key, as it incorporates air and keeps ice crystals small. Finally, store your ice cream in an airtight container immediately after churning and ripening, minimizing exposure to air, which can lead to freezer burn and the development of larger, undesirable ice crystals on the surface.
While this particular recipe is meticulously designed for a traditional ice cream maker to achieve its optimal creamy and dense texture, you can adapt it to a no-churn method with some modifications. Typically, a no-churn recipe involves preparing the chilled custard base and then carefully folding it into stiffly whipped heavy cream. This creates a lighter, airier ice cream that doesn’t require churning in a machine. However, it’s important to note that the resulting texture will differ slightly from the dense, rich ice cream produced by a churner. If you want a true no-churn recipe, it’s often best to find one specifically formulated for that method, as they usually include ingredients like sweetened condensed milk for a thicker, sweeter base that freezes well without churning.
Delicious Pairings and Dessert Ideas
This exquisite homemade vanilla bean ice cream is incredibly versatile, serving as the perfect partner for an array of delightful desserts. Its rich, nuanced flavor enhances almost any sweet treat you can imagine:
- Classic Hot Fudge Sundaes: Elevate your sundae game by topping generous scoops with warm, homemade hot fudge sauce, a dollop of fresh whipped cream, and a maraschino cherry. The contrast of rich vanilla and deep chocolate is simply irresistible and a timeless favorite.
- Fruit & Ice Cream: Serve alongside a slice of warm apple pie, a spoonful of peach cobbler, or a scoop of mixed berry crisp for a quintessential comfort dessert. The cold, creamy ice cream beautifully complements the warm, spiced fruit, creating a harmonious balance of temperatures and textures.
- Brownie & Cookie A La Mode: Place a generous scoop on a warm, fudgy brownie or a freshly baked chocolate chip cookie. The melting ice cream creates a luscious, creamy sauce that intertwines perfectly with the baked goods, enhancing every bite.
- Affogato: For a sophisticated yet simple adult treat, pour a hot shot of freshly brewed espresso over a scoop of vanilla bean ice cream. The delightful contrast between the bitter coffee and sweet, cold cream creates a truly invigorating and delicious balance.
- Milkshakes and Smoothies: Blend this luxurious ice cream with milk, a splash of additional vanilla extract, or even some fresh fruit (like bananas or strawberries) for an unbelievably rich and creamy homemade milkshake or a decadent smoothie.
- Beyond Vanilla: Use this incredible base as a starting point for other flavors! After churning, swirl in fruit purees, miniature chocolate chips, toasted nuts, or even a ribbon of caramel sauce for custom, unique creations tailored to your taste.
Explore More Irresistible Dessert Recipes
If you’ve enjoyed the rewarding process of crafting this perfect vanilla bean ice cream, you’re sure to love exploring these other fantastic dessert ideas from our kitchen. Expand your baking repertoire and discover your next favorite sweet indulgence:
- Easy Vanilla Ice Cream from Barefeet in the Kitchen
- Cookie Dough Ice Cream
- Chocolate Ice Cream with Fudge Sauce
- Chocolate Ice Cream Pie
- Discover a wider collection of the Best Dessert Recipes
A Note on Our Photo Props
The charming ceramic ice cream bowls and unique ice cream cones featured in our beautiful photographs were delightful finds from Anthropologie in the summer of 2013, adding a touch of timeless elegance to our dessert presentation.
Stay connected with us and share your culinary adventures! Follow us on social media @ Instagram, Facebook, and Pinterest. We’d love to see your creations, so don’t forget to tag us when you try one of our recipes! If you’re thrilled with the results, please consider leaving a 5-star rating in the recipe card below – your feedback truly helps others discover these delicious recipes!

Vanilla Bean Ice Cream
15 minutes
10 minutes
25 minutes
1 quart
A simple, luscious ice cream flavored with real vanilla pods.
Ingredients
- 1 cup whole milk
- Pinch of salt
- ¾ cup sugar
- 1 teaspoon vanilla paste
- 2 cups heavy cream
- 5 egg yolks
- 1 teaspoon vanilla extract
Instructions
- Heat the milk, salt, and sugar in a large saucepan.
- When the mixture comes to a simmer, take it off the heat and stir in vanilla paste. Let steep a few minutes.
- Whisk yolks in a 4-cup Pyrex measuring cup (or use a bowl). Slowly drizzle just a bit of the hot mixture in the yolks while whisking constantly.
- Continue to slowly add the milk to the eggs, then return the mixture to the pan. Cook, stirring constantly, till the mixture thickens (it should coat the back of a spoon).
- Wash the Pyrex measuring cup and add the cream to the cup. Strain the yolk/milk mixture (to remove any cooked egg particles) into the cup full of cream and mix in vanilla.
- Cool at room temperature, then place the custard in a container with a lid and refrigerate overnight.
- To make the ice cream, follow the manufacturer’s instructions for your ice cream maker.
Notes
Inspired by David Lebovitz.
Total time does not include overnight chilling.
Recommended Products
As an Amazon Associate and member of other affiliate programs, I earn from qualifying purchases.
- Pyrex Measuring Cups
- Ice Cream Scoop
- Ice Cream Maker
Nutrition Information:
Yield:
8
Serving Size:
1/2 cup
Amount Per Serving:
Calories: 331Total Fat: 25gSaturated Fat: 15gTrans Fat: 1gUnsaturated Fat: 8gCholesterol: 186mgSodium: 51mgCarbohydrates: 22gFiber: 0gSugar: 22gProtein: 4g
HOW MUCH DID YOU LOVE THIS RECIPE?
Please leave a comment on the blog or share a photo on Pinterest
