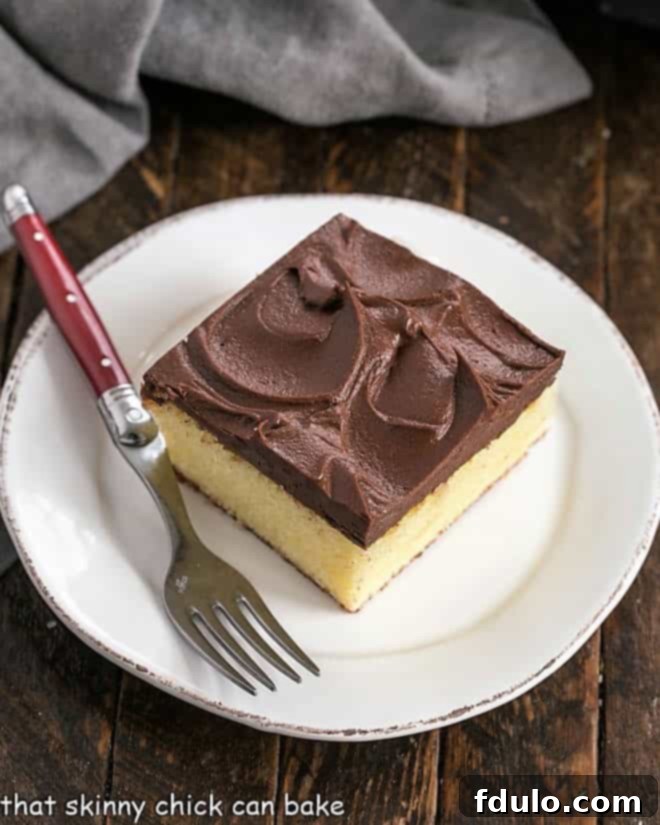
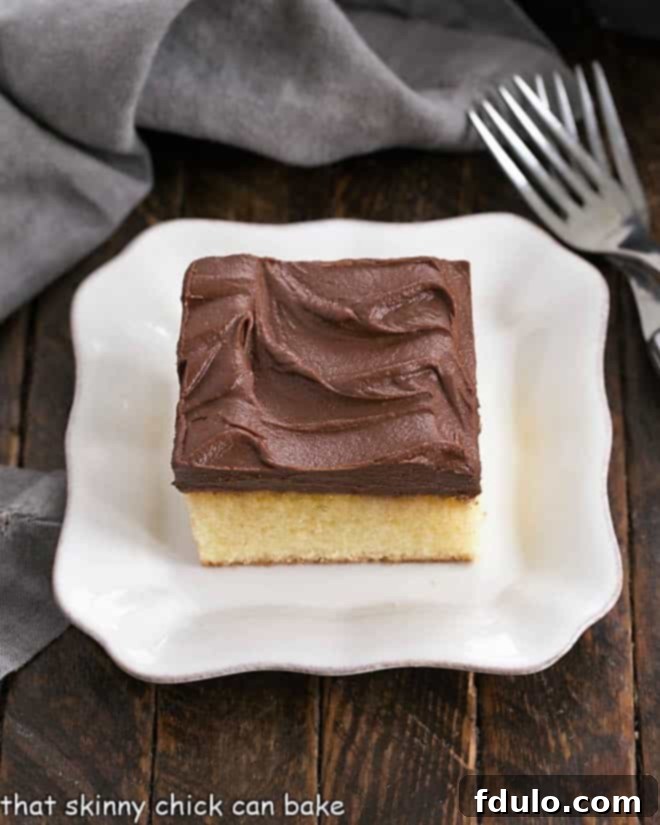
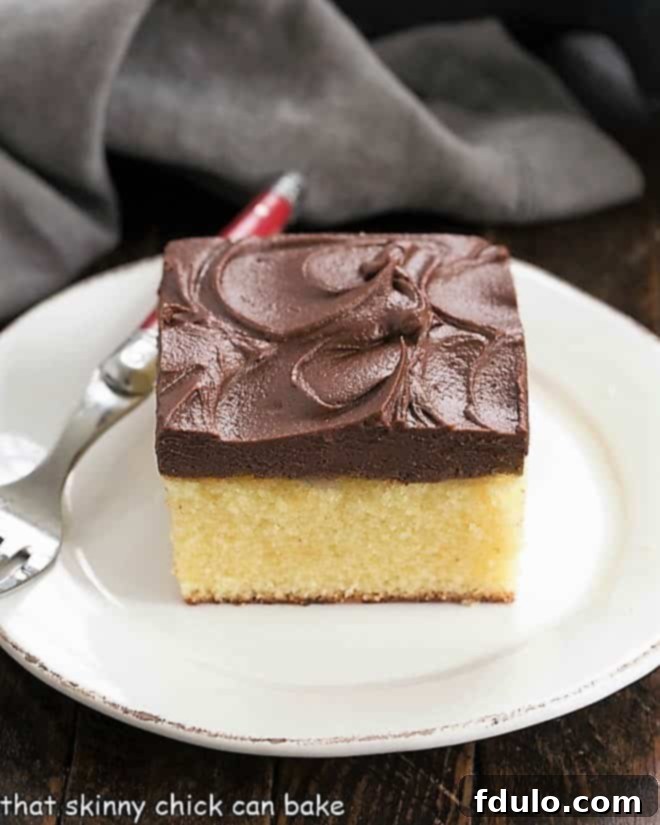
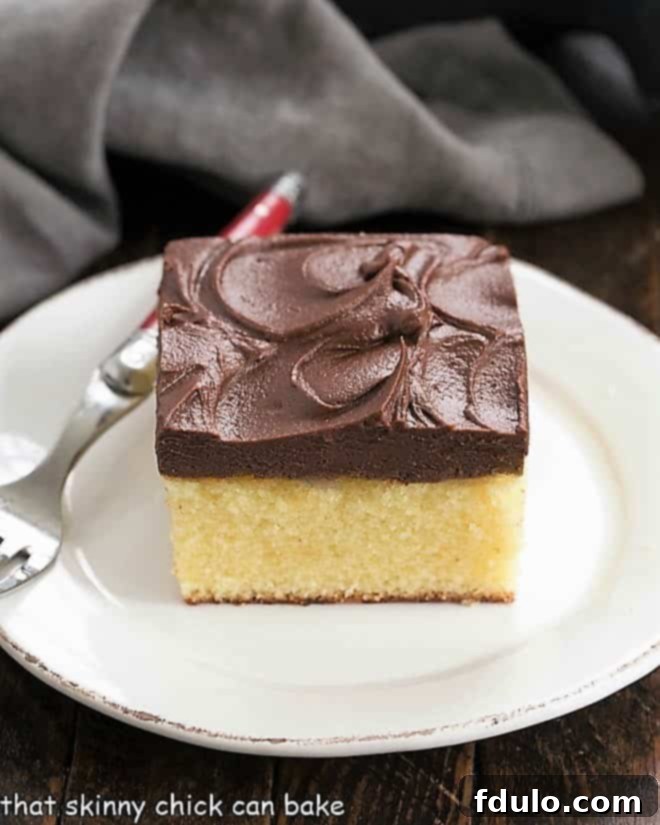
Indulge in the nostalgic charm of a classic homemade dessert with this exquisite One Layer Yellow Cake with Chocolate Frosting. This recipe delivers a perfectly moist, tender yellow cake, crowned with a rich, decadent chocolate frosting that’s guaranteed to be a crowd-pleaser. Whether you’re celebrating a family birthday, hosting a casual gathering, or simply craving a comforting treat, this simple yet sensational yellow cake promises an unforgettable experience.
Forget the fuss of multi-tiered creations; this single-layer marvel offers all the flavor without the complexity. Its effortless elegance and irresistible taste make it an instant favorite, echoing the beloved flavors of traditional American baking. Prepare to impress with every slice of this magnificent Yellow Cake Recipe.

The Irresistible Allure of a One-Layer Yellow Cake
There’s something inherently charming and practical about a single-layer cake, especially when it’s as delicious as this one. This recipe isn’t just about simplicity; it’s about maximizing flavor and convenience, making it the ideal choice for any occasion. Here’s why this easy yellow cake recipe is a must-make for every home baker:
- Effortless Baking Experience: Compared to traditional two-layer frosted cakes, this one-layer version drastically cuts down on preparation and assembly time. You eliminate the need for leveling, stacking, and intricate frosting techniques, making it a dream for busy bakers or those new to baking. It’s perfect when you want a show-stopping dessert without the stress.
- Perfect for Portion Control and Sharing: Serving cake in neat squares is often much easier and less messy than cutting wedges from a tall layer cake. This format makes it ideal for parties, picnics, and potlucks, allowing for simpler portioning and encouraging guests to easily grab a slice. Plus, squares can naturally lead to more modest, satisfying servings.
- Travel-Friendly Delight: Transporting a delicate layer cake can be a challenge. This robust one-layer cake can be baked and transported directly in its baking pan, ensuring it arrives at its destination in perfect condition. It’s the ultimate dessert for taking to a friend’s house, a potluck, or an outdoor picnic.
- A Taste of Nostalgia: Many describe this recipe as the perfect Copycat Entenmann’s Fudge Iced Golden Cake. It captures that classic, buttery yellow cake flavor paired with a rich chocolate fudge frosting that brings back cherished childhood memories. Enjoying this homemade version offers a comforting familiarity that store-bought cakes often miss.
- Versatility for Any Occasion: While excellent for birthdays, this yellow sheet cake fits seamlessly into a variety of events. Think casual Sunday dinners, bake sales, school events, or even just an afternoon treat with coffee. Its understated elegance makes it suitable for both everyday indulgences and special celebrations.

Crafting the Perfect Yellow Cake: The Cook’s Country Method
This isn’t just any yellow cake; it’s a revelation. The technique employed here, inspired by Cook’s Country, deviates from traditional cake-making methods to produce an exceptionally tender, moist, and fine-crumbed cake every single time. This unique approach ensures a superior texture and flavor that will elevate your baking game. Here’s a detailed breakdown of the process to create this incredible moist yellow cake:
- Prepare Your Pan and Oven: Begin by preheating your oven to 350°F (175°C). Properly prepare a 13×9-inch baking pan by greasing it thoroughly and dusting it lightly with flour, or use a flour-and-oil baking spray. This crucial step prevents sticking and ensures an easy release.
- Whisk the Wet Ingredients (Excluding Oil): In a separate bowl, whisk together the eggs (including the extra yolks for richness and color), buttermilk, and vanilla extract until well combined. Set this liquid mixture aside.
- Combine Dry Ingredients in the Mixer: Place all the dry ingredients – cake flour, sugar, baking powder, baking soda, and table salt – into the bowl of your stand mixer. Use the whisk attachment to thoroughly combine them. This method effectively replaces traditional sifting, ensuring an even distribution of ingredients.
- Cream Butter and Oil with Dry Ingredients: Switch to the paddle attachment. Add the softened butter and vegetable oil directly to the dry ingredients. Mix on low speed initially to incorporate, then gradually increase the speed to medium-high. Beat until the mixture becomes light, fluffy, and significantly increased in volume. This creaming action introduces air, creating a tender crumb.
- Incorporate Egg Mixture and Thicken Batter: Reduce the mixer speed to low and slowly stream in the reserved egg and buttermilk mixture. Once fully incorporated, scrape down the sides and bottom of the bowl. Increase the speed to medium-high and beat for approximately 3 minutes. During this time, the batter will visibly lighten in color and thicken, developing its unique tenderizing structure.
- Pour, Smooth, and Release Air: Carefully pour the prepared batter into your greased and floured baking pan. Use an offset spatula to gently smooth the top for an even bake. To eliminate any large trapped air bubbles that could lead to an uneven texture, gently rap the pan on your counter two to three times.
- Bake to Perfection: Bake for 28 to 32 minutes, or until a wooden toothpick inserted into the center comes out clean or with only a few moist crumbs attached. Avoid overbaking, as this can lead to a dry cake.
- Cool Completely: Once baked, remove the cake from the oven and let it cool completely on a wire rack before attempting to frost it. Frosting a warm cake will result in melted, messy frosting.
- Prepare and Apply Frosting: While the cake cools, prepare your rich chocolate frosting. Once the frosting has reached a thick, spreadable consistency (you may need to chill it briefly), generously spread it over your cooled yellow cake. Chill the frosted cake briefly to allow the frosting to set.
This meticulous method ensures every bite is bursting with flavor and boasts a wonderfully soft, moist texture, making it one of the best yellow cake recipes you’ll ever try.

Essential Ingredients for a Heavenly Yellow Cake
The success of this extraordinary yellow cake lies in its carefully selected ingredients and understanding their roles. Here’s a deeper look at the components that contribute to its incredible flavor and texture:
- Pantry Staples: Eggs, Sugar, Table Salt, Baking Soda – These foundational ingredients are critical for structure, sweetness, balance, and leavening. Use large eggs for consistency, and ensure your sugar is fine granulated.
- Buttermilk: The Secret to Tenderness – Buttermilk is a superstar ingredient, known for lending an incredible tenderness and subtle tang to baked goods. Its acidity reacts with baking soda to create carbon dioxide, aiding in leavening, and also helps break down gluten strands, resulting in a softer crumb. If you don’t have buttermilk on hand, don’t worry! You can easily make your own by adding 1 tablespoon of lemon juice or white/cider vinegar to a liquid measuring cup, then filling it to the 1-cup mark with regular milk. Let it sit for 5-10 minutes until it slightly curdles, then stir and use as directed.
- Vanilla Extract: Flavor Foundation – For the purest and richest flavor, always opt for real vanilla extract. Imitation vanilla simply cannot replicate the depth and warmth that genuine vanilla beans impart. Look for “pure vanilla extract” on the label for the best results.
- Cake Flour: The Ultimate Tenderizer – Cake flour contains a lower protein (gluten) content than all-purpose flour, which is key to achieving a supremely tender and delicate cake crumb. The reduced gluten development prevents the cake from becoming tough. If you don’t have cake flour, you can easily create a substitute: for every 1 cup of cake flour needed, measure out 2 tablespoons of cornstarch into your measuring cup, then fill the rest of the cup with all-purpose flour. Whisk well to combine before using.
- Baking Powder: The Leavening Powerhouse – Baking powder is a chemical leavening agent that helps the cake rise, creating a light and airy texture. It’s crucial to ensure your baking powder is fresh, as it can lose its potency over time. To test its freshness, simply add 1/2 teaspoon to 1/4 cup of boiling water; if it bubbles vigorously, it’s still good to go!
- Butter: For Flavor and Richness – Use unsalted butter unless specified, and ensure it’s at room temperature for both the cake batter and the frosting. Room temperature butter creams beautifully, incorporating air for a light texture in the cake and a smooth consistency in the frosting.
- Vegetable Oil: The Moisture Provider – The addition of vegetable oil alongside butter is a fantastic technique for achieving an exceptionally moist cake. While butter provides flavor, oil ensures lasting moisture, keeping your cake soft and delicious for longer.
- Powdered Sugar: For Silky Smooth Frosting – Also known as confectioners’ sugar, powdered sugar is essential for a smooth, lump-free frosting. While the recipe instructs whisking in the mixer, for an extra-silky texture, sifting your powdered sugar beforehand is always a good idea.
- Cocoa Powder: Deep Chocolate Flavor – For the rich chocolate frosting, use unsweetened cocoa powder, not sweetened cocoa mix (which is designed for beverages like hot chocolate). The unsweetened variety provides a deep, authentic chocolate flavor.
- Semisweet Chocolate: Elevating the Frosting – Chopped semisweet chocolate adds another layer of decadent chocolate flavor and helps achieve that luscious, fudgy texture in the frosting. Gently melt it using a microwave (in short bursts, stirring frequently) or a double boiler to prevent scorching.
Frequently Asked Questions About Yellow Cake
Both yellow cakes and white cakes share a delightful vanilla flavor profile, often complemented by subtle buttery undertones. The key difference lies in their ingredients: yellow cakes derive their characteristic golden hue and a richer flavor from the inclusion of egg yolks. White cakes, on the other hand, are typically made without yolks, using only egg whites, resulting in a lighter color and a slightly milder, pure vanilla taste. The yolks in yellow cake contribute to a more decadent and full-bodied vanilla experience.
Achieving a supremely moist and tender yellow cake involves a few key ingredients and techniques, all present in this recipe. Firstly, the use of buttermilk is crucial. Its acidity helps to break down longer strands of gluten, preventing the cake from becoming tough and contributing to a tender crumb. Secondly, the combination of both butter and vegetable oil is a game-changer. Butter provides that classic rich flavor, while oil ensures an unparalleled moisture that keeps the cake soft for longer. Lastly, cake flour, with its lower gluten content, is essential. Less gluten development means a more delicate and melt-in-your-mouth texture. Additionally, the unique mixing method outlined in this recipe, which focuses on proper creaming and specific beating times, also contributes significantly to the cake’s fine crumb and moistness.
While the terms “snack cake” and “snacking cake” are often used interchangeably, they generally refer to single-layer cakes that are simple to prepare and serve. These cakes are baked in a single pan (often a 9×13-inch sheet pan) and are typically served cut into squares rather than traditional wedges. Their unfussy nature makes them perfect for casual occasions, afternoon pick-me-ups, school lunchboxes, or spontaneous gatherings. They embody comfort and ease, providing a delicious homemade treat without requiring extensive effort or presentation. This one-layer yellow cake perfectly fits the description of a delightful snacking cake.
You May Also Love These Cake Recipes
If you’ve fallen for the simplicity and deliciousness of this one-layer yellow cake, you’ll surely enjoy exploring other fantastic cake recipes:
- Strawberry Lemon Snack Cake from Inside BruCrew Life
- Yellow Cupcakes with Chocolate Ganache
- Yellow Cake from Scratch
- Black Magic Snack Cake
- One Layer Cocoa Fudge Cake
- Easy Spice Cake
- Plus, don’t forget to check out all my Best Cake Recipes for more baking inspiration!
Stay connected and share your baking triumphs! Find me on social media @ Instagram, Facebook, and Pinterest. Don’t forget to tag me when you try one of my recipes! If you love the results, please consider giving it a 5-star rating in the recipe card below.

One Layer Yellow Cake with Chocolate Frosting
30 minutes
32 minutes
40 minutes
1 hour 42 minutes
20
A one-layer yellow cake with rich chocolate frosting! Perfect for picnics and family dinners when you don’t need a frosted layer cake.
Ingredients
Cake
- 4 large eggs + 2 large egg yolks
- ½ cup buttermilk
- 1 tablespoon vanilla extract
- 2 ¼ cups cake flour
- 1 ¾ cups sugar
- 1 ¼ teaspoons baking powder
- ¼ teaspoon baking soda
- ½ teaspoon table salt
- 8 tablespoons butter, softened
- ½ cup vegetable oil
Frosting (make another half batch if you love chocolate frosting!)
- 2 ¼ cups powdered sugar, sifted
- ½ cup cocoa powder
- ½ cup butter, at room temperature (I use salted butter)
- ¼ cup hot water
- 2 ounces semisweet chocolate, melted
Instructions
- To make the cake, preheat the oven to 350°. Spray a 13 x 9-inch baking pan with flour and oil baking spray.
- Whisk together the eggs and yolks, buttermilk, and vanilla. Set aside.
- Put the flour, sugar, baking powder, baking soda, and salt into the bowl of a stand mixer. Whisk the mixture together. Then insert the paddle attachment.
- Add butter and oil and mix at low speed to combine, then increase the speed and mix until light and fluffy. Reduce speed to low and slowly add the egg mixture.
- When the eggs are incorporated, scrape down the bottom of the mixer bowl. Beat at medium-high speed until the batter lightens in color and thickens for about 3 minutes.
- Scrape the batter into the prepared pan and smooth the top with an offset spatula. Rap the pan on the counter 2-3 times to bring up any big air bubbles trapped in the batter.
- Bake for 28 to 32 minutes or until a toothpick inserted in the middle comes out with only a few crumbs. Cool completely on a rack.
- To make the frosting, put the powdered sugar, cocoa powder, butter, and hot water in the bowl of a stand mixer fit with the whisk attachment. Mix on low to combine, then increase the speed to medium. Mix for about a minute until the mixture is smooth. Scrape down the sides of the bowl, mix briefly, then add the chocolate.
- Mix on low until combined, scraping down the sides and bottom of the bowl as needed, then let the frosting sit at room temperature until spreadable, about 30-40 minutes.
- Frost the cake, then chill to let the frosting firm up.
Notes
I doubled the frosting which was way too thick for me, but the family loved it. The frosting recipe provided here is for a standard batch.
Make sure your baking powder is fresh. If it’s older than a year, it’s best to replace the can as it often expires while sitting in your pantry. A quick freshness test (1/2 tsp in hot water) can save your cake!
Recipe adapted from Cook’s Country, a trusted source for meticulously tested recipes.
Recommended Products
As an Amazon Associate and member of other affiliate programs, I earn from qualifying purchases.
- 3 cup sifter
- Baker’s Joy
- Silicone Spatulas
- KitchenAid KSM150PSER Artisan Tilt-Head Stand Mixer with Pouring Shield, 5-Quart, Empire Red
- 9 x 13 Baking Pan
Nutrition Information:
Yield:
20
Serving Size:
1 slice
Amount Per Serving:
Calories: 352Total Fat: 18gSaturated Fat: 7gTrans Fat: 1gUnsaturated Fat: 9gCholesterol: 90mgSodium: 207mgCarbohydrates: 45gFiber: 1gSugar: 32gProtein: 4g
Thatskinnychickcanbake.com occasionally offers nutritional information for recipes contained on this site. This information is provided as a courtesy and is an estimate only. This information comes from online calculators. Although thatskinnychickcanbake.com attempts to provide accurate nutritional information, these figures are only estimates. Varying factors such as product types or brands purchased can change the nutritional information in any given recipe. Also, many recipes on thatskinnychickcanbake.com recommend toppings, which may or may not be listed as optional and nutritional information for these added toppings is not listed. Other factors may change the nutritional information such as when the salt amount is listed “to taste,” it is not calculated into the recipe as the amount will vary. Also, different online calculators can provide different results. To obtain the most accurate representation of the nutritional information in any given recipe, you should calculate the nutritional information with the actual ingredients used in your recipe. You are solely responsible for ensuring that any nutritional information obtained is accurate.
HOW MUCH DID YOU LOVE THIS RECIPE?
Please leave a comment on the blog or share a photo on Pinterest
