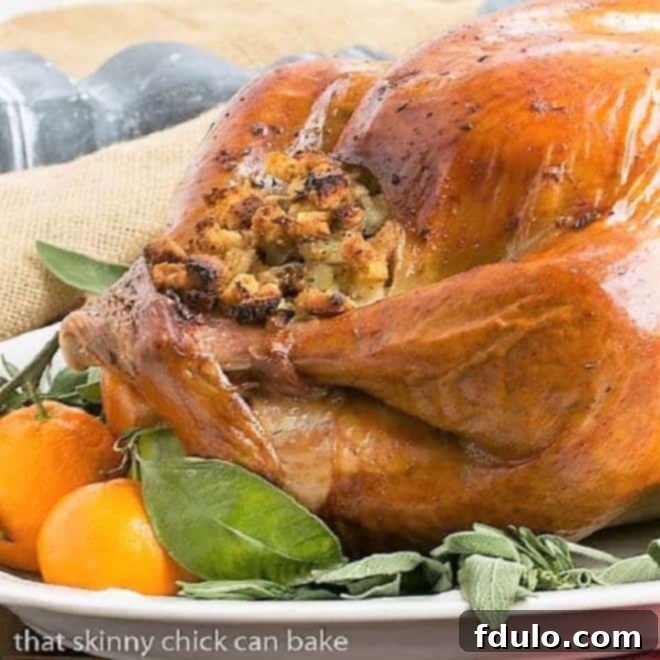
Are you dreaming of a succulent **Thanksgiving turkey** that’s incredibly juicy, bursting with rich flavor, and boasts perfectly crispy, golden-brown skin? Look no further! This **dry brined turkey recipe** is not just my personal favorite method; it’s a revolutionary approach that will transform your holiday feast. Forget the elaborate, messy, and time-consuming process of traditional wet brining. Our dry brine technique simplifies preparation dramatically while consistently delivering delicious, moist results that will impress every single guest at your table, making you the undisputed holiday host.
After decades of experimenting with various turkey preparations, this has truly become my **go-to Thanksgiving turkey recipe**. It’s remarkably easy, requiring minimal active time and an almost entirely hands-off approach for most of the process. Without exaggeration, this is the **best turkey recipe** I’ve mastered in over thirty years of holiday cooking. Prepare for a significantly more stress-free Thanksgiving and a turkey so memorable, your family will be talking about it until next year!
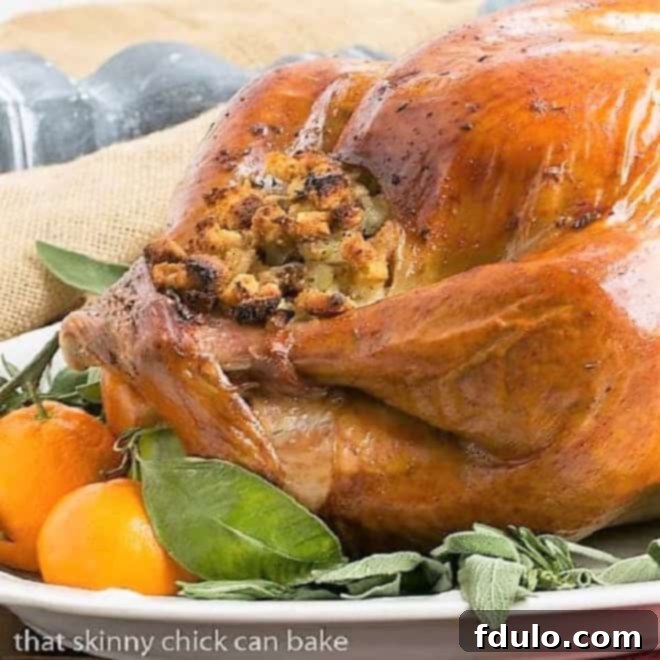
Why Dry Brining Your Thanksgiving Turkey is an Absolute Must
If you’re still on the fence about trying a dry brine for your holiday bird, let me detail exactly why this method will revolutionize your annual cooking routine and ensure you get a truly show-stopping **Thanksgiving turkey** every single time, without the usual fuss and stress:
- Unmatched Ease and Cleanliness: The primary advantage of dry brining is its sheer simplicity compared to its wet counterpart. Say goodbye to gigantic buckets, unwieldy brine bags, and the hazardous task of maneuvering gallons of salty water. Dry brining involves a simple rub-down of the turkey with a salt and herb blend, followed by a quiet rest in your refrigerator. This eliminates the mess, the heavy lifting, and the potential for spills that are often associated with traditional wet brining, making holiday meal prep significantly less stressful.
- Deep, Even Flavor Infusion: The magic of dry brining lies in the scientific principle of osmosis. When you apply a salt and herb blend directly to the turkey’s skin, the salt initially draws moisture from the surface of the meat. This moisture then combines with the dissolved salt and aromatic herbs to create a concentrated, flavorful brine right on the turkey’s skin. Over time, this seasoned liquid is reabsorbed back into the meat, carrying the delicious flavors deep into the muscle fibers. This process ensures that every single bite of your turkey is seasoned to perfection, offering a depth of flavor that’s hard to achieve otherwise.
- Superior Moisture Retention and Texture: Unlike wet brining, which can sometimes leave turkey meat tasting slightly watery or artificially plump, dry brining actually enhances the turkey’s natural juices. The salt actively works to change the protein structure within the muscle fibers, enabling them to retain more moisture during the high heat of roasting. The result is an incredibly moist and tender interior that’s never dry. Furthermore, the extended dry environment in the refrigerator allows the skin to dehydrate slightly, guaranteeing a beautifully crisp, golden-brown, and utterly irresistible exterior, a hallmark of a perfectly roasted turkey.
- A Mostly Hands-Off Approach: After the initial 10-15 minutes of applying the dry brine, your active work is largely complete. The turkey then rests undisturbed in the refrigerator for three days, allowing the salt to perform its wonders with minimal intervention from you. This invaluable hands-off time frees you up significantly during the busy holiday week, allowing you to focus on preparing side dishes, spending time with family, or simply relaxing before the big feast.
Essential Ingredients for Your Perfect Dry Brined Turkey
Crafting the perfect **dry brined turkey** starts with understanding and carefully selecting your ingredients. While the list itself is remarkably simple, each component plays a crucial and distinct role in achieving that mouthwatering flavor, tender texture, and golden finish:
- Turkey – Choose Wisely (Unbrined is Key!): This is perhaps the most critical note for success. **Your turkey absolutely should NOT be pre-brined or injected with a sodium solution.** Many commercially available turkeys, particularly popular brands like Butterball, are already treated this way to enhance moisture. Attempting to dry brine an already-brined turkey will result in an excessively salty bird that is unpleasant, if not inedible. Always check the product label carefully for terms such as “pre-brined,” “enhanced,” “contains up to X% solution,” or “self-basting.” For this recipe, always opt for a natural, unprocessed, and unbrined turkey to ensure the dry brine can work its magic effectively.
- Kosher Salt – The Indispensable Foundation: Do not, under any circumstances, substitute regular table salt for kosher salt in this dry brining recipe. Table salt crystals are much finer, denser, and more concentrated in sodium per volume than kosher salt. Using table salt in the quantities specified for kosher salt will invariably lead to over-salting and uneven distribution, resulting in an unpleasantly salty turkey. Kosher salt, with its larger, flakier crystals, allows for much better control over seasoning and ensures the salt can draw out moisture effectively and distribute evenly across the turkey’s surface. Its coarse texture is absolutely key to the gentle yet effective dry brining process.
- Dry Herbs – Aromatic Flavor Boosters: Aromatic herbs are vital for imparting that classic, comforting holiday flavor to your turkey. My preferred blend includes fragrant rosemary, earthy thyme, pungent bay leaves, and savory sage. For a typical turkey, you’ll want to use about 1 to 1.5 teaspoons of a dried herb blend. If you opt for fresh herbs instead, remember to increase the quantity to about 1 tablespoon, as fresh herbs are less concentrated in flavor. Feel entirely free to experiment with a high-quality poultry seasoning blend or other herbs you enjoy to customize your turkey’s flavor profile to your family’s liking.
- Butter – For Golden Perfection: While the dry brine itself is responsible for ensuring an incredibly moist and tender turkey, butter is your secret weapon for achieving a truly gorgeous, golden-brown, and wonderfully crispy skin. I typically reach for salted butter for basting, as its mild saltiness perfectly complements the subtly brined meat. However, unsalted butter works perfectly well too, especially if you prefer to have more precise control over the final saltiness of the skin. The butter aids in browning and adds a rich, luxurious texture to the crust.
Expert Tips for a Flawless, Irresistible Dry Brined Turkey
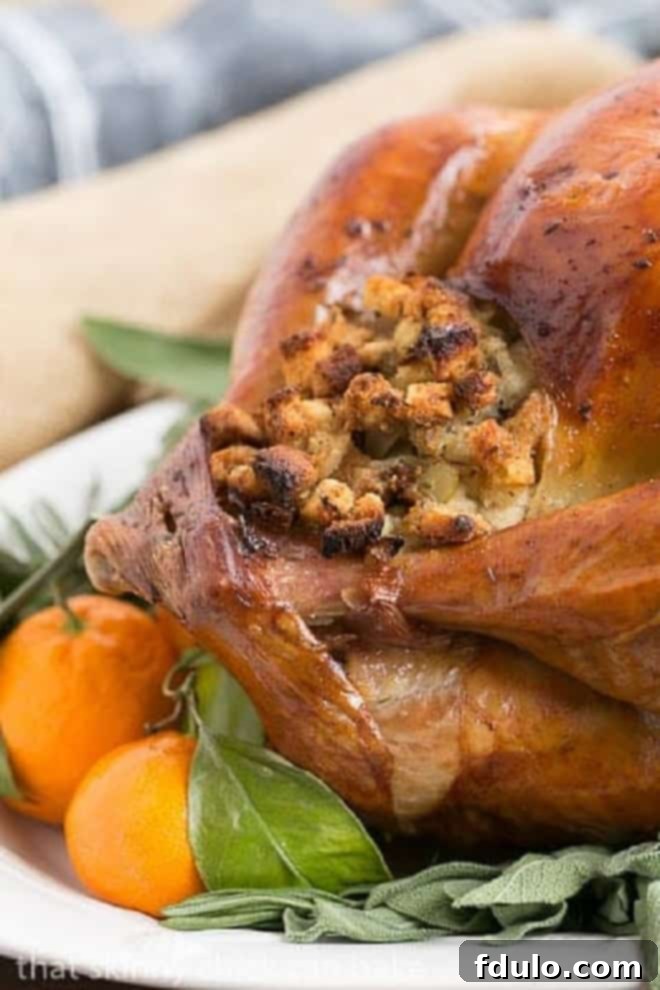
Achieving a truly spectacular **dry brined turkey** is remarkably straightforward, but a few expert tips and insights can elevate your results from merely good to absolutely unforgettable. I’ve gathered these practical nuggets of wisdom through years of holiday cooking, including one memorable year where a forgotten Monday market trip cut my brining short. Even with less than the ideal three days, that turkey was still a showstopper, a testament to the robustness of the dry brine method! This year, however, I am perfectly prepared to ensure every inch boasts crispy skin and incredibly moist, perfectly seasoned meat. I once roasted a formidable 22-pound bird, and astonishingly, half of it vanished by the end of the day – a true testament to its deliciousness, especially when you have two hungry twenty-something sons around! Don’t underestimate the power of thoughtful preparation.
- Strategic Brining Timeline: The absolute key to successful dry brining is allowing sufficient time for the salt to work its deep-penetrating magic through the process of osmosis. Your turkey must be fully defrosted and ready to receive its brine at least three full days before you plan to roast it. For many, this conveniently means starting the brining process on the Monday before Thanksgiving. Plan to purchase your turkey early enough to allow for ample thawing time in the refrigerator, which can easily take several days, depending on the bird’s size.
- The Unrivaled Simplicity of Dry Brine: Compared to the traditional wet brine, which involves filling a massive bag with a water-based brine solution, painstakingly lifting a slippery, heavy turkey into its liquid bath, and then wrestling it into an oversized cooler (perhaps even rigging it to be critter-proof for paranoid partners!), the dry brining process is an absolute piece of cake. There is no heavy liquid to manage, virtually no fear of accidental spillage, and significantly minimal cleanup involved.
- Thoughtful Herb Selection: While I’ve suggested classic choices like rosemary, thyme, bay leaves, and sage, feel empowered to use your favorite combination of herbs. A good quality poultry seasoning blend is also an excellent and convenient option. The primary goal is to complement the turkey’s natural flavor with aromatic notes without ever overpowering it. Often, two or three carefully chosen herbs are more than enough to create a beautifully balanced profile.
- Process Herbs with Salt for Uniformity: For optimal flavor distribution and adherence, I highly recommend using a food processor to finely blend your kosher salt and selected herbs together. This ensures that the herbs are thoroughly and evenly dispersed throughout the salt mixture, creating a uniform rub that adheres beautifully to every contour of the turkey and infuses every part with its aromatic goodness during the brining process.
- Ensure a Bone-Dry Turkey Surface: Before applying the salt mixture, it is absolutely crucial to pat your turkey’s skin thoroughly dry with paper towels. A completely dry surface allows the salt to interact directly with the skin and initiate the brining process most effectively. More importantly, this step contributes significantly to achieving that highly coveted, beautifully crispy, and golden-brown skin when your turkey finally roasts.
- Generous Application and Daily Massage: Liberally cover the entire exterior surface of your dried turkey with the prepared salt and herb mixture. Don’t forget to get some under the wings and around the legs for comprehensive seasoning. Carefully place the seasoned turkey into a large, food-safe plastic bag (a designated brining bag or a sturdy oven bag works perfectly), remove as much air as possible, and securely seal it with a twist tie. Each day during the brining period, gently rub the turkey through the bag to redistribute the salt mixture and ensure even contact. On the third day, flip the turkey so it rests breast-side down to promote uniform brining across all parts of the bird.
- Prioritize Food Safety: Always practice diligent and strict food safety when handling raw poultry. Wash your hands thoroughly with soap and warm water for at least 20 seconds before and after touching the turkey, and meticulously clean all surfaces, cutting boards, and utensils that come into contact with it using hot, soapy water or a sanitizing solution. Poultry is known to harbor bacteria like salmonella, so proper hygiene is paramount to prevent any cross-contamination.
- Acclimatize to Room Temperature Before Roasting: Approximately one hour before you intend to roast your turkey, remove it from the refrigerator. Allowing the turkey to come closer to room temperature promotes more even cooking throughout the entire bird. This crucial step helps prevent the outside from overcooking and drying out while the colder interior struggles to reach its target safe temperature, ensuring a uniformly juicy result.
- Baste and Roast to Golden Perfection: Place your unrinsed (and air-dried) turkey, breast-side up, on a sturdy rack set inside a large roasting pan. Baste it generously with melted butter (or a delectable butter-wine mixture for added flavor) before it goes into the oven and periodically throughout the roasting process. Roast until the internal temperature reaches a safe 165°F (74°C) in both the thickest part of the breast and the inner thigh, making sure your thermometer does not touch any bone.
I can practically taste the incredibly crispy skin and tender, succulent meat just thinking about the amazing results this dry brine method consistently delivers. If you haven’t yet experienced the profound ease and deliciousness of incorporating a dry brine into your **Thanksgiving Turkey Recipe**, I’m absolutely confident you’ll be delighted and truly impressed when you give it a shot. It genuinely simplifies the holiday meal preparation without compromising an ounce of flavor or succulence.
P.S. For those culinary adventurers who enjoy experimenting with different techniques, I also have a delicious Holiday Honey Brined Turkey Recipe if you’re curious to explore traditional wet brining methods!
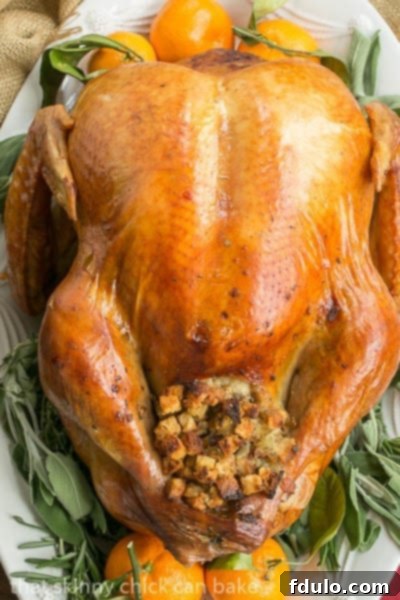
Delicious Recipes to Transform Your Turkey Leftovers
One of the true joys of Thanksgiving is the abundance of delicious leftovers! Don’t let your perfectly roasted turkey go to waste; instead, transform it into exciting and flavorful new meals. Here are some fantastic ideas to give your leftover turkey a delicious second life:
- 21 Easy Recipes for Turkey Leftovers from Foodie Crush
- Leftover Turkey Cranberry Monte Cristo from Wishes and Dishes
- Hearty Turkey Nachos from The View from Great Island
- Classic Turkey Tetrazzini
- Zesty Turkey Enchilada Casserole
- Comforting Turkey Soup Recipe
- Flavorful Curried Turkey Salad
Frequently Asked Questions About Dry Brining Turkey
Considering dry brining your holiday bird but still have some lingering questions? We’ve got comprehensive answers to your common queries, ensuring your turkey turns out perfectly every time.
While both dry and wet brining methods aim to deliver a moist and flavorful turkey, I personally find dry brining to be superior due to its unparalleled ease, significantly less mess, and consistently excellent results. For many years, I relied on wet brines and appreciated the moist outcome, but the sheer hassle of managing large containers of liquid and the potential for spills were considerable drawbacks. Dry brining a turkey might require more total passive time (mostly spent in the refrigerator), but it eliminates the need for large, cumbersome containers and messy liquids. The flavor achieved with a dry brine is often more concentrated, and it reliably delivers a crispier, more appealing skin than its wet counterpart, making it the tastier and undeniably more convenient alternative in my extensive cooking experience.
No, it is strongly and unequivocally recommended that you do not use regular table salt for dry brining a turkey. There’s a critical difference in crystal structure: table salt is much finer, denser, and more concentrated in sodium per volume compared to kosher salt. If you attempt to use table salt in the same quantities specified for kosher salt, you will almost certainly end up with a turkey that is far too salty, as it’s incredibly easy to over-season with the smaller, more potent table salt crystals. Kosher salt, with its larger, coarser crystals, provides better coverage, more controlled absorption into the meat, and a more even distribution, leading to a perfectly seasoned rather than an overwhelmingly salty bird.
To successfully dry brine a turkey, you will need a few essential items. First and foremost, you need a whole, **unbrined turkey**. It is crucial to avoid brands like Butterball that are pre-injected with a sodium solution, as this will lead to an overly salty final product. You’ll also need high-quality **kosher salt**, a selection of **dry herbs** such as sage, rosemary, thyme, or a pre-made poultry seasoning blend to add depth of flavor. Finally, a large **food-safe plastic brining bag** or a sturdy oven bag is absolutely crucial. This bag will hold the turkey snugly during its refrigerator rest, ensuring the salt and herb mixture remains in close contact with the bird while also preventing any potential cross-contamination in your refrigerator.
The comprehensive dry brining process includes a crucial air-drying phase. After you’ve applied the dry brine and allowed the turkey to rest in a sealed bag for the initial two days, you should then remove it from the bag and permit it to **air dry, uncovered, in the refrigerator for the third day**. This specific air-drying period is incredibly vital for dehydrating the turkey’s skin effectively. This dehydration is the secret to achieving that beautifully crispy, crackling, and perfectly golden-brown skin when your turkey is finally roasted. Make sure you allocate sufficient refrigerator space for this important uncovered drying step.
Yes, absolutely! Despite some common advice to the contrary, you can certainly stuff a dry brined turkey. The primary concerns associated with stuffing a brined turkey typically relate to potential excessive saltiness (especially with wet brines) or food safety issues. With a dry-brined turkey, the risk of the stuffing becoming overly salty is significantly reduced due to the method of salt absorption. While a thorough rinsing of the cavity is often advised for wet-brined turkeys before stuffing, a quick, light rinse of the cavity of a dry-brined turkey is usually sufficient, or even entirely optional, depending on your personal preference. The most critical aspect is ensuring that your stuffing reaches a safe internal temperature of 165°F (74°C).
No, there is generally no need to rinse your dry brined turkey before roasting, and in fact, it’s often strongly discouraged for several key reasons. While the very surface of the skin might taste slightly salty before cooking, it typically will not be overly salty once it’s beautifully roasted. More importantly, rinsing a dry brined turkey will reintroduce unwanted moisture to the meticulously dried skin, thereby preventing it from crisping up beautifully and achieving that desirable golden-brown perfection in the oven. Furthermore, rinsing raw poultry carries a significant risk of splashing water and potentially spreading harmful bacteria like salmonella onto your sink, countertops, and other kitchen surfaces, dramatically increasing the risk of cross-contamination in your kitchen. It’s always best to avoid rinsing raw poultry whenever possible.
Roasting a dry brined turkey generally follows a similar process to roasting any other turkey, but with the added confidence of knowing it will be incredibly moist, tender, and flavorful thanks to the brining. Begin by placing your unrinsed (and ideally air-dried) turkey, breast-side up, on a sturdy rack that is set inside a large roasting pan. You can baste it periodically throughout the cooking process with melted butter (perhaps mixed with some white wine or chicken broth for extra layers of flavor and moisture). Roast until the turkey reaches the USDA’s recommended safe internal temperature for doneness. A common and effective method is to start with a higher temperature to achieve crispy skin, then reduce the heat to ensure slow, even cooking through the interior.
The most reliable and accurate way to determine if your turkey is cooked through to a safe temperature is by using a **reliable meat thermometer**. Insert the thermometer into the thickest part of the thigh, making sure the probe does not touch the bone, and also into the thickest part of the breast. For a safe, moist, and juicy turkey, the internal temperature should consistently register **165°F (74°C)** in both of these areas. If you’re stuffing your turkey, the stuffing itself must also reach 165°F. While looking at the turkey’s juices (clear versus reddish-pink) can offer a visual cue, it is not nearly as accurate or safe as using a thermometer. Always refer to your turkey’s packaging for estimated cooking times based on its weight, and begin checking for doneness about 30-60 minutes before the suggested time to prevent any risk of overcooking and drying out your magnificent bird.
Resting your roasted turkey after it comes out of the oven is an absolutely critical, non-negotiable step that ensures maximum juiciness and flavor. Once cooked, loosely tent the turkey with aluminum foil and allow it to rest undisturbed for at least 20-30 minutes (or even longer for very large birds, up to an hour). During this vital resting period, the intense heat within the turkey begins to redistribute evenly throughout the meat, allowing the internal juices to reabsorb back into the muscle fibers. If you were to carve the turkey immediately after removing it from the oven, these delicious juices would simply run out onto your cutting board, leaving you with noticeably drier meat. Resting allows the meat to relax and reabsorb its precious moisture, resulting in a significantly more tender, flavorful, and easier carving experience for everyone to enjoy.
You May Also Like: Essential Thanksgiving Sides & Desserts
Complete your unforgettable holiday feast with these delectable side dishes and tempting desserts that pair perfectly with your perfectly roasted **dry brined turkey**. Elevate your entire Thanksgiving meal with these crowd-pleasing recipes:
- Savory Pancetta Ciabatta Dressing
- Light and Fluffy Cranberry Fluff Salad
- Creamy and Decadent Spinach Souffle
- The Best Praline-Topped Sweet Potato Casserole
- Irresistible Thanksgiving Dessert Recipes
- 25+ Must-Try Thanksgiving Recipes for Your Feast
Stay in touch through social media @ Instagram, Facebook, and Pinterest. Don’t forget to tag me when you try one of my recipes! And if you absolutely love the results, please consider giving it a 5-star rating in the recipe card below – your feedback means the world!
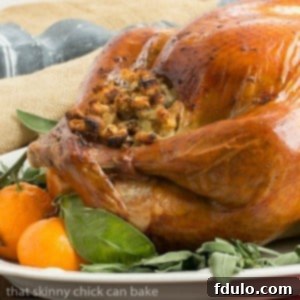
Dry-Brined Turkey Recipe: A Thanksgiving Must-Try
10 minutes
3 hours
3 hours 10 minutes
12 servings
This award-winning dry brine recipe, inspired by the L.A. Times, promises an incredibly juicy, tender, and crisp-skinned turkey without any of the traditional wet brining mess. It’s the easiest way to achieve your most flavorful Thanksgiving turkey yet!
Ingredients You’ll Need
- 16 pound turkey, completely defrosted with giblets removed (adjust salt quantities if using a turkey of a different weight)
- 3 tablespoons kosher salt (use 1 tablespoon per every 5 pounds of turkey)
- Herbs, optional (Suggestions: fresh or dried rosemary, thyme, and bay leaves for a classic flavor profile)
- 6 tablespoons melted butter, for basting during roasting
Step-by-Step Instructions
- Begin by thoroughly rinsing your turkey under cold water, then pat it completely dry with paper towels. In a food processor, combine the kosher salt with approximately one tablespoon of your chosen herbs (such as rosemary, thyme, or bay leaves). Pulse until the herbs are finely mixed with the salt.
- Lightly season the inside cavity of the turkey with a pinch of the herbed salt. Next, generously sprinkle the breast side with a bit more than a tablespoon of the mixture, and apply slightly less than a tablespoon to each side (legs/thighs). Place the seasoned turkey into a large oven bag or brining bag, remove as much air as possible, and secure it with a twist tie. Position the bag on a rimmed baking sheet.
- Refrigerate the turkey for 3 days. For the first two days, keep it breast-side up, gently rubbing the skin through the bag once daily to redistribute the brine. On the third day, flip the turkey so it rests breast-side down. Remove it from the bag and let it air dry, uncovered, in the refrigerator for at least 8 hours (or overnight) before roasting. This step is crucial for crispy skin.
- One hour prior to roasting, remove the turkey from the refrigerator and let it sit at room temperature. This helps ensure more even cooking. Place the turkey on a rack in a sturdy roasting pan.
- Preheat your oven to 425ºF (220ºC). Brush the turkey generously with melted butter. Roast for 30 minutes at this higher temperature to achieve a golden-brown, crispy skin. Then, reduce the oven temperature to 325ºF (160ºC). If the top is browning too quickly, loosely tent it with aluminum foil. Continue to cook until the turkey reaches the desired internal temperature (165°F in the breast and thigh), basting periodically as needed. You may add some white wine or chicken broth to the bottom of the roaster during the low-temperature cooking phase to keep the pan drippings from burning.
Note: Cook time will vary based on the size of your turkey and your oven. Always rely on a meat thermometer for accurate doneness.
Important Notes & Tips
For the absolute best results and to prevent an overly salty outcome, ensure you do not use a turkey that has been pre-brined or injected with a solution (such as many Butterball turkeys). Always meticulously check the label before purchasing.
Recommended Kitchen Essentials
As an Amazon Associate and member of other affiliate programs, I earn from qualifying purchases.
- Turkey Baster
- Turkey Brining Bags
- Roasting Pan
Nutrition Information:
Yield:
12
Serving Size:
1
Amount Per Serving:
Calories: 423Total Fat: 20gSaturated Fat: 6gTrans Fat: 1gUnsaturated Fat: 31gCholesterol: 196mgSodium: 722mgCarbohydrates: 0gFiber: 0gSugar: 0gProtein: 58g
Nutritional data provided is an estimate based on the original LA Times recipe. Actual values may vary based on ingredients and preparation methods.
LOVED THIS RECIPE? SHARE THE JOY!
Please consider leaving a comment on the blog or sharing a photo of your magnificent turkey on Pinterest. Your invaluable feedback and shares help others discover this incredible, game-changing recipe!
