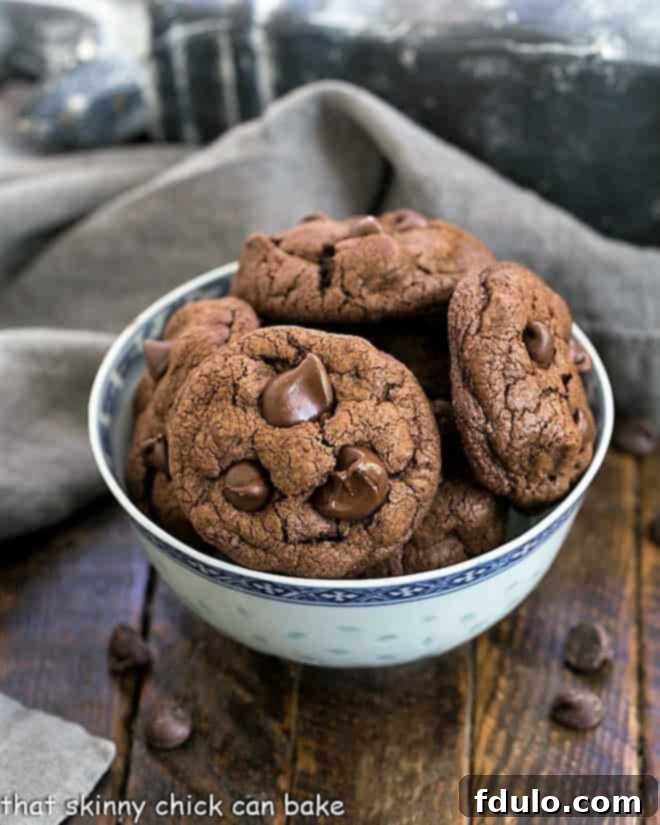
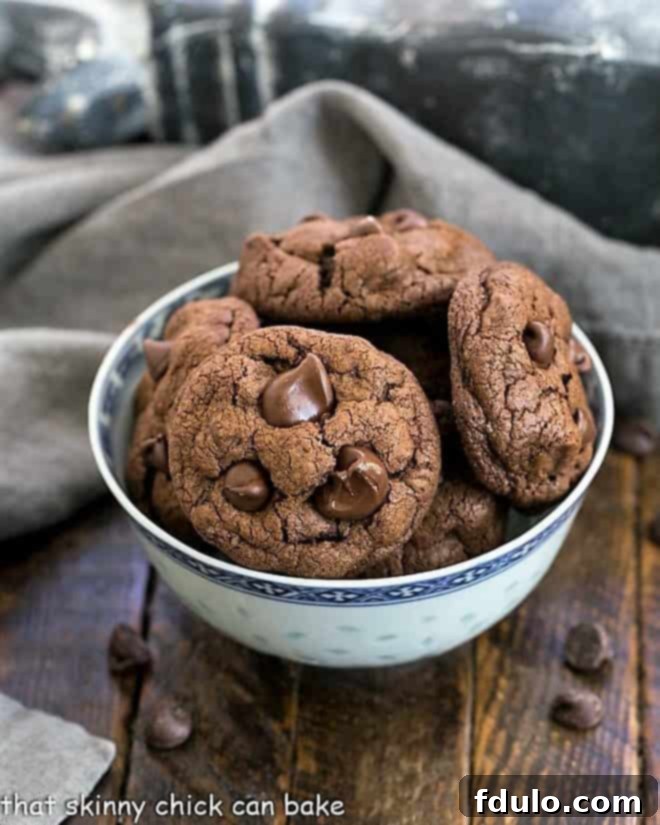
Double Chocolate Chunk Cookies are an absolute dream come true for any chocolate aficionado. This recipe masterfully combines cocoa powder, rich melted chocolate, and generous chocolate chips or chunks, delivering an unparalleled chocolate experience in every single bite. Prepare to be utterly thrilled!
Baking chocolate cookies is a passion of mine, and I’ve experimented with countless recipes over the years. However, this particular Double Chocolate Chunk Cookie recipe stands out. After a recent taste test with my closest girlfriends, the immediate and unanimous verdict was a demand for the recipe. Even my husband, who usually tries to moderate his sweet intake, requested that I hide them in the freezer – a clear sign of their irresistible appeal! Knowing him, that self-restraint will only last a day or two before he’s rummaging for a frozen midnight snack. These cookies boast a wonderfully soft and chewy texture, elevated by an incredible trio of distinct chocolate elements that create a depth of flavor unmatched by other recipes.
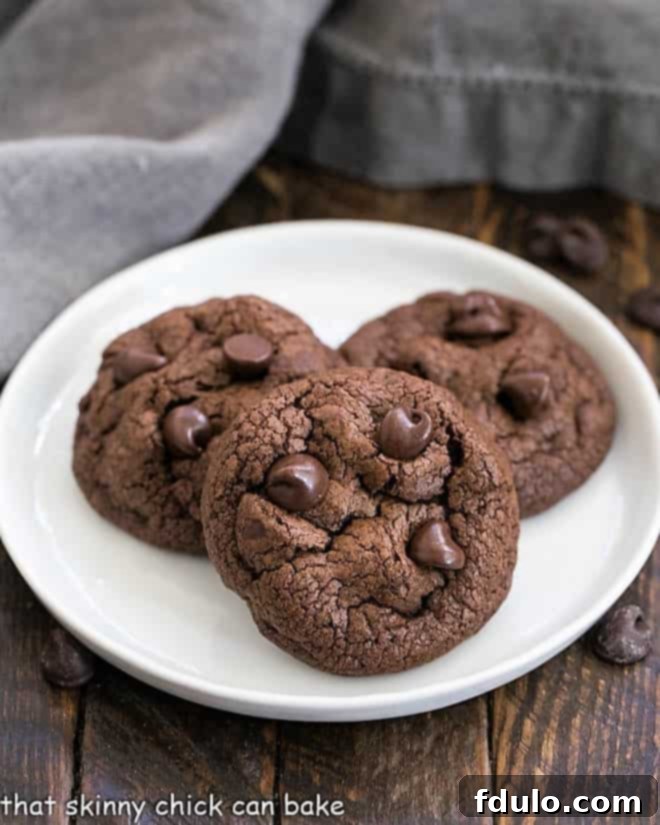
Why These Double Chocolate Chunk Cookies Are a Must-Bake
In a world full of cookie recipes, these Double Chocolate Chunk Cookies shine as a beacon for chocolate lovers. Here’s why you absolutely need to add this recipe to your baking repertoire:
- **A Symphony of Chocolate Flavors:** This recipe isn’t just “chocolate” – it’s a profound chocolate experience. With cocoa powder for deep, earthy notes, melted chocolate for a smooth, intense base, and chocolate chips or chunks for bursts of melty goodness, every bite delivers a harmonious trio of chocolate. This layered approach creates an unparalleled richness that single-chocolate cookies simply can’t achieve.
- **Instant Gratification for Chocolate Cravings:** When that intense chocolate craving hits, you need a solution that’s both satisfying and quick. These cookies are relatively swift to prepare, moving from mixing bowl to oven in a reasonable timeframe, making them the perfect indulgence for a sudden sweet tooth. They offer a gourmet experience without requiring hours in the kitchen.
- **Freezer-Friendly Convenience:** One of the best qualities of these cookies is how beautifully they freeze. Whether you want to prepare the dough in advance for spontaneous baking sessions or save baked cookies for later enjoyment, they maintain their incredible flavor and texture. This makes them ideal for meal prep, unexpected guests, or simply ensuring you always have a delightful homemade treat on hand without constant baking.
The genesis of these Soft Chocolate Chocolate Chip Cookies stemmed from a domestic “crisis.” I caught my husband attempting to discreetly raid the Oreo canister after dinner, a clear sign that my role as a food blogger wife had, momentarily, faltered. Our kitchen, surprisingly, was devoid of any freshly baked homemade treats. Feeling a surge of culinary inspiration and a touch of guilt, I immediately set out to remedy the situation.
I quickly found a promising recipe from the renowned Donna Hay for these Double Chocolate Chunk Cookies. For me, sampling cookie dough is a cherished, guilty pleasure – and from the very first taste, I knew these were destined for greatness. An undeniable sign of a truly outstanding cookie is dough that is simply irresistible, and this batter passed that critical test with flying colors. The baked cookies, of course, were equally phenomenal, solidifying their place as a new household favorite.
**A Public Service Announcement (PSA):** While I often express my love for tasting cookie dough, please be fully aware that consuming raw dough carries risks. Young children, the elderly, and individuals with compromised immune systems should strictly avoid it due to the potential for food-borne illnesses like salmonella. Always consider the risks if you choose to sample raw dough.
Expert Recipe Tips for Perfect Double Chocolate Chunk Cookies
Achieving bakery-quality Double Chocolate Chunk Cookies at home is easier than you think with these essential tips. The magic of these cookies lies in the “double” chocolate effect, achieved by incorporating both cocoa and melted chocolate into the batter itself. This robust chocolate base is then gloriously enhanced by the addition of chocolate chips or generous chocolate chunks, ensuring a deep and complex chocolate flavor that will delight any true chocoholic.
- **Choosing Your Chocolate:** I typically use semi-sweet chocolate in the batter for a balanced sweetness, but don’t hesitate to customize! If you prefer an even deeper, more intense chocolate flavor, substituting your favorite bittersweet chocolate in the dough will elevate the richness significantly. Experiment to find your perfect balance.
- **Chips vs. Chunks – A Texture Debate:** While both chocolate chips and chocolate chunks are incredibly delicious in these cookies, they offer different textural experiences. I’ve found that chocolate chips tend to make the dough slightly easier to roll into uniform balls, as their smaller, more consistent size integrates smoothly. Chunks, on the other hand, provide more dramatic pockets of melted chocolate. Feel free to use either, or even a combination! You can also vary the type of chocolate (bittersweet, milk, or even white chocolate) for added complexity.
- **The Power of a Stand Mixer:** This recipe truly benefits from a stand mixer, primarily due to the extended beating times required. The initial creaming of butter and sugar for approximately 8 minutes is crucial for incorporating air, which contributes to the cookies’ light and chewy texture. A subsequent 3-minute beating after adding the egg and vanilla ensures proper emulsification and further aeration. While a hand mixer can work, a stand mixer makes these steps effortless and consistent.
- **Folding, Not Mixing:** When it comes to incorporating the dry ingredients into the wet batter, the technique of “folding” is paramount. Instead of using the electric mixer’s beaters, gently fold in the flour, cocoa, baking soda, and salt with a spatula. This gentle action prevents over-developing the gluten in the flour, which can lead to tough cookies. It also helps to retain the air pockets created during the creaming process, resulting in a softer, more tender cookie.
- **Taming Sticky Dough:** The dough for these cookies can be a bit sticky, especially when it’s time to roll it into balls. This is a sign of a rich, moist dough, so don’t be alarmed!
- **PRO-Tip: Damp Palms for Easy Rolling:** To combat the stickiness, lightly dampen your palms with water before rolling each tablespoon of dough into a ball. This creates a non-stick surface, making the process much smoother and preventing the dough from clinging to your hands. Re-dampen your hands as needed to maintain effectiveness.
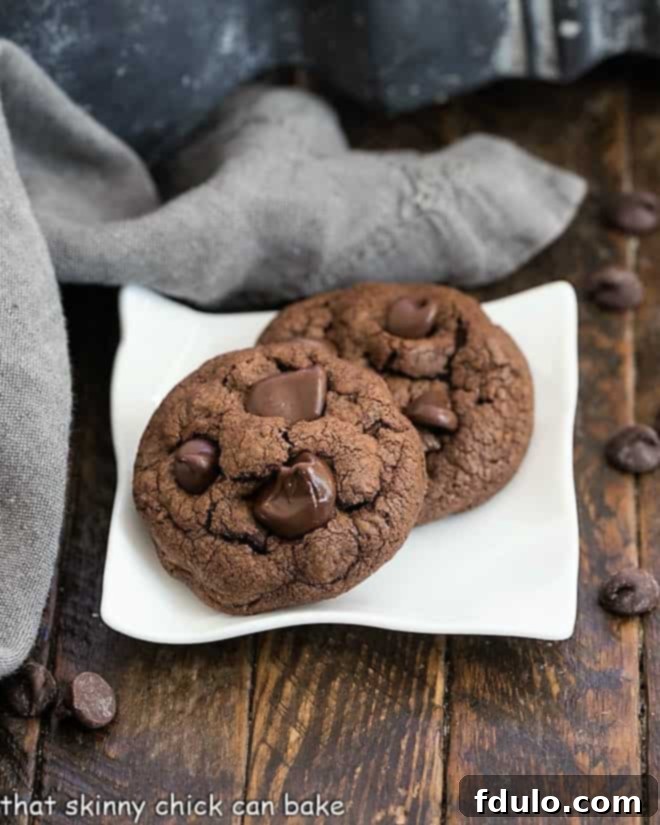
- **PRO-Tip: The Art of Presentation:** If you’re baking these soft chocolate chip cookies for a special occasion, as a gift, or simply for a stunning presentation, here’s a trick: immediately after removing the baking sheets from the oven, press a few extra chocolate chips or chunks onto the tops of each cookie. Do this while the cookies are still very warm and pliable. The residual heat will slightly melt the added chocolate, creating a beautiful, glossy finish that makes them look professionally baked.
- **Reshaping Warm Cookies:** Don’t fret if some of your cookies emerge from the oven looking a little misshapen. While they’re still hot and pliable on the baking sheet, gently use a spatula or the back of a spoon to tap their edges into perfectly round shapes. This quick fix can significantly improve their appearance.
- **Craving More Chunks?** If you’re a devoted fan of chocolate chunks, you absolutely must try my Chocolate Chunk Potato Chip Cookies – they offer a unique sweet and salty combination that is simply superb!
Frequently Asked Questions About Baking Cookies
While the recipe’s recommended baking time serves as an excellent guide, remember that every oven has its unique quirks and heats a little differently. The first delightful indicator is often the unmistakable aroma of freshly baked cookies wafting from your oven. Visually, look for cookies that appear set and slightly golden around the edges, though their very centers might still look a touch soft or underdone. This is perfectly normal and desired! The residual heat from the hot baking pan will continue to cook them gently as they cool on the tray, preventing them from becoming overly dry. You’ll also typically notice subtle cracks forming around the perimeters and the shiny, wet appearance on top will have dulled as they cook through.
Presenting homemade cookies as gifts adds a personal touch that store-bought treats simply can’t match. To make your cookies look as impressive and professional as those from a high-end bakery, consider these tips. As soon as the cookies come out of the oven, while they’re still piping hot and pliable, carefully press a few extra chocolate chips or decorative sprinkles onto their tops. The warmth will slightly melt them, creating a beautiful, glossy finish. If any cookies have baked into less-than-perfect shapes, you can gently use a spatula to tap their edges into neater rounds. Always steady the hot cookie sheet with an oven mitt to prevent burns. Another excellent method for reshaping hot cookies is to use a round cookie cutter that is a couple of sizes larger than your baked cookies; place the cutter over a warm cookie and gently swirl it around to nudge the cookie into a perfect circle. Again, exercise extreme caution and always use a hot pad to protect your hands.
Beyond the cookies themselves, attractive packaging elevates the gift. I personally love using charming paper boxes, often resembling Chinese takeout containers, or sturdy decorative tins. Line them with festive tissue paper to add a pop of color and cushioning. Then, place your cooled cookies into individual cellophane bags before arranging them inside the box or tin. This keeps them fresh, prevents them from sticking together, and adds a professional flourish.
Folding is a crucial, gentle technique in baking that involves carefully combining a lighter, often airy, ingredient (like whipped egg whites or whipped cream) into a heavier, denser mixture (like a batter or custard) without deflating the air bubbles. The primary goal of folding is to maintain the lightness and volume of the aerated ingredient, which is essential for creating taller, tender cakes, delicate mousses, and light, airy soufflés. It also minimizes gluten development in flour-based mixtures, preventing a tough texture.
To properly fold two mixtures together, typically you add a portion of the lighter mixture to the heavier one first, to lighten the base without overwhelming it. Then, add the remaining lighter mixture. Using a flexible rubber spatula, cut down through the center of the bowl, sweep it across the bottom, and then bring it up the side, gently folding the lighter mixture over the heavier one. Rotate the bowl a quarter turn and repeat this motion, always scraping down the side and folding over the top. Continue this process carefully and patiently until the mixture is homogeneous, meaning no streaks of either ingredient remain. The key is to be gentle and efficient, stopping as soon as the ingredients are just combined to preserve as much air as possible.
More Irresistible Chocolate Cookie Recipes You’ll Love:
If these Double Chocolate Chunk Cookies have ignited your passion for chocolate baking, you’re in luck! There’s a whole world of delightful chocolate cookie recipes waiting to be explored. From decadent stuffed cookies to classic chewy delights, here are some more chocolate-packed treats to satisfy your cravings:
- Salted Caramel Stuffed Chocolate Cookies from Life, Love and Sugar
- Rolo Brownie Cookies
- Death by Chocolate Cookies
- M & M Brownie Cookies
- Brownie Drop Cookies
- Jumbo Chocolate Chip Cookies
- Oatmeal Chocolate Chunk Cookies
- Peanut Butter No-Bake Cookies (A delicious alternative!)
- Explore even more delightful Cookie Recipes
Stay connected and join our community of passionate bakers through social media! Follow us on Instagram, Facebook, and Pinterest. Don’t forget to tag me when you try one of my delicious recipes – I love seeing your creations! And if you absolutely adore the results, please consider leaving a 5-star rating in the recipe card below to share your feedback with others.
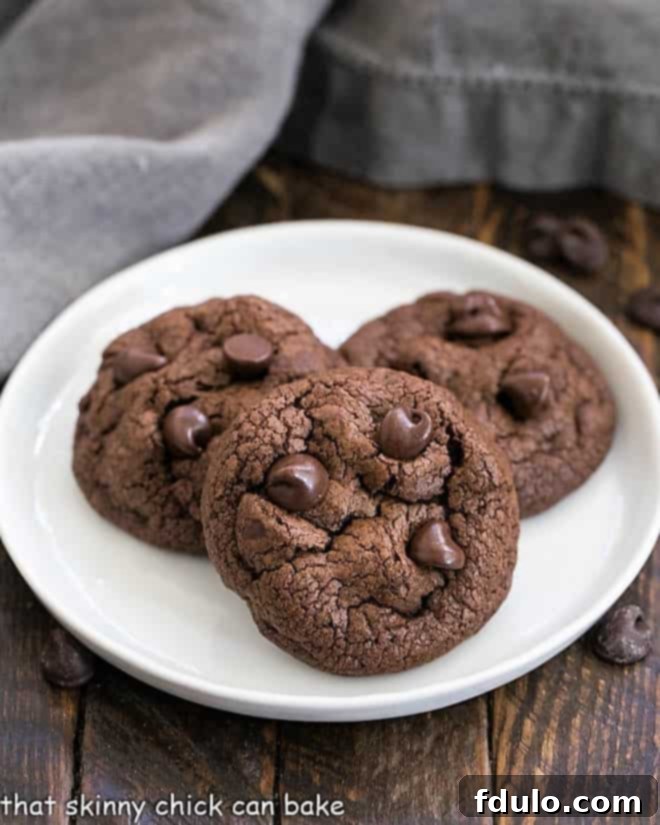
Double Chocolate Chunk Cookies
20 minutes
12 minutes
32 minutes
16 cookies
Indulge in a truly decadent experience! These Double Chocolate Chunk Cookies feature a triple dose of rich chocolate, making them exceptionally enticing and a dream for every chocoholic. Soft, chewy, and bursting with flavor!
Ingredients
- 4 ounces semi-sweet chocolate, chopped
- 1 stick (4 ounces) butter, at room temperature
- ¾ cup brown sugar
- 1 large egg
- 1 teaspoon vanilla extract
- 1 cup all-purpose flour, sifted
- ¼ cup unsweetened cocoa powder, sifted
- 1 teaspoon baking soda
- ¼ teaspoon salt
- 8 ounces semi-sweet or bittersweet chocolate, chopped (or use chocolate chips for ease)
Instructions
- Preheat your oven to 325°F (160°C). Line several baking sheets with parchment paper or silicone baking mats and set aside.
- In a heatproof bowl, melt the 4 ounces of chopped semi-sweet chocolate. You can do this in 30-second increments in the microwave, stirring well after each interval until it is smooth and completely melted. Allow it to cool slightly while you prepare the other ingredients.
- In the bowl of a stand mixer fitted with the paddle attachment, or using a hand mixer, beat the softened butter and brown sugar on medium-high speed for about 8 minutes. Continue until the mixture is visibly lightened in color and has a wonderfully creamy, fluffy texture. This step is crucial for incorporating air.
- Add the large egg and vanilla extract to the creamed butter and sugar. Beat for an additional 3 minutes, ensuring everything is thoroughly combined and well aerated.
- In a separate bowl, whisk together the sifted flour, sifted cocoa powder, baking soda, and salt. Gently fold these dry ingredients into the wet batter using a spatula, mixing until just combined. Next, carefully fold in the cooled melted chocolate. Finally, add the remaining 8 ounces of chopped chocolate (or chocolate chips) and stir gently until they are evenly distributed throughout the dough. Avoid overmixing.
- Using slightly damp palms, roll tablespoons of the sticky dough into uniform balls. The dampness helps prevent the dough from sticking to your hands.
- Place the rolled dough balls onto the prepared baking sheets, ensuring you leave approximately 2 inches of space between each cookie to allow for proper spreading during baking.
- Bake for 10-12 minutes. The cookies are done when the edges appear set and slightly cracked, but the centers may still look a little soft. This softness is key for a chewy texture once cooled.
- Remove the baking sheets from the oven and allow the cookies to cool on the sheets for a few minutes. This allows them to firm up without becoming brittle. Then, carefully transfer the cookies to wire racks to cool completely.
Notes
This fantastic recipe has been lovingly adapted from an original by Donna Hay, ensuring a perfect balance of flavor and texture.
Recommended Baking Essentials
As an Amazon Associate and member of other affiliate programs, I earn from qualifying purchases, helping to support this blog.
- KitchenAid Artisan Series 5-Quart Stand Mixer
- Reynolds Kitchens Pre-Cut Parchment Paper Sheets
- USA Pan Bakeware Half Sheet Pan
Nutrition Information:
Yield:
16
Serving Size:
1 cookie
Amount Per Serving (approximate):
Calories: 196Total Fat: 10gSaturated Fat: 6gTrans Fat: 0gUnsaturated Fat: 3gCholesterol: 12mgSodium: 123mgCarbohydrates: 24gFiber: 3gSugar: 12gProtein: 4g
HOW MUCH DID YOU LOVE THIS RECIPE?
Please leave a comment on the blog or share a photo on Pinterest
