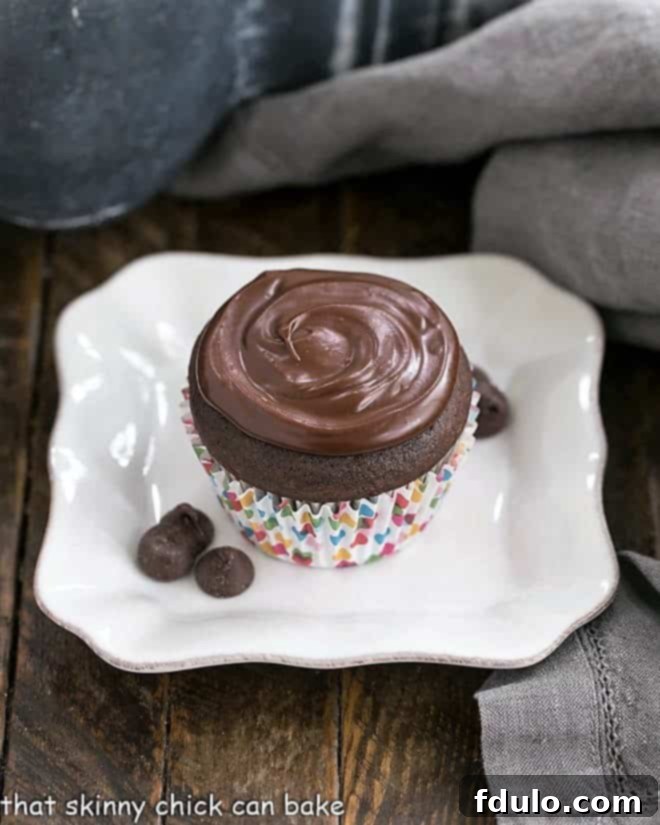
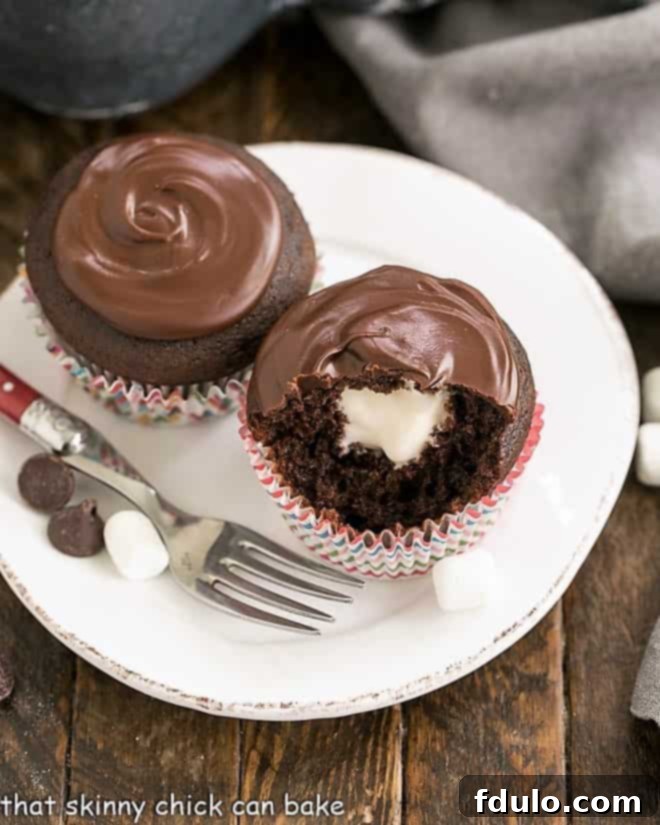
Indulge in the ultimate homemade treat with these rich, tender Chocolate Cream Filled Cupcakes. Often hailed as the ultimate Copycat Hostess Cupcake Recipe, these delightful confections are a step above any store-bought alternative. Each bite promises a moist chocolate cupcake, generously filled with a fluffy marshmallow cream, and crowned with a luscious chocolate ganache. Forget those pre-packaged versions; these scratch-made cupcakes offer an unparalleled experience that will transport you straight back to childhood with every decadent mouthful. This beloved recipe was definitely due for a fresh look, and the results are even more magnificent than before.
There’s something truly special about baking for loved ones, especially when it’s for a celebration. When our youngest, Nick, requested a chocolate dessert for his birthday dinner, my mind instantly went to these incredible Filled Cupcakes. I recalled an old blog post featuring a similar recipe – a testament to its timeless appeal – but knew it was time for a modern update. The original recipe was already a winner, but with improved techniques and photography, these renewed chocolate cream-filled delights shine even brighter. They were just as marvelous, if not more so, than the first time I made them, proving that some classics only get better with age.
Why You Must Make These Homemade Chocolate Cream Filled Cupcakes
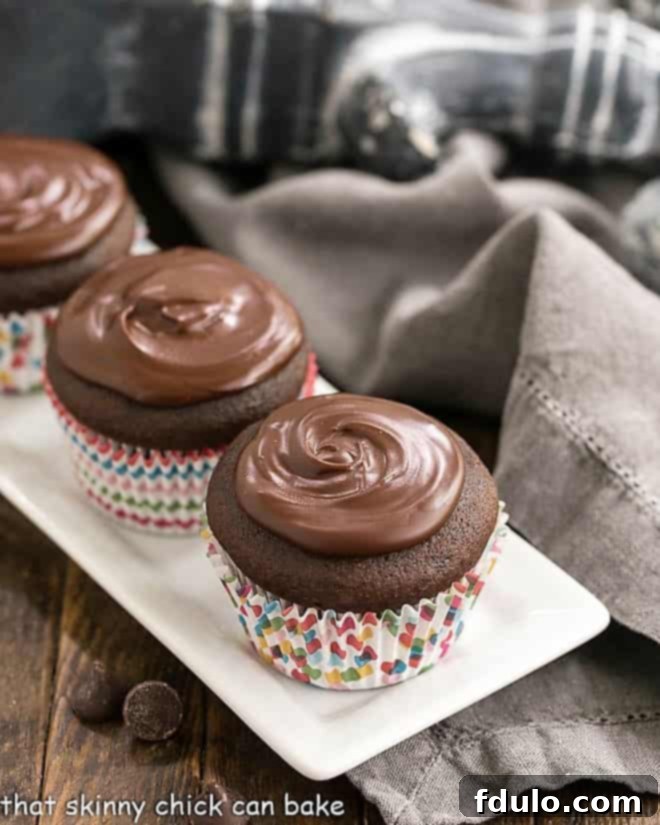
If you’re searching for a dessert that truly stands out, these homemade chocolate cream-filled cupcakes are an absolute must-try. They offer a significant upgrade from anything you’ll find in the snack aisle, bringing joy and a sense of accomplishment to your kitchen. Here are just a few compelling reasons why this recipe should be next on your baking list:
- Unbeatable Flavor and Texture: These cupcakes simply taste superior to their store-bought counterparts. The tender, moist chocolate cake combined with the cloud-like marshmallow cream filling and rich chocolate ganache creates a symphony of flavors and textures that no packaged cupcake can replicate.
- Wholesome Ingredients: You’ll recognize every ingredient on the list. No strange chemicals, artificial flavors, or unpronounceable preservatives here. Just good, honest baking staples you can trust.
- No Preservatives: Enjoy your treats fresh and without the worry of unnecessary additives. This is real food, made with care, offering peace of mind along with deliciousness.
- A Fun and Engaging Baking Project: The process of filling these cupcakes is surprisingly simple and incredibly satisfying. It’s a wonderful activity to share with family or friends, and the reveal of the creamy center is always a delightful surprise. Everyone will be asking for your secret!
- Customizable for Any Palate: While this recipe mimics the classic Hostess cupcake, the beauty of homemade is the ability to customize. Adjust the sweetness, add a hint of mint to the ganache, or even experiment with different flavor extracts in the filling. The possibilities are endless.
- The Pride of Homemade: There’s immense satisfaction in presenting a dessert you’ve crafted from scratch. These cupcakes are sure to impress at parties, potlucks, or as a special treat for your family.
These reasons combined make the effort of baking these chocolate cream-filled cupcakes incredibly rewarding. Prepare to be delighted by a dessert that’s not only delicious but also made with quality and love.
How to Make Perfect Chocolate Cream Filled Cupcakes
Creating these delightful chocolate cream-filled cupcakes is a straightforward and enjoyable process that yields professional-looking results. The core technique for filling works beautifully not just for these chocolate marshmallow treats, but also for any other cupcake and filling combination you might dream up. If you want to achieve the iconic “Ding Dong” look, you can core from the bottom and replace the cake round to plug the hole before glazing. For a classic Hostess cupcake appearance, simply core from the top as described below.
Once filled, a simple glaze of warmed or thinned frosting covers the top, and after it cools, a distinctive white squiggle of frosting can be piped across the top to perfectly mimic the real Hostess cupcake design. This attention to detail elevates your homemade treats to an art form. Here’s a detailed breakdown for mastering my version:
- Bake and Cool Your Cupcakes: Begin by baking your chocolate cupcakes according to the recipe instructions. This initial step is crucial; ensure they are completely cooled before moving on to the filling process. Warm cupcakes will melt the filling and make coring difficult.
- Prepare for Coring (Option 1 – Knife Method): Once the cupcakes are fully cooled, you have a couple of options for creating the perfect well. One method involves using a small, sharp knife to carefully cut a cone shape out of the center of each cupcake. Angle the knife inward as you cut to create a divot.
- Prepare for Coring (Option 2 – Cupcake Corer): For a more uniform and effortless approach, consider using a cupcake corer (affiliate link). These handy tools are widely available online and in kitchen supply stores. They make the process incredibly quick and clean.
- Using the Coring Device: If using a corer, simply insert the device into the center of the cupcake, twist gently, and pull to remove a perfect cylinder of cake.
- Alternative Tools: Don’t have a dedicated cupcake corer? No problem! An [easyazon_link identifier=”B00004OCIQ” locale=”US” tag=”thskchcaba-20″]apple corer[/easyazon_link] or even a [easyazon_link identifier=”B00004OCM4″ locale=”US” tag=”thskchcaba-20″]melon baller[/easyazon_link] can work wonders. This is a great way to get more use out of your existing kitchen tools.
- Creating the Cake Lid: With a small knife, carefully slice off the top portion of each cored cake cylinder. These small rounds of cake will serve as “lids” to cover the filling once it’s in place, ensuring a smooth top for frosting.
- Adjusting Well Size: Depending on how much filling you desire, you might need to make the cones or wells slightly larger. After using my coring device, I sometimes remove a little more cake with a knife to accommodate a generous marshmallow cream filling.
- Filling the Cupcakes: Now for the fun part! You can use a small spoon to carefully scoop the marshmallow cream filling into each well. For a neater and more controlled application, a piping bag fitted with a large round tip (or a Ziploc bag with a corner snipped off) works exceptionally well. Ensure the opening is wide enough for the filling to flow easily.
- Sealing the Filling: Gently place the reserved cake rounds (the “lids”) over the marshmallow cream filling and press them down lightly. This seals the filling inside and creates a flat surface for frosting.
- Final Frosting: Once the cupcakes are filled and sealed, they are ready for their finishing touch! Frost them as desired with the rich chocolate glaze, and for that classic look, add a white squiggle.
Expert Tips for Your Best Chocolate Cream Filled Cupcakes
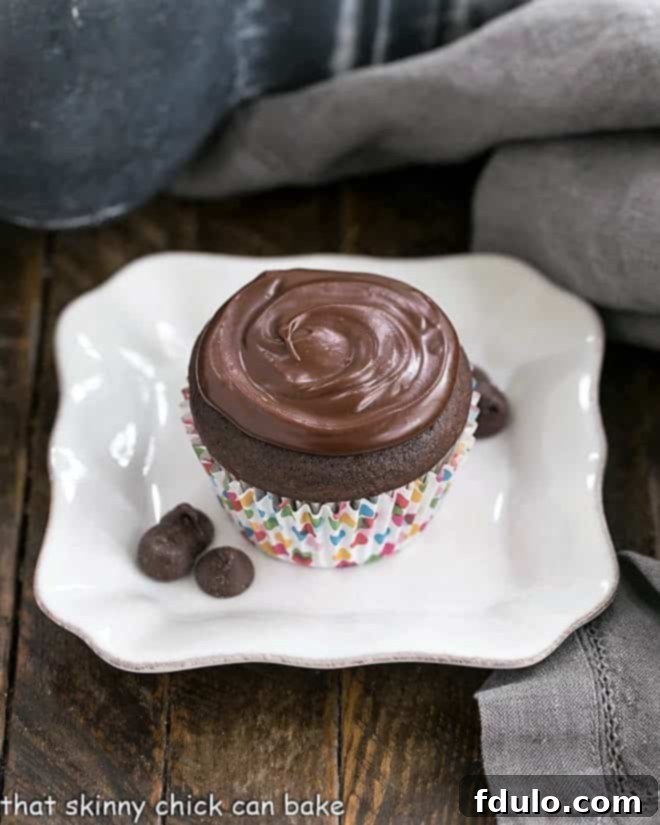
Baking is an art, and even the simplest recipes benefit from a few expert insights. My husband’s grocery runs often yield nostalgic treats like Hostess Ding Dongs, so when I discovered this cupcake recipe in Cook’s Country, I knew it was destined to become a family favorite. The guys devoured them, and even my daughter Katie, who prefers milder chocolate, enjoyed the unglazed version. My resident Hostess fanatic’s verdict of “Quite tasty” was a definite win in my book! Here are some crucial tips to ensure your homemade Hostess cupcakes turn out perfectly every time:
- Prevent Dry Cupcakes: Overbaking is the enemy of moist cupcakes. Bake just until the cake springs back when you gently tap the middle with your finger, or a toothpick inserted comes out with only a few moist crumbs. This ensures a tender, rich chocolate base for your filling.
- Cool Completely Before Coring: Patience is key! Make sure your cupcakes are entirely cool before you attempt to core them. Warm cupcakes will be too delicate, prone to crumbling, and the filling will melt.
- Choose Your Coring Tool Wisely: Whether you opt for a specialized cupcake coring tool, a small paring knife, an apple corer, or a melon baller, ensure your tool is sharp and clean. Practice on a spare cupcake if you’re new to coring to get a feel for the depth and width you prefer for your marshmallow cream filling.
- Efficient Filling Method: For a neat and quick filling process, a piping bag fitted with a large round tip is ideal. If you don’t have one, a sturdy Ziploc bag with a corner snipped off works just as well. This method allows for precise control and minimal mess.
- Don’t Discard the Cake Tops: Always save the small round piece of cake you core out of each cupcake. These pieces act as perfect “caps” to seal in the creamy filling, making the cupcakes easier to frost and giving them a smooth, professional finish.
- Customize Your Topping and Filling: While a rich chocolate glaze is classic, don’t hesitate to experiment! You can frost these with any flavor of buttercream you like. Similarly, the marshmallow cream filling can be swapped for other delightful surprises, such as peanut butter cream, raspberry jam, or even a different type of custard.
- Achieve the Signature Swiggle: To truly replicate the Hostess look, use a small piping bag with a fine round tip (or another Ziploc bag with a tiny snip) filled with white icing. Pipe the characteristic squiggle across the cooled chocolate glaze for that unmistakable, iconic finish.
Ultimately, we had a unanimous family decision: these Copycat Hostess Cupcakes surpassed the originals I aimed to imitate! (I even got a quick lesson on the various names of supermarket chocolate cake goodies). Feel empowered to pipe those white icing squiggles across the top of the glaze if you’re looking for that unmistakable Hostess product appearance. Your homemade version will undoubtedly be a delicious triumph.
Frequently Asked Questions About Chocolate Cream Filled Cupcakes
The exact composition of the original Hostess Ding Dong’s cream filling remains a bit of a trade secret. Reading the lengthy ingredient list on a Hostess label can be quite a challenge, as it’s often difficult to discern where the cake ingredients end and the filling ingredients begin. Beyond a multitude of multi-syllabic preservatives and stabilizers, only a handful of recognizable ingredients usually stand out. Based on the ingredient declarations, common components that could be found in the filling include sugar, soybean oil, various natural flavorings, and salt. Our homemade version, however, uses simple, wholesome ingredients you can easily identify and trust.
Hostess first introduced the beloved Ding Dongs to the American market in 1967. These chocolate-covered, cream-filled cakes quickly became a staple in lunchboxes and snack times across the nation. Interestingly, in the Eastern United States, they were briefly marketed under the name “King Dongs.” This temporary rebranding was a strategic move to avoid confusion and potential legal issues with a competitor’s similar product, “Ring Dings,” which had an established presence in that region. The name “Ding Dong” eventually became universal.
The origin of the name “Ding Dong” for these iconic treats is quite simple and tied directly to marketing. Hostess chose the name to coincide with a catchy television advertising campaign that featured a ringing bell. Despite the fact that the snack itself bears no resemblance to a bell, the memorable jingle and visual association with the ringing sound helped cement the name in the public’s mind, making it instantly recognizable and synonymous with a delightful, chocolatey indulgence.
These homemade chocolate cream-filled cupcakes are best enjoyed within 2-3 days when stored in an airtight container at room temperature. For extended freshness, especially due to the marshmallow cream filling, you can refrigerate them for up to 5 days. Just bring them to room temperature before serving for the best texture and flavor.
Yes, you can! To freeze, place unfrosted and unfilled cupcakes in an airtight container or freezer bag for up to 3 months. Thaw at room temperature, then core and fill as directed. You can also freeze fully assembled (filled and glazed) cupcakes, though the texture of the glaze might change slightly upon thawing. Wrap individually in plastic wrap, then place in a freezer-safe container for best results.
You May Also Like These Delicious Cupcake Recipes
Cupcakes are the quintessential portable dessert! Their individual portions make them perfect for virtually any occasion—from lively picnics and school celebrations to festive birthday parties and cozy family gatherings. If you enjoyed crafting these chocolate cream-filled cupcakes, you’ll love exploring more of our favorite cupcake creations. Each recipe is designed to bring joy and deliciousness to your table, offering a variety of flavors and styles to suit every taste and event.
- Best White Cupcakes
- Red Velvet Cupcakes
- Coconut Cupcakes
- Perfect Chocolate Cupcakes
- Mounds Brownie Cupcakes
- Easy Chocolate Cupcakes
- More of the Best Cupcake Recipes
Stay connected and share your baking adventures with me through social media! Find me on Instagram, Facebook, and Pinterest. Don’t forget to tag me when you try one of my delicious recipes! If you love the results, please consider leaving a 5-star rating in the recipe card below to help other home bakers discover these fantastic treats.
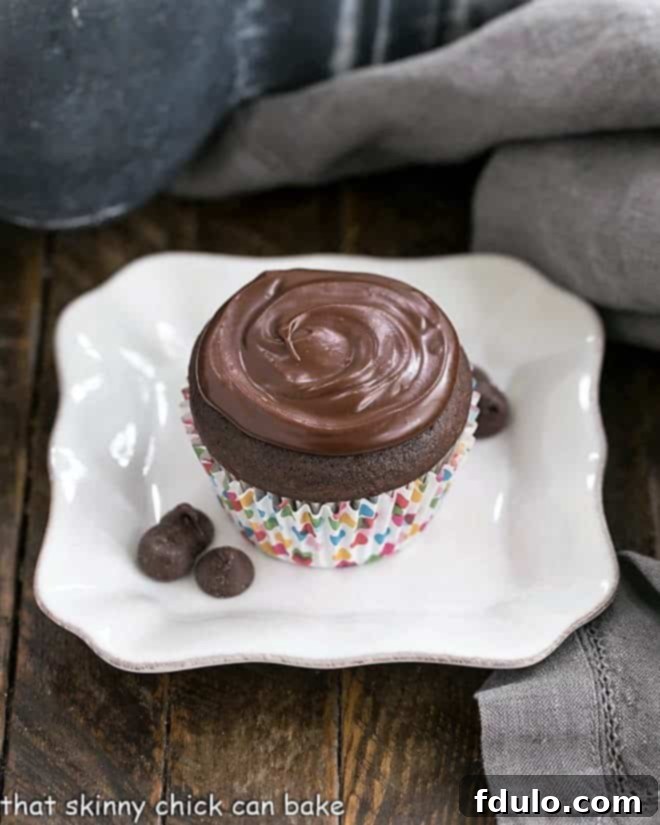
Chocolate Cream Filled Cupcakes
30 minutes
22 minutes
52 minutes
12 cupcakes
Hostess Cupcake Copycats but a whole lot better!! These homemade chocolate cream-filled cupcakes feature a moist chocolate cake, a fluffy marshmallow cream filling, and a rich chocolate ganache. The ultimate nostalgic treat, made from scratch!
Ingredients
For the Chocolate Cupcakes:
- 1 cup all-purpose flour
- ½ teaspoon baking soda
- ½ cup boiling water
- ⅓ cup unsweetened cocoa powder
- ⅓ cup semi-sweet chocolate chips
- 1 teaspoon instant espresso powder
- ¾ cup granulated sugar
- ½ cup sour cream
- ½ cup vegetable oil
- 2 large eggs
- 2 teaspoons pure vanilla extract
For the Marshmallow Cream Filling:
- 3 tablespoons water
- ¾ teaspoon unflavored gelatin
- 4 tablespoons (½ stick) unsalted butter, at room temperature
- 1 teaspoon pure vanilla extract
- 1 jar (7 ounces) marshmallow creme
For the Chocolate Glaze:
- ½ cup semi-sweet chocolate chips
- 3 tablespoons unsalted butter
Instructions
- Preheat your oven to 350ºF (175ºC). Line a 12-cup muffin tin with paper liners or grease and flour the tin thoroughly.
- In a medium bowl, whisk together the flour and baking soda until well combined. Set this dry mixture aside.
- In a large mixing bowl, whisk together the boiling water, cocoa powder, chocolate chips, and instant espresso powder until smooth and the chocolate chips begin to melt. Then, add the sugar, sour cream, vegetable oil, eggs, and vanilla extract, whisking until all ingredients are fully combined and the batter is smooth.
- Gradually add the reserved flour mixture to the wet ingredients, whisking until just combined. Be careful not to overmix.
- Divide the batter evenly among the prepared muffin cups. Bake for 18-22 minutes, or until a toothpick inserted into the center of a cupcake comes out with just a few moist crumbs. Let the cupcakes cool for 10 minutes in the muffin tin, then transfer them to a wire rack to cool completely.
- To prepare the marshmallow cream filling, combine 3 tablespoons of water and the unflavored gelatin in a small, microwave-safe bowl. Let it sit for about 5 minutes to bloom. Microwave for approximately 30 seconds, or until the gelatin appears completely dissolved. Whisk the mixture, then add the room temperature butter and vanilla extract. Allow this mixture to cool for about 5 minutes, until it’s just warm to the touch.
- Whisk the marshmallow creme into the gelatin-butter mixture until the filling is smooth and fully incorporated.
- Refrigerate the filling until it has set and is firm enough to work with, typically 30 minutes or longer.
- To assemble the cupcakes, use a cupcake corer or a small paring knife to cut a cone shape out of the top of each cooled cupcake. Carefully cut the bottom of the removed cake cone off, leaving just a small, round disc of cake. Save these small rounds of cake; they will serve as the caps.
- Using a small spoon or a piping bag, fill each cupcake divot with a generous spoonful or so of the marshmallow filling. Place the reserved cake circles on top of the filling and gently press them down to create a sealed, flat surface.
- To make the chocolate glaze, combine the semi-sweet chocolate chips and 3 tablespoons of butter in a microwave-safe bowl. Microwave for about 30 seconds. Stir the mixture until smooth; if the chocolate is not completely melted, microwave again in 15-second intervals, stirring after each, until smooth.
- Allow the glaze to cool for about 10 minutes until slightly thickened but still pourable. Then, generously glaze the tops of the filled cupcakes. For the classic Hostess look, pipe white icing squiggles on top once the glaze has set.
Notes
Recipe adapted from Cook’s Country. For an even richer chocolate flavor, consider using high-quality cocoa powder and chocolate chips. To achieve a perfectly smooth glaze, ensure both the chocolate and butter are melted slowly and stirred until fully emulsified. The marshmallow cream filling can be made ahead of time and stored in the refrigerator for up to 2 days.
Recommended Products
As an Amazon Associate and member of other affiliate programs, I earn from qualifying purchases.
- OXO Good Grips 11-Inch Better Balloon Whisk
- Cupcake Tin
- Cupcake Corer
Nutrition Information:
Yield:
12
Serving Size:
1 cupcake
Amount Per Serving:
Calories: 293Total Fat: 19gSaturated Fat: 6gTrans Fat: 0gUnsaturated Fat: 11gCholesterol: 44mgSodium: 93mgCarbohydrates: 30gFiber: 1gSugar: 20gProtein: 3g
HOW MUCH DID YOU LOVE THIS RECIPE?
Please leave a comment on the blog or share a photo on Pinterest
