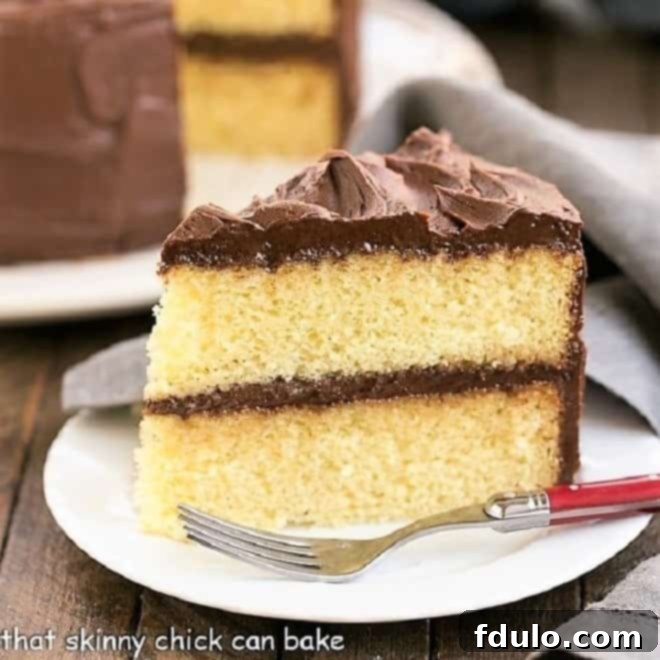
There’s something uniquely comforting and celebratory about a classic yellow cake, especially when crowned with a rich, dreamy chocolate buttercream frosting. This isn’t just any dessert; it’s a timeless masterpiece, a staple for birthdays, holidays, and any occasion that calls for a touch of sweet nostalgia. Forget the boxed mixes; a homemade yellow cake offers an unparalleled tenderness and moisture that truly elevates the experience. Our best yellow cake recipe, perfected over countless celebrations, consistently receives rave reviews and is a testament to the simple joy of baking from scratch.
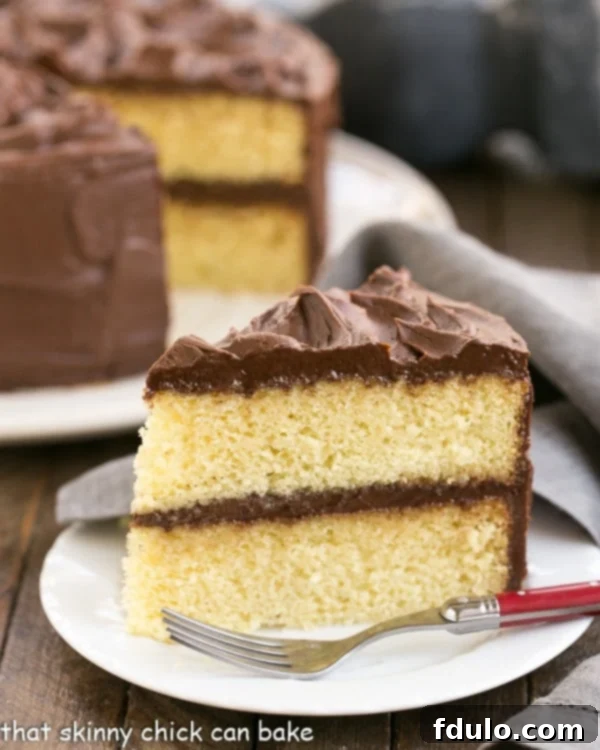
Why This Homemade Yellow Cake Recipe Stands Out
For years, this has been the requested centerpiece for my husband Bill’s birthday, even though he’s a self-proclaimed chocoholic. His choice reflects a deeper sentiment, often picked because he knows our daughter, Miss Katie, absolutely adores it. It’s no wonder she has a sign above her bed declaring it “The Queen’s Bed” in elegant calligraphy – this cake is truly fit for royalty! But beyond sentimental value, there are many compelling reasons why this particular yellow cake recipe has become a family favorite and will surely become yours too:
- A Tested and True Foundation: This recipe is inspired by the reliable techniques of Smitten Kitchen, a culinary source known for its consistently delicious and nearly foolproof recipes. Following these well-established methods ensures a successful bake every time, even for novice bakers. It takes the guesswork out of baking, allowing you to focus on the joy of creating.
- Unmatched Tenderness and Fine Crumb: The secret to its incredibly sweet and tender texture lies in the strategic use of buttermilk. Buttermilk’s acidity reacts with baking soda, creating a lighter, more delicate crumb structure. This chemical reaction not only contributes to the cake’s rise but also breaks down gluten, resulting in an exceptionally moist and fine-textured cake that melts in your mouth.
- The Ultimate Chocolate Pairing: While a full chocolate cake is always an option, pairing this delightful yellow cake with our rich, fudgy chocolate buttercream frosting offers the best of both worlds. It satisfies the deepest chocolate cravings without overpowering the subtle, buttery vanilla notes of the yellow cake. This harmonious blend ensures that everyone, from dedicated chocoholics to classic cake enthusiasts, finds something to love.
- Universal Acclaim: Time and again, this cake has earned enthusiastic praise from everyone who tries it. From family gatherings to festive parties, the feedback is always the same: “This is the best yellow cake I’ve ever had!” Its consistent success makes it a reliable choice for any event where you want to impress and delight your guests.
- The Joy of Baking from Scratch: Beyond the ingredients and techniques, there’s an immense satisfaction in crafting a beautiful cake from scratch. The aroma filling your kitchen, the careful layering, and the final flourish of frosting create a sense of accomplishment and a truly personal touch that a store-bought cake simply cannot replicate. This is more than just a recipe; it’s an experience.
Crafting the Best Chocolate Buttercream Frosting
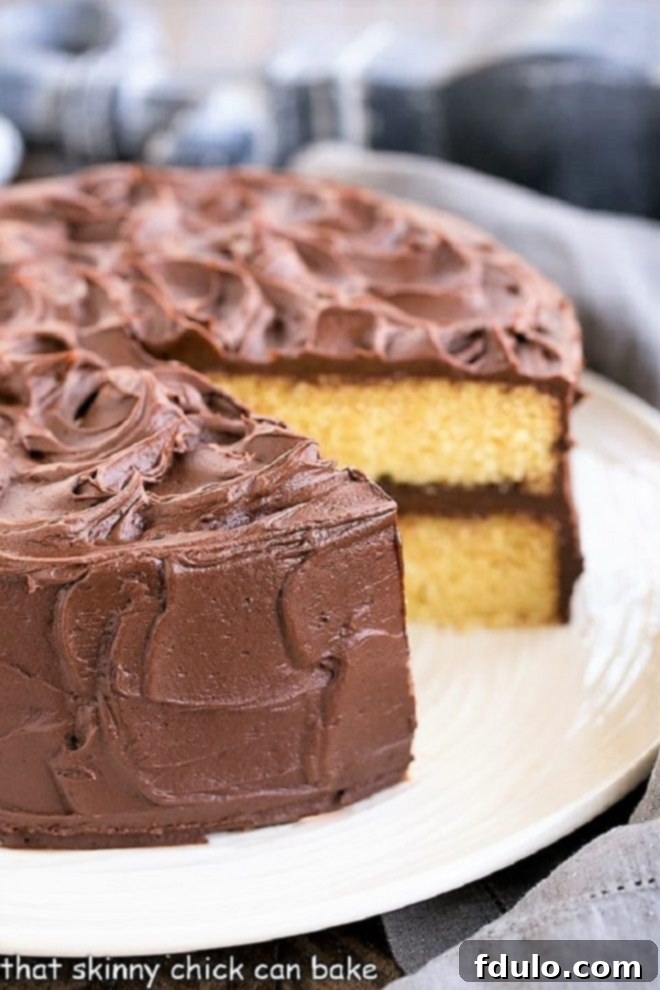
When it comes to a classic yellow cake, the only logical companion is a rich, velvety chocolate buttercream frosting. This isn’t just any frosting; it’s a decadent creation that perfectly complements the light, fluffy yellow cake, creating a magical flavor combination that’s truly irresistible. For many in our family, chocolate reigns supreme, and this particular buttercream delivers on every front. It’s lusciously smooth, deeply chocolatey, and has that perfect fudgy consistency that holds its shape beautifully while still being wonderfully spreadable. If you’re planning any celebration, from a birthday to an anniversary, we wholeheartedly recommend this terrific duo: a perfect yellow cake beneath a generous swirl of this incredible chocolate frosting. The contrast in textures and flavors is pure culinary bliss.
Frequently Asked Questions About Yellow Cake and Frosting
The primary distinction lies in the eggs used. A yellow cake incorporates whole eggs, meaning both the yolks and whites are included. The egg yolks are responsible for the cake’s characteristic yellow hue and contribute significantly to its richness and moistness. They add a subtle depth of flavor that’s distinctly comforting. In contrast, a white cake typically uses only egg whites, resulting in a paler color and a slightly lighter, airier texture. Both types of cakes are traditionally flavored with vanilla, but the presence or absence of egg yolks creates noticeable differences in appearance, richness, and overall mouthfeel.
Achieving a super moist yellow cake involves several key ingredients and techniques working in harmony. Firstly, the generous amount of butter in this recipe not only adds incredible flavor but also helps to tenderize the cake by slowing down gluten formation and contributing significant moisture. Sugar plays a dual role: it sweetens the cake and acts as a humectant, attracting and retaining moisture, while also helping to break up the gluten strands. Eggs are another crucial component, providing fat that enriches the batter and adds to the cake’s overall moistness and tender crumb. Additionally, using buttermilk, as detailed in this recipe, introduces acidity that tenderizes the crumb further. Finally, avoiding over-mixing the batter is paramount; over-mixing develops too much gluten, which can lead to a tough, dry cake. Gentle mixing ensures a delicate and moist result.
Proper storage is essential to maintain the freshness and moistness of your yellow cake. Once a cake has been cut, the exposed surfaces are prone to drying out quickly. To prevent this, cover any cut edges tightly with plastic wrap. For the best results, store the entire cake in an airtight container at room temperature. This method typically keeps the cake fresh and delicious for 3-4 days. While refrigeration can extend its shelf life, it can also alter the cake’s texture, sometimes making it slightly dense or drying it out faster. However, if your frosting contains ingredients that require refrigeration (like fresh cream or perishable fruit), then refrigeration is necessary, but ensure it’s still well-sealed to lock in moisture.
Freezing cake is a great way to preserve it for later enjoyment, but there are nuances. Leftover cake slices, especially those unfrosted or lightly frosted with a sturdy buttercream, can be wrapped well in several layers of plastic wrap and then foil, or placed in an airtight freezer-safe container. These can be frozen for up to one to two months. However, freezing a whole, fully frosted cake is generally not advised, particularly if the frosting is delicate or contains fresh ingredients. The process of moving, freezing, and thawing can significantly impact the frosting’s texture, potentially leading to cracking, weeping, or an undesirable grainy consistency. For best results with whole cakes, it’s often better to freeze unfrosted cake layers separately, wrap them meticulously, and then thaw and frost them fresh closer to when you plan to serve. This preserves the integrity of both the cake and the frosting.
Mastering the Art of Layer Cake Baking
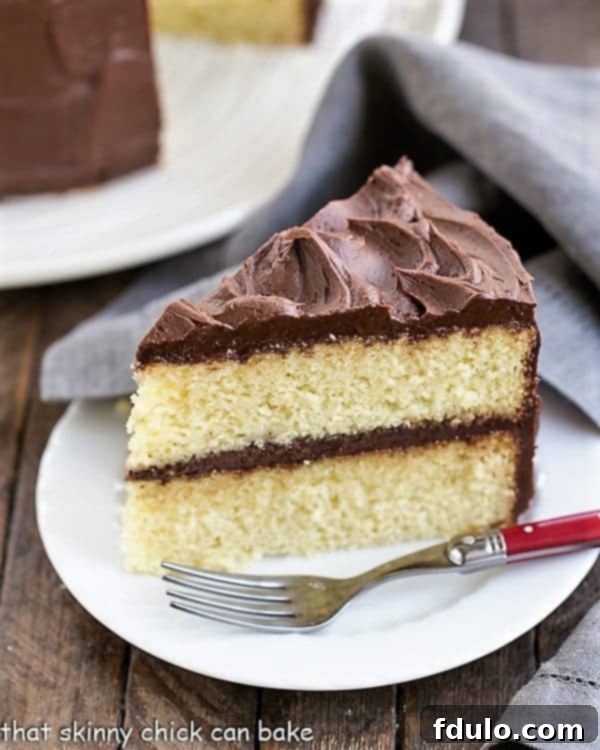
The thought of baking and assembling a stunning layer cake can seem a bit intimidating. From dividing the batter evenly to achieving perfectly flat layers and then frosting it flawlessly like a professional bakery creation, there are several steps that require a careful hand. But with a few expert tips, you can conquer these challenges and create a show-stopping dessert with confidence:
- Precision with Batter Division: A key to even layers is consistent batter distribution. PRO-Tip: I highly recommend using a kitchen scale to divide your cake batter evenly between the pans. This ensures that each layer bakes up to the same height and density, making stacking much easier and the final cake more aesthetically pleasing.
- Achieving Flat Cake Tops: It’s common for cake layers to bake with a slightly rounded dome. To create a level surface for frosting and stacking, gently trim the tops off your cooled cake layers using a serrated knife. This simple step ensures a stable foundation for your tiers.
- Minimizing Crumb Mishaps: After trimming, place the trimmed cake layers bottom-side up when you begin frosting. The bottom surface of the cake is typically flatter and has fewer loose crumbs, which significantly reduces the chances of crumbs mixing into your beautiful frosting.
- The Crumb Coat Technique: For a truly polished finish, consider applying a crumb coat. This involves spreading a very thin layer of frosting over the entire cake – top and sides – to trap any stray crumbs. Chill the cake in the refrigerator for about 15-20 minutes until this thin layer hardens slightly. Once set, you can apply your final, thicker layer of frosting without any crumbs marring the smooth surface.
- Patience with Cooling: Resist the urge to frost warm cakes! Ensure your cake layers are completely cooled to room temperature before you begin frosting. Attempting to frost a warm cake will result in melted, sliding frosting and a messy disaster.
- The Magic of Cake Flour and Buttermilk: These two ingredients are paramount for a tender cake. Cake flour, with its lower protein content, produces a softer crumb than all-purpose flour. Buttermilk’s acidity tenderizes the cake, contributing to an incredibly moist and delicate texture.
- Buttermilk Substitute (If You’re Out): No buttermilk on hand? No problem! PRO-Tip: To make a quick buttermilk substitute, add one tablespoon of lemon juice or white or cider vinegar to a liquid measuring cup. Fill the cup to the one-cup mark with whole or 2% milk. Stir gently and let it rest for 5-10 minutes until it slightly curdles. Use this mixture in place of store-bought buttermilk in equal amounts.
- Cake Flour Substitute (In a Pinch): Don’t have cake flour? You can make your own! PRO-Tip: For every cup of cake flour needed, measure out one cup of all-purpose flour. Remove two tablespoons of that flour, then sift the remaining 14 tablespoons of flour with two tablespoons of cornstarch three times. This process lightens the flour and mimics the properties of cake flour.
- Maintaining a Clean Serving Plate: For a professional presentation, tuck small strips of parchment or wax paper underneath the bottom layer of the cake around its perimeter on the serving plate. These strips will catch any errant frosting drips, keeping your cake plate pristine. Once the cake is fully frosted, carefully slide out the paper strips.
- Proper Pan Preparation: Always butter and flour your cake pans thoroughly, or use a cooking spray specifically designed for baking (like Baker’s Joy) that contains flour. For extra insurance and easier release, line the bottoms of your pans with parchment paper circles. This prevents sticking and ensures your beautiful layers come out intact.
- Don’t Peek Too Early: Resist the temptation to open the oven door during the first two-thirds of the baking time. Fluctuations in temperature can cause cakes to sink in the middle. Trust your oven and the timer.
- Sifting Dry Ingredients: Sifting your flour, baking powder, baking soda, and salt together ensures they are well combined and aerated, leading to a lighter, more uniform cake texture.
More Irresistible Birthday Cake Recipes You’ll Love:
- Birthday Cake Roll from Crazy for Crust
- Birthday Cake Brownies from Back for Seconds
- Birthday Cake Mix Cookies Recipe from Crunchy Creamy Sweet
- Elegant White Birthday Cake
- Decadent Chocolate Fudge Layer Cake
- Light and Fluffy Angel Food Cake Recipe
Connect with us on social media! Find more delicious recipes and baking inspiration by following us on Instagram, Facebook, and Pinterest. Don’t forget to tag us when you try one of our recipes – we love seeing your creations! If you adore the results, please consider giving it a 5-star rating in the recipe card below.
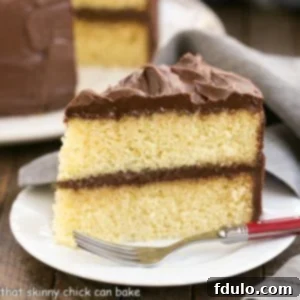
Perfect Yellow Cake Recipe with Chocolate Buttercream
1 hour
40 minutes
1 hour 40 minutes
16 servings
A classic combination of a fine crumb yellow cake and dreamy chocolate frosting! Perfect for any celebration!
Rating: 4.9/5 stars based on 46 reviews.
Ingredients
For the cake:
- 4 cups plus 2 tablespoons cake flour
- 2 teaspoons baking powder
- 1 ½ teaspoons baking soda
- 1 teaspoon salt
- 1 cup butter (2 sticks), at room temperature
- 2 cups sugar
- 2 teaspoons vanilla extract
- 4 eggs, at room temperature
- 2 cups buttermilk
For the frosting:
- 1 ½ cups butter (3 sticks), at room temperature
- 1 cup cocoa powder
- 5 cups powdered sugar, sifted
- ½ cup milk
- 2 teaspoons vanilla extract
Instructions
- Preheat oven to 350°F (175°C).
- Butter two 9-inch round cake pans and line with circles of parchment paper, then butter the parchment paper (I use an oil/flour cooking spray like Baker’s Joy for ease).
- In a medium bowl, whisk together the cake flour, baking powder, baking soda, and salt until well combined.
- In the bowl of your stand mixer fitted with the paddle attachment, beat the softened butter and granulated sugar on medium speed until the mixture is pale and fluffy, typically for 3-5 minutes. Mix in the vanilla extract.
- Add the eggs one at a time, beating well after each addition and scraping down the sides of the bowl to ensure everything is fully incorporated.
- Gradually mix in the buttermilk until just combined. The mixture may look slightly curdled or not completely smooth at this stage, which is normal.
- Add the dry flour mixture to the wet ingredients in three batches, mixing on low speed until just combined after each addition. Be careful not to over-mix the batter, as this can develop gluten too much, leading to a tough cake and potentially large air bubbles. Mix just until no dry streaks of flour remain.
- Divide the batter evenly between the prepared cake pans. To release any large air bubbles, gently drop the cake pans onto the counter from a few inches up, 2 or 3 times.
- Bake for 35 to 40 minutes, or until a wooden skewer or toothpick inserted into the center of the cake comes out clean.
- Allow the cakes to cool in their pans on a wire rack for about 10-15 minutes. Then, carefully invert them onto the wire rack, remove the pans and parchment paper, and let the cakes cool completely before frosting.
- To make the frosting: Place the cocoa powder in the bowl of your stand mixer. Mix with a whisk attachment on low speed to break up any lumps. Add the softened butter and cream together on medium speed until smooth and fluffy.
- With the mixer on low speed, gradually alternate adding the sifted powdered sugar and milk. Start by adding about a cup of powdered sugar, mix until mostly incorporated, then add a tablespoon of milk, mix, and repeat this process until all the powdered sugar and milk are incorporated.
- Add the vanilla extract and mix until the frosting is smooth and creamy. If you prefer a thicker frosting, add more powdered sugar a tablespoon at a time. For a thinner consistency, add more milk a teaspoon at a time. Beat on medium-high speed for a final minute or two to make it extra fluffy.
Notes
Always check the expiration date on your baking powder and baking soda. These leavening agents lose their potency over time and can significantly impact the rise and texture of your cake. For optimal results, ensure they are fresh.
This yellow cake recipe is an adaptation from the highly regarded Smitten Kitchen, celebrated for its reliable and delicious recipes. The rich chocolate buttercream frosting has been thoughtfully adapted from a classic recipe by Add a Pinch, ensuring a perfect balance of sweetness and deep chocolate flavor.
Recommended Products
As an Amazon Associate and member of other affiliate programs, I earn from qualifying purchases.
- 9-inch Parchment Rounds
- 9-inch USA Pan Bakeware Round Cake Pan
- KitchenAid KSM150PSER Artisan Tilt-Head Stand Mixer with Pouring Shield, 5-Quart, Empire Red
Nutrition Information:
Yield:
16
Serving Size:
1 slice
Amount Per Serving:
Calories: 547
Total Fat: 31g
Saturated Fat: 19g
Trans Fat: 1g
Unsaturated Fat: 9g
Cholesterol: 125mg
Sodium: 620mg
Carbohydrates: 65g
Fiber: 1g
Sugar: 60g
Protein: 4g
Thatskinnychickcanbake.com occasionally offers nutritional information for recipes contained on this site. This information is provided as a courtesy and is an estimate only. This information comes from online calculators. Although thatskinnychickcanbake.com attempts to provide accurate nutritional information, these figures are only estimates.
Varying factors such as product types or brands purchased can change the nutritional information in any given recipe. Also, many recipes on thatskinnychickcanbake.com recommend toppings, which may or may not be listed as optional and nutritional information for these added toppings is not listed. Other factors may change the nutritional information such as when the salt amount is listed “to taste,” it is not calculated into the recipe as the amount will vary. Also, different online calculators can provide different results.
To obtain the most accurate representation of the nutritional information in any given recipe, you should calculate the nutritional information with the actual ingredients used in your recipe. You are solely responsible for ensuring that any nutritional information obtained is accurate.
HOW MUCH DID YOU LOVE THIS RECIPE?
Please leave a comment on the blog or share a photo on Pinterest!
