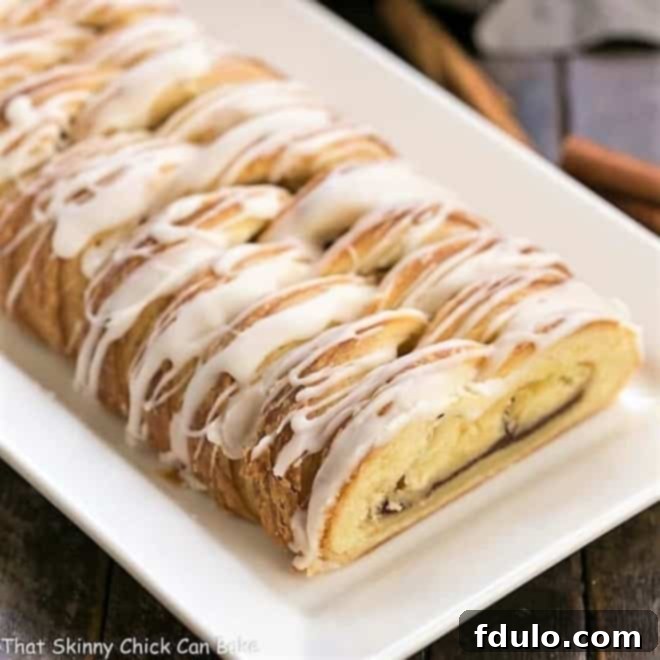
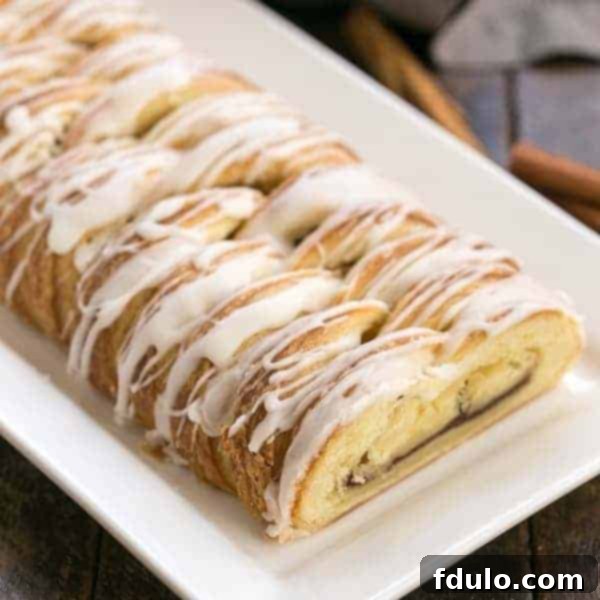
When you’re looking to truly impress your weekend guests, or simply treat yourself to a culinary masterpiece, there’s nothing quite like a freshly baked, homemade **Braided Cinnamon Danish**. This spectacular pastry, featuring a rich, buttery flavor and delicate, flaky layers, is crafted using a meticulous yet rewarding homemade laminated dough. Forget store-bought danishes; this gourmet **Cinnamon Bread Recipe** delivers an experience usually reserved for the finest bakeries, right in your own kitchen.
Each bite of this exquisite danish reveals layers upon layers of tender, yeast-leavened dough, generously filled with a sweet, aromatic cinnamon mixture and elegantly plaited before being drizzled with a simple, shimmering glaze. It’s more than just a breakfast item; it’s a labor of love that promises a truly memorable start to any day, transforming an ordinary morning into a special occasion.
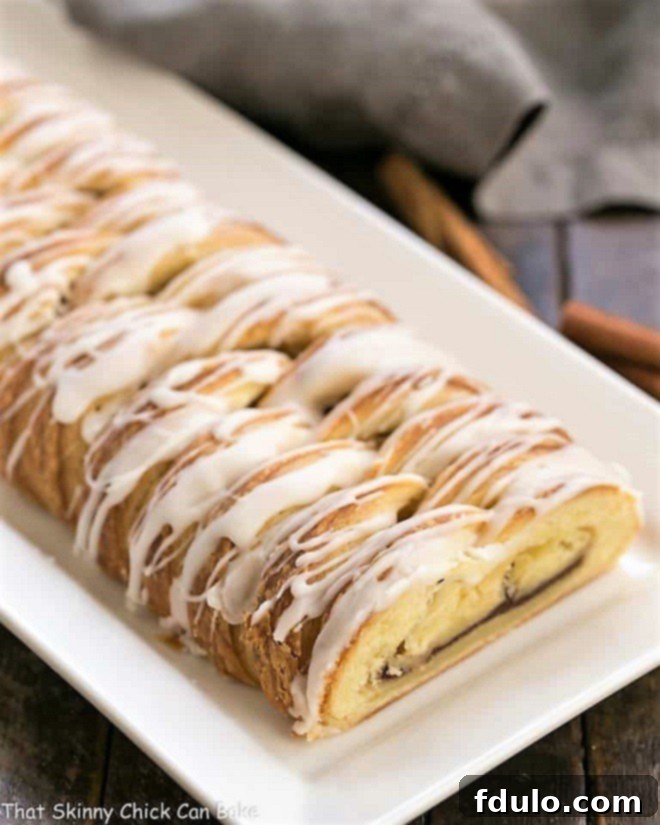
Master the Art of Baking: Homemade Braided Cinnamon Danish with Laminated Dough
Why This Homemade Braided Cinnamon Danish is a Must-Make
Embarking on the journey of creating your own **Braided Cinnamon Danish** with laminated dough might seem daunting at first, but the rewards far outweigh the effort. Here’s why this recipe deserves a prime spot in your baking repertoire:
- Unmatched Flavor and Texture: Unlike anything you’ll find pre-packaged, this homemade danish boasts an incredible depth of flavor. The rich butter permeates every delicate layer of the dough, creating an irresistibly flaky, tender, and melt-in-your-mouth texture that is simply divine. The warm spices of the cinnamon filling perfectly complement the buttery pastry, making each bite an indulgence.
- A Sense of Accomplishment: Successfully crafting laminated dough and seeing your beautifully braided pastry emerge golden and puffed from the oven is incredibly satisfying. It’s a true baking triumph that will make you feel like a master patissier. While it requires patience due to several chilling periods, the process itself isn’t difficult and is immensely rewarding.
- Perfect for Special Occasions: This isn’t just a breakfast; it’s a centerpiece. Whether you’re hosting a holiday brunch, celebrating a birthday, or simply want to elevate a casual weekend morning, this **Braided Cinnamon Danish** makes a stunning presentation. Its intricate braid and glossy glaze are guaranteed to impress friends and family, making any gathering feel more festive and luxurious.
- Control Over Ingredients: When you bake from scratch, you have complete control over the quality and freshness of your ingredients. Using good quality butter, fresh yeast, and your favorite spices ensures a superior taste and allows you to avoid any unwanted additives often found in commercially baked goods.
Understanding Laminated Dough: The Secret to Flakiness
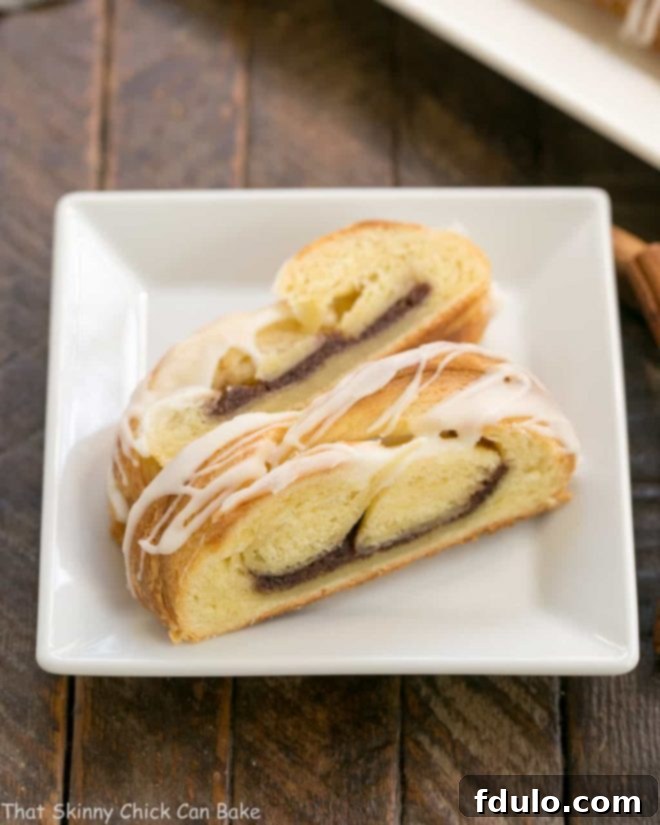
At the heart of this extraordinary **Braided Cinnamon Danish** lies laminated dough. If you’ve ever savored the crispy, airy layers of a croissant or the delicate flakiness of puff pastry, then you’ve experienced the magic of lamination. This technique involves repeatedly folding butter into dough, creating countless thin layers that separate and puff up when baked. In the case of this danish, yeast is added to the dough, giving it extra rise, richness, and a more bread-like yet still incredibly flaky texture, setting it apart from non-yeasted puff pastry.
The process, often referred to as “turns,” involves rolling out the dough, placing a slab of butter on it, folding the dough over the butter, and then rolling it out again. This is repeated multiple times, with chilling periods in between each “turn” to keep the butter firm and prevent it from melting into the dough. These chilling times are crucial for maintaining distinct layers of butter and dough. When the danish bakes, the water in the butter rapidly turns to steam, pushing apart the dough layers and creating that characteristic light, airy, and incredibly flaky texture that defines a perfect danish.
Embracing this technique might seem like a project, but it’s a foundational skill in baking that, once mastered, opens up a world of exquisite pastries. The patience required for the chilling phases is a small investment for the significant culinary reward of a genuinely bakery-worthy **Braided Cinnamon Danish**.
Expert Baking Tips for Success
Baking with laminated dough and achieving a beautiful braid might seem advanced, but with a few expert tips, you can ensure a successful and delicious outcome. My passion for braided breads, from the traditional challah to delightful plaited breakfast loaves, has taught me a thing or two:
- PRO-Tip: Check Your Yeast’s Vitality. Before you even start mixing ingredients, always check the expiration date on your active dry yeast. An expired or inactive yeast will lead to a dense, flat danish, negating all your hard work. To test it, sprinkle a small amount over warm water (around 105-115°F / 40-46°C) with a pinch of sugar. If it foams and gets bubbly within 5-10 minutes, your yeast is active and ready to go!
- PRO-Tip: Temperature Control is Paramount. Laminated dough is highly sensitive to temperature. If your kitchen is warm, the butter will soften too quickly as you roll the dough, making it difficult to create distinct layers. Ideally, work in a cool environment. If it’s a hot day, crank up your air conditioner or consider waiting for a cooler day. You can also place the dough (wrapped in plastic) in the freezer for 10-15 minutes between rolls if it becomes too soft, ensuring the butter remains pliable but not melted.
- Mastering the Braiding Technique: My technique for creating a visually stunning **Braided Cinnamon Danish** starts with rolling the chilled dough into a large rectangle, typically around 18 x 10 inches. The cinnamon filling is then spread evenly over the middle third of the dough, running from one short side to the other.
- Creating Symmetrical Strips: Next, carefully cut strips from the outer thirds of the dough, extending right up to the filling. I find that strips a little wider than half an inch work best. Cut them one at a time, alternating sides, to ensure symmetry. This attention to detail will result in a beautifully even braid.
- The Art of the Crosshatch: Starting from one end, gently fold a strip from one side diagonally over the filling, pressing it lightly into place. Then, take a strip from the opposite side and fold it diagonally over the first strip and the filling. Continue this alternating pattern, creating a lovely crosshatch or “braided” effect until the entire filling is covered. The ends of the braid can either be left slightly open or carefully folded and tucked underneath for a neater finish.
- Patience Pays Off: Chilling Times. Remember, this recipe isn’t complicated in terms of skill, but it demands patience. The resting periods in the refrigerator between each fold (or “turn”) are non-negotiable. These chilling times allow the gluten in the dough to relax and the butter to firm up, making the dough easier to work with and crucial for achieving those delicate, flaky layers. I often prepare the dough and let it chill overnight after the final turn, then bake it fresh the next morning for the ultimate breakfast treat.
Don’t be afraid to experiment and trust the process. If you’re fearless in the kitchen and crave truly exceptional baked goods, give this **Braided Cinnamon Danish** a try. The result is a tender, flaky pastry that’s utterly irresistible.
Crafting the Irresistible Cinnamon Filling and Glaze
While the laminated dough is the star of the show for texture, the rich cinnamon filling and sweet glaze are what truly bring this **Braided Cinnamon Danish** to life in terms of flavor. The filling is a simple yet potent combination of softened butter, granulated sugar, brown sugar, and aromatic cinnamon. This mixture melts into a warm, gooey layer during baking, infusing the pastry with its signature comforting spice.
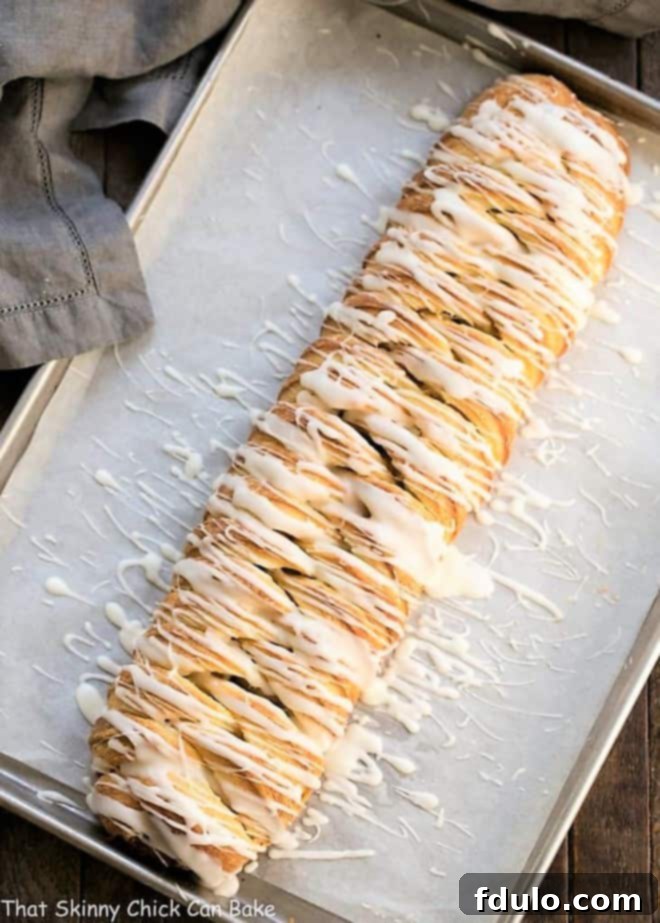
The final touch is a glossy, simple glaze. Made from powdered sugar, melted butter, vanilla, and a touch of hot water, its consistency can be adjusted to your preference – thicker for a more opaque topping, or thinner for a delicate drizzle that allows the beautiful braid to shine through. The subtle sweetness and hint of vanilla in the glaze provide the perfect counterpoint to the spiced cinnamon, creating a harmonious balance of flavors that makes this danish truly unforgettable.
Frequently Asked Questions
Laminated dough is a type of pastry dough, like that used in croissants or puff pastry, characterized by multiple thin layers of butter separated by layers of dough. These layers are created through a process of repeatedly folding and rolling the dough and butter together, with chilling periods in between. When baked, the butter releases steam, causing the layers to puff up and separate, resulting in an incredibly flaky and airy texture. For a danish, yeast is also incorporated into the dough, providing additional rise and a richer, more bread-like consistency than plain puff pastry.
Achieving that perfect bakery-style drizzle is easier than you think! For a rustic look, simply use a spoon: swoop it back and forth over the cooled danish, repeating the motion for even coverage. Holding the spoon higher will result in thinner, more delicate lines of icing. For a more controlled and professional finish, transfer the glaze to a piping bag fitted with a small, round open tip. This allows you to create precise, elegant lines or even intricate patterns across the pastry.
Absolutely! In fact, preparing the dough in advance is highly recommended for this **Braided Cinnamon Danish**. The laminated dough benefits greatly from extended chilling. You can prepare the dough through all the “turns” and let it refrigerate for up to 24 hours, or even up to two days, before the final shaping and baking. This makes it an ideal make-ahead option for impressive holiday breakfasts or weekend brunches, allowing you to enjoy a freshly baked treat without the early morning rush.
To keep your **Braided Cinnamon Danish** fresh, store it at room temperature in an airtight container for up to 2-3 days. If you wish to extend its shelf life, you can refrigerate it for up to a week, though the texture might firm up slightly. For longer storage, the baked and cooled danish can be wrapped tightly in plastic wrap and then in aluminum foil and frozen for up to 1 month. Thaw at room temperature and warm gently in a low oven (around 300°F/150°C) for a few minutes to restore its fresh-baked taste and flakiness.
Serving and Pairing Suggestions
This **Braided Cinnamon Danish** is a truly versatile delight. Serve it warm for breakfast or brunch alongside a steaming cup of coffee or a fresh glass of milk. Its rich flavor also pairs beautifully with a dollop of fresh whipped cream or a side of seasonal berries for an elevated presentation. For a festive touch, sprinkle with a little extra powdered sugar just before serving. It’s perfect on its own as a sweet treat, or as part of a larger breakfast spread.
You May Also Like:
- Strawberries and Cream Danishes from A Kitchen Addiction
- The Best Cinnamon Rolls
- Cream Cheese Tea Roll
- Danish Twist with Cream Cheese Filling
- Raspberry Danish Braid (This post has a photo of cutting the strips for braiding)
- Cream Cheese Tea Roll
Stay in touch through social media @ Instagram, Facebook, and Pinterest. Don’t forget to tag me when you try one of my recipes! And if you love the results, please give it a 5-star rating in the recipe card.
Braided Cinnamon Danish Recipe
1 hour
30 minutes
1 hour 30 minutes
10
Made with homemade laminated dough, this braided danish is flaky, tender and irresistible!
Ingredients
Laminated Dough:
- ½ cup warm milk (110°)
- 1 envelope active dry yeast (2 ¼ teaspoons) I use Red Star Yeast
- 2 ¼ cups flour (plus more for dusting the work surface)
- ¼ cup sugar
- 1 ½ teaspoon kosher salt
- ¼ teaspoon ground cardamom
- 2 sticks (½ pound) butter), at room temperature, cut into tablespoons
- 1 egg
- 1 egg yolk
Filling:
- ¼ cup sugar
- 3 tablespoons brown sugar
- 1 tablespoon cinnamon
- 3 tablespoons butter, at room temperature
Glaze:
- 2 tablespoons butter, melted
- 1 cup powdered sugar
- ½ teaspoon vanilla
- 1 ½ -3 tablespoons hot water, depending on how thin you want your glaze
Instructions
- In a small bowl, sprinkle the yeast over the warm milk. Stir and let sit about 5 minutes, till bubbles are visible.
- Using a stand mixer with a dough hook, combine flour, sugar, salt, cardamom, and 2 tablespoons of butter. Beat on low till the butter is incorporated and the dough looks like cornmeal, about 3-4 minutes.
- Add milk mixture and mix till dough comes together.
- Add egg and yolk and mix till just combined, 2-3 minutes. Don’t over-mix.
- Gently knead bread on a lightly floured surface till a smooth ball is formed, about 30 seconds. Wrap in plastic, and refrigerate for at least 2 hours or overnight.
- On a lightly floured surface, roll dough into an 18 x 10-inch rectangle. Try to keep corners square.
- With the short side facing you, disperse the remaining butter over the top ⅔ of the dough. Fold the unbuttered bottom third up over half the buttered dough. Then make a second fold to seal in the butter (like folding a letter to stuff an envelope).
- Roll the dough out again to an 18 x 10-inch rectangle, then fold the dough again as above.
- Wrap in plastic and refrigerate for one hour. This folding and rolling is considered the “first turn.”
- Repeat the rolling two more times, making sure to refrigerate for an hour between all turns. After the last turn, wrap well in plastic and refrigerate for at least 4 hours or overnight.
- When ready to bake, bring the dough out to sit out at room temperature for about 15 minutes. Preheat to 350º.
- Make the filling by mixing softened butter, sugars, and cinnamon.
- Roll out the dough to an 18 x 10-inch rectangle. Place filling down the center third of the dough.
- Slice dough into strips from the outer edge to filling at about ½ inch intervals. Do one side, then repeat in a similar fashion on the other side. Fold strips over the filling, alternating sides to make a crosshatch pattern.
- Place the danish on a parchment-lined baking sheet.
- Bake for about 30 minutes, till puffed and browned.
- Make the glaze by combining the ingredients, adding hot water till the desired consistency is reached. Drizzle over the cooled danish.
Notes
Recipe adapted from Martha Stewart, John Barricelli, and Dorie Greenspan.
Recommended Products
As an Amazon Associate and member of other affiliate programs, I earn from qualifying purchases.
- Wilton Cake Lifter
- French Rolling Pin
- Roul’Pat silicone counter sized silcone mat
Nutrition Information:
Yield:
10
Serving Size:
2 slices
Amount Per Serving:
Calories: 282Total Fat: 7gSaturated Fat: 4gTrans Fat: 0gUnsaturated Fat: 3gCholesterol: 53mgSodium: 380mgCarbohydrates: 50gFiber: 1gSugar: 27gProtein: 5g
HOW MUCH DID YOU LOVE THIS RECIPE?
Please leave a comment on the blog or share a photo on Pinterest
