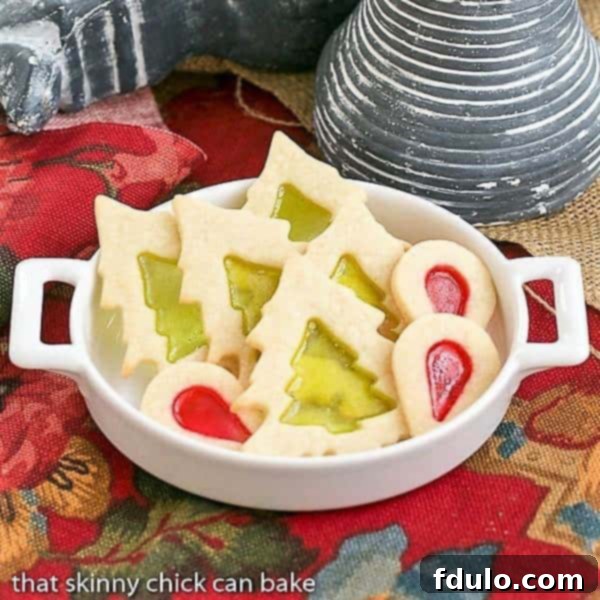
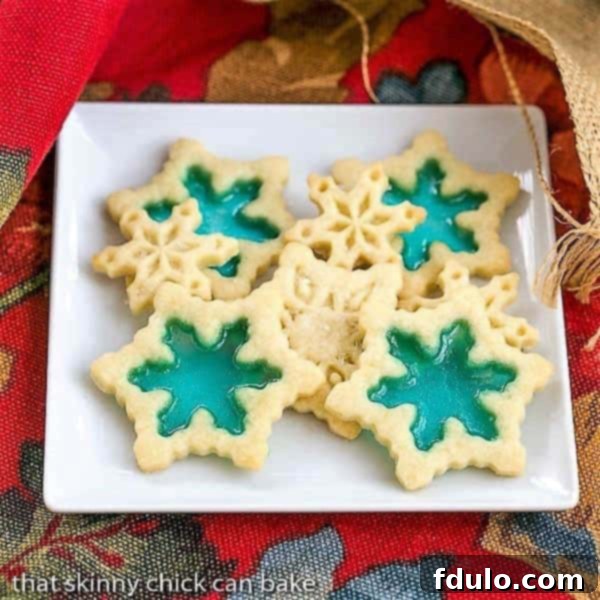
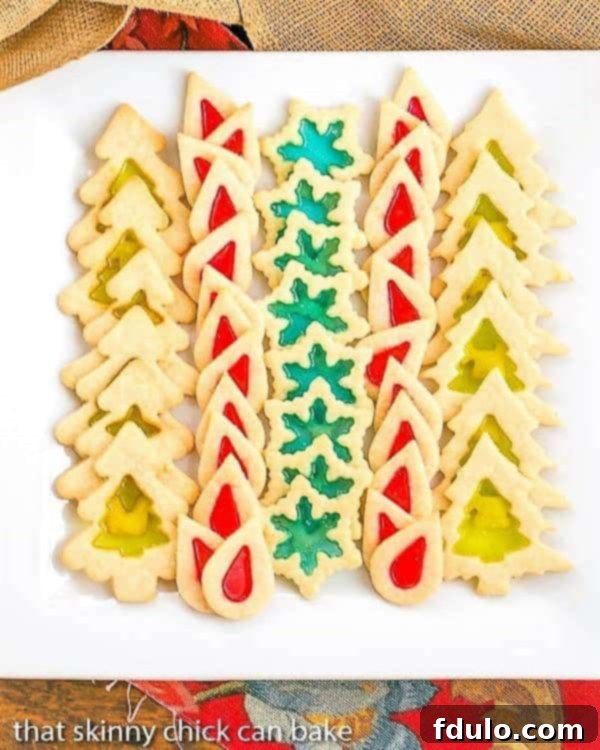
Stained glass cookies are more than just a sweet treat; they are miniature works of art that capture the festive spirit of the holidays. These dazzling delights are surprisingly easy to make and are guaranteed to be showstoppers at any gathering, leaving everyone impressed by your culinary creativity. Imagine the gasps of delight when you reveal that these sparkling, jewel-toned cookies were made right in your kitchen!

Stained Glass Cookies: A Dazzling Holiday Treat and Comprehensive Recipe Guide
As the holiday season approaches, bakers everywhere seek that perfect recipe to share joy and wonder. When the opportunity arose to try Stained Glass Sugar Cookies, I knew immediately these picture-perfect confections would be the ultimate centerpiece for our annual neighborhood cookie exchange. Their vibrant “windows” make them truly unique, transforming simple sugar cookies into edible masterpieces that delight both young and old.
Why You’ll Adore These Festive Cookies
These delightful treats, often affectionately called Church Window Cookies, offer numerous compelling reasons to make them your go-to holiday bake:
- Effortless Elegance: Despite their intricate and captivating appearance, these cookies are no more difficult to prepare than traditional cut-out sugar cookies. The true magic unfolds as the candy centers melt into shimmering, jewel-like “glass” during baking, creating a stunning visual without complex techniques.
- The Ultimate Conversation Starter: Be prepared for an avalanche of compliments! These cookies are guaranteed to be the talk of any party or gathering. Guests, especially those who don’t frequent the kitchen, will undoubtedly inquire how you achieved such a stunning effect, or even where you managed to purchase such unique confections.
- Incredibly Versatile for Any Celebration: While they are a quintessential Christmas cookie, their vibrant beauty and customizable shapes make them ideal as Hanukkah cookies, too! Simply use a round cookie cutter for the main shape and a small dreidel cutter for the center window, creating a beautiful and meaningful festive treat for the Festival of Lights. Their adaptability extends to any occasion requiring a touch of edible artistry.
- A Unique Gifting Idea: Packaged thoughtfully in a beautiful tin or cellophane bag, these cookies make exceptionally thoughtful and impressive homemade gifts for friends, family, teachers, or colleagues. They convey effort, care, and a touch of festive flair.
- Engaging Family Activity: Involve children in the simpler steps, such as crushing the candies (with supervision) and cutting out cookie shapes. This fosters a fun and memorable baking experience that builds cherished holiday traditions.
Finding inspiration for holiday baking is always an exciting part of the season. I often browse through festive roundups like “50 of the Best Holiday Cookies” or “The Top Ten Holiday Cookies” for fresh ideas. However, knowing that acclaimed baker Dorie Greenspan had a well-regarded recipe for stained glass sugar cookies, which my “Dorista” baking group was enthusiastically tackling, provided the perfect push to try these captivating treats. It’s truly a delight to bring such sparkling joy to the table.

Mastering Stained Glass Cookies: Expert Tips for Success
Creating truly beautiful and flawless stained glass cookies involves a few key techniques and insider tips. Paying attention to these details will ensure your edible windows shine brightly and your cookies are a resounding success:
- Pulverize Your Candies Thoroughly: The secret to perfectly melted, clear candy windows lies in how finely you crush your hard candies. Smashing Jolly Ranchers to a near-powder consistency is absolutely crucial. The nostalgic aroma of those fruit candies often brings back vivid childhood memories, like hiking adventures in Colorado. While a few slightly larger pieces might be acceptable, aiming for a fine, uniform powder ensures an even melt and a smooth “glass” finish. Be warned: this process can be surprisingly messy! Place candies inside two sturdy Ziploc bags (double-bagging is essential to prevent tearing) and pound them with a metal meat mallet or a heavy rolling pin. Even with two bags, small shards can sometimes break through, so exercise caution and consider wearing eye protection.
- Choose the Right Candy for Clarity: Not all hard candies are created equal when it comes to melting clearly. PRO-Tip: Jolly Ranchers are highly recommended because they melt beautifully transparent and retain their vibrant, distinct colors, creating that authentic stained glass effect. Lifesavers, while tempting, often don’t yield the same clear, consistent result and can sometimes become cloudy. Other transparent, hard suckers like Dum Dums can also work well, but always do a small test batch if using a new candy.
- The Imperative of a Non-Spreading Dough: An excellent, non-spreading roll-out sugar cookie recipe is absolutely imperative for these cookies. A dough that holds its shape is key to maintaining the integrity of your cookie and, most importantly, the precise shape of the “window” cut-out. Chilling the dough thoroughly before rolling also significantly helps prevent unwanted spreading during baking, preserving your intricate designs.
- Dough Thickness Matters for Your “Well”: PRO-Tip: Don’t roll your cookie dough too thin. You’ll want to create a deep enough “well” in the middle of each cookie to adequately hold a good amount of the crushed candy. A ¼-inch thickness works wonderfully, providing a sturdy cookie base and a substantial candy depth for a brilliant display. If you prefer thinner cookies, ⅛-inch can also work, but you’ll need to be more careful when handling and filling.
- Creative Cookie Cut-Outs: The beauty of these cookies lies in their customizable shapes! You can use any shape of cookie cutter for the main cookie. Then, select a smaller cookie cutter that complements your main shape to cut out a window or two in the center. Get creative with different combinations – a small star inside a large circle, or a heart within a square! Don’t discard the mini cookie pieces cut from the centers; bake them separately for delightful bite-sized treats.
- Precise Candy Placement is Critical: PRO-Tip: Carefully spoon the crushed candy dust into the center opening of each cookie. This step requires a delicate touch. Any candy crumbs that land on the dough outside the cutout will melt and fuse with the cookie, marring its smooth appearance. A small, dry silicone brush or a clean, fine paintbrush is an excellent tool to gently push any stray candy particles back into the center or to carefully remove them from the dough before baking. A pointed grapefruit spoon can also be helpful for precise placement of the powdered candy into the window openings.
- Making Edible Ornaments or Gift Tags: If you envision hanging your finished cookies as festive ornaments or using them as unique gift tags, remember to make a small hole in the cookie with a skewer or straw *before* baking. After the cookies come out of the oven and are still warm and pliable, you may need to gently widen the hole slightly if it isn’t quite large enough, as the dough can expand during baking.
- Prevent Sticking with Proper Lining: PRO-Tip: Always bake stained glass cookies on baking sheets lined with parchment paper or a silicone baking mat (such as a Silpat). This is absolutely critical to prevent the melted candy from sticking stubbornly to your baking sheet, which can make removal nearly impossible without breaking your beautiful creations. Parchment paper or a silicone mat ensures easy release and perfectly preserved “windows.”
- Patient Cooling is Key for Solidification: Allow the cookies to cool completely on the baking sheet before attempting to move them to a cooling rack. The melted candy in the middle needs sufficient time to solidify and harden into its beautiful, crisp “glass” state. Rushing this step will invariably result in broken cookies and a sticky, frustrating mess. Patience here is truly a virtue!
My quest for the perfect sugar cookie base for these showstoppers led me to Alton Brown’s renowned recipe, which proved to be outstanding and handled beautifully. I also incorporated valuable tips and precise baking times from Dorie Greenspan’s classic “Baking Chez Moi.” The culmination of these efforts was truly impressive, and my friends were absolutely delighted with these incredibly festive and visually stunning Stained Glass Cookies!

Frequently Asked Questions About Stained Glass Cookies
Given the inherent hardness of Jolly Rancher candies, it’s a very common and understandable concern that these cookies might be difficult to bite into. Fortunately, when baked, the candy in the windowpane melts into a thin, brittle, glass-like layer. This thinness allows you to easily bite through the candy centers without any difficulty, providing a satisfying and pleasant crunch rather than a hard, unyielding chew.
Absolutely! Feel free to let your creativity soar with various cookie cutter shapes for both the main cookie and the inner “window.” You can choose a small cookie cutter that is the same shape as your larger one for a cohesive and classic look (as seen in many examples), or you can mix and match different shapes for a playful and eclectic assortment. Imagine a small star inside a large circle, or a mini gingerbread man within a heart – the possibilities for customization are truly endless!
While Jolly Ranchers are highly recommended for their clear melt and vibrant colors, other hard candies can be experimented with. As mentioned in our tips, Lifesavers generally don’t bake up as clear or consistently transparent, often resulting in a cloudy or opaque finish. Suckers like Dum Dums are often a good alternative, producing a clear melt. The key is to select candies that are hard, transparent, and contain no fillings or opaque elements, as these will prevent the beautiful stained glass effect. Avoid chewy candies, chocolate, or anything opaque.
It is generally not recommended to freeze stained glass cookies. The “glass portion” of these cookies, made from melted hard candy, is highly susceptible to humidity. When exposed to moisture, especially after thawing from being frozen, the candy can become unpleasantly sticky and lose its beautiful, crisp, and shiny texture. While I haven’t extensively tested freezing them, there’s a high likelihood that the candy centers could significantly degrade upon defrosting. For best results, it’s always best to enjoy them fresh or store them in an airtight container at room temperature away from humidity.
This is a crucial tip that bears repeating! To prevent a sticky disaster, always bake your stained glass cookies on a baking sheet lined with either parchment paper or a silicone baking mat (such as a Silpat). The melted candy, once cooled, can become extremely sticky and adhere firmly to an unlined metal pan, making removal nearly impossible without damaging or breaking your beautiful cookies. Parchment paper or a silicone mat ensures an easy, clean release and perfectly preserved “windows” every time.
More Holiday Cookie Inspiration
Looking for even more delicious ideas to fill your cookie platters, impress at your next cookie exchange, or simply enjoy with your loved ones this holiday season? These recipes are all wonderful contenders that offer diverse flavors and festive appeal:
- Best Sugar Cookie Recipe Ever from In Katrina’s Kitchen
- Rolo Double Chocolate Chip Christmas Cookies from Living Locurto
- 30+ Christmas Cookies – A comprehensive collection of festive delights.
- Holiday Pinwheel Cookies – Visually striking and fun to make.
- White Chocolate Candy Cane Cookies – A refreshing, minty twist.
- Linzer Cookie Recipe – Elegant, jam-filled classics perfect for gifting.
- Chewy Gingersnaps plus 40+ Holiday Cookie Recipes – Spiced perfection and an abundance of choices.
- Plus, learn How to Host a Cookie Exchange – All the tips you need for a successful event.
- Explore even more Holiday Recipes for every festive occasion.
Stay connected and share your baking adventures with us!
Find us and tag us on Instagram, Facebook, and Pinterest. Don’t forget to tag us when you try one of our recipes! Your creations inspire us. And if you love the results, please consider giving this recipe a 5-star rating in the recipe card below – it helps others discover these delightful cookies!
Stained Glass Cookies Recipe

Stained Glass Cookies
Perfectly festive cookies for the holidays! Sugar cookie recipe adapted from Alton Brown.
Ingredients
- 3 cups all-purpose flour
- ¾ teaspoon baking powder
- ¼ teaspoon salt
- 1 cup (2 sticks) unsalted butter, softened
- 1 cup granulated sugar
- 1 large egg
- 1 tablespoon milk
- Powdered sugar, for rolling out dough
- Jolly Ranchers hard candies, separated by color and finely smashed into a powder (approximately 15-20 total candies)
Instructions
- In a medium bowl, whisk together the flour, baking powder, and salt. Set this dry mixture aside.
- In the bowl of a stand mixer fitted with the paddle attachment, beat together the softened butter and granulated sugar on medium speed until the mixture is light in color and fluffy.
- Add the egg and milk to the butter mixture and beat until thoroughly combined. Scrape down the sides of the bowl as needed to ensure everything is incorporated.
- With the mixer on low speed, gradually add the dry flour mixture, beating until the dough comes together and pulls away from the sides of the bowl. Be careful not to overmix; stop once just combined.
- Divide the dough in half, flatten each half into a disc, wrap tightly in plastic wrap, and refrigerate for at least 2 hours (or up to 2 days). This chilling step is crucial for easy rolling and to prevent the cookies from spreading during baking.
- Preheat your oven to 350ºF (175ºC). Line baking sheets with parchment paper or silicone baking mats. This is essential for preventing the candy from sticking.
- Lightly sprinkle your work surface with powdered sugar (using powdered sugar instead of flour can help keep the cookies tender). Roll out one disc of chilled dough to a uniform thickness of ¼-inch (or ⅛-inch for thinner cookies, though ¼-inch is recommended for optimal candy depth).
- Using your desired large cookie cutters, cut out shapes from the rolled dough.
- Next, take a smaller cookie cutter (either the same shape as the larger one or a complementary shape) and cut out a “window” in the center of each larger cookie. Carefully transfer the cookies to the prepared baking sheets, leaving about 1 inch of space between them.
- Carefully spoon a small amount of the crushed Jolly Ranchers into the center opening of each cookie. If any candy dust lands on the dough outside the window, use a dry pastry brush or a clean, small paintbrush to gently push it into the center or to remove it completely, as stray candy will melt and mar the cookie’s appearance.
- Bake for 7 to 8 minutes, or until the edges of the cookies are just beginning to turn a light golden brown and the candy centers are completely melted and clear. Keep a close eye on them to prevent overbaking.
- Remove from the oven and allow the cookies to cool for at least 5-10 minutes on the baking sheet. This crucial cooling period allows the melted candy to solidify and harden into its beautiful “stained glass” state.
- Once the candy is firm and completely set, carefully transfer the cooled cookies to a wire rack to finish cooling completely.
Notes
You will need two coordinating cookie cutters: one larger for the main cookie shape and one smaller, often of a similar shape, to cut out the opening for the “window.”
For best results, store cooled stained glass cookies in an airtight container at room temperature. Avoid humid environments, as humidity can make the candy centers sticky and less appealing.
Recommended Products
As an Amazon Associate and member of other affiliate programs, I earn from qualifying purchases.
- 2-inch Snowflake Cookie Cutters
- 4-inch Snowflake Cookie Cutters
- French Rolling Pin
- Reynolds Kitchens Non-Stick Baking Parchment Paper Sheets
Nutrition Information:
- Yield: 24 servings
- Serving Size: 2 cookies
- Amount Per Serving:
- Calories: 224
- Total Fat: 10g
- — Saturated Fat: 6g
- — Trans Fat: 0g
- — Unsaturated Fat: 4g
- Cholesterol: 28mg
- Sodium: 141mg
- Carbohydrates: 31g
- — Fiber: 1g
- — Sugar: 14g
- Protein: 2g
I specifically selected the cherry, sour apple, and blue raspberry Jolly Rancher candies from the bag to create the vibrant, multi-colored windows of these stained glass cookies. The sweet, fruity aromas wafting from the crushed candies instantly transported me back to cherished memories of hiking the picturesque trails near Aspen with my family. My dad, ever the prepared adventurer, would always have a secret stash of lemon drops and Jolly Ranchers tucked away in the exterior pocket of his backpack. I, being particularly fond of the grape flavor, relied on a continuous supply as we huffed and puffed our way over challenging switchbacks, through sun-dappled meadows, and dense forests toward our scenic destinations. These cookies don’t just taste good; they evoke wonderful feelings and memories, making them a truly special part of the holiday season.
