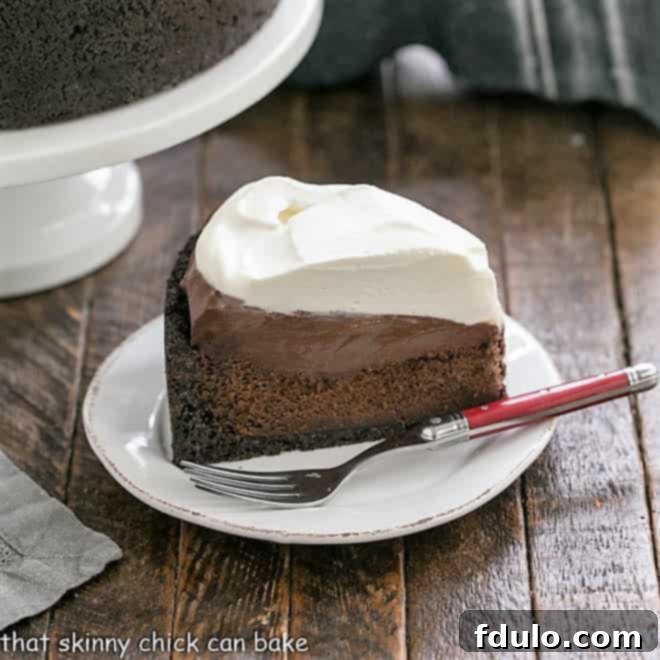
Indulge in the ultimate chocolate experience with this truly decadent Mississippi Mud Pie. This classic Southern delight features a rich, layered construction that promises pure bliss for any chocolate aficionado. It starts with a crisp Oreo cookie crust, topped with a dense, fudgy flourless chocolate cake. Next comes a luscious, silky chocolate pudding, all crowned with a generous layer of billowy, fresh whipped cream. While countless variations of this exquisite dessert exist, this particular recipe stands out as a true champion, transforming your dream Chocolate Pudding Pie into an unforgettable masterpiece of flavor and texture.
Often, the term “Mississippi Mud Cake” refers to a dessert primarily consisting of a rich chocolate cake, sometimes with a sauce or frosting. However, to truly embrace the grandeur of this Southern classic, incorporating that magnificent fourth layer – the iconic cookie crust – elevates it to a celebratory “Mississippi Mud Pie.” As *The Oxford Companion to Sugar and Sweets* eloquently describes, a Mississippi mud pie is a “rich chocolate dessert composed of pudding, cake, biscuits, ice cream, whipped cream, marshmallows, and liqueur presented in a cookie crust.” While that sounds like a grand affair, our version focuses on a perfectly balanced blend of essential elements, proving that sometimes, less is more when it comes to chocolate perfection.
Why This Mississippi Mud Pie Recipe Is an Absolute Must-Make
Prepare to impress and delight with this incredible Mississippi Mud Pie. Here’s why this recipe will become your go-to for a show-stopping chocolate dessert:
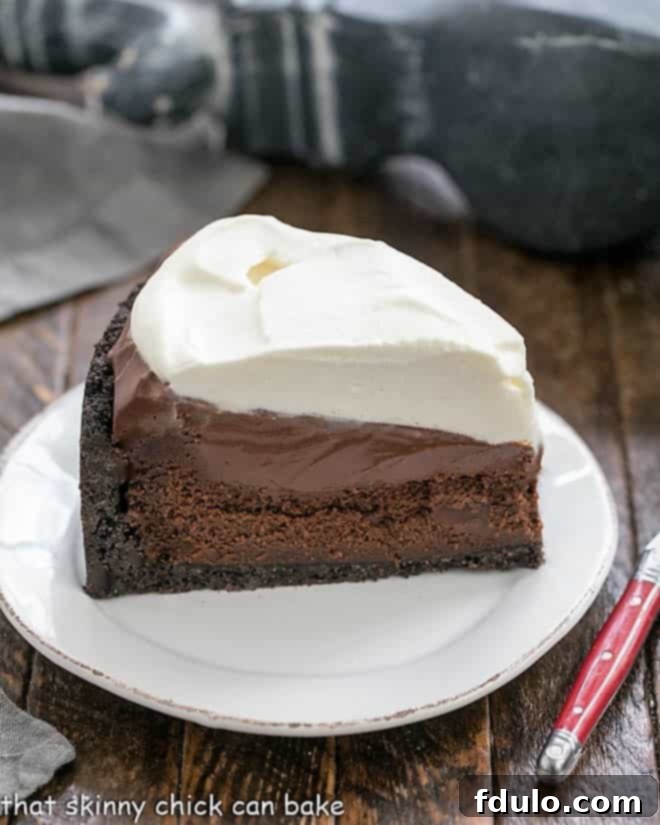
- Unforgettable Layers of Decadence: This pie is a symphony of textures and flavors, boasting four magnificent layers. Each component—the crunchy Oreo crust, the rich flourless chocolate cake, the velvety chocolate pudding, and the light, airy whipped cream—contributes to an unparalleled dessert experience.
- A True Chocoholic’s Dream: If you or your loved ones adore chocolate, this pie is designed to satisfy every craving. It’s intensely chocolatey without being overly sweet, offering a sophisticated depth of flavor that chocolate lovers will rave about.
- Perfect for Special Occasions: Whether it’s a birthday celebration, a holiday gathering, or simply a weekend treat, this Mississippi Mud Pie makes a sensational presentation. Its impressive layers and rich taste make it a perfect centerpiece dessert that’s sure to garner compliments. It’s the kind of dessert that creates lasting memories, much like how the photos in a cookbook inspired my youngest to insist we make it!
Essential Ingredients for a Perfect Mississippi Mud Pie
Crafting this phenomenal Mississippi Mud Pie relies on a few key ingredients. Quality makes a difference, so choose your components wisely to achieve the best flavor and texture:
- Kitchen Staples: You’ll need unsalted butter (both melted for the crust and softened for the cake/pudding), granulated sugar, cornstarch (essential for thickening the pudding), a pinch of salt to balance sweetness and enhance flavors, unsweetened cocoa powder for intense chocolate notes, and powdered sugar for the whipped cream.
- Oreos: The foundation of our pie! Use classic chocolate sandwich cookies (like Oreos) for the crust. Their unique flavor profile, including the cream filling, is integral to the crust’s texture and taste. Crushing them finely is key for an even base.
- Semisweet Chocolate: Chopped high-quality semisweet chocolate is used in both the flourless cake and the pudding. This provides a deep, complex chocolate flavor. Opt for a brand you enjoy eating on its own.
- Espresso Powder: This secret ingredient is a game-changer. Adding espresso powder doesn’t make the pie taste like coffee; instead, it significantly enhances and deepens the natural chocolate flavor. I typically use 1 tablespoon, but feel free to increase it to 2 tablespoons for an even more pronounced chocolate intensity.
- Coffee: Used in the flourless cake layer, room temperature brewed coffee (or instant coffee dissolved in water) complements the espresso powder in bringing out the richness of the chocolate.
- Vanilla Extract: Always opt for pure vanilla extract over artificial vanilla flavoring. Brands like Nielssen-Massey are excellent choices, offering a rich aroma and taste that elevates the entire dessert.
- Eggs: Eggs play crucial roles in this recipe. Separate them while they’re cold; cold yolks are less likely to break. However, allow the egg whites to come to room temperature before whipping, as this ensures they achieve maximum volume and stability for the flourless cake. Egg yolks are used to enrich and thicken the chocolate pudding.
- Whole Milk: For the pudding, whole milk (3.5% milk fat) is recommended. Its higher fat content contributes to a creamier, richer, and more luxurious pudding texture compared to lower-fat milk varieties.
- Whipping Cream (Heavy Cream): This is the star of our topping. Look for heavy cream or whipping cream with a milk fat content of 36-40%. It whips up beautifully into a light and airy topping.
- Whip-It (Optional): This is a whipped cream stabilizer that can be incredibly useful if you plan to store your pie for more than a day or if you live in a humid climate. It helps prevent the whipped cream from weeping or separating, maintaining its perfect billowy texture.
Mastering Your Mississippi Mud Pie: Expert Tips for Success
Creating this magnificent Mississippi Mud Pie is a delightful process, and with these expert tips, you’ll ensure every layer is perfect, resulting in a truly spectacular dessert:
- The Signature Oreo Crust: This recipe specifically calls for crushed Oreos (or similar chocolate sandwich cookies) for the crust. The cream filling within the Oreos contributes not just to flavor but also to the unique texture of the crust, so chocolate cookie crumbs alone won’t provide the same result. For convenience, process the cookies in a food processor until fine crumbs form. While you can use a Ziploc bag and a rolling pin, a food processor is much quicker and ensures consistent crumb size. Once pressed into the pan, freezing the crust briefly helps it set before baking, creating a sturdy foundation.
- The Flourless Chocolate Cake Layer:
- Egg Separation: You’ll need to separate eggs for this cake, using the whites for the cake itself and the yolks for the pudding. A crucial tip for clean separation: eggs separate best when they are cold, as the yolks are firmer and less likely to break.
- Whipping Egg Whites: While cold eggs separate easily, egg whites whip best and achieve maximum volume when they are at room temperature. Allow them to warm up for about 20-30 minutes after separating.
- Cleanliness is Key: Even a tiny speck of oil or egg yolk in your bowl or on your beaters can prevent egg whites from whipping properly. Ensure all your equipment is impeccably clean and dry. To be extra safe, separate your eggs one at a time into a small bowl, then add the white to your main whipping bowl, discarding any yolk that might break. This prevents a single broken yolk from ruining the entire batch of whites.
- Gentle Folding Technique: When incorporating the whipped egg whites into the chocolate mixture for the cake, use a gentle folding technique to maintain their airy volume. Start by mixing about one-third of the egg whites into the chocolate batter to lighten it. Then, carefully add the remaining whites. Use a rubber spatula, cutting down through the center of the batter, scraping along the bottom, and folding it up over the top. Rotate the bowl and repeat until the mixture is *almost* completely combined. Be careful not to overmix, as this will deflate the whites and result in a less airy cake.
- Cake Texture Post-Bake: Don’t be alarmed if the flourless chocolate cake puffs up significantly during baking, then falls as it cools. This is entirely normal for this type of cake and contributes to its dense, fudgy texture.
- Perfecting the Silky Chocolate Pudding:
- Constant Whisking: When cooking your pudding, constant whisking is absolutely essential. This prevents lumps from forming and ensures a smooth, creamy consistency. If you stop whisking, the pudding can scorch on the bottom or develop a lumpy texture.
- Proper Chilling: The pudding must be chilled for a minimum of 3 hours (or even better, overnight) before it’s spread over the cake layer. This allows it to fully set and thicken, achieving that desired silky texture. Don’t rush this step!
- Assembling and Serving Your Pie:
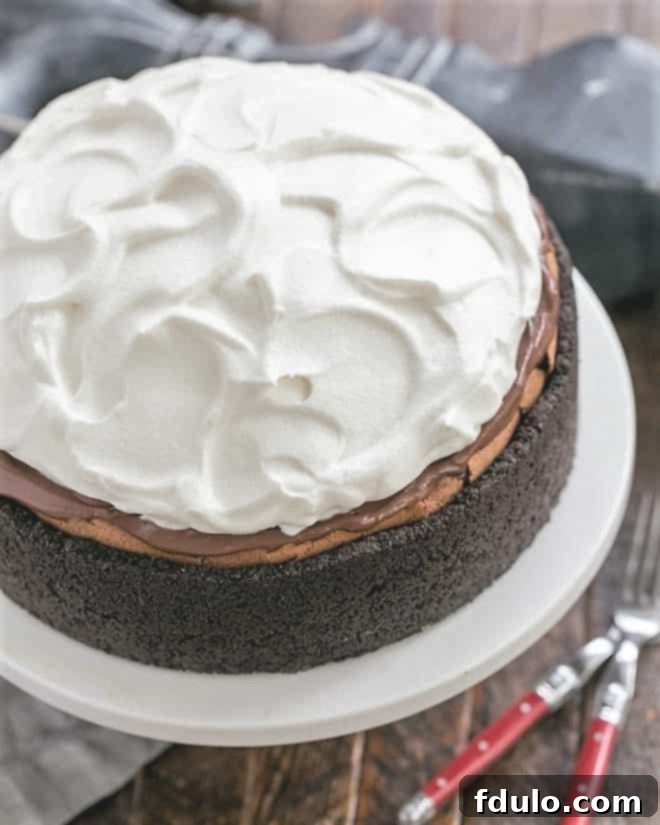
- Crust Thickness: The Oreo crust in this recipe is intentionally generous, making it wonderfully substantial. While delicious, it can be quite thick and firm, sometimes a bit challenging to cut through with a fork. Embrace it! My boys certainly enjoyed the “crust flying” experience, which is all part of the fun of a truly rustic, decadent dessert.
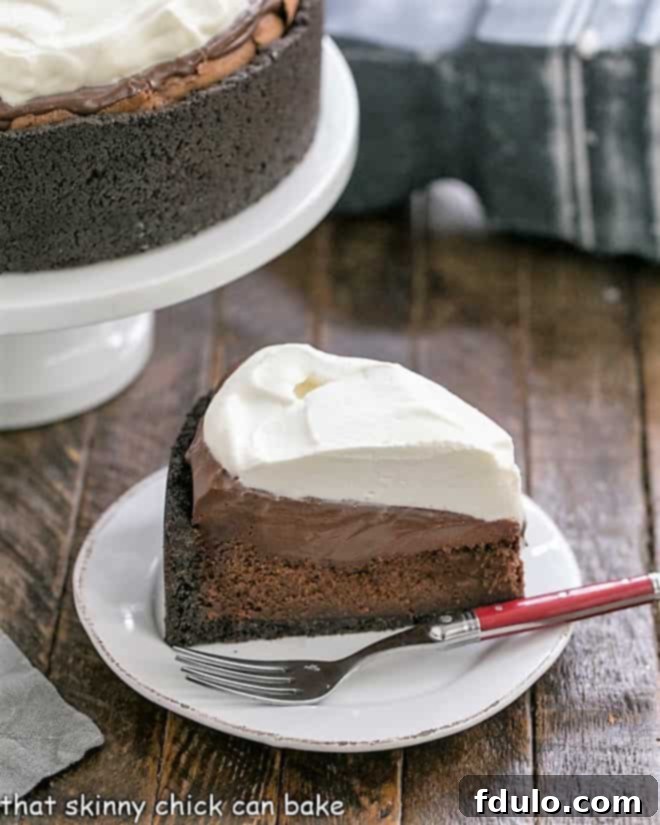
- Sensational Presentation: This Mississippi Mud Pie is designed to be a showstopper. Its distinct layers create an elegant and mouth-watering presentation, making it ideal for any occasion where you want to impress.
Frequently Asked Questions About Mississippi Mud Pie
The origins of the name “Mississippi Mud Pie” are quite fascinating, stemming from its resemblance to the rich, dark mud found along the banks of the Mississippi River. The concept of “Mississippi Mud Cake” emerged during World War II when groceries were rationed, leading to resourceful and hearty desserts. The pie version, with its distinctive crust, followed later. Its existence was even debated by culinary figures like Craig Claiborne of The New York Times in 1981, who, after questioning its authenticity, was inundated with recipes, solidifying its place in American dessert history.
Given the many regional and personal variations, there’s no single definitive answer to how to make a Mississippi Mud Pie. However, most versions, including this one, feature a combination of baked and unbaked layers. The core components typically include a cookie crust (often made with chocolate wafers or Oreos), a rich brownie or cake layer, and a creamy pudding or mousse. Beyond these, variations can include additional elements like biscuits, ice cream, whipped cream, marshmallows, or even a splash of liqueur for an adult twist. This recipe focuses on creating the classic layered structure for maximum flavor and texture.
Freezing a Mississippi Mud Pie with its whipped cream topping can be tricky, as the whipped cream’s texture may suffer upon thawing. If you plan to make it ahead for longer storage, it’s best to prepare and assemble the crust, cake, and pudding layers, then cover the pie tightly with plastic wrap to make it airtight. You can freeze it for up to 3 months without the whipped cream topping. When you’re ready to serve, defrost the pie slowly in the refrigerator overnight, and then prepare and add the fresh whipped cream topping just before serving to ensure the best texture and appearance.
Discover More Decadent Chocolate Pie Recipes
If you’re a fan of rich chocolate desserts, you’ll love exploring these other irresistible pie creations:
- Double Chocolate Cream Pie from Saving Room for Dessert
- Dark Chocolate Satin Pie
- Fudgy Brownie Pie
- Ganache Topped Chocolate Tart
- Coconut Crusted Chocolate Ganache Pie
- Explore more of the Best Pie Recipes for endless baking inspiration!
Stay connected and share your baking adventures with us! Follow @thatskinnychickcanbake on Instagram, Facebook, and Pinterest. Don’t forget to tag me when you whip up one of my recipes! If you adore the results, please consider leaving a 5-star rating in the recipe card below—it truly helps!
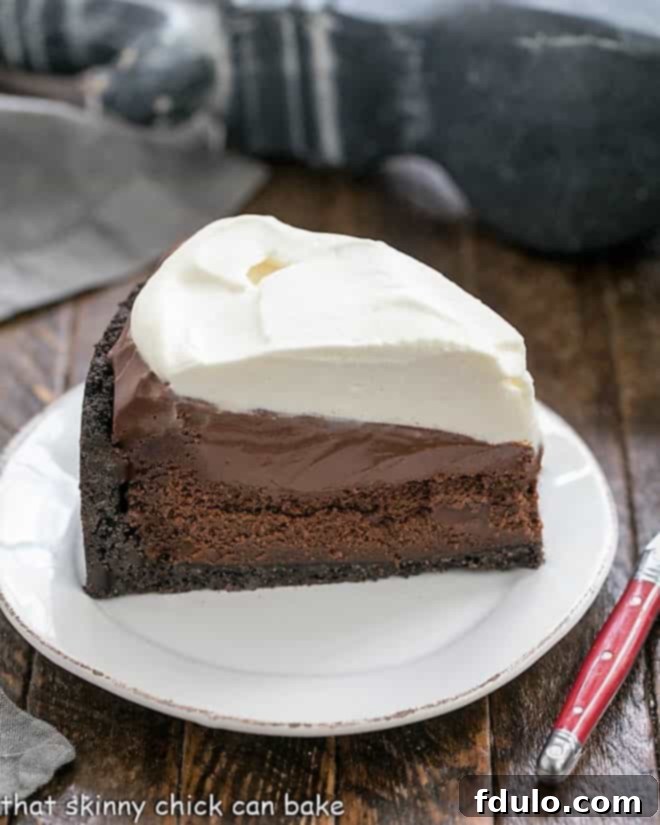
Decadent Mississippi Mud Pie Recipe
40 minutes
1 hour 10 minutes
1 hour 50 minutes
12 servings
An irresistible layered pie featuring a crunchy Oreo crust, a rich flourless chocolate cake, creamy chocolate pudding, and a light whipped cream topping. The ultimate chocolate indulgence!
Ingredients
For the Oreo Crust:
- 35-40 chocolate sandwich cookies (such as Oreos), crushed into fine crumbs
- 5 tablespoons melted unsalted butter
For the Flourless Chocolate Cake Layer:
- 4 tablespoons (½ stick) unsalted butter, softened
- 6 ounces semisweet chocolate, finely chopped
- 1-2 tablespoons instant espresso powder (1 tablespoon recommended for subtle enhancement)
- ¼ cup brewed coffee, at room temperature
- ¼ teaspoon salt
- 1 tablespoon pure vanilla extract
- 6 large eggs, separated, at room temperature (yolks for cake, whites for pudding)
- 1 cup granulated sugar
For the Silky Chocolate Pudding:
- ¾ cup granulated sugar
- ½ cup unsweetened cocoa powder
- ¼ cup cornstarch
- ¼ teaspoon salt
- 4 large egg yolks (reserved from cake separation)
- 2 ½ Cups whole milk (3.5% milk fat)
- 3 tablespoons unsalted butter
- 2 teaspoons pure vanilla extract
- 3 ounces semisweet chocolate, finely chopped
For the Whipped Cream Topping:
- 1 ¼ cups cold heavy whipping cream (36-40% milk fat)
- ¼ cup powdered sugar
- 1 teaspoon pure vanilla extract
- 1 envelope Whip-It or similar whipped cream stabilizer, optional (for extended storage)
Instructions
Preparing the Oreo Crust:
- Preheat your oven to 300°F (150°C). Lightly spray a 9-inch springform pan with nonstick cooking spray. For easier removal, line the bottom of the pan with parchment paper, then spray the parchment as well.
- In a food processor, pulse the chocolate sandwich cookies until fine crumbs are formed. Transfer the crumbs to a medium bowl. Pour the melted butter over the crumbs and mix thoroughly with a rubber spatula until all crumbs are moistened.
- Press the buttered cookie crumbs firmly into the bottom and slightly up the sides of the prepared springform pan, leaving about ½ inch space from the top edge of the pan. Use the back of a spoon or your fingers to ensure an even and compact layer. Place the pan in the freezer for approximately 10 minutes to firm up the crust.
- Bake the chilled crust for 10 minutes. Once baked, remove from the oven and allow it to cool completely on a wire rack before proceeding.
Crafting the Flourless Chocolate Cake Layer:
- Increase the oven temperature to 350°F (175°C).
- In a microwave-safe bowl, gently melt the 4 tablespoons of butter and 6 ounces of chopped semisweet chocolate together. Heat in 30-second intervals, stirring after each, until smooth and fully combined. Set aside to cool slightly.
- In a small separate bowl, whisk together the espresso powder, room temperature coffee, salt, and 1 tablespoon of vanilla extract. Set this mixture aside.
- Using a standing mixer fitted with the whisk attachment (ensure it’s clean and dry), beat the 6 egg yolks with ½ cup of sugar on medium-high speed. Continue beating for about 5 minutes, until the mixture is light in color and has almost doubled in volume.
- Reduce the mixer speed to low. Gradually add the cooled chocolate-butter mixture to the egg yolk mixture, beating until just combined. Scrape down the sides and bottom of the bowl, then mix on low for a few more seconds to ensure everything is incorporated.
- Add the coffee-espresso mixture to the chocolate batter. Beat on low speed until just combined, then scrape down the bowl and mix for another 5 seconds.
- In a separate, impeccably clean bowl with a clean whisk attachment, beat the 6 egg whites until they become foamy. Gradually increase the mixer speed to high and slowly add the remaining ½ cup of sugar, continuing to beat until soft, glossy peaks form.
- Gently fold 1 cup of the whipped egg whites into the chocolate batter using a rubber spatula. This step helps to lighten the batter.
- Carefully add the remaining egg whites and continue folding until they are *almost* completely incorporated. Be very gentle and avoid overmixing, which can deflate the air from the whites.
- Pour the lightened chocolate batter evenly over the cooled Oreo cookie crust in the springform pan. Bake for 38 to 42 minutes. The cake should appear set around the edges but may still be slightly jiggly in the center.
- Transfer the baked cake on its crust to a wire rack and allow it to cool completely at room temperature. The cake will naturally sink as it cools. Once cool, wrap the pan loosely with plastic wrap and refrigerate for at least three hours, or ideally overnight, to allow the cake to firm up.
Preparing the Silky Chocolate Pudding:
- In a medium saucepan, whisk together the ¾ cup sugar, ½ cup cocoa powder, ¼ cup cornstarch, and ¼ teaspoon salt until well combined. Add the 4 egg yolks (reserved from earlier) and whisk until the mixture is smooth. Slowly pour in the 2 ½ cups of whole milk, whisking constantly to prevent lumps.
- Place the saucepan over medium heat. Bring the pudding mixture to a gentle boil, whisking continuously to prevent sticking and ensure even thickening. Once boiling, continue to whisk and boil for 30 seconds. Remove from heat and immediately transfer the pudding to a medium bowl.
- Add the 3 tablespoons of butter, 2 teaspoons of vanilla extract, and 3 ounces of chopped semisweet chocolate to the hot pudding. Whisk vigorously until the butter and chocolate are fully melted and incorporated, and the pudding is smooth and glossy. Continue whisking for a few more minutes to help it cool slightly.
- Press a piece of plastic wrap directly onto the surface of the pudding to prevent a skin from forming. Let the pudding stand at room temperature for 15 minutes, then transfer it to the refrigerator to chill for at least 3 hours, or until thoroughly set and cold.
Assembling Your Decadent Mississippi Mud Pie:
- Once the cake and pudding are sufficiently chilled, whisk the set pudding to loosen it slightly, then pour it evenly over the top of the flourless chocolate cake layer, ensuring it stays within the cookie crust border. Spread the pudding gently to create a smooth, even layer.
- Return the assembled pie to the refrigerator for at least 30 minutes. This allows the pudding layer to settle and firm up slightly before adding the final topping. While it chills, prepare your whipped cream.
- In a cold bowl, combine the cold heavy whipping cream, ¼ cup powdered sugar, and 1 teaspoon of vanilla extract. If using, add the Whip-It stabilizer. Beat with a whisk attachment (or electric mixer) on medium-high speed until soft, billowy peaks form.
- Carefully spread the freshly whipped cream over the chilled pudding layer, extending it all the way to the edges of the pie. Gently remove the sides of the springform pan. Your magnificent Mississippi Mud Pie is now ready to serve! Store any leftovers covered in the refrigerator.
Notes
Leftovers of this pie keep wonderfully in the refrigerator for up to 2 days when covered tightly.
Recommended Products
As an Amazon Associate and member of other affiliate programs, I earn from qualifying purchases.
- KitchenAid KSM150PSER Artisan Tilt-Head Stand Mixer with Pouring Shield, 5-Quart, Empire Red
- Food Processor
- 9-inch springform pan
Nutrition Information:
Yield:
12
Serving Size:
1 slice
Amount Per Serving:
Calories: 0Total Fat: 0g
HOW MUCH DID YOU LOVE THIS RECIPE?
Please leave a comment on the blog or share a photo on Pinterest
