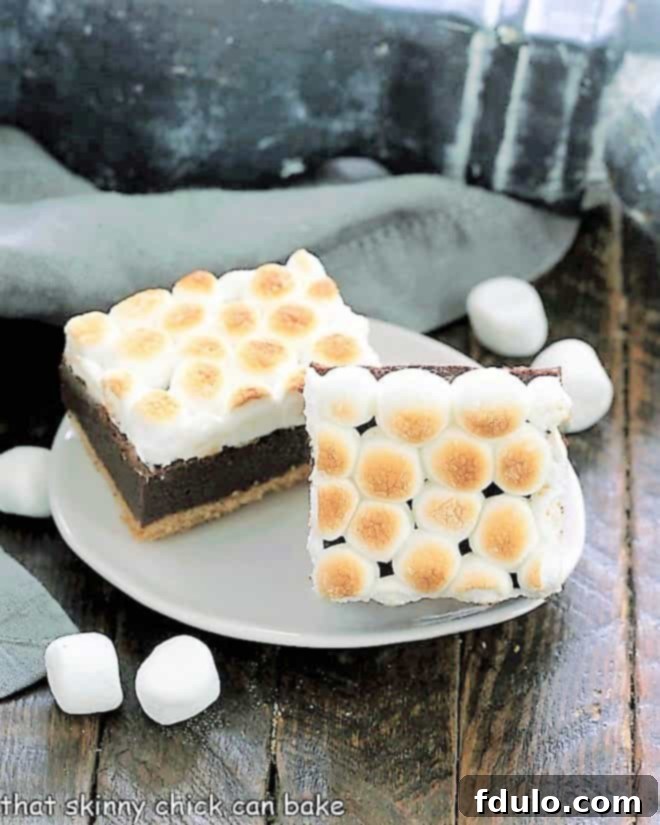
Irresistible S’mores Brownies: Your Ultimate Guide to a Gooey, Fudgy Delight
Transform your favorite campfire treat into a spectacular baked dessert with these incredible S’mores Brownies. Featuring a buttery graham cracker crust, a rich, fudgy brownie center, and a golden, toasted mini marshmallow topping, these bars are destined to become a household favorite. Perfect for any occasion, especially when you crave that classic s’mores experience without the need for a flickering flame.
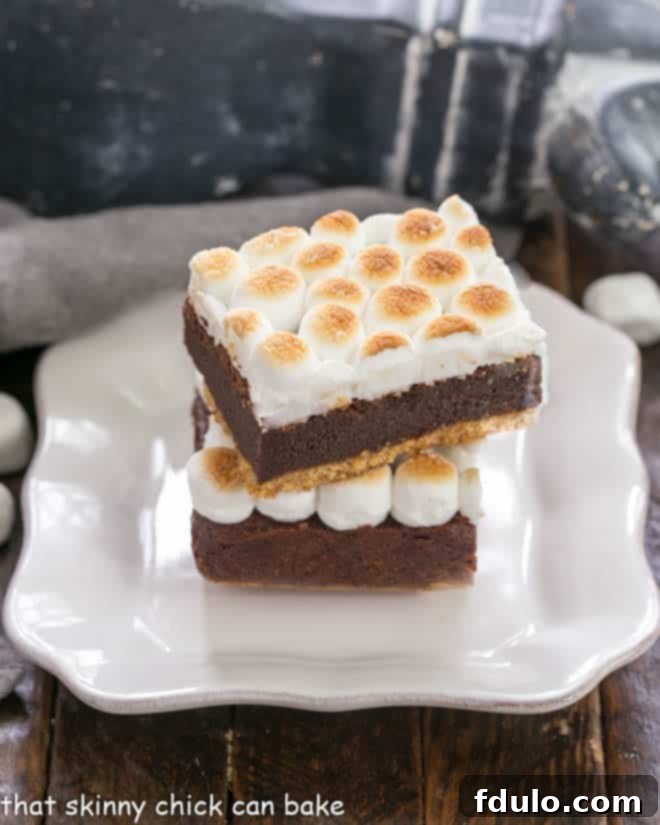
Why S’mores Brownies Are a Must-Make
These S’mores Brownie Bars are more than just a dessert; they’re an experience. Combining the beloved flavors and textures of traditional s’mores into an easy-to-serve bar form makes them uniquely versatile and utterly delicious. Here’s why they deserve a spot in your baking rotation:
- All the Classic S’mores Goodness: Imagine the crunchy graham cracker, the melt-in-your-mouth chocolate, and the gooey, toasted marshmallow—all perfectly layered in a convenient bar. You get every element of that nostalgic treat in a single bite.
- Perfect for Any Gathering: Whether it’s a summer picnic, a backyard barbecue, a potluck, or just a cozy night in, these bars travel well and are always a crowd-pleaser. No need to worry about building a campfire or gathering sticks; all the magic happens right in your kitchen.
- Effortless Summer Entertainment: During warmer months, you want desserts that are simple to prepare but still make a big impact. These s’mores brownies fit the bill perfectly, offering a fun, festive treat that evokes memories of outdoor adventures.
- A Unique Twist on a Beloved Classic: While classic s’mores are wonderful, these brownies offer a sophisticated yet fun variation that elevates the humble ingredients into something truly special. The rich brownie base adds an extra layer of decadence that you won’t find around a campfire.
My family’s love for s’mores stems from countless memorable camping trips out West. We explored magnificent National Parks like Banff, Yellowstone, the Grand Tetons, Rocky Mountain, and the Grand Canyon, traveling in either our trusty Plymouth station wagon (sans radio or air conditioning!) or the Big Blue Dodge van. No matter where we were, a roaring campfire and a feast of s’mores were always central to our outdoor dining experiences. Those sticky, sweet moments around the fire are some of my fondest childhood memories, and this recipe brings that warmth and joy right into my home.
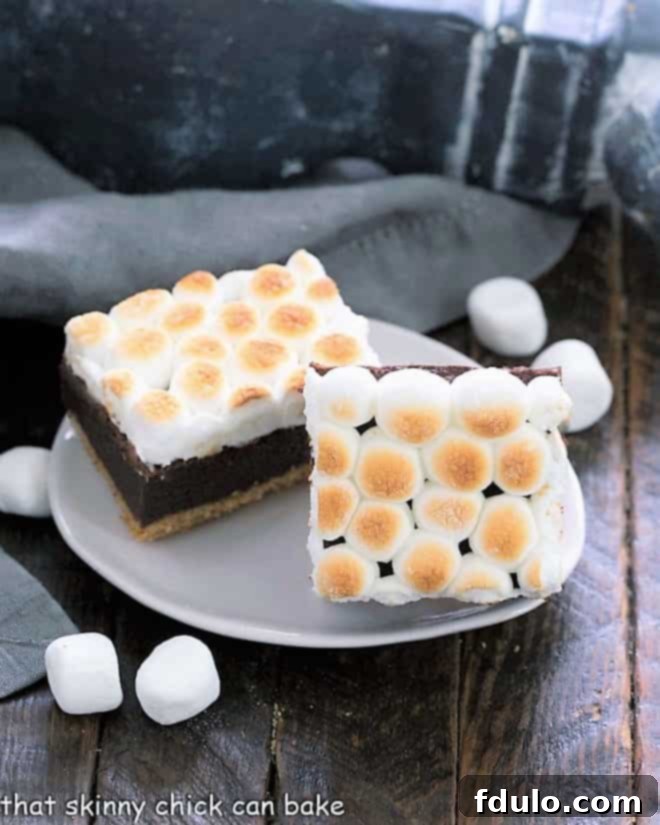
Mastering the S’mores Brownie: Expert Tips for Perfection
I remember my dad starting the campfire while my siblings and I gathered sticks, which he’d then meticulously whittle with his trusty Swiss Army knife to perfectly skewer our marshmallows. I always loved my s’mores with a deeply charred, gooey marshmallow. While those rustic creations hold a special place in my heart, these S’mores Brownies take the concept to an entirely new level. With three distinct and delicious layers, they are utterly irresistible. Follow these expert tips to ensure your brownies are nothing short of spectacular:
- Prepare Your Pan Properly: The first step to a successful s’mores brownie is proper pan preparation. Start by lining your baking pan with non-stick foil. The broiled marshmallows become incredibly gooey, and this special foil (or regular foil generously sprayed with non-stick cooking spray) will make cleanup a breeze and ensure your bars lift out easily. This is a crucial step for avoiding sticky situations!
- Craft the Perfect Graham Cracker Crust: Combine your crust ingredients thoroughly, then press the mixture firmly and evenly into the bottom of the prepared pan. A great pro-tip is to use the flat bottom of a measuring cup or a glass to really compact and smooth out the layer. This creates a stable, delicious base that won’t crumble. Bake as directed, then allow it to cool completely while you prepare your brownie batter. A cool crust prevents the brownie batter from melting into it prematurely.
- Achieve a Level Brownie Layer: Once your brownie batter is ready, use an offset spatula to spread it evenly over the cooled graham cracker crust. An offset spatula gives you better control and helps create a smooth, level surface, which is key for uniform baking and an aesthetically pleasing final product.
- Know When Your Brownies Are Done: Brownies are notorious for being tricky to bake perfectly. Keep an eye (and nose!) on them. As they near completion, your kitchen will fill with an amazing chocolate aroma. Visually, look for the edges to start pulling away slightly from the sides of the pan, and the center should appear set with only a slight jiggle if gently shaken. Overbaking can lead to dry brownies, so err on the side of slightly underbaked for that ultimate fudgy texture.
- Marshmallow Topping Application: Once your brownies are completely cool, it’s time for the star topping! Cover the entire surface with mini marshmallows. For a truly professional and uniform look, you can carefully arrange them upright, flat-side down, in neat rows. However, this is purely optional; simply scattering them to create a full, even layer works just as well. Ensure complete coverage to get that delightful toasted effect across every piece.
- Broiling with Precision: This is where the magic happens and also where vigilance is paramount. Pop the marshmallow-topped brownies under the broiler for just a few minutes. PRO-Tip: Never walk away from the broiler! Marshmallows can go from perfectly golden to burnt (or even catch fire) in mere seconds. Keep the oven door slightly ajar and watch them continuously until they reach your desired level of toasted perfection – a beautiful golden brown with slightly charred peaks.
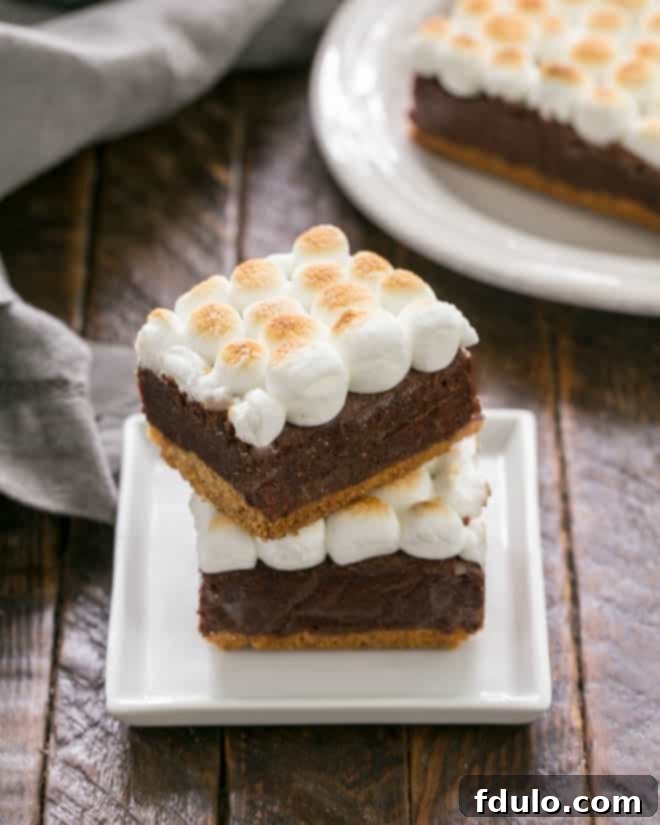
Frequently Asked Questions About S’mores Brownies
S’mores, a contraction of “some more,” refer to a classic American campfire treat. They famously debuted in a 1920s cookbook but were already a popular staple among Boy Scouts and Girl Scouts. The traditional s’more consists of a toasted marshmallow and a piece of chocolate (often a Hershey’s bar) sandwiched between two graham crackers. The heat from the marshmallow melts the chocolate, creating a wonderfully warm, gooey, and sweet confection.
Toasting marshmallows in the oven is best achieved using your oven’s broiler function. Position the marshmallow-topped brownies on a middle oven rack, ensuring they are not too close to the heating element (typically 4-6 inches away). Keep the oven door cracked open and maintain constant supervision. Marshmallows can go from perfectly golden to burnt or even ignited very quickly, usually within one to two minutes. Watch them carefully until they expand and achieve a beautiful golden-brown color.
Absolutely! While this recipe provides instructions for a delicious homemade brownie, you can certainly use your favorite boxed brownie mix for convenience. Simply prepare the graham cracker crust as directed, then follow the instructions on your brownie mix box for baking. Once the brownie layer is cooked and cooled, proceed with adding and toasting the marshmallows as specified in this recipe.
S’mores brownies are best enjoyed fresh, but leftovers can be stored. Place them in an airtight container at room temperature for up to 2-3 days. If you want to keep them longer, you can refrigerate them for up to a week, though the marshmallows might firm up slightly. For optimal gooeyness, you can gently warm them in the microwave for a few seconds before serving.
More Delicious Treats You May Also Like:
When my youngest son was home from college, these s’mores brownies disappeared almost instantly. Dorm food, he reported, had not been particularly impressive, and I have a feeling this kind of homemade treat isn’t making their menu rotation! Even I couldn’t resist sampling a couple – it’s always that irresistible graham cracker crust that tempts me every time. If you love these S’mores Brownies, you might also enjoy these other delightful recipes:
- S’mores Cookie Bars
- S’mores Cookies
- S’mores Fudge Bars
- Explore all my Brownie Recipes and Cookie Recipes for more sweet inspiration!
Stay connected and share your baking creations! Find me on Instagram, Facebook, and Pinterest. Don’t forget to tag me when you try one of my recipes! If you love the results, please consider giving it a 5-star rating in the recipe card below.
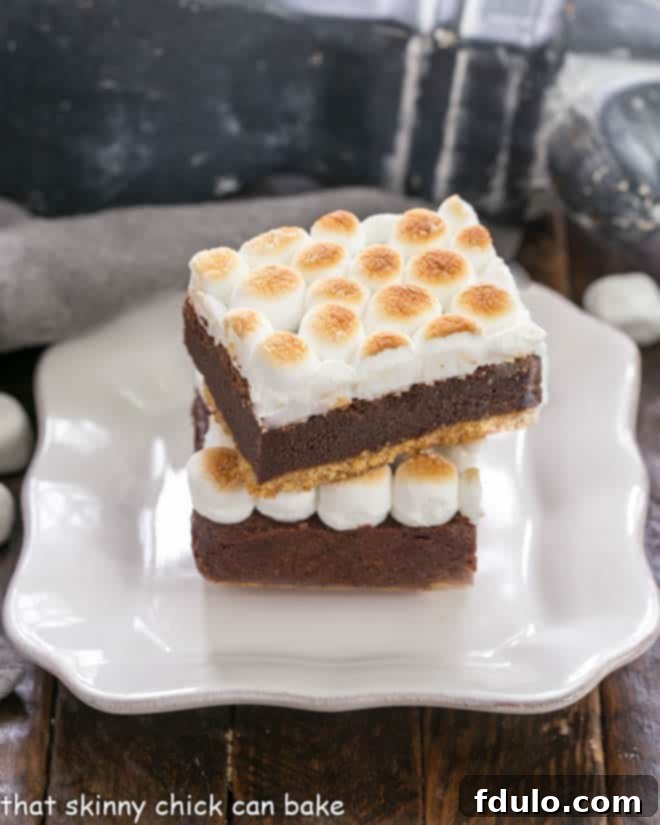
S’mores Brownies with a Graham Cracker Crust
20 minutes
27 minutes
47 minutes
16 bars
Fudgy brownies inspired by the classic s’mores campfire treat, complete with a graham cracker crust and toasted marshmallow topping.
Ingredients
For the Graham Cracker Crust:
- 1 1/2 cups graham cracker crumbs
- 6 tablespoons butter, melted
- 2 tablespoons sugar
For the Fudgy Brownie Layer:
- 8 tablespoons unsalted butter
- 4 ounces unsweetened chocolate, chopped
- 1 1/4 cups sugar
- 1 teaspoon vanilla extract
- 1/4 teaspoon salt
- 2 large eggs
- 1/2 cup all-purpose flour
For the Toasted Marshmallow Topping:
- Approximately 2 cups mini marshmallows
Instructions
- Preheat your oven to 350ºF (175ºC). Line an 8×8-inch baking pan with non-stick foil, or use regular foil sprayed generously with non-stick cooking spray. Set aside.
- In a medium bowl, combine the graham cracker crumbs, melted butter, and sugar. Mix thoroughly until well combined. Press this mixture evenly into the bottom of the prepared pan. Bake for 7 minutes. Remove from oven and allow the crust to cool completely while you prepare the brownie layer.
- Increase the oven temperature to 400ºF (200ºC).
- In a microwave-safe bowl, melt the 8 tablespoons of butter and chopped unsweetened chocolate together. Heat in 30-second intervals, stirring often, until smooth and fully melted.
- Stir the sugar, vanilla, and salt into the melted chocolate mixture. Add the eggs one at a time, mixing well after each addition. Finally, stir in the flour until the mixture is very smooth and just pulls away from the sides of the bowl. Spread the brownie batter evenly over the cooled graham cracker crust in the prepared pan. Bake for 18 minutes or until the brownies pull away from the sides of the pan and the center looks set. A toothpick inserted into the center should come out with moist crumbs, not wet batter.*
- Let the brownies cool completely at room temperature. This is essential for clean cuts. Once cool, sprinkle enough mini marshmallows over the surface to create one even layer, completely covering the brownies.
- Place the pan under the broiler, about 6 inches from the heating element. Watch very carefully and broil for approximately 1-2 minutes until the marshmallows are golden brown and toasted. Broiler times can vary significantly between ovens, so do not leave unattended, as marshmallows can burn quickly.
- Remove from broiler and let cool slightly before cutting. For the cleanest slices, use a hot knife (run under hot water and wipe dry) to cut the bars. Serve and enjoy!
Notes
If you choose to use a boxed brownie mix as a substitution, simply follow the baking instructions provided on the box after preparing the graham cracker crust.
*Note: 18 minutes worked perfectly for my oven, but some testers have found that their brownies required slightly longer baking times. Always check for doneness visually.
Recommended Products
As an Amazon Associate and member of other affiliate programs, I earn from qualifying purchases.
- Nonstick Foil
- Set of Glass Mixing Bowls
- USA Pan Bakeware Square Cake Pan, 8 inch, Nonstick
Nutrition Information:
Yield:
16
Serving Size:
1 bar
Amount Per Serving:
Calories: 278
Total Fat: 15g
Saturated Fat: 9g
Trans Fat: 0g
Cholesterol: 47mg
Sodium: 88mg
Carbohydrates: 33g
Fiber: 2g
Sugar: 23g
Protein: 3g
HOW MUCH DID YOU LOVE THIS RECIPE?
Please leave a comment on the blog or share a photo on Pinterest
