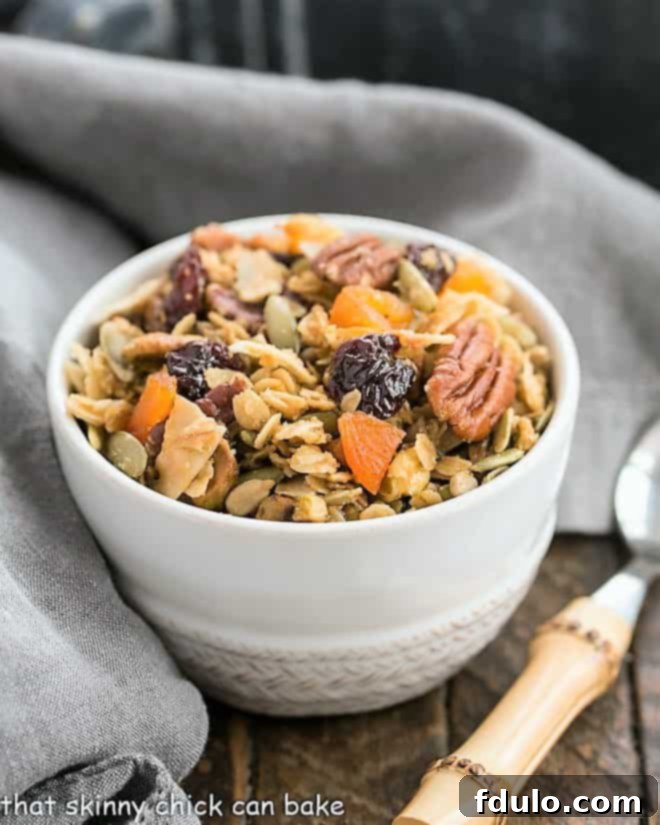
Welcome to the ultimate guide for crafting the most delectable Maple Coconut Granola you’ll ever taste! This recipe began as a delightful discovery, a thoughtful gift after an evening of cocktails at a friend’s exquisite Aspen condo. From the very first bite, I knew I had stumbled upon something truly special. It was the perfect blend of crunchy textures and a comforting sweetness, transforming ordinary mornings and snack breaks into moments of pure joy. I was so captivated by its irresistible charm that I was determined to recreate this magic in my own kitchen.
This isn’t just any granola recipe; it has quickly become one of my absolute favorites, a staple in my repertoire. The symphony of textures from the hearty oats, a diverse array of nuts and seeds, and chewy dried fruits elevates this recipe beyond comparison. Every spoonful delivers a satisfying crunch followed by a burst of flavor, making it the Best Homemade Granola I’ve ever made. Forget bland, store-bought options – prepare to embark on a culinary journey that promises fresh, wholesome, and utterly addictive granola, right from your oven.
Unlock the Benefits: Why Craft Your Own Homemade Granola?
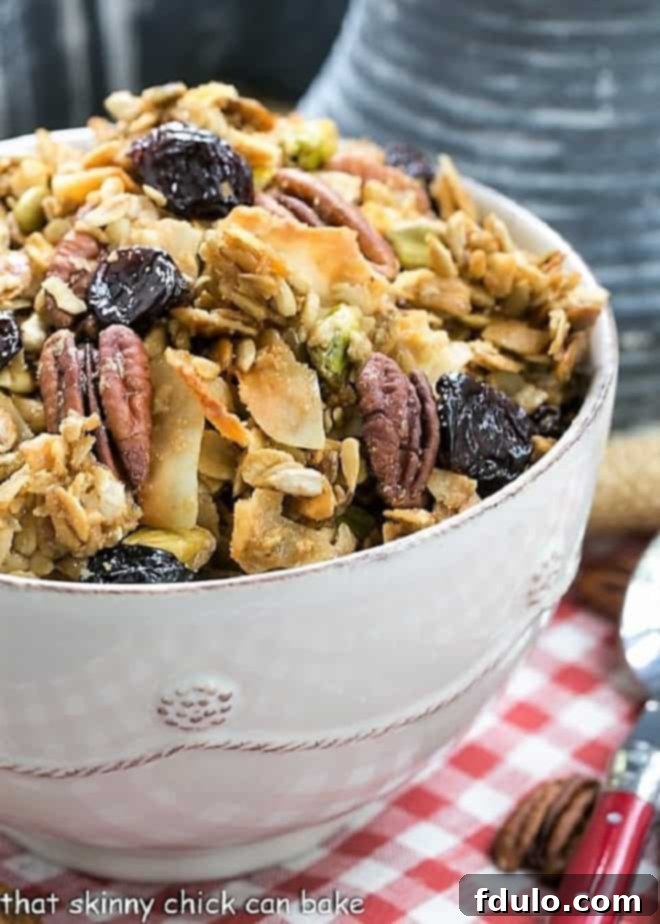
Making your own granola is a rewarding experience that offers a multitude of benefits over purchasing pre-made varieties. For me, it’s a practice I embrace a few times a year, whipping up a generous batch to savor. While it’s undeniably tempting to have this delicious treat on hand at all times, the joy and control that come with homemade granola are unparalleled. Mary’s Maple Coconut Granola, for instance, vanished quickly, devoured for breakfast, snacks, and everything in between. Sweetened with authentic maple syrup and a touch of brown sugar, the beauty of this recipe lies in its adaptability – allowing you to tailor every ingredient to your personal preference and dietary needs.
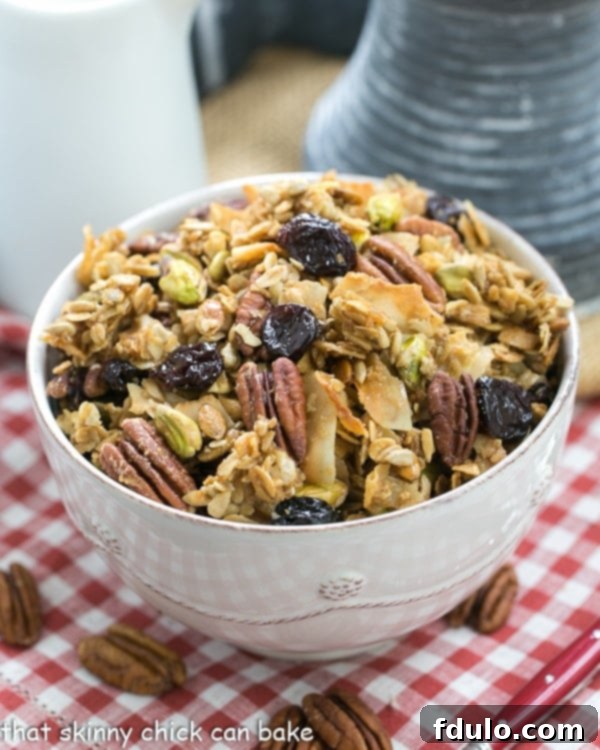
- Ultimate Customization: The power is in your hands! You can easily tweak this recipe using ingredients you already have, or specifically select what you love most. I often use sweetened angel flake coconut in my granola, but I discovered that large, unsweetened coconut flakes create an even more sophisticated texture and flavor profile here, especially since the maple syrup and brown sugar provide ample sweetness. Following Mary’s lead, I enhanced the basic Food52 recipe with pistachios and dried fruit, alongside classic pecan halves, sunflower seeds, and pumpkin seeds. The result? A truly magical mixture tailored to perfection.
- Dietary Adaptability: Have allergies or specific dietary requirements? No problem. If pistachios aren’t your favorite, simply leave them out! Substitute with almonds, walnuts, or cashews, or omit them entirely. You can experiment with gluten-free oats, different types of dried fruit, or adjust the level of sweetness. This flexibility ensures everyone can enjoy a bowl of delicious, healthy granola.
- Superior Freshness and Flavor: Store-bought granolas often sit on shelves for months, losing their crispness and vibrant taste. Homemade granola, however, is bursting with fresh flavor and an incredibly satisfying crunch that simply can’t be replicated. The aroma of baking granola alone is enough to justify the effort!
- Cost-Effective: While specialty granolas can be quite expensive, making your own is surprisingly economical. Buying oats, nuts, and seeds in bulk often saves money in the long run, giving you more delicious granola for your buck.
- Portion Control and Storage: Granola can be addictive, and I often find myself needing to “hide it” from myself! But here’s a secret: homemade granola freezes beautifully. This means you can make a large batch, enjoy some now, and store the rest for later, ensuring you always have a healthy, convenient snack or breakfast option on hand without overindulging.
Beyond this incredible Maple Coconut Granola, I’ve shared other fantastic recipes, including my popular Pistachio Coconut Granola. For more culinary inspiration, check out Mary’s blog, Lights on Bright No Brakes. Her recipes are always a hit, like her dreamy Guacamole, which I’ve also had the pleasure of making.
Smart Kitchen Solutions: Essential PAM Cooking Spray Hacks for Baking and Beyond
Over the years, I’ve discovered a myriad of practical kitchen tips and tricks, and one of my absolute favorites involves a simple can of PAM Cooking Spray. I’ve shared this hack with countless friends and readers on this blog, but its sheer genius warrants repeating. Have you ever found yourself in a sticky situation, struggling to scrape every last bit of peanut butter, honey, or even thick maple syrup out of a measuring cup? It’s a common kitchen frustration, leading to wasted ingredients and a messy cleanup. Well, I have a fantastic, game-changing tip for you!
Before you measure any sticky substance, give your measuring cup a quick, light spray with PAM Cooking Spray. Seriously, that’s it! Once you do this, you’ll find that honey, peanut butter, corn syrup, or in the case of our delicious granola, pure maple syrup, will effortlessly slide out of the measuring utensil without leaving a trace. It’s truly a snap! The first time you try it, you’ll likely kick yourself for not discovering this ingenious trick sooner. Not only does it save precious ingredients, but it also makes post-baking cleanup a heck of a lot easier, allowing you to spend more time enjoying your creations and less time scrubbing.
Here’s a quick review of my favorite PAM Hacks that every home cook should know:
- Effortless Measuring of Sticky Ingredients: As mentioned, always spray your measuring cups with PAM when working with viscous foods and liquids such as peanut butter, honey, corn syrup, molasses, or maple syrup. This ensures every drop transfers cleanly, and your measuring cup rinses clean in seconds.
- Perfect Release for Baked Goods and Roasted Veggies: When baking cookie bars, brownies, or roasting vegetables, line your baking tins or sheet pans with aluminum foil first, then spray the foil with PAM. This creates a non-stick surface that guarantees easy release, preventing anything from sticking and making cleanup a breeze. Say goodbye to stubbornly stuck corners!
- Parchment Paper Adhesion: Even when a recipe calls for lining the bottom of a baking pan with parchment paper, a quick spray of PAM underneath the parchment can be incredibly helpful. It helps the parchment adhere to the pan, preventing it from shifting, and also provides an extra layer of non-stick security, ensuring that not even a tiny morsel sticks when it’s time for removal.
- Preventing Pasta Boil-Overs: A surprising trick! Lightly spray the rim of your pot with PAM before boiling pasta or potatoes. This creates a barrier that can help prevent the foamy water from boiling over onto your stovetop, saving you from a messy clean-up.
- Grating Cheese Made Easy: When grating soft cheeses, lightly spray your grater with PAM beforehand. The cheese will glide through much more smoothly, and cleanup will be significantly easier as less cheese will stick to the grater.
These simple hacks demonstrate how a product like PAM Cooking Spray can become an indispensable tool in your kitchen, simplifying tasks and enhancing your cooking experience. It’s about working smarter, not harder, to achieve delicious results with minimal fuss.
Crafting Your Perfect Batch: A Step-by-Step Guide to Homemade Granola
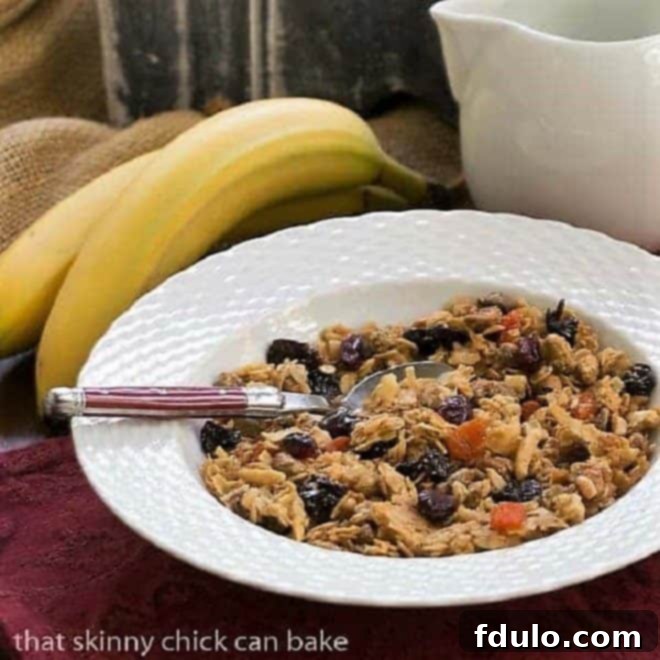
One of the most appealing aspects of making granola at home is its incredible adaptability. This isn’t a rigid recipe; it’s a canvas for your culinary creativity. Feel free to incorporate the dried fruits, seeds, and nuts that you genuinely enjoy, and omit anything you don’t. For instance, if pecans aren’t to your liking, easily substitute them with crunchy walnuts, delicate slivered almonds, or even hearty cashews. Any dried fruit, such as cranberries, apricots, or even blueberries, chopped into bite-sized pieces, will work wonderfully. The goal is to adapt this Maple Coconut Granola recipe entirely to your taste buds and preferences, creating a truly personalized breakfast or snack.
- Preparation is Key: Begin by preheating your oven to the specified temperature (typically around 300°F or 150°C for slow, even toasting). While the oven heats, line your baking pan or pans with foil. For extra convenience, nonstick foil is a fantastic option. If you’re using regular aluminum foil, a quick spray with non-stick cooking spray (like PAM) will work wonders to minimize sticking and ensure effortless cleanup. This step is crucial for preventing your granola from baking onto the pan.
- Combine Wet and Dry Ingredients: In a large mixing bowl, combine all your dry ingredients – the old-fashioned rolled oats, pumpkin seeds, sunflower seeds, coconut flakes, pistachios, and pecan halves. Give them a good toss to ensure they’re well distributed. Then, add your wet ingredients: the pure maple syrup, extra-virgin olive oil, brown sugar, and kosher salt. Mix everything thoroughly until every oat, nut, and seed is evenly coated with the sweet, sticky mixture. I like to hold off on adding the dried cherries or other delicate dried fruits at this stage to prevent them from becoming too hard or burnt during the initial baking. This keeps them wonderfully chewy.
- Evenly Spread for Consistent Crispiness: Once combined, spread the granola mixture evenly across your prepared baking sheet. It’s important not to overcrowd the pan, as this can lead to steaming rather than toasting. If necessary, use two baking sheets. A thin, even layer promotes consistent crisping and browning, ensuring every cluster is perfectly toasted.
- Bake and Stir: Place the baking sheet in your preheated oven. Bake, stirring the granola every 10-15 minutes, for about 35 minutes. Stirring is essential to promote even browning and prevent the edges from burning while the center remains undercooked.
- Add Dried Fruit and Finish Baking: After the initial baking period (around 35 minutes), remove the pan from the oven. Now is the time to add your dried cherries or any other dried fruit you’ve held back. Stir them into the granola mixture. Return the pan to the oven and continue baking for another 10 minutes, or until the granola is beautifully golden brown and toasted to your desired crispness. Keep a close eye on it during this final stage, as granola can go from perfectly golden to burnt very quickly.
- Cool Completely for Ultimate Crispness: Once baked, remove the granola from the oven and let it cool completely on the baking sheet. Resist the urge to transfer it while warm; the cooling process is vital for the granola to fully crisp up and form those coveted clusters. Once cooled, break it into pieces or store it as is. Serve it with milk, yogurt, or enjoy it as a standalone snack. Store any leftovers in an airtight container to maintain freshness.
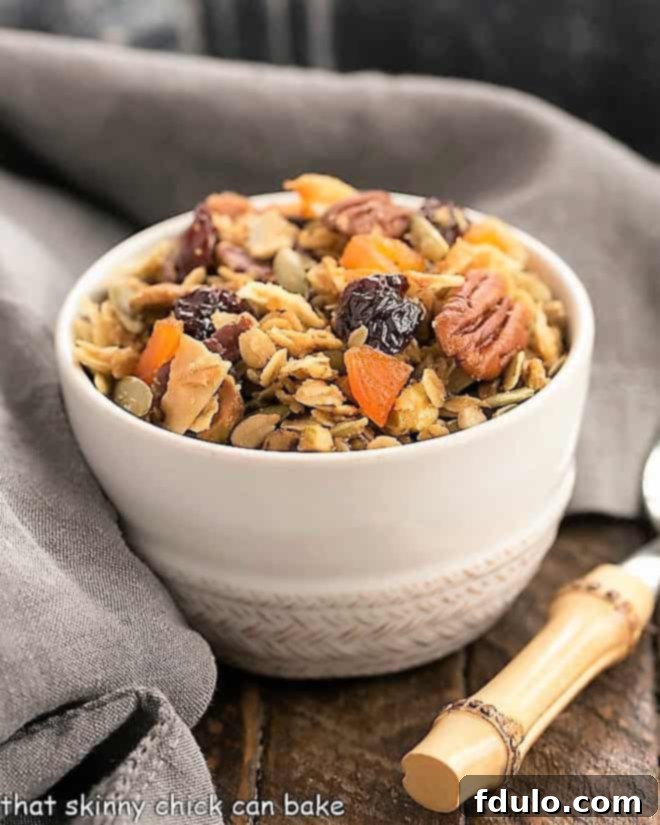
Preserving Freshness: How to Store Your Delicious Homemade Granola
Once you’ve mastered the art of making homemade granola, the next important step is knowing how to store it properly to maintain its delightful crunch and fresh flavor. Proper storage ensures your hard work pays off, allowing you to enjoy your Maple Coconut Granola for weeks or even months to come.
- Airtight is Key: The golden rule for storing granola is to keep it in an airtight container. Exposure to air is the primary culprit behind stale or soft granola. Oxygen causes the fats in the nuts and seeds to oxidize, leading to off-flavors, and moisture in the air can turn your crispy granola chewy.
- Choose the Right Container: Opt for a large mason jar, a sturdy glass jar with a tight-fitting lid, or a high-quality Rubbermaid-type container with a secure seal. These options effectively keep air and moisture out, preserving the granola’s texture and taste.
- Room Temperature Storage: For immediate consumption, your homemade granola cereal keeps exceptionally well at room temperature. Simply place your airtight container in a cool, dark pantry or cupboard. When stored correctly, it will stay fresh and crunchy for up to 2 weeks. Ensure it’s away from direct sunlight or heat sources, which can cause the oils to go rancid more quickly.
- Refrigeration for Extended Freshness: If you live in a humid climate or prefer an extra layer of freshness, you can store your granola in the refrigerator. This can extend its shelf life slightly, often keeping it fresh for up to 3 weeks. However, make sure the container is truly airtight to prevent any refrigerator odors from being absorbed.
- Freezing for Long-Term Storage: Granola freezes wonderfully, making it an excellent option for large batches or if you want to always have some on hand. To freeze, ensure the granola is completely cooled. Place it in a freezer-safe airtight container or a heavy-duty freezer bag, removing as much air as possible before sealing. When stored in the freezer, your granola should maintain its quality for at least 3 months, often longer. To enjoy, simply take out the desired portion and let it come to room temperature; no thawing or reheating is necessary. It will regain its crispness as it thaws.
- Reviving Slightly Stale Granola: If your granola loses a bit of its crunch over time, don’t despair! You can often revive it by spreading it on a baking sheet and toasting it in a preheated oven at 250°F (120°C) for about 10-15 minutes, or until crisp again. Let it cool completely before storing.
Frequently Asked Questions About Granola
Granola is a versatile breakfast food and snack primarily composed of rolled oats, nuts, and dried fruit. These ingredients are typically mixed with a sweetener (like honey, maple syrup, or brown sugar) and an oil (such as olive or coconut oil), then baked until golden brown and crispy. This process toasts the oats and nuts, enhancing their flavor and creating a delightful crunchy texture.
While similar baked grain products existed earlier, the term “granola” as we know it today was popularized in the 1960s. John Kellogg, the brother of the Kellogg’s cereal founder, is often credited with inventing and naming “granola” in the 1960s, though earlier forms were developed in the late 19th century by people like James Caleb Jackson. The modern health food movement of the 60s and 70s really propelled granola into mainstream popularity.
Muesli, which translates to “mixture” in Swiss German, is another popular breakfast food that shares some similarities with granola. The primary distinction lies in their preparation: muesli is typically raw and unbaked, consisting of a mix of rolled oats and other grains (like wheat, barley, or millet), nuts, seeds, and dried fruit. Unlike granola, it’s usually unsweetened and can be served cold with milk or yogurt, or soaked overnight. Granola, by contrast, is baked with oil and a sweetener, resulting in its characteristic clusters and crispy texture.
Absolutely! Granola’s crunchy texture and sweet flavor make it incredibly versatile. It can be used as a delicious topping for fruit crisps or crumbles, added to quick breads or muffins for extra texture, and provides a delightful crunch when sprinkled over parfaits, smoothie bowls, or ice cream sundaes. Granola can also be pressed into a pie crust for a unique base, or blended with nut butter and other binders to create homemade energy balls or snack bars.
Homemade granola can be incredibly healthy, especially when compared to many store-bought varieties that are often laden with excessive sugar and unhealthy oils. When you make it yourself, you have complete control over the ingredients. You can choose whole grains, healthy fats (like olive or coconut oil), natural sweeteners, and a generous amount of nuts, seeds, and dried fruits, which are packed with fiber, vitamins, and minerals. This allows you to tailor it to your specific dietary needs and preferences, making it a wholesome and energizing part of your diet.
The secret to those coveted granola clusters lies in a few key steps. First, ensure your mixture has enough binding agents, typically maple syrup or honey, and a little brown sugar. Second, spread the granola evenly but don’t stir it too frequently during baking; allow it to set and form bonds. Most importantly, do NOT break up the granola immediately after removing it from the oven. Let it cool completely and undisturbed on the baking sheet. As it cools, the sugars will harden, creating those lovely, crunchy clusters. Once fully cooled, you can break it into desired pieces.
Explore More Delicious Granola Recipes:
If you’ve fallen in love with homemade granola, there’s a world of flavor combinations to explore! Here are a few more delightful granola recipes to inspire your next baking adventure:
- Maple, Almond Cranberry Granola from Sally’s Baking Addiction – A classic combination of sweet maple, crunchy almonds, and tart cranberries.
- Vanilla Granola with Dried Fruit – A wonderfully fragrant granola, enhanced by the warm notes of vanilla and your favorite dried fruits.
- Chunky Maple Coconut Granola – If you love big, satisfying clusters, this variation is designed to deliver maximum crunch and flavor.
- Pistachio Coconut Granola – A vibrant and flavorful granola featuring the unique taste of pistachios paired with tropical coconut.
- For even more breakfast inspiration, browse our collection of Easy Breakfast Recipes.
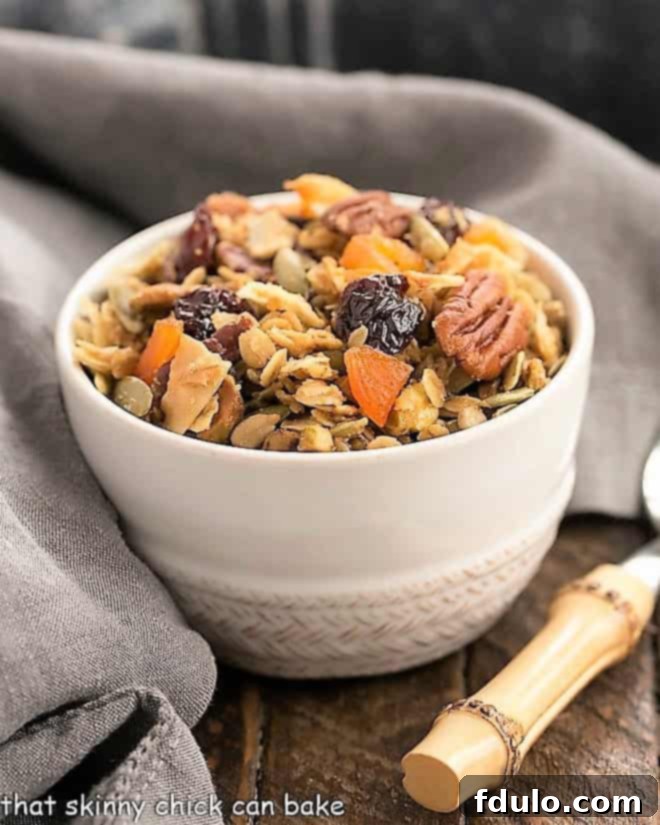
Maple Coconut Granola
10 minutes
45 minutes
55 minutes
8 cups
A delightful maple granola full of wholesome nuts and seeds. This recipe is an adaptation from Food52 and inspired by my talented food blogger friend, Mary, of Lights on Bright No Brakes.
Rating: 5 out of 5 stars (Based on 29 reviews)
Ingredients
- PAM Cooking Spray
- 3 cups old-fashioned rolled oats
- 1 cup raw pumpkin seeds, hulled
- 1 cup raw sunflower seeds, hulled
- 1 cup unsweetened coconut flakes
- 1 cup unsalted pistachios
- 1 ¼ cup raw pecan halves
- ¾ cup pure maple syrup (Grade B preferred for better flavor)
- ½ cup extra-virgin olive oil
- ½ cup brown sugar
- 1 teaspoon kosher salt
- 1 cup dried tart cherries and/or dried apricots, chopped
Instructions
- Preheat the oven to 300ºF (150ºC). Line a rimmed baking sheet with nonstick foil or spray regular foil generously with Pam cooking spray. Set aside.
- Place all ingredients except the dried cherries (and/or apricots) into a large bowl. Mix thoroughly until all the dry ingredients are well combined and evenly coated with the wet mixture.
- Spread the granola mixture evenly on the prepared baking sheet, ensuring it’s in a thin layer to promote even baking.
- Bake for about 35 minutes, stirring the granola every 10-15 minutes to ensure uniform toasting and to prevent burning.
- After 35 minutes, remove the baking sheet from the oven. Add the dried cherries (and/or apricots), stir them into the granola, and return to the oven for another 10 minutes, or until the granola is golden brown and toasted to your liking.
- Allow the granola to cool completely on the baking sheet before serving or storing. This crucial step helps it crisp up and form delicious clusters. Store covered in an airtight container.
Notes
Remember to spray your measuring cup with PAM Cooking Spray before measuring sticky liquids like maple syrup for incredibly easy cleanup and no frustrating scraping!
Recommended Products
As an Amazon Associate and member of other affiliate programs, I earn from qualifying purchases.
- Nonstick Foil
- Black Spatula
- USA Pan Bakeware Half Sheet Pan
Nutrition Information:
Yield:
16 servings
Serving Size:
1/2 cup
Amount Per Serving (estimated):
Calories: 380Total Fat: 25gSaturated Fat: 6gTrans Fat: 0gUnsaturated Fat: 18gCholesterol: 0mgSodium: 653mgCarbohydrates: 35gFiber: 6gSugar: 17gProtein: 7g
Please note: Nutritional information provided for recipes on this site is an estimate only, offered as a courtesy. This information is typically generated by online calculators. While we strive for accuracy, these figures are approximate. Factors such as specific product types or brands used can alter the nutritional content of any given recipe. Additionally, many recipes may suggest optional toppings or variations for which nutritional information is not calculated. Ingredients listed as “to taste,” like salt, will also vary in their impact on the final nutritional values. Different online calculators may also yield varying results. For the most precise nutritional data for your recipe, we recommend calculating the information using the exact ingredients you utilize. You are solely responsible for verifying the accuracy of any nutritional information obtained.
HOW MUCH DID YOU LOVE THIS RECIPE?
Please leave a comment on the blog or share a photo on Pinterest
Did you know? PAM Cooking Spray leaves 99% less residue than margarine or bargain-brand cooking sprays! This impressive statistic is based on comparisons against leading cooking sprays (excluding olive oil), after spraying on glass bakeware, baking at 400°F for 30 minutes, cooling, washing in a standard home dishwasher with detergent, and repeating the cycle four times. This means less scrubbing for you and cleaner bakeware every time.
For more innovative recipes, smart cooking tips, and to stay connected with the latest from PAM Cooking Spray, be sure to follow them on Facebook and Pinterest, or visit their official website at pamcookingspray.com. Discover how simple culinary solutions can transform your time in the kitchen!
