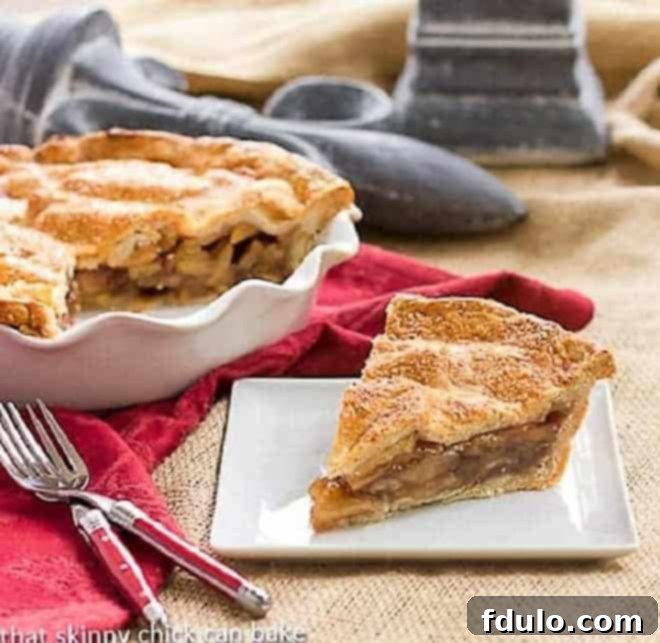
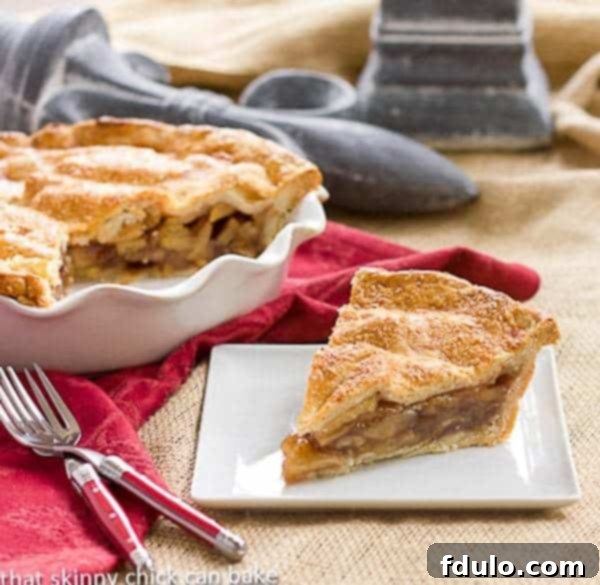
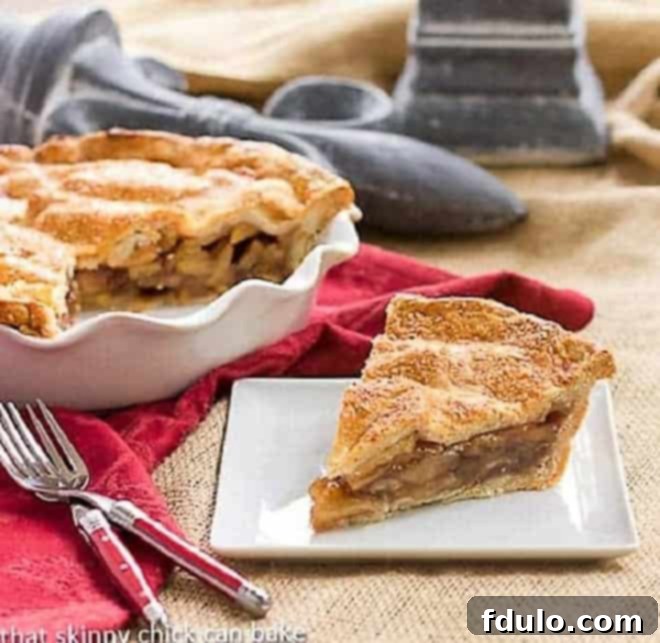
Indulge in the quintessential taste of American tradition with this exquisite Classic Apple Pie. Featuring a perfectly flaky, golden-brown pastry crust cradling a luscious, cinnamon-spiced apple filling, this dessert is utterly irresistible. It evokes the comforting nostalgia of a treat lovingly baked in your grandmother’s kitchen, making it more than just a pie – it’s a memory in the making. While it shines as the centerpiece of autumn feasts, Thanksgiving gatherings, or Fourth of July celebrations, its timeless appeal makes it a delicious choice for any time of year.
There’s no need to search further for the ultimate apple pie recipe; this is truly the Best Apple Pie Recipe you’ll ever encounter. Prepare for your friends and family to savor every single bite, eagerly requesting second, third, and even fourth slices! This homemade apple pie is destined to become a staple in your baking repertoire, so be sure to add it to your must-bake list without delay. Its unparalleled flavor and texture promise to elevate any meal into a special occasion.

Why This Is the Perfect Homemade Apple Pie to Bake
Baking a homemade apple pie is a labor of love that rewards you with an incomparable dessert. This particular recipe stands out for several compelling reasons, promising a baking experience that’s both enjoyable and incredibly rewarding.
- Unmatched Texture and Flavor: The combination of a tender, double pastry crust and a perfectly balanced apple filling makes this the quintessential autumn dessert. Every bite offers a harmonious blend of crisp crust and soft, flavorful apples, creating a sensory delight that store-bought pies simply can’t replicate.
- A True Fall Classic: Apple pie is more than just a dessert; it’s a symbol of comfort, tradition, and the cozy feelings of fall. Making it entirely from scratch amplifies this experience, filling your home with the warm, inviting aroma of baking apples and cinnamon. It’s a timeless recipe that brings joy and evokes cherished memories.
- Proven Success: This isn’t just any recipe; it’s a tried and true classic that has been perfected over time. You can bake with confidence, knowing that each step has been tested to ensure a successful and delicious outcome. Say goodbye to soggy bottoms or bland fillings – this recipe delivers consistent excellence every time.
- Impress Your Guests: Serving a homemade apple pie from scratch is a sure way to impress anyone at your dinner table. The effort and care you put into crafting such a magnificent dessert will not go unnoticed, making it an ideal centerpiece for family gatherings, holiday meals, or any special occasion where you want to show off your baking prowess.
- Customizable Experience: While the recipe provides a classic foundation, it also allows for subtle customizations. Whether you prefer a slightly tarter filling, a hint of nutmeg, or a decorative lattice top, this robust recipe serves as an excellent canvas for your personal touch, ensuring the pie is perfectly tailored to your taste.
Expert Tips for Baking the Best Apple Pie
Achieving the perfect apple pie involves a few key techniques that can elevate your baking from good to extraordinary. Follow these expert tips to ensure your homemade apple pie turns out flaky, flavorful, and utterly delightful every single time.
- PRO-Tip: Choose the Right Apples for the Best Flavor. The secret to an exceptional apple pie filling lies in using a combination of baking apples. Aim for a mix of sweet, tart, and firm varieties. This ensures a complex flavor profile and a texture that holds up well during baking, preventing a mushy filling. Some excellent choices include Granny Smith (for tartness), Honeycrisp (for sweetness and crispness), Golden Delicious (for sweetness and tenderness), and Pink Lady (for a balanced sweet-tart flavor).
- Keep Your Pie Crust Ingredients Icy Cold. The flakiest pie crust relies on very cold butter and shortening. Cold fats create pockets of steam during baking, which separate the layers of dough and result in that desirable flaky texture. I recommend chilling your shortening and butter in the freezer for about 15-20 minutes before you begin. Even your water should be ice cold!
- PRO-Tip: Chill Your Pie Crust Dough Thoroughly. Once your pie crust dough is made, it’s crucial to keep it chilled. Cold pieces of butter and shortening are the key to producing steam when the crust cooks, which creates those beautiful, delicate flaky layers. After forming the dough into discs, wrap them tightly in plastic wrap and refrigerate for at least 30 minutes, or even up to two days. This also allows the gluten to relax, making the dough easier to roll out.
- Prevent a Gap: Consider Pre-Cooking Your Apples. A common issue with apple pies is a gap between the baked top crust and the apple filling as the apples cook down. To mitigate this, gently pre-cook your sliced apples in a large skillet for about 5-7 minutes with a small amount of butter and a tablespoon or two of the sugar from the recipe. This softens them slightly, reduces their volume before baking, and ensures a fuller pie. Let them cool completely before adding them to the crust.
- Alternatively: Layer Uncooked Apples Strategically. If you prefer not to pre-cook, you can still minimize the gap by carefully layering uncooked apples into the crust. Make sure to pack them tightly and fill all spaces, mounding them slightly higher in the center, as they will shrink during baking.
- Don’t Overwhelm Your Pie with Too Many Spices. While spices are essential, a delicate hand is best. I find cinnamon alone provides the perfect warm, inviting aroma and flavor for a classic apple pie. One teaspoon of ground cinnamon is typically plenty to enhance the natural sweetness of the apples without overpowering them. If you wish to add a hint of other spices like nutmeg or allspice, do so sparingly, starting with a mere pinch.
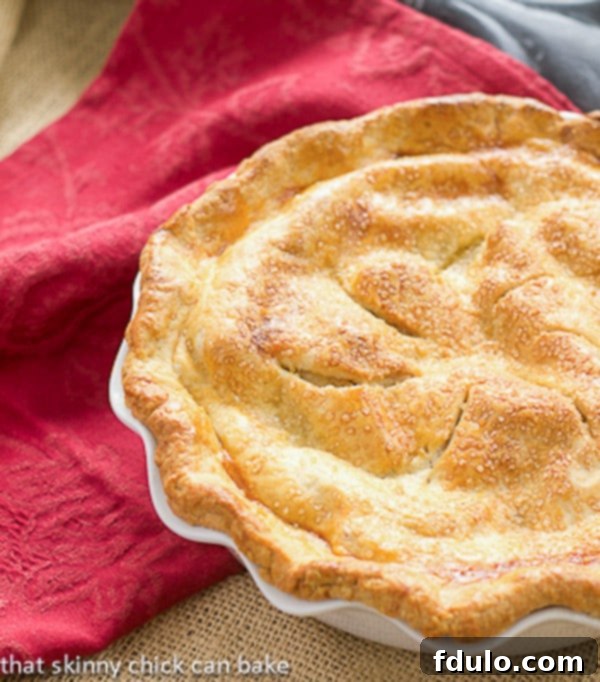
- PRO-Tip: The Finishing Touch – Egg Wash and Sugar. For a beautiful, golden-brown crust with a delightful crunch, brush your top crust with an egg wash (one egg whisked with a teaspoon of water) just before baking. Then, sprinkle generously with coarse sugar. This not only adds visual appeal but also a lovely textural contrast and a hint of extra sweetness to the crust.
- Patience is Key: Cool Your Pie Before Slicing. This is perhaps one of the most crucial tips for a picture-perfect slice. Make sure to cool your apple pie completely, ideally for at least 3-4 hours, or even overnight, before slicing. The filling needs time to set as it cools; otherwise, it will be very runny, and your beautiful slices will collapse. While the aroma of a warm pie is tempting, resist the urge to cut into it too soon!

Frequently Asked Questions About Baking Apple Pie
For the ultimate flaky and tender pie crust, a combination of both butter and shortening is highly recommended. Butter provides that rich, irresistible flavor synonymous with homemade pie crusts. Its lower melting point contributes to a delicate crispness. Shortening, on the other hand, boasts a higher melting point than butter, which makes the dough significantly easier to handle and roll out, preventing it from becoming too sticky. The shortening also contributes to a superior flakiness. Using both fats ensures you get the best of both worlds: exceptional flavor and an incredibly workable, flaky crust.
The secret to a mouthwatering apple pie lies in a thoughtful combination of apple varieties. For my filling, I prefer a blend of Granny Smith, Golden Delicious, and Pink Lady apples. The Granny Smith apples provide a crucial tartness that balances the sweetness of the pie, while their firm texture holds up well during baking. Golden Delicious apples offer a lovely sweetness and become tender, almost meltingly soft. Pink Lady apples contribute a beautiful balance of sweet and tart, with a crispness that adds to the overall texture. This mixture of sweet and tart, firm and slightly softer apples ensures an exquisite taste and a varied, appealing texture in every bite. Nobody wants their apple filling to be mushy like applesauce; this blend guarantees a delightful chew!
Determining when your apple pie is perfectly baked is crucial for both flavor and texture. Look for several key indicators. First, visually inspect the pie through the crust vents; you should see thick, bubbling juices, indicating the filling has thickened and the apples are cooking. The crust itself should be a deep golden brown, not just light yellow. For a more definitive test, carefully take a sharp, thin knife or a skewer and gently insert it through one of the vent openings into a few of the apples. The apples should be tender, and the knife point shouldn’t meet any significant resistance as it’s inserted. If the knife goes in smoothly, your apples are cooked through. If you feel resistance, continue baking for a bit longer, covering the crust with foil if it’s browning too quickly.
Absolutely! Apple pie is a fantastic dessert to prepare in advance, especially during busy holidays. You can bake the entire pie one to two days ahead of serving. Once baked, allow it to cool completely at room temperature before covering it loosely with foil or plastic wrap. Store it at room temperature for up to two days. For longer storage, you can freeze a baked pie for up to three months. Thaw overnight in the refrigerator, then warm gently in a low oven (300°F/150°C) before serving for that freshly baked taste.
To keep your leftover apple pie fresh and delicious, allow it to cool completely to room temperature. Then, cover it loosely with plastic wrap or foil. You can store apple pie at room temperature for up to two days. For longer storage or in warmer climates, it’s best to refrigerate it, where it will last for up to 4-5 days. While refrigeration is safe, the crust might lose a bit of its crispness. You can gently reheat individual slices in the microwave or a toaster oven to warm them through.
A classic apple pie is delightful on its own, but it truly shines when paired with certain accompaniments. The most popular choice is a generous scoop of vanilla bean ice cream, creating a warm and cold contrast that is simply heavenly. Other wonderful options include a dollop of freshly whipped cream, a drizzle of warm caramel sauce, or a slice of sharp cheddar cheese (a traditional pairing in some regions that offers a surprising and delicious savory balance to the sweet apples). For a cozy touch, a cup of hot coffee or tea also makes for a perfect pairing.
Explore More Delicious Apple and Dessert Recipes
If you’ve fallen in love with the comforting flavors of this Classic Apple Pie, you’re in for a treat! We have a wide array of other delightful recipes featuring apples and various desserts that are perfect for any occasion. Expand your baking horizons with these fantastic selections:
- Top 30 Apple Recipes for Apple Season from A Spicy Perspective
- 25 All-American Apple Desserts from Melissa’s Southern Style Kitchen
- Cream Cheese Filled Apple Bundt Cake
- Favorite Apple Recipes
- Dutch Apple Pie
- Fried Apple Pies
- More Dessert Recipes
- More Pie Recipes
Stay in touch and share your baking journey with us! Follow us on social media @ Instagram, Facebook, and Pinterest. Don’t forget to tag me when you try one of my recipes! And if you absolutely love the results and this classic apple pie recipe brings a smile to your face, please consider giving it a 5-star rating in the recipe card below. Your feedback helps other bakers discover these delightful creations!

Classic Apple Pie Recipe
30 minutes
1 hour 5 minutes
1 hour 35 minutes
8 servings
The BEST apple pie recipe. This tried-and-true classic boasts a flaky, tender crust and a perfectly spiced apple filling. Recipe courtesy of Hugs & Cookies XOXO.
Ingredients
Crust:
- 12 tablespoons (1 ½ sticks) very cold butter
- 3 cups all-purpose flour
- 1 teaspoon kosher salt
- 1 tablespoon granulated sugar
- ⅓ cup very cold shortening
- 6 to 8 tablespoons (about ½ cup) ice water
Apple Filling:
- 5 cups sliced and peeled apples (a combination of baking apples is recommended for best flavor and texture)
- 1 cup light brown sugar, packed
- 6 tablespoons cornstarch
- 1 teaspoon ground cinnamon
- ¼ teaspoon salt
- 1 tablespoon unsalted butter, diced into small pieces
- 1 large egg, whisked with 1 teaspoon water (for egg wash)
- Coarse sugar, for sprinkling
Instructions
- Begin by preparing the pie crust. Dice the very cold shortening and butter into small, ½-inch pieces.
- In the bowl of a food processor, combine the flour, kosher salt, and granulated sugar. Pulse a few times to ensure they are well mixed.
- Add the diced butter and shortening to the flour mixture. Pulse 8 to 12 times, or until the butter and shortening pieces are roughly the size of small peas. This creates pockets of fat essential for a flaky crust.
- With the food processor running on low, gradually pour in the ice water, one tablespoon at a time, until the dough just begins to clump together and form a ball. Be careful not to overmix.
- Carefully pour the dough mixture out onto a lightly floured board. Gently gather it into a ball, then divide the dough in half. Flatten each half into a disc, wrap tightly in plastic wrap, and refrigerate for at least 30 minutes to chill thoroughly.
- While the dough chills, preheat your oven to 425ºF (220ºC).
- Prepare the apple filling: In a large bowl, combine the sliced and peeled apples, brown sugar, cornstarch, cinnamon, and ¼ teaspoon salt. Toss gently until the apples are evenly coated.
- On a lightly floured surface, roll one disc of dough into a 12-inch circle. Carefully fold the dough in half, place it into a 9-inch pie pan, and unfold it to fit the pan, gently pressing it into the bottom and sides without stretching.
- Spoon the apple filling evenly over the bottom crust. Dot the filling with the diced butter, sprinkling the small pieces over the apples. Roll out the second half of the dough into another 12-inch circle and place it carefully over the filling.
- Trim any excess dough from the perimeter of the pie, leaving about a ½-inch overhang. Pinch the top and bottom crusts together, then flute the edges decoratively. Cut a few slits into the top crust to allow steam to escape during baking.
- In a small bowl, whisk together one egg with 1 teaspoon of water to create an egg wash. Lightly brush the top crust with this mixture. Sprinkle generously with coarse sugar for a beautiful golden finish and added crunch.
- Place the pie on a baking sheet (to catch any potential drips) and bake for 25 minutes at 425ºF (220ºC). After 25 minutes, reduce the oven temperature to 350ºF (175ºC) and continue to bake for an additional 40 to 50 minutes, or until the crust is golden brown and the filling is bubbling.
- To check if the apples are tender, carefully insert a thin, sharp knife through a vent opening into the center of the pie. If the knife slides in easily without resistance, the apples are cooked. If not, continue baking in 5-10 minute increments.
- If the crust begins to brown too quickly at any point during baking, loosely cover the edges or the entire pie with aluminum foil to prevent burning.
- Once baked, remove the pie from the oven and place it on a wire rack to cool completely. This is essential for the filling to set properly, preventing a runny pie. Allow it to cool for at least 3-4 hours, or preferably longer, before slicing and serving.
Notes
Recipe adapted from Danielle of Hugs and Cookies XOXO. For the most complex and delicious flavor, always use a variety of baking apples, combining sweet and tart, firm and tender types. This ensures your apple pie filling is never mushy and always packed with fantastic taste.
Recommended Products for Perfect Pie Baking
As an Amazon Associate and member of other affiliate programs, I earn from qualifying purchases, which helps support this blog and allows me to share more delicious recipes with you.
- French Rolling Pin
- Roul’Pat silicone counter sized silicone mat
- Ceramic pie plate
Nutrition Information:
Yield:
8 servings
Serving Size:
1 slice
Amount Per Serving:
Calories: 578Total Fat: 28gSaturated Fat: 16gTrans Fat: 1gUnsaturated Fat: 11gCholesterol: 78mgSodium: 506mgCarbohydrates: 76gFiber: 3gSugar: 32gProtein: 6g
HOW MUCH DID YOU LOVE THIS RECIPE?
Please leave a comment on the blog or share a photo on Pinterest
