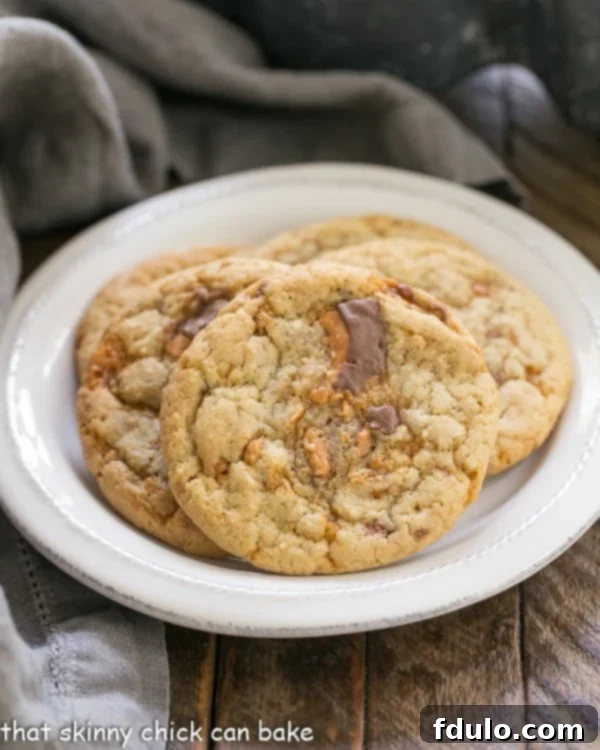
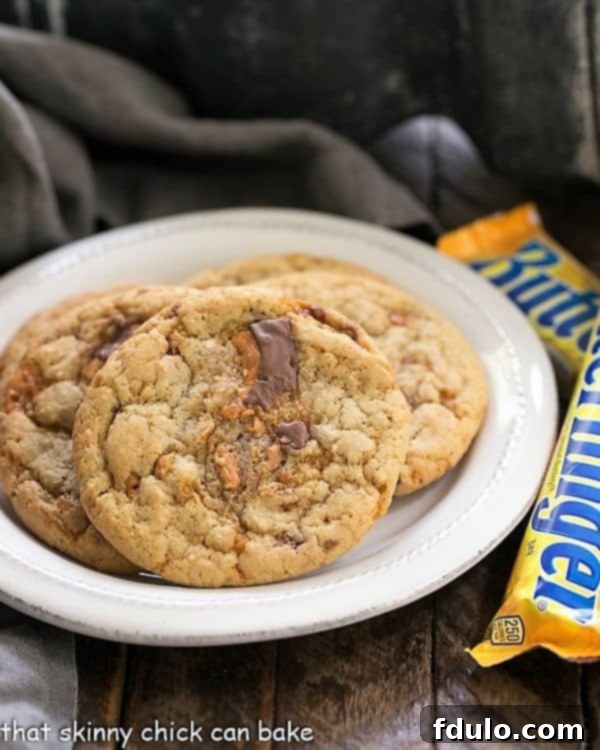
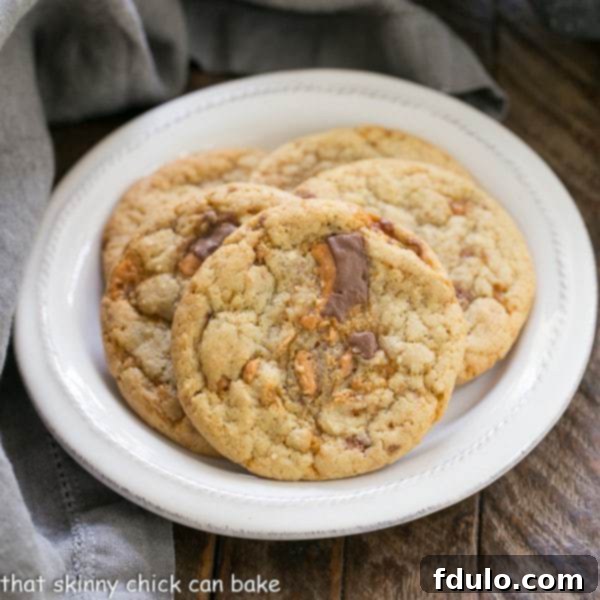
Indulge in the irresistible delight of these homemade, Chewy Butterfinger Cookies! Each bite offers a harmonious blend of buttery, soft cookie texture with the signature crisp, peanut-butter-flavored crunch of Butterfinger candy bars. So unbelievably delicious, you’ll find it hard to stop at just one!
There’s something uniquely satisfying about a cookie that perfectly balances chewiness with a delightful crunch, and these Butterfinger cookies deliver precisely that. Bursting with generously chopped pieces of America’s favorite crispety, crunchety candy bar, these treats are more than just a dessert; they’re a celebration in every bite. Whether you’re looking for a creative way to use up leftover Halloween candy, or simply craving an extraordinary sweet treat, this recipe is your ultimate answer. Prepare for rave reviews and requests for the recipe from family and friends alike!

Why These Chewy Butterfinger Cookies Are a Must-Bake
When it comes to homemade cookies, few recipes offer the unique texture and flavor profile that these Butterfinger-packed delights do. Here’s why this particular recipe deserves a prime spot in your baking repertoire:
- Unforgettable Flavor Combination: If the iconic taste of Butterfinger candy bars makes your heart sing, prepare to fall head over heels for these cookies. The rich, caramelly notes of the cookie dough perfectly complement the distinct crispy peanut butter flavor and chocolate coating of the chopped Butterfingers, creating an explosion of taste in every mouthful.
- A Delightful Textural Contrast: Beyond the amazing flavor, these cookies offer an exciting play on textures. You get the soft, chewy bite of a classic cookie dough, wonderfully punctuated by the crispy, flaky chunks of Butterfinger. This isn’t just a cookie; it’s a textural adventure!
- Break from the Norm: While chocolate chip cookies are timeless, sometimes you crave something new and exciting. This Butterfinger cookie recipe offers a fantastic way to refresh your baking routine and introduce a beloved candy bar into a comforting cookie format. It’s a twist that’s sure to impress.
- Incredibly Addictive: Don’t say we didn’t warn you! The combination of sweet, salty, chewy, and crunchy makes these cookies notoriously difficult to resist. They have a way of disappearing quickly from any cookie jar or plate they grace. Many readers, like Kelli, can attest: “I have made these cookies for work three times now, everyone loves them!”
- Perfect for Any Occasion: Whether it’s a casual get-together, a school bake sale, a holiday treat platter, or just an evening snack with a glass of milk, these chewy Butterfinger cookies are always a hit. Their unique appeal makes them stand out from the crowd.
The Magic of Butterfinger Cookies: A Unique Treat
What sets Butterfinger cookies apart from other candy bar-infused recipes? It’s the distinctive character of the Butterfinger candy itself. Unlike chewy caramels or solid chocolate, Butterfingers bring a unique “crispety, crunchety, peanut-buttery” texture that transforms a simple cookie into something truly special. The thin, flaky layers of peanut butter candy, coated in chocolate, maintain their integrity during baking, providing delightful pockets of crunch that contrast beautifully with the soft, tender cookie base. This isn’t just adding mix-ins; it’s integrating a candy that enhances the entire sensory experience of the cookie.
Ingredient Notes for the Best Chewy Butterfinger Cookies
Creating exceptional Butterfinger cookies starts with understanding your ingredients. While the recipe calls for common pantry staples, a few key details will ensure your cookies are nothing short of perfect:
- Kitchen Staples: You’ll need all-purpose flour, baking soda, salt, granulated sugar, and light brown sugar. Ensure your baking soda is fresh for optimal lift, and pack your brown sugar firmly when measuring to achieve the right moisture and chewiness.
- Butter: The recipe specifically calls for melted butter, which should then be cooled slightly. This is crucial for achieving that desirable chewy texture. Melted butter creates a denser, chewier cookie because it prevents air from being incorporated as much as softened butter would, which would lead to a more cake-like texture. If using salted butter, you may want to slightly reduce the added salt in the recipe. If using unsalted butter, you might need a pinch or two more salt to balance the flavors.
- Eggs: Always use large eggs for this recipe unless otherwise specified. For easier and more uniform incorporation into the butter and sugar mixture, ensure your eggs are at room temperature. This helps create a smoother, more emulsified batter, leading to a better cookie texture.
- Vanilla Extract: Quality matters here! Opt for real vanilla extract over imitation. The subtle yet rich flavor of pure vanilla significantly enhances the overall taste profile of your cookies, adding a warmth that imitation vanilla simply can’t replicate.
- Butterfinger Candy Bars: The star of the show! You’ll need about 1 cup of chopped Butterfingers for this recipe. This typically translates to about two and a half 2.1-ounce standard-sized bars. Don’t worry too much about exact measurements; a little more or less won’t significantly alter the outcome, but aim for roughly this amount for a good distribution of candy in each cookie.
Expert Tips for Perfectly Chewy Butterfinger Cookies
If you’ve mastered the art of making classic chocolate chip cookies, these Butterfinger beauties will be a breeze. The process is remarkably similar, with the delightful twist of swapping out chocolate chips for chopped Butterfinger candy bars! Here are some expert tips to help you bake the best chewy Butterfinger cookies:
- Room Temperature Ingredients are Key: This cannot be stressed enough for consistent cookie baking. Ensure your butter (once melted and slightly cooled) and eggs are at room temperature. This allows them to mix together more easily and emulsify better with the sugars, creating a smooth, cohesive dough that yields a superior texture in the finished cookies.
- Chop Your Butterfingers Thoughtfully: Aim to chop your Butterfinger bars into pieces roughly the size of standard chocolate chips, or even slightly larger if you prefer bigger candy chunks. Don’t discard any crumbs that result from chopping; these tiny bits will melt into the cookie dough, infusing even more delicious Butterfinger flavor throughout!
- Mix Dry Ingredients Gently: When it comes to incorporating the flour, baking soda, and salt, resist the urge to overmix. Using a wooden spoon or a spatula to gently fold in the dry ingredients is preferable to an electric mixer. Overmixing with a mixer can whip too much air into the dough, leading to a cakey rather than chewy cookie. More importantly, overmixing develops the gluten in the flour, resulting in tougher, less tender cookies. Mix until just combined – a few streaks of flour are acceptable.
- Achieve Uniformity with a Cookie Scoop: For consistently sized cookies that bake evenly, a cookie scoop is your best friend. This ensures each cookie is roughly the same size and bakes for the same amount of time. If, despite your best efforts, some cookies emerge from the oven looking a little misshapen, don’t fret! While they’re still hot and pliable, gently tap their edges with a spatula to nudge them into perfectly round shapes. This trick works wonders for presentation!
- Don’t Overbake: For truly chewy cookies, it’s vital not to overbake them. Cookies should be lightly browned at the edges and still look slightly soft in the center when you pull them from the oven. They will continue to set and firm up as they cool on the baking sheet.
- Cooling Process Matters: Allow your freshly baked cookies to cool on the baking sheet for a couple of minutes before transferring them to a wire rack. This initial cooling period allows them to firm up slightly, preventing them from breaking apart when moved, and helps maintain their chewy texture.
Baking is a delightful journey, and sometimes the simplest pleasures, like a nibble of fantastic cookie dough, are the most rewarding. These Butterfinger cookies truly start with a stellar dough that promises an amazing final product.
Frequently Asked Questions About Butterfinger Cookies
Butterfingers are famous for their unique “crispety, crunchety” texture and their distinctive flavor profile. At their core, they feature a crispy, flaky, bright orange-colored peanut butter-flavored candy center. This crunchy core is then enrobed in a layer of rich, smooth milk chocolate, creating a delightful contrast of textures and a perfect balance of sweet and salty notes.
The iconic Butterfinger brand has a rich history! It was originally created in 1923 by the Curtiss Candy Company in Chicago. Over the decades, its ownership has changed hands. In 1990, Nestlé acquired the brand and was responsible for its production for many years. More recently, in 2018, Ferrero (the same company behind beloved products like Nutella and Kinder Surprise) purchased the Butterfinger brand, continuing its legacy of deliciousness.
To keep your chewy Butterfinger cookies fresh and delicious, store them in an airtight container at room temperature for up to 3-4 days. For longer storage, these cookies freeze beautifully! Place cooled cookies in a single layer on a baking sheet to flash freeze for about 30 minutes, then transfer them to a freezer-safe bag or container. They can be frozen for up to 3 months. When you’re ready to enjoy, simply pull out the desired number of cookies and let them defrost overnight in the refrigerator, or for a few hours at room temperature. For optimal flavor and texture, allow them to come fully to room temperature before serving.
Absolutely! Freezing cookie dough is a fantastic way to enjoy freshly baked cookies anytime. Simply scoop the cookie dough into balls and place them on a parchment-lined baking sheet. Flash freeze for about an hour until solid, then transfer the frozen dough balls to a freezer-safe bag. They can be stored for up to 2-3 months. When ready to bake, you can bake them directly from frozen, adding a few extra minutes to the baking time, or let them thaw slightly in the refrigerator first.
Customizing Your Chewy Butterfinger Cookies
While these Butterfinger cookies are spectacular on their own, there are always ways to personalize them and make them even more unique:
- Add More Chocolate: If you’re a serious chocolate lover, consider adding a handful of milk chocolate or semi-sweet chocolate chips to the dough along with the Butterfinger chunks.
- Nutty Variations: For an extra layer of crunch and flavor, mix in some chopped peanuts or pecans. The nutty flavor will complement the peanut butter in the Butterfingers beautifully.
- Drizzle for Decoration: Once the cookies are cooled, a simple drizzle of melted chocolate (milk, dark, or white) can add an elegant touch and another layer of flavor.
- Other Candy Bar Mix-ins: Don’t limit yourself! While Butterfingers are stellar, you could experiment with other crunchy candy bars like Heath bars or Skor for a toffee-flavored variation.
- Sea Salt Sprinkle: A light sprinkle of flaky sea salt on top of the cookies just after they come out of the oven can enhance all the flavors, offering a wonderful sweet and salty contrast.
You May Also Like: Other Candy-Inspired Treats
If you’re a fan of these delightful Butterfinger cookies and enjoy baking with candy, you’ll love exploring these other tempting recipes:
- Easy Homemade Kit Kat Bars from Back for Seconds
- Candy Bar Cookie Pizza from Dinners, Dishes & Desserts
- Twix Fudge from Inside Bru Crew Life
- M & M Brownie Cookies
- Candy Bar Blondies
- Candy Topped Toffee Squares
- More of the Best Cookies Recipes
Stay in touch through social media @ Instagram, Facebook, and Pinterest. Don’t forget to tag me when you try one of my recipes! And if you love the results, please give it a 5-star rating in the recipe card below.

Chewy Butterfinger Cookies Recipe
15 minutes
10 minutes
25 minutes
3 dozen
Caramelly, chewy cookies packed with Butterfinger bits for an irresistible crunch!
Ingredients
- 2 ¼ cups all-purpose flour
- 1 teaspoon baking soda
- ½ teaspoon salt
- ½ cup unsalted butter, melted, cooled slightly
- 1 cup light brown sugar, packed
- ¼ cup granulated sugar
- 2 large eggs, at room temperature
- 1 ½ teaspoons pure vanilla extract
- 1 cup chopped Butterfinger candy bars (approximately 2 ½, 2.1-ounce bars)
Instructions
- Preheat your oven to 325°F (160°C). Line baking sheets with parchment paper for easy removal and cleanup.
- In a large bowl, combine the slightly cooled melted butter with the brown sugar and granulated sugar. Beat with a wooden spoon or electric mixer on low speed until the mixture is creamy and well combined.
- Mix in the room temperature eggs one at a time, followed by the pure vanilla extract. Continue to mix until fully incorporated, scraping down the sides of the bowl as needed.
- In a separate bowl, whisk together the flour, baking soda, and salt. Gradually add the dry ingredients to the wet ingredients, mixing until just combined. Be careful not to overmix; overmixing can lead to tough cookies.
- Gently fold in the chopped Butterfinger candy bars using a wooden spoon or spatula until evenly distributed throughout the dough.
- Scoop tablespoonfuls of dough onto the prepared baking sheets, leaving about 2 inches between each cookie. Bake for 8-10 minutes, or until the edges are lightly golden brown and the centers still look slightly soft.
- Allow the cookies to cool on the baking sheets for a couple of minutes before carefully transferring them to a wire rack to cool completely. This helps them set and prevents them from breaking.
Notes
If you’re aiming for perfectly round cookies for guests or gifts, gently tap the hot cookies with a spatula immediately after removing them from the oven to reshape any irregular edges into nice, neat circles.
Recommended Products
As an Amazon Associate and member of other affiliate programs, I earn from qualifying purchases.
- USA Pan Bakeware Half Sheet Pan
- Black Spatula
- OXO Good Grips Medium Cookie Scoop
Nutrition Information:
Yield:
36
Serving Size:
1 cookie
Amount Per Serving:
Calories: 102Total Fat: 4gSaturated Fat: 2gTrans Fat: 0gUnsaturated Fat: 1gCholesterol: 17mgSodium: 101mgCarbohydrates: 16gFiber: 0gSugar: 9gProtein: 1g
HOW MUCH DID YOU LOVE THIS RECIPE?
Please leave a comment on the blog or share a photo on Pinterest
