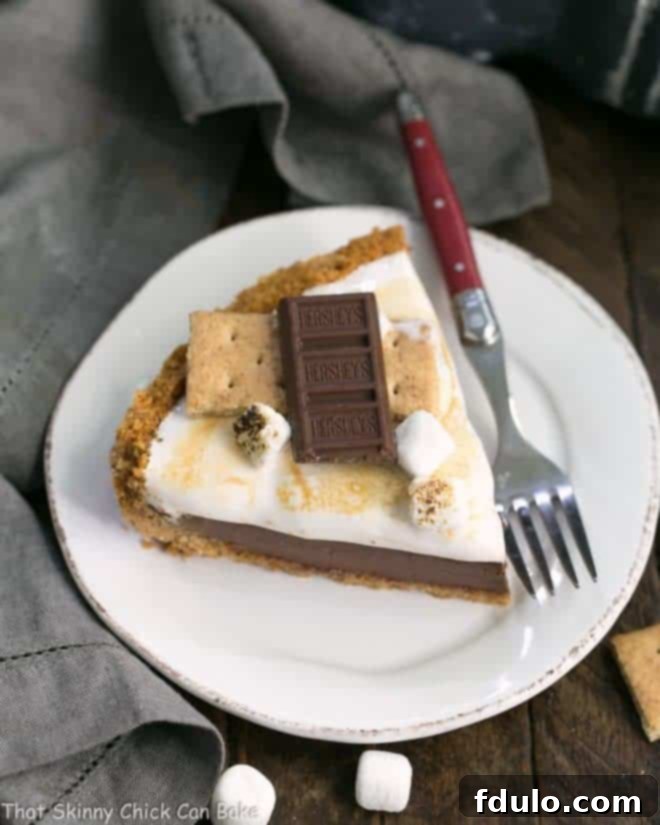
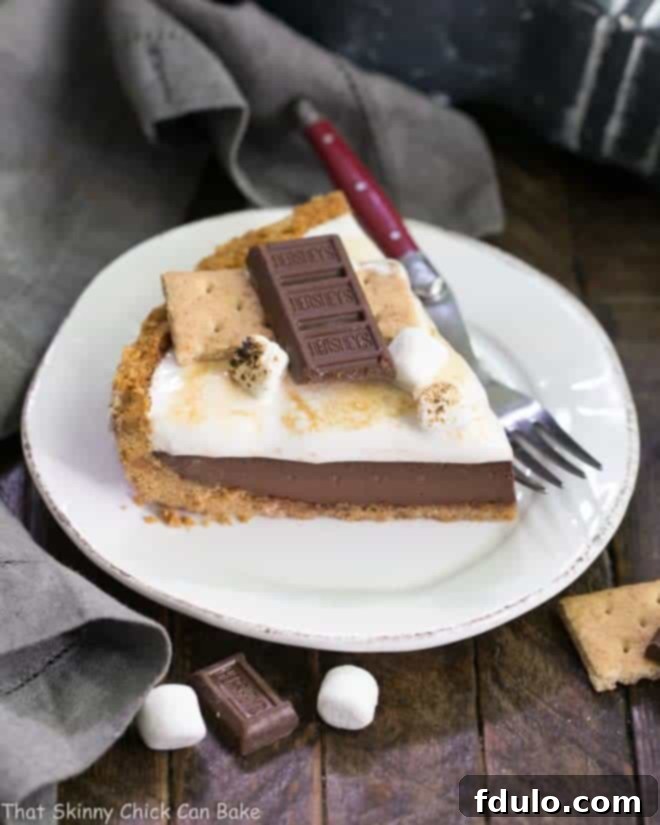
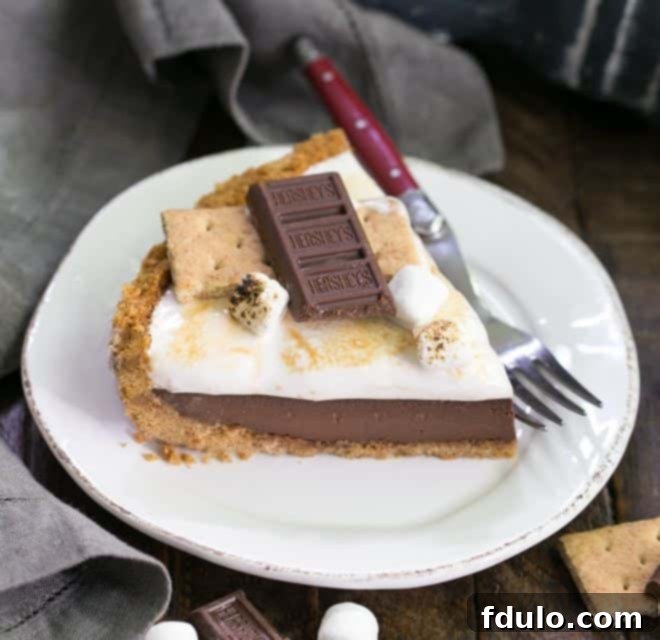
Indulge in the ultimate summer dessert with this incredibly fudgy and decadent S’mores Pie, topped generously with toasted homemade marshmallow. This show-stopping treat, featuring a buttery graham cracker crust, rich chocolate ganache filling, and a fluffy marshmallow crown, is more than just a dessert; it’s a celebration of classic American flavors. Perfect for your 4th of July celebration, summer picnics, or any occasion that calls for a truly unforgettable dessert, this S’mores Pie is guaranteed to become a cherished tradition.
Forget the sticky, charred marshmallows and melting chocolate of a traditional campfire s’mores sandwich for a moment, and discover a refined, yet equally nostalgic, experience. This sophisticated S’mores Dessert takes everything you adore about the beloved campfire classic and elevates it into a stunning pie that’s both elegant and utterly comforting. My family, like many, has a deep affection for the simple joy of s’mores, and this pie captures that magic in every single bite, making it a quintessential treat for any gathering.

Why This S’mores Pie Will Be Your New Favorite
When it comes to desserts that evoke pure joy and nostalgia, few can rival the charm of s’mores. This S’mores Pie recipe takes that beloved concept and transforms it into an elegant, easy-to-serve dessert that’s perfect for any occasion. Here’s why this pie is an absolute must-make:
- A Dream for Campfire S’mores Lovers: If the thought of gathering around a crackling fire, toasting marshmallows, and enjoying gooey, chocolatey goodness brings a smile to your face, then this pie is your dessert soulmate. It captures all the iconic flavors and textures of traditional s’mores in a sophisticated, fork-friendly format. You’ll find yourself transported back to those cherished summer nights with every bite.
- Unparalleled Homemade Marshmallow Topping: While melted store-bought marshmallows can get the job done, nothing compares to the light, airy, and intensely flavorful homemade marshmallow topping. Crafted with real vanilla extract, this topping achieves a perfect balance of sweetness and a delicate, cloud-like texture that simply melts in your mouth. Torched to golden perfection, it mimics that perfectly roasted marshmallow exterior, adding an incredible depth of flavor that sets this pie apart.
- A Symphony of Classic S’mores Elements: Every component of the beloved s’mores experience is meticulously recreated and celebrated in this pie. You’ll enjoy the familiar crunch and subtly sweet notes of the buttery graham cracker crust, followed by a rich, deeply fudgy chocolate ganache filling that’s both smooth and intensely satisfying. Finally, it’s crowned with the irresistible homemade gooey marshmallow topping, tying all these classic ingredients together into a harmonious and truly sensational dessert.
- Perfect for Celebrations: This pie isn’t just delicious; it’s a showstopper. Its impressive appearance, especially with the beautifully toasted marshmallow topping, makes it ideal for holiday gatherings, summer barbecues, potlucks, and especially Independence Day celebrations. It’s a guaranteed crowd-pleaser that will have everyone asking for the recipe.
The Sweet History of S’mores: A True American Classic
The story of s’mores is as heartwarming and American as the treat itself. First appearing in print in the 1927 Girl Scout handbook “Tramping and Trailing with the Girl Scouts” under the name “Some More,” these delightful confections quickly captured the hearts (and taste buds) of generations. The original recipe called for a simple trio: graham crackers, toasted marshmallows, and chocolate bars, usually Hershey’s milk chocolate. The name “s’mores” is, of course, a contraction of “some more,” a testament to their irresistible nature.
My own memories of s’mores are deeply intertwined with summer holidays in the picturesque mountains of Colorado. Picture this: hiking through fragrant pine forests, finally arriving at a serene picnic area nestled alongside the glistening Roaring Fork River. After grilling up savory brats or juicy burgers, the real adventure began – the hunt for the perfect marshmallow-toasting sticks. It was a ritual filled with laughter, the occasional lost marshmallow to the hungry flames, and the challenge of achieving that elusive perfect golden-brown exterior with a soft, gooey interior, without incinerating it to a crisp.
Those moments, sandwiching a warm, melty marshmallow and a few squares of chocolate between sweet graham crackers, were pure bliss. My sisters and I savored every bite of those campfire classics. This S’mores Pie embodies that same spirit of togetherness and simple pleasure, but offers a slightly more elegant and refined version, making it an ideal choice to celebrate the birthday of our nation or any cherished summer moment.

The Perfect 4th of July Dessert
This particular S’mores Pie recipe first graced the pages of Gourmet magazine back in 2006, a testament to its timeless appeal and sophisticated take on a classic. It’s been well over a decade since I first served this delightful pie at our annual 4th of July potluck dinner, and its popularity has only grown. Even on its second (or third, or fourth!) appearance, my friends and family were genuinely impressed by the exquisite layers: a perfectly baked graham cracker crust, a deeply fudgy chocolate filling, and, of course, the crowning glory of a light, homemade marshmallow layer.
To achieve that authentic toasted marshmallow look and flavor, I always grab my trusty culinary torch. A quick pass over the marshmallow topping transforms it into a beautifully bronzed, slightly caramelized cloud, mirroring the experience of a perfectly roasted campfire marshmallow. It creates an irresistible visual appeal and adds a wonderful depth of flavor. Without fail, this S’mores Pie is always the first dessert to disappear from the table, a clear indication of its universal appeal and deliciousness.

Crafting the Perfect S’mores Pie: Expert Tips for Success
While this S’mores Pie delivers on incredible flavor, mastering its elements ensures a truly show-stopping dessert. The graham cracker crust and the rich ganache filling are relatively straightforward, but the homemade marshmallow topping can be a bit finicky. Don’t worry, with these expert tips, you’ll achieve perfection:
Mastering the Marshmallow Topping:
- Gelatin is Key: Ensure you track down and purchase plain, unflavored gelatin. This is absolutely crucial for giving the marshmallow topping its necessary structure and bounce. Most major supermarkets carry brands like Knox.
- Blooming the Gelatin: Before combining it with other ingredients, the gelatin must be “proofed” or “bloomed.” This means sprinkling it over cold water and letting it sit for about a minute until it softens and swells. This step ensures it dissolves smoothly and effectively.
- Accurate Temperature for Sugar Syrup: Making the sugar syrup involves heating sugar, water, and corn syrup to precisely 260ºF. This requires an accurate candy thermometer. Do not eyeball this temperature, as it directly impacts the texture of your marshmallow. Undercooked syrup will result in a runny topping, while overcooked syrup will make it too stiff.
- Whipping Time is Essential: The marshmallow topping requires a significant amount of whipping time. It will start frothy and gradually transform into a thick, white, and glossy mixture. A stand mixer with a whisk attachment is highly recommended for this process, making it much easier and ensuring consistent results. While a hand mixer can work, be prepared for a longer and more strenuous whipping session. Patience is truly a virtue here!
- Slow and Steady Pour: When adding the hot sugar syrup to the gelatin mixture while beating, do so very slowly and carefully. Aim for a steady stream, avoiding the sides of the bowl and the beaters themselves to prevent crystallization and ensure even incorporation.
Alternative Marshmallow Topping Method:
If the idea of making homemade marshmallow feels too daunting, or if you’re short on time, there’s a simpler alternative that still delivers great results:
- Purchase large marshmallows and cut them in half horizontally to create short, round discs.
- Arrange these marshmallow rounds neatly over the surface of your chilled chocolate filling, completely covering it.
- Use a culinary torch to brown the tops of the marshmallows. This gives them that appealing toasted color and adds a wonderful caramelized flavor.
- Alternatively, you can place the pie under your oven’s broiler for a few minutes. If using this method, watch it extremely carefully, as marshmallows can go from perfectly toasted to burnt in a matter of seconds. Keep the pie about 4-6 inches from the broiler element.
Following these tips will help you create a S’mores Pie that’s not only delicious but also visually stunning, ensuring rave reviews from everyone who tastes it!
Frequently Asked Questions About S’mores Pie
The delightful name “S’mores” is a charming abbreviation of the phrase “‘some more.” This nickname perfectly encapsulates the irresistible nature of these treats, as everyone always wants “some more” after their first bite. They famously originated with the Girl Scouts, cementing their place in American camping and dessert culture.
Slicing a pie with a sticky filling, especially one topped with marshmallow, can be tricky. The secret to clean, elegant slices is heat! Dip your sharp knife in very hot water for a few seconds, then wipe it dry with a clean cloth. The warm blade will glide effortlessly through the sticky marshmallow and dense chocolate filling. You’ll need to clean and reheat the knife frequently between slices for the best results, ensuring each piece looks as perfect as the last.
Homemade marshmallows, while requiring a bit of technique, are incredibly rewarding and far superior to store-bought varieties. The basic ingredients typically include unflavored gelatin (which provides the structure), granulated sugar, corn syrup (to prevent crystallization and add chewiness), a pinch of salt (to balance the sweetness), and pure vanilla extract for flavor. After whipping, a dusting of powdered sugar and cornstarch can prevent stickiness. The result is a pillowy soft, intensely vanilla-flavored cloud that’s a true delicacy.
Hosting a s’mores party is a fantastic way to gather friends and family, and it’s incredibly easy to set up! The key is a dedicated s’mores station. Near a grill, campfire, or fire pit, arrange a table with all the essentials: long roasting sticks or metal skewers, classic graham cracker squares, and plenty of milk chocolate bars (Hershey’s bars are a traditional favorite). Don’t forget an ample supply of large marshmallows!
To elevate your party, offer a variety of gourmet s’mores ingredients. Think beyond the basics with options like chocolate chip cookies or Oreos instead of graham crackers, different types of chocolate (dark, white, peanut butter cups, or even Milky Way bars), fresh sliced strawberries, a drizzle of caramel sauce or Nutella, or a smear of peanut butter. If you’re feeling adventurous, offer homemade marshmallows! Always prioritize safety: have a bucket of water or a fire extinguisher nearby in case of burns, as molten marshmallows can be extremely hot.
Explore More Decadent Dessert Recipes
If you’re a fan of rich, indulgent desserts, especially those featuring chocolate or a delightful crust, then you’ll love exploring these other fantastic pie and s’mores-inspired recipes. These are perfect for expanding your baking repertoire and satisfying any sweet craving:
- Classic Chocolate Pie from Big Bear’s Wife – A timeless favorite for chocolate lovers.
- THE Chocolate Chip Pie from The Food Charlatan – A comforting, irresistible twist on classic chocolate chip cookies.
- Homemade Chocolate Pudding Pie from Melanie Makes – Smooth, creamy, and wonderfully satisfying.
- Triple Chocolate Mousse Pie – Layers of rich chocolate for the ultimate indulgence.
- Chocolate Velvet Pie with Meringue Crust – A luxurious texture paired with a beautiful meringue.
Beyond pies, the world of s’mores-inspired desserts is vast and exciting! I’ve experimented with various s’mores creations that capture that beloved flavor profile in different formats, including delightful s’mores cookies, a fantastic s’mores cookie cake, and chewy s’mores fudge bars. Each offers a unique way to enjoy the classic combination of graham cracker, chocolate, and marshmallow. Be sure to check them out for more sweet inspiration!
Stay connected and share your culinary adventures with me through social media! You can find me on Instagram, Facebook, and Pinterest. Don’t forget to tag me when you whip up one of my recipes – I love seeing your delicious creations! And if this S’mores Pie becomes a favorite, please consider leaving a 5-star rating in the recipe card below. Your feedback helps other home bakers discover and enjoy these recipes too!

S’mores Pie
40 minutes
40 minutes
1 hour 20 minutes
8 servings
A buttery graham cracker crust, fudgy chocolate filling, and fluffy homemade marshmallow topping come together to create this quintessential Independence Day (or any day!) treat.
Ingredients
For the Graham Cracker Crust:
- 8 tablespoons butter, melted
- 1 ¾ cups graham cracker crumbs
- 2 tablespoons sugar
For the Fudgy Chocolate Filling:
- 7 ounces semisweet chocolate, finely chopped
- 1 cup heavy cream
- 1 large egg, at room temperature
For the Homemade Marshmallow Topping:
- 1 teaspoon unflavored gelatin (such as Knox brand)
- ½ cup cold water, divided
- ¾ cup sugar
- ¼ cup light corn syrup
- ½ teaspoon vanilla extract
Instructions
- Preheat your oven to 350ºF (175ºC).
- In a medium bowl, mix together the melted butter, graham cracker crumbs, and 2 tablespoons of sugar until well combined. Press this mixture firmly into the bottom and up the sides of a greased 9-inch pie plate.
- Bake the crust for 12 minutes, or until it’s lightly golden brown. Remove from the oven and let it cool completely on a wire rack.
- Once the crust is cool, preheat your oven to 350ºF (175ºC) again. Place the finely chopped semisweet chocolate into a large, heatproof bowl.
- In a heavy saucepan, bring the heavy cream just to a boil over medium heat (alternatively, microwave it in a large Pyrex measuring cup until it just begins to boil). Immediately pour the hot cream over the chopped chocolate.
- Let the mixture stand undisturbed for 1 to 2 minutes to allow the chocolate to melt. Then, whisk until the chocolate is fully melted and the mixture is smooth and glossy.
- Whisk in the large egg and a pinch of salt until thoroughly combined. Pour this rich chocolate filling into the cooled graham cracker crust.
- Carefully cover the edge of the pie crust with aluminum foil to prevent it from over-browning. Bake for about 25 minutes, or until the filling is almost set but still slightly wobbly in the center. Remove from the oven and let it cool completely to room temperature on a wire rack, which will take approximately 1 hour.
- To prepare the marshmallow topping: Sprinkle the unflavored gelatin over ¼ cup of cold water in the metal bowl of your stand mixer (or another large heatproof bowl if you are using a hand mixer). Let it stand for about 1 minute to soften or “bloom.”
- In a separate heavy saucepan, combine ¾ cup sugar, the light corn syrup, a pinch of salt, and the remaining ¼ cup of cold water.
- Bring the sugar mixture to a boil over medium heat, stirring constantly until the sugar is completely dissolved. Continue to boil without stirring until the liquid reaches 260ºF (127ºC) on a candy thermometer.
- Once the syrup reaches the correct temperature, begin beating the bloomed gelatin mixture in your stand mixer at medium speed. Carefully and slowly pour the hot syrup into the gelatin mixture in a thin, steady stream, taking care to avoid pouring it onto the sides of the bowl or directly onto the beaters.
- After all the syrup has been added, increase the mixer speed to high and continue beating for about 5 minutes. The mixture will become thick, white, glossy, and increase significantly in volume, resembling fluffy marshmallow cream.
- Add the vanilla extract and beat until it is just combined. Spoon the marshmallow topping onto the center of the cooled pie, gently spreading it towards the edges with an offset spatula if needed, creating a beautiful domed effect.
- Chill the pie, uncovered, for 1 hour to allow the marshmallow to set slightly. Then, loosely cover the pie with plastic wrap (you can spray the plastic wrap lightly with non-stick cooking spray to prevent sticking) and chill for an additional 3 hours, or until fully set.
- To serve: For that iconic toasted marshmallow look, use a handheld kitchen torch to brown the top of the pie until golden. Alternatively, place the chilled pie on a baking sheet, cover the sides of the crust with foil to protect them, and broil (about 4 inches from the heating element) for approximately 3 minutes, or until the top is golden brown. Watch it very closely to prevent burning.
- Allow the pie to cool for about 10 minutes after toasting before cutting into slices.
- For the easiest and cleanest slicing, dip a large, sharp knife into hot water, wipe it dry, and then make your cut. Repeat this process for each slice, reheating and cleaning your knife as needed.
Notes
The homemade marshmallow topping, while delicious, can be a bit tricky. If you’re short on time or prefer a simpler approach, you can opt to use store-bought large marshmallows. Simply cut them in half and arrange them over the chocolate filling. Then, use a culinary torch or your oven’s broiler to brown them for a classic toasted effect. Remember to watch carefully when broiling to prevent burning.
Nutrition Information:
Yield:
8
Serving Size:
1 slice
Amount Per Serving (Estimate):
Calories: 527
Total Fat: 32g
Saturated Fat: 19g
Trans Fat: 1g
Unsaturated Fat: 11g
Cholesterol: 87mg
Sodium: 203mg
Carbohydrates: 61g
Fiber: 2g
Sugar: 49g
Protein: 4g
This nutritional information is an estimate provided as a courtesy. Varying factors such as product types or brands purchased can change the nutritional information in any given recipe. This information comes from online calculators and is not guaranteed to be exact. To obtain the most accurate representation, you should calculate the nutritional information with the actual ingredients used in your recipe. You are solely responsible for ensuring that any nutritional information obtained is accurate.
HOW MUCH DID YOU LOVE THIS RECIPE?
Please leave a comment on the blog or share a photo on Pinterest!
