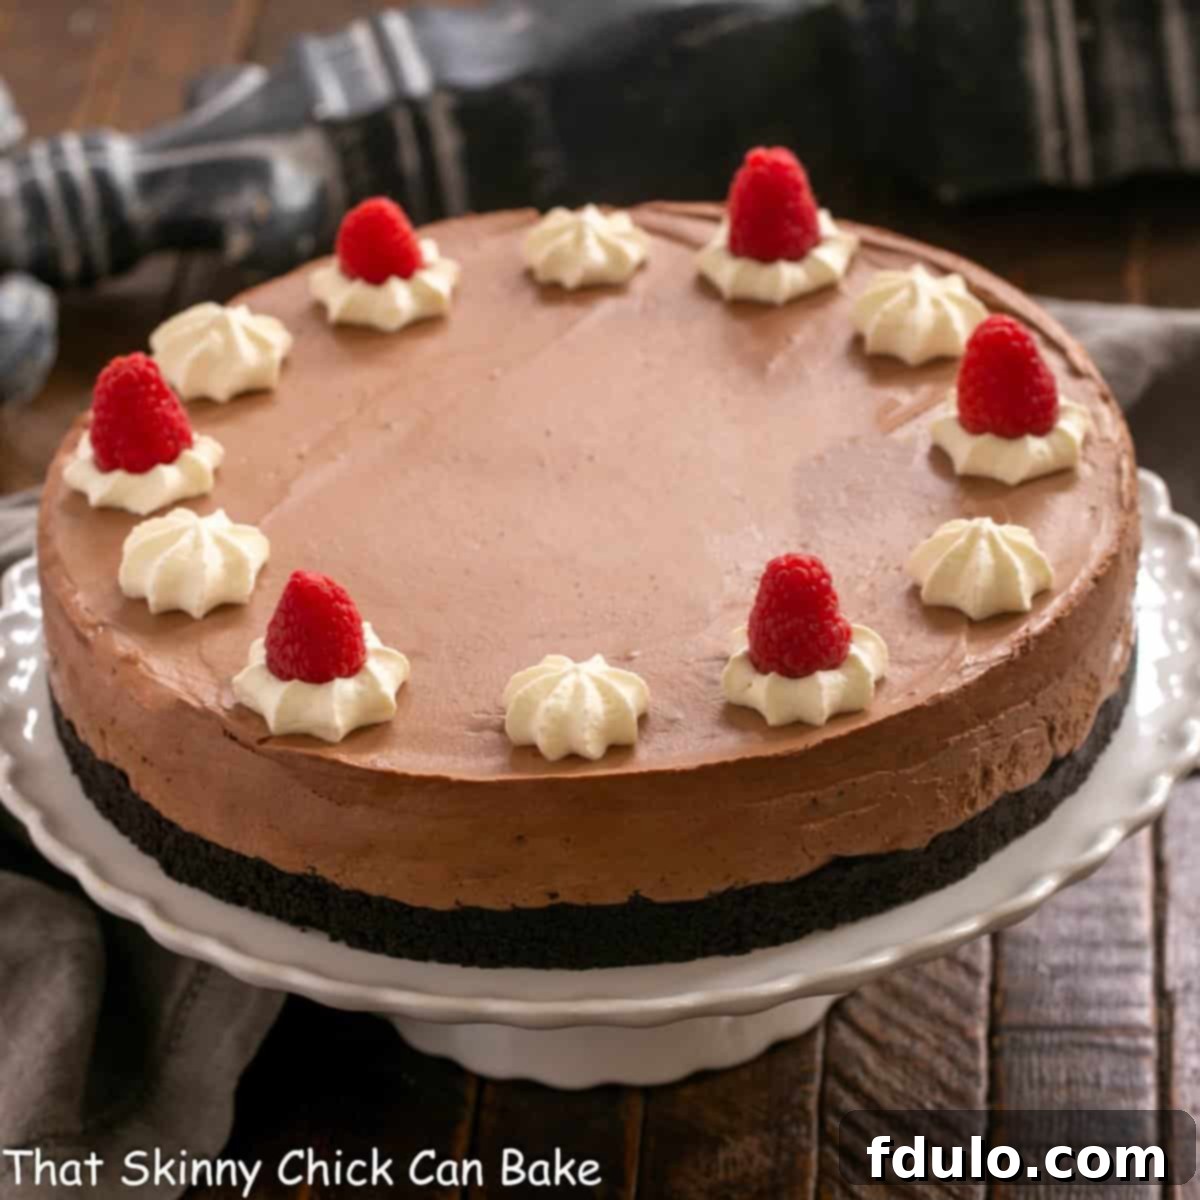
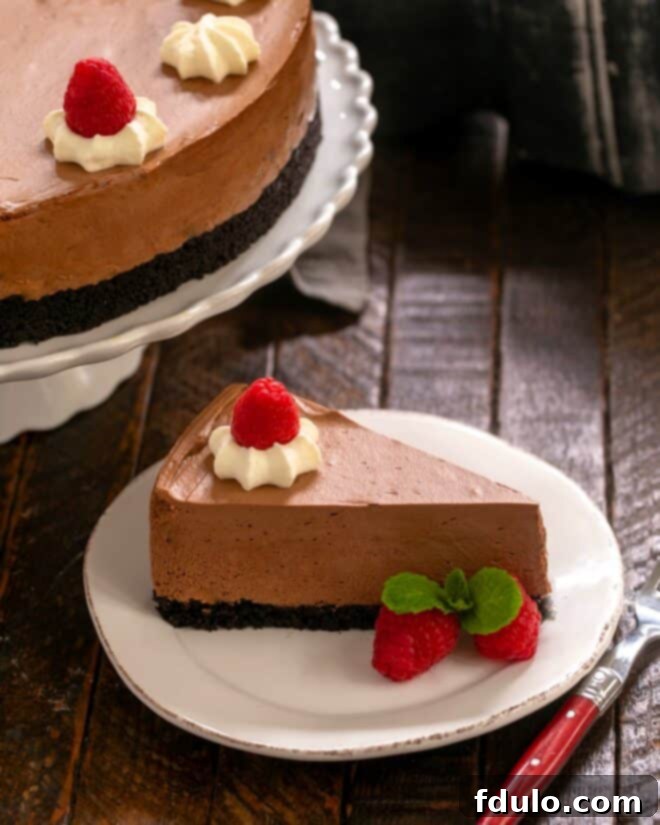
Indulge in the ultimate chocolate experience with our incredibly rich and ethereal Chocolate Mousse Cake. This dessert is a true masterpiece, featuring a crisp, buttery chocolate cookie crust generously filled with a dreamy, light-as-air chocolate mousse. Perfect for any special occasion or when you simply crave an unforgettable chocolate treat, this no-bake wonder is designed to impress with minimal effort.
This exquisite Layered Chocolate Mousse Cake boasts a foundation of a simple yet satisfying chocolate cookie crust. It’s then crowned with a luxurious mousse, meticulously crafted from heavy cream, fresh eggs, and premium semi-sweet chocolate. The combination creates a symphony of textures and deep chocolate flavor that will captivate every palate.
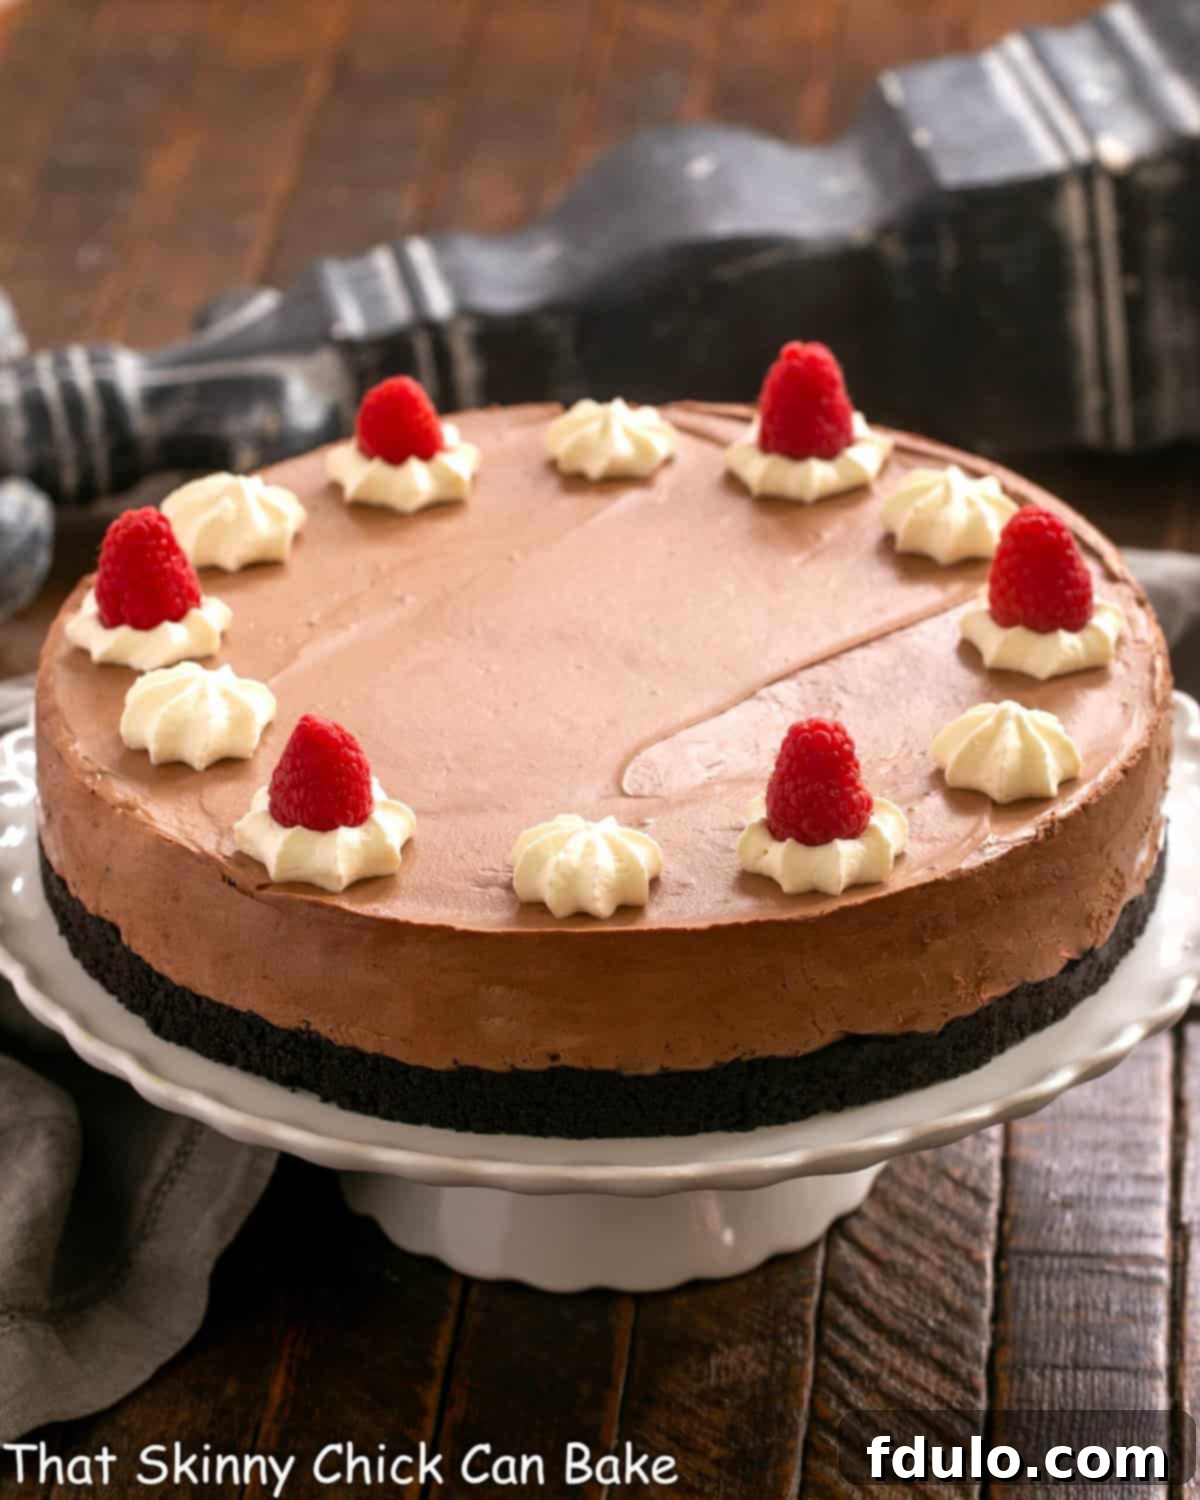
Why You Must Make This Decadent Chocolate Mousse Cake
If your family shares a profound love for all things chocolate, then this easy chocolate mousse cake recipe is destined to become a cherished favorite. It’s more than just a dessert; it’s an experience that promises smiles and satisfied sighs. Here are several compelling reasons why this decadent treat deserves a place in your culinary repertoire:
- Unforgettable Flavor & Texture: This cake offers a delightful contrast between its crunchy, buttery chocolate cookie crumb base and the incredibly smooth, rich, yet surprisingly light chocolate mousse topping. Each bite is a journey through deep cocoa notes and a melt-in-your-mouth texture that defines true indulgence.
- Effortless Elegance: Despite its sophisticated appearance and gourmet taste, this is an incredibly straightforward recipe, especially for a no-bake dessert. You don’t need to be a pastry chef to achieve stunning results, making it perfect for both novice and experienced bakers alike.
- Perfect for Any Occasion: Whether it’s a holiday gathering, a birthday celebration, or a simple weekend dessert, this chocolate mousse cake elevates any event. It’s particularly fantastic for holidays like Thanksgiving or Christmas when a show-stopping chocolate option is a must alongside traditional pies.
- Customizable Garnish: While beautiful on its own, this cake offers endless possibilities for customization. You can go all out with elegant chocolate leaves, fresh berries, a dusting of cocoa powder, or a simple swirl of whipped cream to match your aesthetic and personal preference.
- No Oven Required: For those who dread turning on the oven, especially during warmer months or when oven space is limited during holiday meal prep, this no-bake recipe is a true lifesaver. It simplifies your baking process without compromising on flavor or presentation.
This year, as we gather for special moments, I find myself filled with immense gratitude – for cherished friendships, family bonds, and the simple joys of life. And while my heart often yearns for the sweet comfort of cookie dough, this chocolate mousse cake has certainly staked its claim for a top spot. We traditionally feature pumpkin pie, but the demand for a secondary chocolate dessert is undeniable. While French silk pie has long been a contender, this year, I decided to embrace the mousse. The vision of a glamorous dark chocolate leaf garnish for the holidays was ambitious, and while my initial attempt yielded more delicious shards for my husband than perfectly formed leaves, the phenomenal taste of the cake itself more than made up for any minor imperfections. The consensus was clear: this was one of the best desserts enjoyed in months. You truly need to experience this cake – and soon!
Recipe Tips for a Perfect Chocolate Mousse Cake
Achieving a perfectly smooth, rich, and well-set chocolate mousse cake is simpler than you might think with these expert tips. Pay close attention to these details, and you’ll be rewarded with a dessert that tastes as good as it looks.
- PRO-Tip: Temperature Control for Chocolate and Eggs: It is crucial that the melted chocolate has adequate time to cool slightly before you incorporate the eggs. If the chocolate is too hot, the eggs will scramble, resulting in an undesirable texture and flavor in your mousse. Aim for chocolate that is warm to the touch, but not hot. This step prevents any bits of cooked egg from marring the silky smooth consistency of your mousse.
- PRO-Tip: Sifting Powdered Sugar for Smoothness: As explicitly stated in the recipe, always sift your powdered sugar before adding it to the heavy cream. Powdered sugar tends to clump together, and these lumps will not easily dissolve in cold cream, leaving your mousse with a gritty or uneven texture. Sifting ensures a uniform, smooth, and luxurious mousse every time.
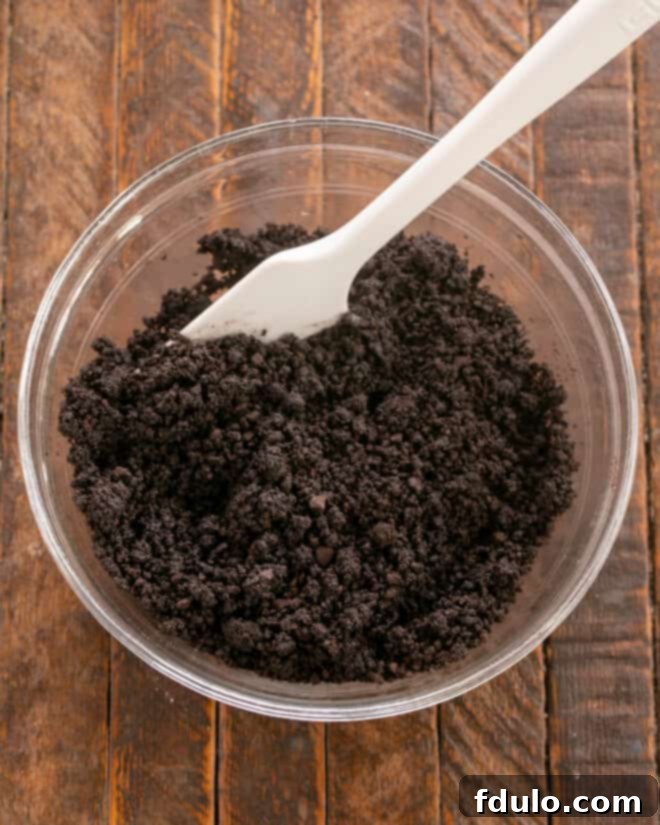
- Crafting the Perfect Cookie Crust: The original recipe called for Nabisco Famous Wafers, which have unfortunately been discontinued. Don’t fret! You have excellent alternatives. You can either purchase a box of pre-made chocolate cookie crumbs, often found in the baking aisle of larger supermarkets, or easily create your own. For a homemade crust, process about 35 Oreo cookies (with the cream filling carefully removed) in a food processor until fine crumbs form. The quality of your crust directly impacts the overall enjoyment of this cake, so choose a good chocolate cookie.
- The Subtle Magic of Vanilla: Though optional, adding a couple of teaspoons of pure vanilla extract into the mousse mixture at the final stage can significantly enhance the overall flavor profile. Vanilla is a remarkable flavor enhancer that rounds out and deepens the notes of chocolate, creating a more complex and satisfying taste experience. Don’t skip it if you have it!
- Patience is Key: Chilling for Perfection: One of the most critical steps for a successful no-bake chocolate mousse cake is sufficient chilling time. This cake requires at least 6 hours in the refrigerator to properly set. This allows the mousse to firm up, making it easier to slice and ensuring it holds its beautiful shape. Rushing this step will result in a runny or messy cake. For best results, consider making it the day before you plan to serve it.
- PRO-Tip: For Clean, Elegant Slices: To achieve impeccably clean slices that showcase the layers of your mousse cake, use a hot, dry knife. Run your knife under very hot water (from the tap or a teapot) and then wipe it completely dry. Make each cut with a single, swift motion. After each slice, repeat the process of heating and drying the knife to prevent sticking and ensure every piece is picture-perfect.
Ingredient Notes for Your Chocolate Mousse Cake
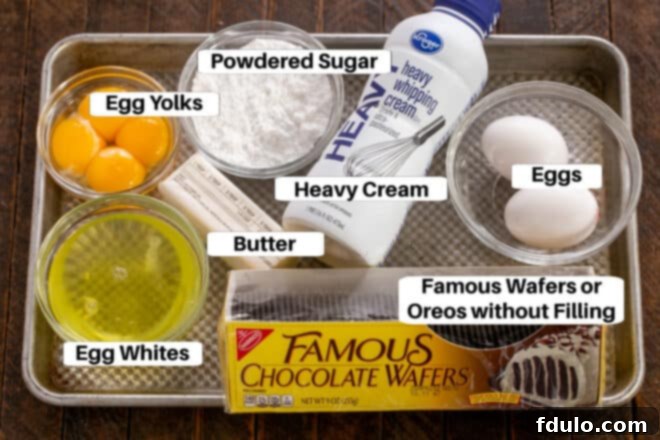
The quality of your ingredients is paramount to the success of this chocolate mousse cake. Choosing fresh, high-quality components will ensure a superior flavor and texture that truly stands out. Here’s a detailed look at each key ingredient:
- Butter: For the crust, either salted or unsalted butter works well. A touch of salt in salted butter can actually act as a flavor enhancer, subtly bringing out the richness of the chocolate. Ensure it is melted and slightly cooled before mixing with the cookie crumbs.
- Powdered Sugar: Also known as confectioners’ sugar, this ingredient is essential for sweetening the whipped cream and ensuring a smooth texture. Always sift it before use to remove any small lumps that could otherwise create a grainy consistency in your mousse. This step is non-negotiable for a truly silky finish.
- Nabisco Famous Wafers or Oreos: As previously mentioned, Nabisco Famous Wafers are no longer produced. The best substitute for a rich chocolate crust is 35 Oreo cookies. Carefully remove the cream filling from each Oreo before processing them into fine crumbs. This ensures a consistent chocolate flavor without the added sweetness and texture of the filling. Alternatively, pre-packaged chocolate cookie crumbs offer a convenient option.
- Semi-sweet Chocolate: The heart of your mousse! I highly recommend using a high-quality brand like Ghirardelli for its superior flavor and melting properties. Choose a good quality semi-sweet chocolate bar or baking chips. It’s best to chop the chocolate before melting to ensure even melting, and then allow it to cool slightly before combining with the eggs.
- Eggs: You will need both whole large eggs and separated large eggs for this recipe. For easier separation with less risk of yolk breakage, it’s best to separate eggs when they are cold. However, for optimal volume and incorporation, allow the egg whites to come to room temperature before whipping. Room temperature whites whip up higher and faster, creating a more stable foam crucial for the mousse’s airy texture.
- Heavy Cream: This is a key component for the mousse’s richness and structure. Look for heavy cream with a minimum of 35% butterfat content. This higher fat content allows the cream to whip up into stable, firm peaks, providing the necessary body and lightness for the mousse. Avoid light cream or half-and-half, as they will not whip correctly.
- Vanilla Extract: To truly elevate the chocolate flavor, use pure vanilla extract, not imitation vanilla. High-quality pure vanilla, such as Nielsen-Massey, offers a complex aroma and taste that complements and deepens the chocolate notes beautifully. It’s an optional addition, but highly recommended for an unparalleled flavor experience.
How to Make Your Decadent Chocolate Mousse Cake
Creating this exquisite Chocolate Mousse Cake is a rewarding process, broken down into simple, manageable steps. Follow these instructions carefully to ensure a perfect, show-stopping dessert.
How to Make Chocolate Leaves to Garnish Your Mousse Cake
Adding a touch of artistic flair to your Chocolate Mousse Cake can elevate it from delicious to truly spectacular. Chocolate leaves are an elegant garnish that, with a bit of practice, can beautifully adorn your dessert. While my initial attempt at these delicate decorations proved more challenging than expected, resulting in delicious, albeit broken, shards, the experience confirmed that the effort is well worth it for the visual appeal and textural contrast they provide. Here’s a more refined approach to crafting these edible masterpieces:
First, source clean, non-toxic leaves from your garden or a floral shop. Lemon leaves are a popular choice due to their sturdy structure and beautiful shape, but any food-safe, clean leaf with a defined vein pattern will work. Wash and thoroughly dry the leaves. Next, gently melt a quantity of high-quality semi-sweet chocolate (the same used in your mousse is ideal) using a double boiler or microwave, ensuring it’s smooth and tempered if possible for the best shine and snap. Allow the chocolate to cool slightly until it’s still pourable but not overly hot.
Using a small, clean pastry brush or a spatula, carefully paint a thin, even layer of melted chocolate onto the underside of each leaf (the side with the more prominent veins). These veins will create a natural texture on your chocolate leaves. For extra durability, you can apply a second thin layer once the first has partially set. Place the painted leaves on a parchment-lined baking sheet and chill them in the refrigerator (or freezer for just a few minutes) until the chocolate is completely firm. The key is to ensure the chocolate is fully set before attempting to peel.
Once firm, gently peel the natural leaf away from the hardened chocolate. The goal is to separate them cleanly, leaving the beautiful chocolate impression intact. Expect a few breakages initially – it’s part of the learning curve! These chocolate fragments are still delicious for snacking or sprinkling over the cake. Arrange your intact chocolate leaves artfully on top of the chocolate mousse cake, perhaps alongside some vibrant fresh raspberries or other berries for a delightful pop of color and freshness. The combination of rich chocolate, tart berries, and the elegant garnish will make your dessert an absolute showstopper.
Frequently Asked Questions About Chocolate Mousse Cake
Mousse recipes that include raw eggs, as this one does, carry a small, inherent risk of salmonella contamination, which can cause food poisoning. For this reason, it is generally recommended that dishes containing raw eggs not be served to vulnerable populations, including very young children, the elderly, pregnant women, or individuals with compromised immune systems. If you are concerned, you can look for recipes that use pasteurized eggs or a cooked egg custard base to ensure complete safety.
To achieve the best volume and most stable stiff peaks when whipping egg whites, separate your eggs when they are cold (this makes the yolks less likely to break). However, allow the egg whites to come to room temperature before you begin whipping them. Room temperature egg whites have less surface tension and will incorporate more air, resulting in a higher, fluffier volume and a more stable foam.
Mousse, in its simplest form, is a light, airy dish that can be either sweet or savory. Its characteristic fluffiness comes from the careful incorporation of whipped egg whites, whipped cream, or both. A mousse cake, however, takes this concept further by being a layered dessert. It typically features a base layer such as a cookie crust (as in this recipe) or traditional cake layers, with the mousse serving as the primary filling or topping.
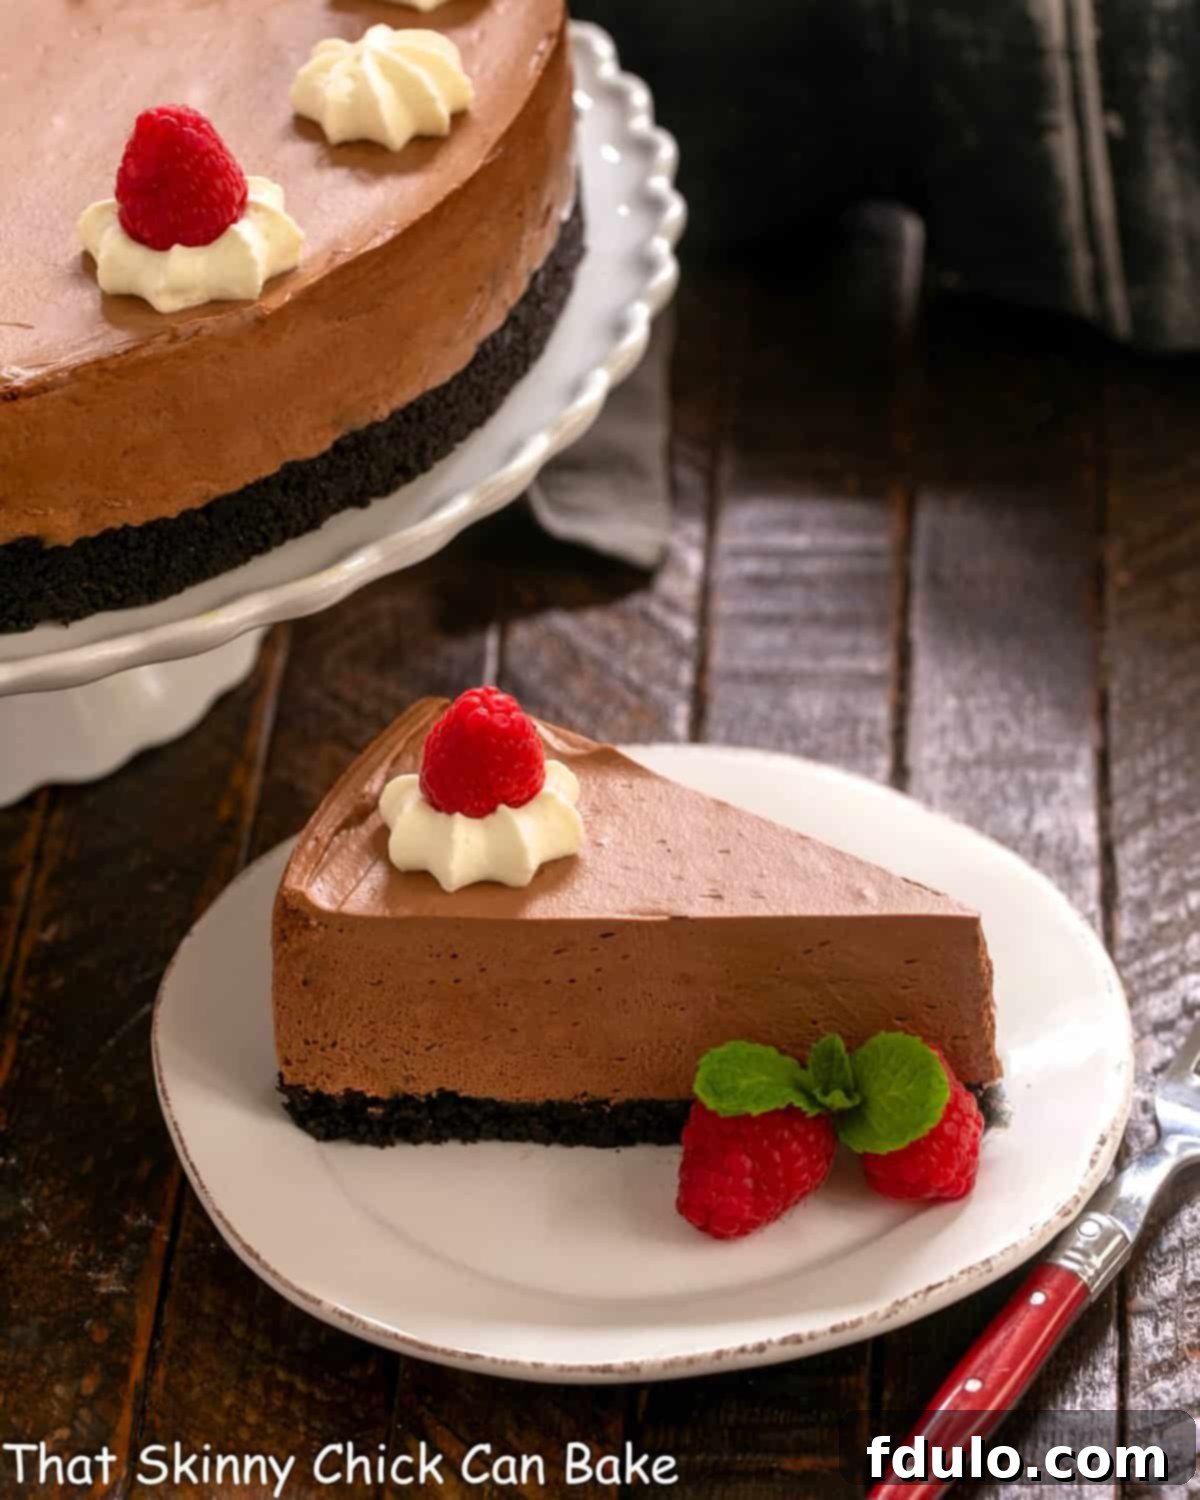
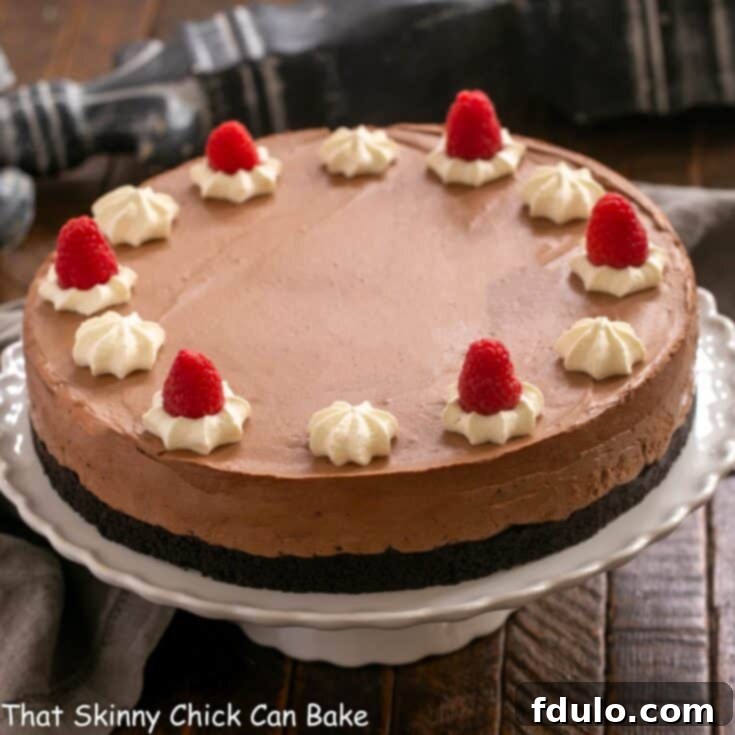
There are many delightful ways to garnish a mousse cake to enhance its visual appeal and flavor. A classic and simple method is to pipe swirls or stars of sweetened whipped cream around the top edge of the cake. You can then place a fresh berry (like raspberries or strawberries) on top of every or every other whipped cream star. For a more sophisticated look, try making chocolate leaves by painting melted chocolate onto food-safe leaves, chilling, and then carefully peeling the chocolate off. Alternatively, a simple dusting of cocoa powder, elegant chocolate shavings, or a medley of fresh seasonal berries makes for a beautiful and delicious presentation. A dollop of whipped cream and a few chocolate curls on individual slices also makes for a stunning serving.
This Chocolate Mousse Cake can be stored, covered loosely with plastic wrap or in an airtight container, in the refrigerator for up to 3-4 days. For longer storage, it freezes exceptionally well. Simply wrap the entire cake or individual slices tightly in plastic wrap and then aluminum foil. It can be frozen for up to 1 month. Thaw in the refrigerator overnight before serving.
Yes, while semi-sweet chocolate is recommended for a balanced flavor, you can certainly experiment with different types of chocolate. Using dark chocolate will result in a more intense and less sweet mousse, perfect for true dark chocolate enthusiasts. Milk chocolate can be used for a sweeter, creamier, and milder chocolate flavor. However, be aware that melting and cooling times might vary slightly depending on the chocolate’s cocoa content and brand.
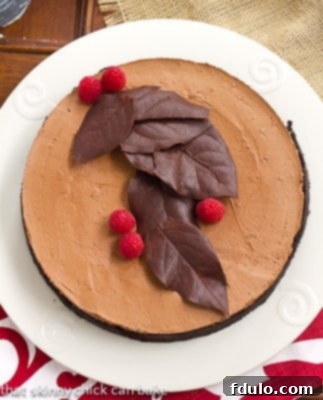
Photo from 2015, showcasing a classic chocolate garnish created by painting melted chocolate onto pesticide-free lemon leaves, chilling, and carefully peeling the leaf from the hardened chocolate.
You May Also Like These Irresistible Chocolate Desserts
- Easy Chocolate Mousse from Spend with Pennies – A quick fix for your chocolate cravings.
- Peanut Butter Chocolate Mousse Cake – A delightful combination of two beloved flavors.
- Layered Chocolate Mousse Cake – Another variation for those who love layered desserts.
- Easy Chocolate Mousse Tart – A charming individual-sized option for your dessert table.
- Explore all my best Chocolate Dessert Recipes for more inspiration.
Stay connected and share your culinary creations with me through social media! Follow @ Instagram, Facebook, and Pinterest. Don’t forget to tag me when you try one of my recipes! If you love the results as much as I do, please consider giving it a 5-star rating in the recipe section below.
Chocolate Mousse Cake
30 minutes
30 minutes
16 servings
A decadent, easy-to-make chocolate dessert featuring a rich chocolate cookie crust and an airy mousse filling! Perfect for holidays or any special occasion.
Rating: ★★★★★ (Based on 42 reviews)
Ingredients
For the Crust:
- 35 Regular Oreos with the cream filling removed
- 6 tablespoons butter, melted
For the Mousse Filling:
- 16 ounces semi-sweet chocolate, melted and cooled
- 2 large eggs (whole)
- 4 large eggs, separated (yolks and whites)
- 2 cups heavy cream (35% butterfat)
- 6 tablespoons powdered sugar, sifted
- 2 teaspoons pure vanilla extract (optional, but recommended)
Instructions
- Prepare the Crust: Crush the cream-removed Oreo cookies by pulsing them in a food processor until they form fine, even crumbs.
- Form the Crust: Add the melted butter to the cookie crumbs and process again until the mixture is well combined and resembles wet sand. Pour this mixture into the bottom of a buttered 10-inch springform pan. Pat the crumbs firmly and evenly onto the bottom of the pan to create a compact crust.
- Chill the Crust: Refrigerate the prepared crust for at least 30 minutes, or longer, to allow it to set firmly. This prevents the crust from becoming too crumbly when sliced.
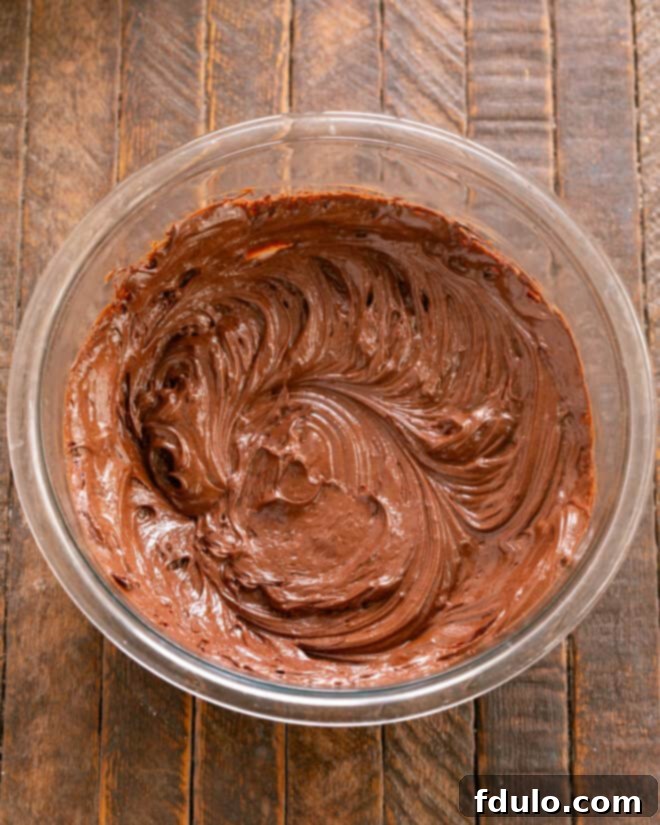
- Prepare Chocolate Mixture: In a large mixing bowl, combine the slightly cooled melted chocolate with the two whole eggs. Mix thoroughly until smooth.
- Add Yolks: Incorporate the 4 egg yolks into the chocolate mixture. Beat this mixture with an electric mixer for about 5 minutes, ensuring to scrape down the sides of the bowl periodically to fully combine all ingredients.
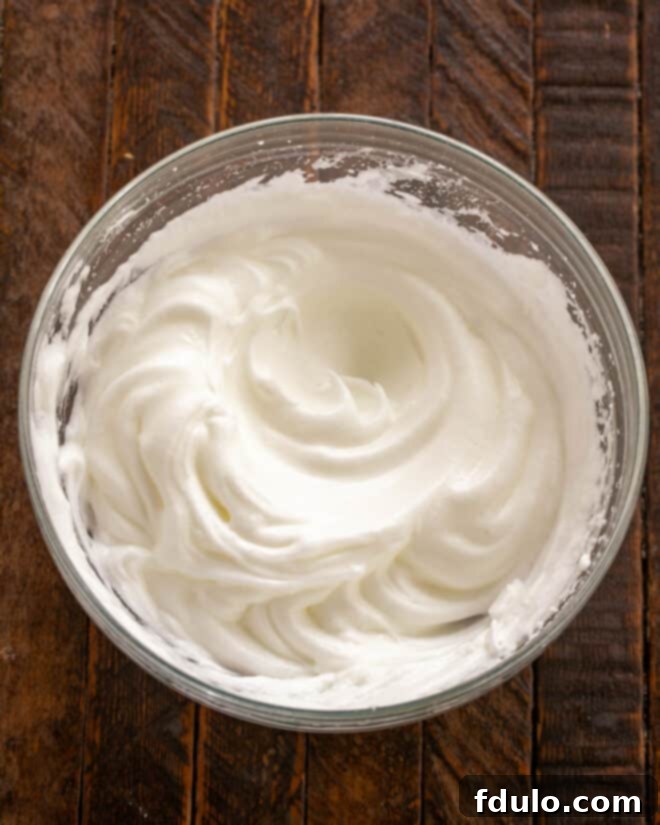
- Whip Egg Whites and Cream: In a separate, clean bowl, whip the 4 egg whites until stiff peaks form. Set aside. In a third bowl, whip the heavy cream with the sifted powdered sugar until stiff peaks form. Be careful not to over-whip the cream, as it can turn grainy.
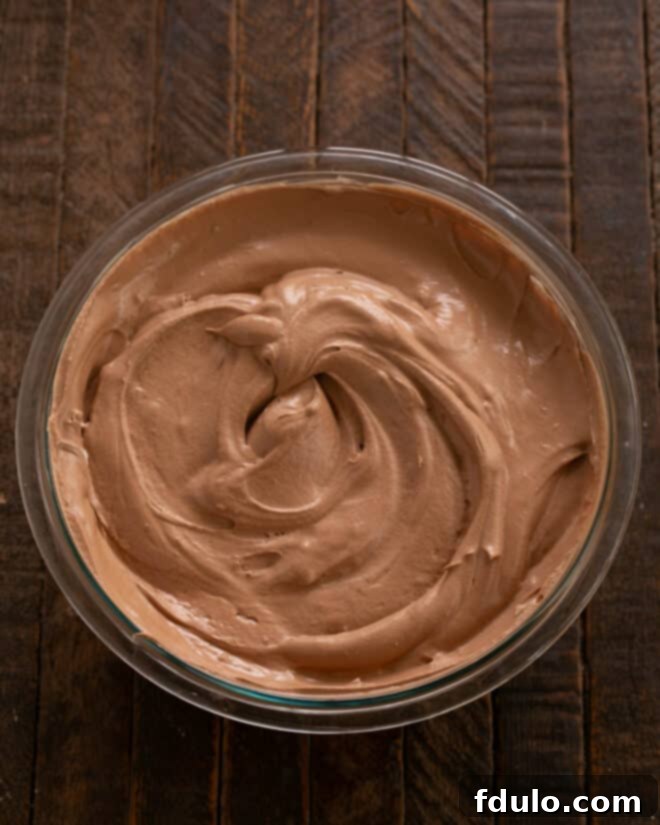
- Combine Mixtures: To lighten the chocolate mixture, gently stir in about a quarter of the whipped egg whites and a quarter of the whipped cream. Then, carefully fold in the remaining whipped egg whites and whipped cream using a spatula, working gently to maintain as much air as possible until everything is just blended. If using, fold in the vanilla extract at this stage.
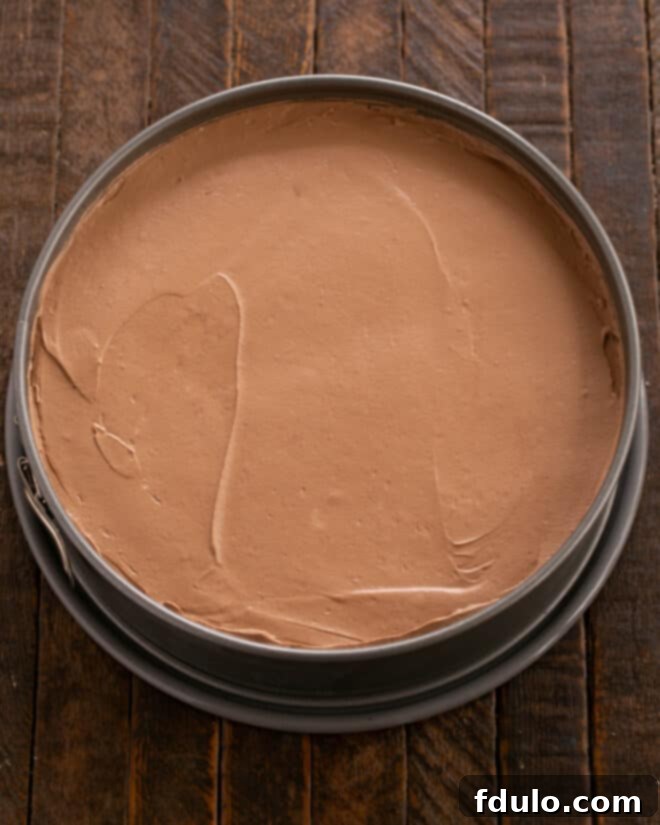
- Assemble and Chill: Carefully scrape the chocolate mousse filling into the chilled cookie crust in the springform pan. Smooth the top if necessary to create an even surface. Refrigerate the cake for a minimum of 6 hours, or preferably overnight, to allow the mousse to set completely.
- Garnish and Serve: Once thoroughly chilled and set, carefully remove the sides of the springform pan. Garnish your beautiful Chocolate Mousse Cake with fresh berries and sweetened whipped cream, or delicate homemade chocolate leaves for an extra touch of elegance. Slice with a hot, dry knife and serve!
Notes
This recipe is adapted from Creme de Colorado.
Please note that the “Total Time” listed in the recipe card does not include the essential chilling time needed for the mousse to set, which is at least 6 hours.
This Chocolate Mousse Cake freezes exceptionally well. For long-term storage, wrap the cooled cake tightly in plastic wrap, then an additional layer of aluminum foil. It can be stored in the freezer for up to one month. Thaw overnight in the refrigerator before serving.
Recommended Products
As an Amazon Associate and member of other affiliate programs, I earn from qualifying purchases.
- KitchenAid 9-Speed Digital Hand Mixer
- Food Processor
- 10-inch Springform Pan
Nutrition Information:
Yield:
16
Serving Size:
1
Amount Per Serving:
Calories: 387Total Fat: 28gSaturated Fat: 16gTrans Fat: 1gUnsaturated Fat: 10gCholesterol: 115mgSodium: 136mgCarbohydrates: 33gFiber: 2gSugar: 24gProtein: 5g
HOW MUCH DID YOU LOVE THIS RECIPE?
Please leave a comment on the blog or share a photo on Pinterest
