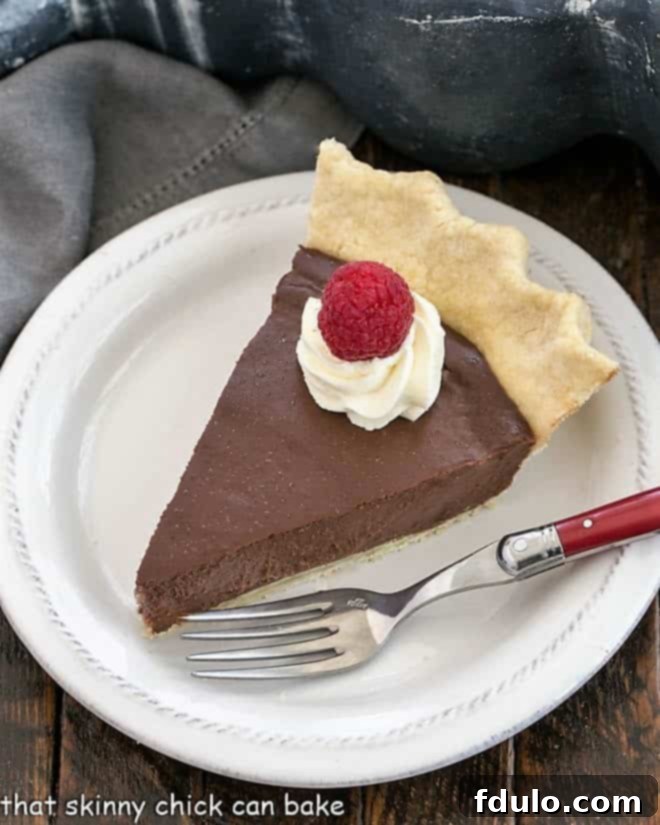
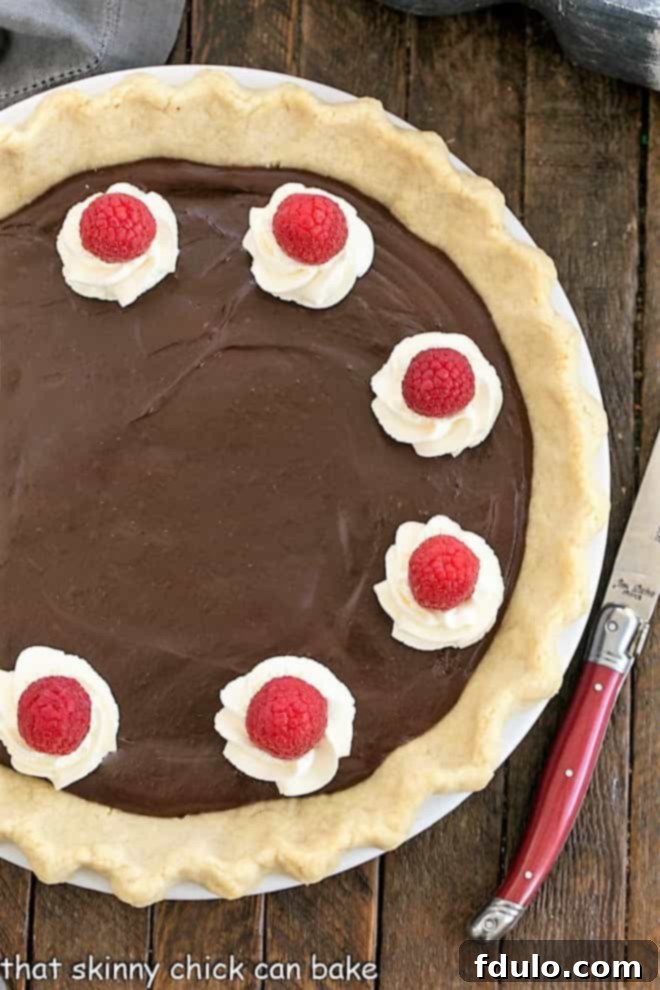
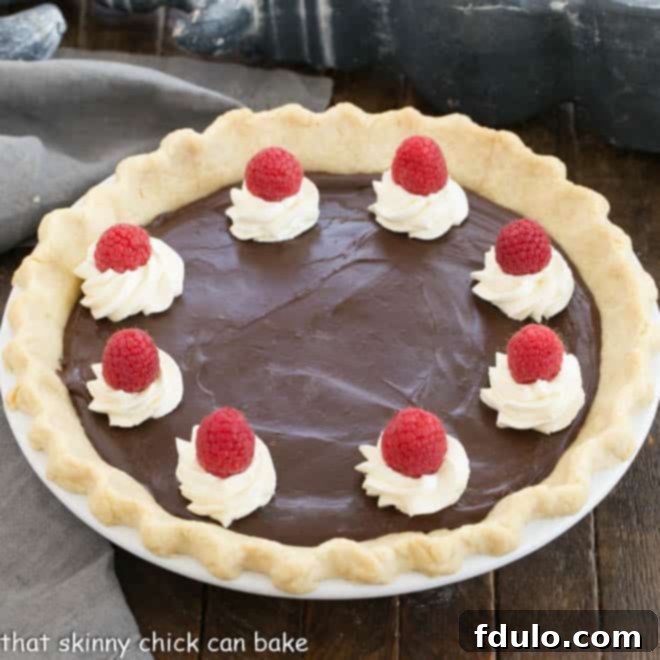
Indulge in the ultimate dessert experience with this exquisite Chocolate Pudding Pie, featuring a rich, velvety chocolate pudding nestled in a flaky, buttery pastry crust and crowned with a generous swirl of freshly whipped cream. It’s a classic treat that promises to tantalize your taste buds with every delightful bite!
There’s an undeniable magic to a perfect slice of Chocolate Pie. For many families, including ours, it’s more than just a dessert; it’s a cherished tradition, a staple on holiday tables, and a comforting presence at family get-togethers. While crusts and fillings might occasionally vary, one thing remains constant: the irresistible allure of chocolate. This recipe elevates that classic love for chocolate into a luxurious, creamy pie that’s surprisingly simple to master.

The Irresistible Allure: Why This Chocolate Pudding Pie Will Be Your New Favorite
There are countless reasons why this particular chocolate pudding pie stands out and why it’s destined to become a beloved fixture in your dessert repertoire. It’s more than just a sweet treat; it’s an experience, a journey back to simpler times, and a celebration of pure, unadulterated chocolate bliss.
- A Dream Come True for Pudding Lovers: If your family adores creamy, decadent pudding, then a luscious chocolate cream pie is the natural next step. This pie takes the comforting essence of homemade pudding and transforms it into an elegant, show-stopping dessert that appeals to all ages. It’s the ultimate comfort food, elevated.
- Simplicity Meets Sophistication: At its heart, a cream pie is a testament to the beauty of simplicity: a rich, homemade pudding carefully piled into a perfectly baked crust and crowned with a cloud of whipped cream. This recipe guides you through creating a truly sublime chocolate pudding that forms the core of this irresistible dessert.
- Endless Crust Possibilities: While homemade pudding is a must for unparalleled flavor, this recipe offers incredible flexibility when it comes to the crust. If time is a constraint, don’t hesitate to use a store-bought graham cracker or chocolate cookie crust for a quick yet delicious shortcut. Alternatively, you can easily press a refrigerated sheet of pie dough into your favorite pie plate, bake it, and fill it once cooled. For those who enjoy baking from scratch, a homemade pastry crust offers a delightful texture contrast to the creamy filling. This adaptability makes it suitable for any occasion, from impromptu cravings to grand holiday feasts.
- A Timeless Classic: Chocolate pudding pie is a dessert that transcends generations. Its rich flavor and comforting texture evoke nostalgia, making it a perfect choice for bringing families together and creating new memories around the table. It’s a classic for a reason – everyone loves it!
- Perfect for Any Occasion: Whether it’s a festive holiday gathering, a casual Sunday dinner, or simply a desire for something sweet, this chocolate pudding pie fits the bill. It’s elegant enough for special events, yet approachable enough for an everyday treat. Plus, it can be made ahead, freeing up your time when entertaining.
My husband Bill, a man of discerning taste, once taught me an important lesson about pudding: “instant” was a no-go, but the box labeled “Cook and Serve” was entirely acceptable. I always found that distinction amusing, but it highlighted his appreciation for quality, even in the simplest desserts. While those boxed mixes have their place, crafting chocolate pudding from scratch, as we do in this recipe, yields a depth of flavor and a velvety texture that simply cannot be replicated. It’s this commitment to homemade goodness that truly elevates this chocolate pudding pie from good to absolutely unforgettable.

Mastering Your Chocolate Pudding Pie: Expert Tips & Tricks
Creating a truly magnificent chocolate pudding pie is an art, but it’s an accessible one with a few expert insights. Follow these tips to ensure your pie is nothing short of perfection every time:
- Choose the Right Pie Plate: For this recipe, a standard 9-inch pie plate is ideal. The first time I ventured into pie-making, I used a deep-dish pan and quickly realized it required more filling than the recipe provided, leading to a thinner slice. If you opt for a deep-dish, be prepared to scale up your pudding filling proportionally.
- Blind-Bake Your Pastry Crust: If you’re using a traditional pastry crust (whether homemade or store-bought), it is absolutely essential to blind-bake it first. This process ensures a crisp, flaky base that won’t become soggy once the moist pudding filling is added, as the pie will not undergo further baking.
- Crust Versatility is Key: The beauty of this creamy chocolate pudding filling is its adaptability. It pairs wonderfully with a variety of crusts. Depending on your preference and the occasion, choose between a classic homemade or store-bought pastry crust, a crunchy graham cracker crust, or a rich chocolate cookie crust. Each option brings its own unique texture and flavor profile to the finished pie.
- Timing is Everything for Cooling: Always allow your baked pie crust to cool completely before adding the filling. However, the pudding filling only needs to cool for about 5 to 10 minutes off the heat, with a few stirs, before being scraped into the prepared crust. Pouring it too hot can lead to a less stable crust, but waiting too long can make it too thick to spread smoothly.
- Chill Thoroughly Before Topping: For the best results and to ensure your pie sets beautifully, chill it uncovered for at least 2-4 hours, or even overnight, before adding the whipped cream topping. This allows the pudding to firm up and develop its full flavor. Small beads of moisture might develop on the surface during chilling, especially if the pie is covered too soon. Don’t fret; these “sweat” marks are completely normal and will not affect the taste or quality of your pie.
- Garnish with Flair: The presentation is almost as important as the taste! Garnish your finished pie as desired to add an extra touch of elegance. Fresh raspberries and delicate chocolate curls are classic choices that offer a lovely contrast in color and flavor. Other ideas include a dusting of cocoa powder, a sprinkle of mini chocolate chips, or even a few fresh mint leaves for a pop of green.
- Quality Chocolate Matters: Since chocolate is the star ingredient, invest in good quality semi-sweet chocolate. This will significantly impact the depth and richness of your pudding filling. While chocolate chips work, a chopped chocolate bar will melt more smoothly and often has a better flavor.
- Proper Storage: Store any leftover pie loosely covered in the refrigerator. While it’s best enjoyed within 2-3 days, the flavors often deepen overnight.

Crafting the Perfect Velvety Chocolate Pudding Filling
The heart of any exceptional chocolate pudding pie lies in its filling. Our homemade chocolate pudding is rich, smooth, and utterly delightful. Puddings made from scratch often rely on eggs as a primary thickening agent, and the goal is to gently cook these eggs to achieve a silky texture, completely integrated into the pudding, rather than ending up with unsightly (and unappetizing) scrambled bits. Here’s a detailed guide to achieving pudding perfection:
- Start with Dry Ingredients in a Heavy-Bottom Saucepan: Begin by whisking together all the dry ingredients – sugar, cornstarch, cocoa powder, and a pinch of salt – in a heavy-bottom saucepan. The “heavy-bottom” is crucial here. A flimsy or thin-bottomed pan won’t conduct heat evenly, which dramatically increases the risk of the mixture scorching and sticking to the bottom. While you can use any pan you have, if it’s on the lighter side, you’ll need to be extra vigilant and stir almost constantly to prevent burning.
- Incorporate the Egg Yolks: Once your dry ingredients are well combined, whisk in the egg yolks until they are thoroughly incorporated. The yolks contribute to the pudding’s richness, color, and smooth texture. Don’t discard those reserved egg whites! They can be used for a variety of delightful treats, such as light and airy meringue cookies, elegant pavlova, delicate macarons, or a classic lemon meringue pie.
- Slowly Add Liquids and Cook: Gradually add the milk, then the cream, whisking continuously to ensure a smooth mixture with no lumps. Place the saucepan over medium-high heat and continue to whisk without interruption. This constant motion is key to preventing the eggs from scrambling and the mixture from sticking. The pudding will begin to thicken as it heats.
- Bring to a Boil and Thicken: Keep whisking until the mixture comes to a full boil and visibly thickens. You’ll notice it coating the back of a spoon. Once it reaches this stage, continue to cook and stir for one more minute to ensure the cornstarch is fully activated and the eggs are cooked through. This guarantees a stable and properly set pudding.
- PRO-Tip: The Right Whisk Matters: For optimal mixing and to ensure you scrape every bit from the bottom and corners of the pan, use a flat whisk. Its shape allows it to reach into those often-missed areas, preventing scorching and promoting an even cook.
- Off the Heat: Chocolate and Vanilla Infusion: Remove the saucepan from the heat immediately after it has thickened. Stir in the chopped semi-sweet chocolate and vanilla extract. Whisk gently until the chocolate is completely melted and the pudding is silky smooth. The residual heat from the pudding will melt the chocolate perfectly, creating a glossy, rich filling.
- Pour and Chill: Allow the pudding to rest for about 5 minutes, stirring occasionally, to let it cool slightly and prevent a skin from forming. Then, pour the warm pudding into your prepared pie shell. Smooth the top with a spatula. Chill the pie thoroughly for at least two hours (or preferably longer) before adorning it with whipped cream and any desired garnishes. This chilling period is crucial for the pudding to set properly, resulting in a firm yet creamy texture perfect for slicing.
Frequently Asked Questions About Chocolate Pudding Pie
While both pudding and custard are creamy, dessert-like mixtures often used in pies, their primary difference lies in their thickening agents. Custards typically rely solely on eggs (and sometimes cream) to thicken when cooked, resulting in a richer, denser, and often firmer texture. Puddings, on the other hand, use a combination of eggs and a starch, such as cornstarch or flour. This starch gives pudding a lighter, silkier, and often more spoonable consistency. Both are delicious and frequently serve as fantastic pie fillings, but puddings tend to be a bit more forgiving in their preparation and yield a delightfully smooth mouthfeel.
Blind baking, also known as pre-baking, is the process of baking a pie crust before adding any filling. This technique is essential for pies like this chocolate pudding pie, which have a “no-bake” filling (meaning the filling itself is not cooked in the oven). Blind baking ensures that your pastry crust is fully cooked, crisp, and golden brown, preventing it from becoming soggy or undercooked once it’s filled with a moist, chilled pudding. It creates a robust foundation for your creamy dessert.
Blind baking a pie crust is a straightforward process that guarantees a perfect base for your pie. Here’s how to do it effectively:
1. To begin, gently fit your rolled-out pie dough into your chosen pie plate, ensuring it’s evenly distributed and snugly against the sides.
2. Trim any excess dough from the edges, then flute or crimp the edges to create an attractive border.
3. Preheat your oven to the temperature specified in your recipe (usually around 375-400°F or 190-200°C).
4. Line the raw pie crust with a sheet of parchment paper. This prevents the pie weights from sticking to the dough and provides an even surface.
5. Fill the parchment-lined crust with pie weights. These can be ceramic pie weights purchased specifically for this purpose, or you can use dried beans or rice that you reserve solely for blind baking. The weights are crucial for weighing down the bottom of the crust, preventing it from puffing up and ensuring it retains its shape during baking.
6. Alternatively, for a quicker but less effective method, you can simply prick the bottom of the crust all over with a fork. This technique, called docking, creates small holes that allow steam to escape, reducing puffiness. However, pie weights offer superior results.
7. Bake for the initial specified time (e.g., 15-20 minutes) until the edges are set. Carefully remove the pie from the oven, lift out the parchment paper (along with the weights), and return the crust to the oven for another 10-15 minutes, or until the bottom is golden brown and appears dry. This second bake ensures the bottom is fully cooked.
8. Once baked, remove the crust from the oven and let it cool completely on a wire rack before filling. A cool crust prevents the pudding from melting or becoming too warm upon contact.
Absolutely! This chocolate pudding pie is an excellent make-ahead dessert, which makes it perfect for entertaining. You can bake the crust and prepare the pudding filling a day or two in advance. Store the cooled crust at room temperature and the chilled pudding in an airtight container in the refrigerator. Assemble the pie the day before serving, allowing ample time for it to chill and set. For the freshest look, add the whipped cream topping just a few hours before serving.
Leftover chocolate pudding pie should be stored in the refrigerator. It’s best to cover it loosely with plastic wrap or aluminum foil to prevent condensation and keep the crust from getting soggy, especially if it already has the whipped cream topping. It will remain delicious for 2-3 days. If you haven’t added the whipped cream, the pie can last a bit longer, up to 4 days, when tightly covered.
You May Also Like These Delicious Desserts:
- Magnolia Bakery Banana Pudding Recipe from Call me PMc
- Mississippi Mud Pie
- White Chocolate Pudding with Frangelico
- Fresh Peach Pudding Recipe
- Hot Fudge Pudding Cake
- Southern Banana Pudding
- More of the Best Dessert Recipes
Stay in touch through social media @ Instagram, Facebook, and Pinterest. Don’t forget to tag me when you try one of my recipes! And if you love the results, please give it a 5-star rating in the recipe card.

Chocolate Cream Pie Recipe
30 minutes
10 minutes
40 minutes
8 servings
A buttery pastry crust, creamy chocolate filling and whipped cream topping for a divine dessert!
Ingredients
Filling:
- ⅔ cup sugar
- ¼ cup cornstarch
- 2 tablespoon cocoa powder
- Pinch of salt
- 6 egg yolks
- 2 cups 2% milk
- ½ cup whipping cream
- 6 ounces semi-sweet chocolate, chopped
- 1 tablespoon dark rum
- 1 teaspoon vanilla
- 9-inch pie crust of your choice
Topping:
- 1 cup whipping cream
- ¼ cup powdered sugar
- ½ teaspoon dark rum
- ½ teaspoon vanilla
Instructions
- Whisk the sugar, cornstarch, cocoa powder, and salt together in a medium saucepan.
- Whisk in egg yolks till well combined.
- Slowly whisk in milk, then cream, and continue to whisk and cook over medium-high heat.
- Once the mixture comes to a boil, cook and stir for one more minute.
- Remove from heat and stir in chocolate. Whisk till smooth.
- Add rum and vanilla. Let rest for about 5 minutes, stirring occasionally, then pour into baked pie crust.
- Chill till cold, at least two hours.
- Beat together the topping ingredients till the mixture comes to firm peaks. Pile onto the middle of the pie or use an open star tip and pipe whipped cream over the top of the pie. Garnish as desired with berries or chocolate curls.
Notes
Adapted from Bon Appetit.
Total time does not include chilling time.
Recommended Products
As an Amazon Associate and member of other affiliate programs, I earn from qualifying purchases.
- Flat Whisk
- Egg separator
- Silicone Spatulas
Nutrition Information:
Yield:
8
Serving Size:
1
Amount Per Serving:
Calories: 528Total Fat: 33gSaturated Fat: 18gTrans Fat: 1gUnsaturated Fat: 13gCholesterol: 194mgSodium: 156mgCarbohydrates: 54gFiber: 2gSugar: 37gProtein: 8g
HOW MUCH DID YOU LOVE THIS RECIPE?
Please leave a comment on the blog or share a photo on Pinterest
