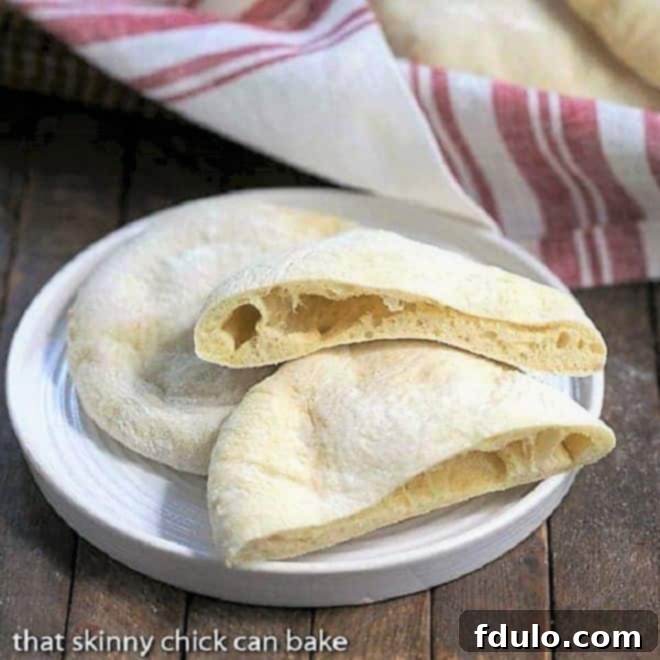
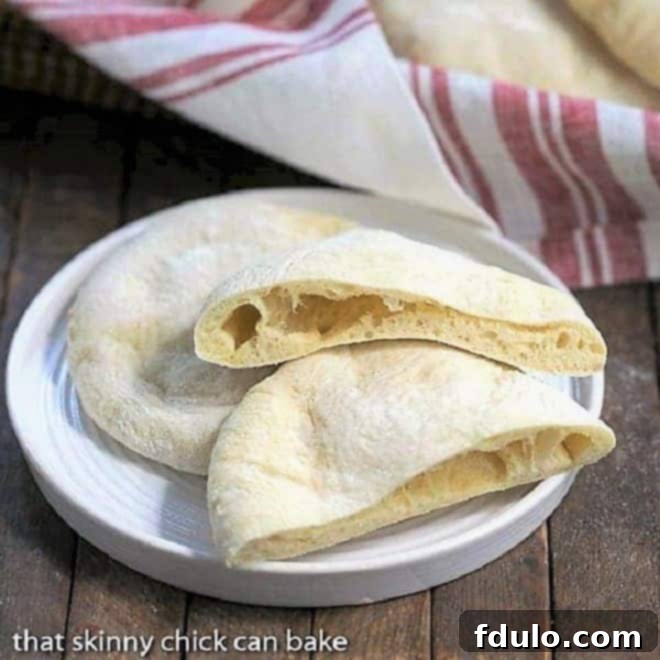
Imagine the irresistible aroma of freshly baked bread wafting through your kitchen, promising a culinary delight that’s both simple and profoundly satisfying. This is exactly what you get with soft, pillowy Homemade Pita Bread. Far superior to anything found in a grocery store, this authentic yeast bread recipe transforms basic kitchen staples into tender, delicious flatbreads with remarkable pockets, ready to embrace your favorite fillings. Get ready to embark on a delightful baking journey that yields restaurant-quality pita right in your own home!
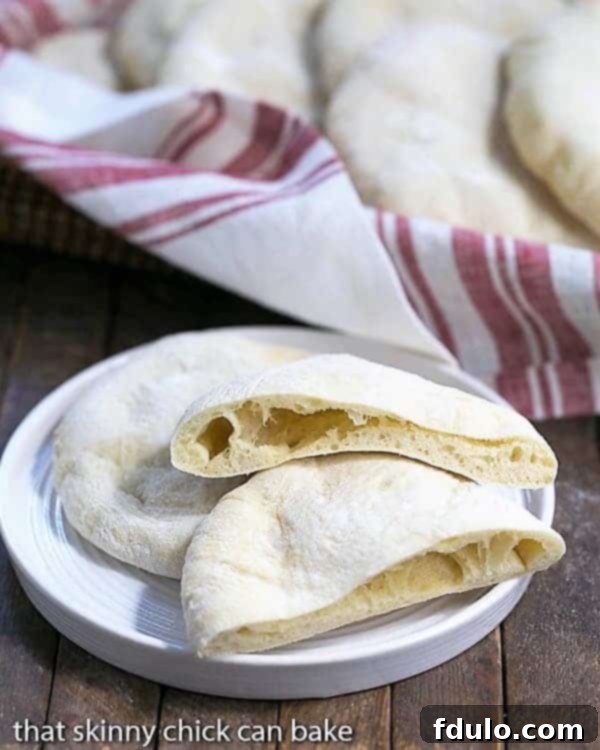
Why Homemade Pita Bread is a Must-Try Culinary Experience
For years, authentic pita bread has been a personal quest for many home bakers, myself included. The store-bought versions often fall short, lacking the distinct soft, pillowy texture and the glorious puff that creates its signature pocket. If you’ve ever been disappointed by flat, dry, or chewy supermarket pitas, then baking your own homemade pita bread is not just a recommendation – it’s an essential upgrade to your culinary repertoire. Here’s why this easy pita bread recipe needs to be on your baking list:
- Unmatched Freshness and Flavor: There’s simply no comparison to the vibrant taste and inviting aroma of pita bread baked fresh in your own kitchen. The subtle sweetness, the earthy notes of the flour, and the yeasty undertones are incredibly fresh, a stark contrast to the often bland and preservative-laden options found in stores.
- The Perfect Pillowy Texture: This recipe delivers an incredibly soft and tender crumb, making each bite a delightful experience. The natural elasticity of homemade pita is perfect for folding, tearing, and dipping without crumbling, ensuring a satisfying mouthfeel every time.
- Witness the Magic of the Pocket: One of the most satisfying moments in baking pita is watching it puff up dramatically in the oven, forming that iconic hollow pocket. This natural separation allows you to stuff your pita with an endless variety of fillings, from savory gyros and falafel to fresh salads and grilled vegetables, creating a truly versatile meal.
- Simple Ingredients, Incredible Results: You’ll find that this homemade pita bread recipe utilizes common pantry staples, making it accessible for any home baker, regardless of experience level. The transformation of these few humble ingredients into such a magnificent flatbread feels truly magical and empowering.
- Cost-Effective and Rewarding: Making your own pita bread is often significantly more economical than purchasing it regularly, especially for families who enjoy it often. Beyond the financial savings, the immense satisfaction of creating something so delicious and essential from scratch is an incredibly rewarding aspect of home baking.
- Elevate Every Meal: From casual lunches to elegant dinners, fresh homemade pita bread elevates any meal. Serve it as a delightful appetizer with creamy dips like hummus or baba ghanoush, as a hearty side for stews and curries, or as the flavorful star of a vibrant sandwich or wrap. Its versatility knows no bounds.
Essential Ingredients for Your Perfect Homemade Pita Bread
Crafting the best homemade pita bread begins with understanding the role of each ingredient. While the list is short and sweet, the quality and careful preparation of these components are paramount to achieving that ideal soft, puffy result with a well-formed pocket. Here’s a closer look at what you’ll need to make this incredible flatbread:
- Kitchen Staples for Foundation:
- Granulated Sugar: A small amount of sugar acts as vital food for the yeast, helping to activate it quickly and contributing to a beautiful golden crust on your pita. Rest assured, it doesn’t make the pita sweet, but rather enhances the overall flavor profile of the bread.
- Warm Water: Crucial for activating the yeast properly. The temperature is absolutely vital – water that’s too cold will prevent the yeast from activating, while water that’s too hot (above 140°F / 60°C) will kill the yeast instantly, rendering it ineffective. Aim for a comfortable temperature between 105-110°F (40-43°C). A kitchen thermometer is highly recommended for accuracy.
- Table Salt: Beyond simply seasoning the dough, salt plays an important role in controlling yeast activity, preventing it from rising too quickly. It also significantly strengthens the gluten structure in the dough, which is key for developing that desirable chewy texture and the integrity of the pita pocket.
- Yeast: The Leavening Agent: For consistent and reliable results, I highly recommend using a premium Instant Yeast, such as Red Star Platinum. Instant yeast is designed to be added directly to the dry ingredients without prior proofing, though a brief proofing with sugar and warm water (as instructed in this recipe) can serve as an excellent test for its vitality. Always, always check the expiration date on your yeast package; expired yeast is the most common reason for a dough that fails to rise. For extended freshness and to prevent spoilage, yeast can be stored in the freezer for up to two years, and for about six months once opened.
- Bread Flour: The Structure Builder: For that desirable chewiness and robust gluten structure, Bread Flour is paramount. Brands like King Arthur are excellent choices due to their consistent quality. Bread flour contains a higher protein content (typically 12-14%) compared to all-purpose flour, which means more gluten development. This strong gluten network is essential for trapping the gases produced by the yeast, creating the characteristic pockets when the dough is baked at high temperatures. While all-purpose flour can be substituted in a pinch, bread flour will consistently yield superior results in terms of texture, elasticity, and the perfect pita puff.
- Olive Oil: For Tenderness and Flavor: A good quality Olive Oil not only adds a subtle richness and delightful flavor to the dough but also contributes significantly to the pita’s tenderness and keeps it from drying out during and after baking. Brands like California Olive Ranch are excellent choices as they often provide pressing and expiration dates, ensuring you’re using fresh, high-quality oil. Extra virgin olive oil is generally preferred for its robust flavor and beneficial properties.
Mastering the Art: Expert Tips for Flawless Homemade Pita Bread
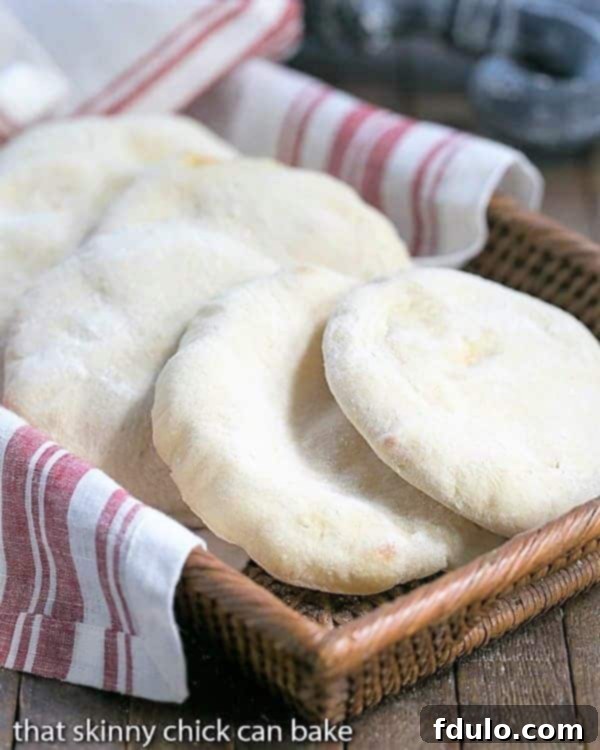
While making homemade pita bread is an incredibly rewarding culinary adventure, there can be a slight learning curve, especially when aiming for perfectly round discs or consistently large pockets. Don’t be discouraged if your first few attempts aren’t picture-perfect; even amoeba-shaped pitas taste absolutely delicious! These expert tips will guide you toward success and help you understand the nuances of this fantastic yeast bread recipe, ensuring you achieve that desired soft, pillowy pocket every time.
- Yeast Vitality is Key: Before you even start mixing any ingredients, always double-check the expiration date on your yeast package. Dormant or expired yeast is the number one culprit for a dough that fails to rise adequately, leading to flat and dense pita. Fresh, active yeast is the foundation of fluffy bread.
- PRO-Tip: To significantly extend the shelf life of your yeast, store unopened packages in the freezer for up to two years. Once opened, it’s best to use it within 6 months, even if refrigerated, as exposure to air and moisture can reduce its potency.
- The Perfect Water Temperature: When proofing your yeast, the water temperature is absolutely critical. It should be comfortably warm to the touch, ideally between 105-110°F (40-43°C). Water that’s too cold won’t sufficiently activate the yeast, while water at 140°F (60°C) or higher will instantly kill it, preventing any rise. Using a kitchen thermometer is highly recommended to ensure you hit that sweet spot for optimal yeast activity and a vigorous rise.
- Kneading for Optimal Gluten Development: Proper kneading is essential for developing the strong gluten network in bread flour. This network provides the elasticity and structure necessary for pita to trap gases and form its characteristic pockets.
- If you own a stand mixer fitted with a dough hook, this process becomes incredibly easy and efficient. Allow the mixer to work the dough for several minutes (as specified in the recipe) until it becomes smooth, elastic, and pulls away cleanly from the sides of the bowl.
- PRO-Tip for Stand Mixers: Kneading for extended periods can sometimes overheat the motor of your stand mixer. Periodically place your hand on top of the mixer’s motor; if it feels hot, give your mixer a 10-15 minute rest before continuing to prevent potential damage and ensure longevity of your appliance.
- If kneading by hand, be prepared for a good arm workout! Knead on a lightly floured surface for about 8-10 minutes, using a push-and-fold motion until the dough is smooth, pliable, and springs back when gently poked.
- The Art of Proofing: Allowing your dough to rise, or “proof,” in an ideal environment is crucial for its texture, volume, and ultimate ability to puff.
- The optimal temperature for proofing bread dough is around 85°F (29°C). While a warmer spot might seem to speed up the process, excessively warm temperatures can negatively affect the final texture and flavor of your pita, often leading to a denser crumb or an off-flavor. Find a warm, draft-free spot in your kitchen.
- To create an ideal proofing environment, you can place the covered dough bowl in a slightly warm oven (turned off, perhaps after running for a few minutes and then off, or with just the oven light on) or in a microwave with a cup of hot water.
- Resting the Dough Before Rolling: After the first rise and dividing the dough into balls, resist the urge to roll them out immediately. This is a common mistake that can lead to frustration.
- PRO-Tip: Allow the dough balls to rest for at least 15 minutes, covered with a clean towel or plastic wrap, before attempting to roll them. This crucial resting period allows the gluten to relax, making the dough much easier to roll out evenly without it constantly springing back. This relaxation also helps in achieving a smoother, more consistent round, which is vital for the pita to puff up correctly and evenly.
- The Power of a Hot Baking Surface: This is arguably the most critical step for achieving the famous pita pocket.
- Using a thoroughly preheated pizza stone or a heavy cast-iron skillet in a very hot oven (500°F / 260°C or higher) replicates the traditional methods of baking pita in a tandoor oven. The intense, direct heat causes the moisture within the dough to rapidly turn into steam, which then gets trapped by the developed gluten network, forcing the pita to puff up dramatically like a balloon.
- Ensure your pizza stone or baking surface is thoroughly preheated for at least 30-60 minutes before baking to ensure it’s scorching hot throughout. This high, consistent heat is the secret to soft, perfectly pocketed pita bread.
- Rolling Technique for the Perfect Puff: Aim for a uniform thickness (about ¼-inch or 0.6 cm) when rolling out your pita rounds. Uneven thickness can lead to incomplete puffing or uneven pockets. Ensure there are no folds or creases in the dough, as these can prevent the layers from separating properly to form a consistent pocket. Gently flour your surface and rolling pin as needed, but avoid excessive flour which can make the pita dry and tough.
- Watch Carefully During Baking: Pita bakes incredibly quickly due to the high oven temperature! Keep a close eye on your pitas as they cook, typically 3-4 minutes per side, or until they puff up beautifully and turn a pale golden color. Overbaking can lead to dry, stiff pita that lacks its signature softness and pliability.
Frequently Asked Questions About Homemade Pita Bread
Whether you’re new to baking pita or looking to perfect your technique, these frequently asked questions address common curiosities and concerns about this versatile and delicious flatbread. Get ready to bake like a pro!
Pita is a classic flatbread with deep historical roots in the Middle East, particularly the Levant region. Its history stretches back thousands of years, with archaeological evidence suggesting similar flatbreads were consumed in ancient Mesopotamia and Egypt. Traditional pita is typically made with either white or whole wheat flour and remains a fundamental staple in Middle Eastern, Mediterranean, and North African cuisines, cherished for its versatility and delicious simplicity.
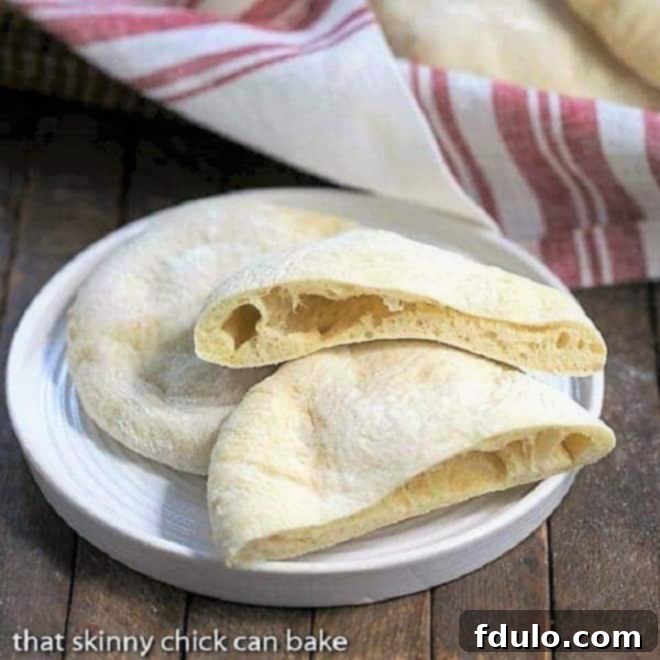
Yes, “pocket bread” is another common and descriptive name for pita bread, and it refers directly to its most distinctive and beloved feature: the large, hollow pocket that naturally forms in the center when the bread is baked. This unique pocket is created when the high heat of the oven causes the moisture inside the dough to rapidly turn into steam, which then separates the two layers of the dough. This makes pita bread absolutely perfect for stuffing with a wide array of savory or sweet ingredients.
Pita bread is incredibly versatile and can be enjoyed in countless ways! Once baked, you can slice it into two semi-circles to create perfect pockets for building delicious sandwiches like traditional gyros, falafel, shawarma, or any combination of grilled meats, fresh vegetables, and flavorful sauces. Alternatively, you can cut each half into triangular wedges, transforming them into ideal dippers for creamy hummus, smoky baba ghanoush, cool tzatziki, various seasoned olive oils, a spicy muhammara, or even a simple cheese dip. Warm pita also pairs wonderfully with hearty stews, scrambled eggs for breakfast, or as a quick and customizable individual pizza base. Don’t be afraid to get creative – its neutral flavor profile makes it suitable for almost anything you can imagine!
Several factors can prevent your pita from achieving that glorious puff. The most common reasons include insufficient oven temperature (the oven and pizza stone must be very hot and thoroughly preheated!), dough that wasn’t kneaded enough (leading to poor gluten development), or rolling the dough too thick, too thin, or unevenly. Over-proofing or under-proofing the dough can also negatively impact the final result. Ensure your yeast is active, your oven is preheated to its highest setting (500°F / 260°C) with a hot pizza stone for at least 30 minutes, and your dough is rolled to a consistent ¼-inch thickness without creases. Don’t worry if it doesn’t puff perfectly every time – it will still be incredibly delicious!
To keep your freshly baked homemade pita bread at its best, store it in an airtight container or a clean plastic bag at room temperature for up to 2-3 days. For longer storage, pita freezes beautifully! Wrap individual pitas or stacks of 2-3 tightly in plastic wrap, then place them in a freezer-safe bag for up to 3 months. To reheat, you can quickly warm them in a dry skillet over medium heat for about 30 seconds per side until soft and pliable, microwave for 15-20 seconds, or briefly toast them in a toaster oven. If reheating from frozen, allow them to thaw slightly at room temperature before warming for the best texture.
Explore More Delicious Bread Recipes
If you’ve enjoyed the rewarding experience of baking this homemade pita bread, you’ll love exploring other delightful bread recipes. Expanding your baking skills is a fantastic way to bring more flavor and warmth into your home and share delicious creations with loved ones. Here are some other fantastic flatbreads and yeast breads you might enjoy adding to your baking repertoire:
- No Yeast Flatbread from Life Currents Blog – A quick and easy flatbread option that doesn’t require yeast, perfect for when you’re short on time or ingredients.
- Lefse Recipe – Discover this wonderful traditional Norwegian soft flatbread, uniquely made with potatoes, offering a delicate texture.
- Shokupan Bread – Experience the incredible, cloud-like softness and fluffy texture of Japanese milk bread, a true baking marvel.
- Homemade Potato Bread – A hearty and tender bread that features mashed potatoes in the dough, resulting in a wonderfully moist and comforting texture.
- Discover even more Yeast Bread Recipes to further expand your baking repertoire and find your next favorite loaf or flatbread!
We sincerely hope you cherish this amazing homemade pita bread recipe as much as we do! Your feedback and culinary creations mean the world to us. Stay connected and share your baking adventures by following us on Instagram, Facebook, and Pinterest. Don’t forget to tag us when you try one of our recipes! If you loved the results and enjoyed the process, please consider leaving a 5-star rating and a comment in the recipe section below – your support truly helps us share more delicious content!
Print Recipe
Homemade Pita Bread: Your Go-To Recipe for Soft, Fluffy Pockets
Experience the delight of authentic, soft, and chewy pita bread made entirely from scratch. This simple recipe, expertly adapted from Tyler Florence, brings restaurant-quality Middle Eastern flatbread right to your kitchen. Perfect for stuffing with your favorite fillings, dipping into flavorful sauces, or serving alongside hearty meals, this easy pita recipe is a guaranteed crowd-pleaser.
20 minutes
4 minutes
24 minutes
8 pitas
Rated 5 out of 5 stars by many happy bakers!
Ingredients You’ll Need:
- 1 package (about 2 ¼ teaspoons) instant yeast (Red Star Platinum recommended for best results)
- 1 teaspoon granulated sugar
- 1 ½ cups warm water (maintain a temperature between 105-110°F / 40-43°C)
- 1 teaspoon table salt
- 3 ½ cups bread flour, plus additional for dusting work surfaces
- 1 teaspoon olive oil, plus extra for oiling the mixing bowl
Step-by-Step Instructions for Perfect Pita:
- Activate the Yeast: In the bowl of your heavy-duty stand mixer fitted with the dough hook attachment, combine the instant yeast, sugar, and warm water. Blend briefly on low speed. Allow the mixture to stand undisturbed for 5 to 10 minutes until it becomes visibly foamy and bubbly, which confirms the yeast is active and ready.
- Form the Dough: Stir in the salt into the yeast mixture. Gradually add the bread flour, one cup at a time, mixing at the lowest speed of your stand mixer until all the flour has been fully incorporated and a shaggy dough begins to form. Continue mixing at low speed for approximately 4 minutes until the dough gathers into a cohesive ball and starts to look smooth and elastic.
- First Rise (Proofing): Turn the kneaded dough out onto a lightly floured surface and continue to knead by hand for an additional minute or two until it is completely smooth and elastic to the touch. Lightly oil a large clean mixing bowl, then place the dough into the bowl, turning it over once to ensure all sides are coated with oil. Cover the bowl tightly with plastic wrap or a clean kitchen towel. Move the covered bowl to a warm, non-drafty spot in your kitchen (an ideal proofing temperature is around 85°F / 29°C). Let the dough rise undisturbed until it has doubled significantly in size, which typically takes about 1 ½ hours.
- Preheat Oven & Pizza Stone: Approximately 30-45 minutes before your dough is expected to finish its proofing, place a large pizza stone (or a heavy-duty baking steel/cast-iron skillet) on a lower oven rack. Preheat your oven to its highest possible setting, ideally 500°F (260°C). This extreme, consistent heat is absolutely crucial for creating the pita’s signature pocket.
- Portion and Rest Dough Balls: Once the dough has doubled in size, gently punch it down to release the trapped air. Transfer the dough to a lightly floured work surface. Divide the dough into 8 equal pieces (using a kitchen scale for accuracy is recommended). Roll each piece into a smooth, tight ball. Lightly dust these dough balls with flour and keep them covered with a clean kitchen towel or plastic wrap to prevent drying. Allow these dough balls to rest for 15 minutes. This crucial resting period allows the gluten to relax, making them much easier to roll out.
- Roll Out the Pitas: On a lightly floured surface, use a rolling pin to carefully roll each dough ball into a round shape, approximately 6-8 inches (15-20 cm) in diameter and about ¼-inch (0.6 cm) thick. It is essential that the rounds are as smooth and even in thickness as possible, without any folds or creases, for them to puff up properly and evenly. Cover the rolled rounds with a towel as you finish each one to prevent them from drying out.
- Bake to Perfection: Carefully place two of the rolled pita rounds directly onto the preheated pizza stone in the scorching hot oven. Bake for approximately 3 to 4 minutes. Watch carefully! The pita bread should puff up dramatically like a balloon and turn a pale golden color. There’s typically no need to flip them if your oven distributes heat evenly. Using tongs or a pizza peel, carefully remove the baked pita from the oven and transfer it to a wire rack to cool slightly. Repeat this process with the remaining dough rounds, baking two at a time.
- Serve and Enjoy: Allow the baked pita bread to cool slightly on a wire rack before serving. This brief cooling period helps them firm up slightly while retaining their beautiful softness and pliability. Serve warm and savor your delicious homemade creation!
Notes and Pro Tips:
The total time listed above refers to active preparation and cook time only, and does not include the essential proofing time for the dough. Remember that an ideal proofing temperature is around 85°F (29°C) for the best rise and texture. For even more consistent pitas, consider using a kitchen scale to divide your dough into equal portions, which helps in uniform baking and puffing.
Recommended Baking Tools:
As an Amazon Associate and member of other affiliate programs, I earn from qualifying purchases. These recommendations are products I genuinely use and trust in my own kitchen.
- Pizza Stone
- French Rolling Pin
- KitchenAid Artisan Stand Mixer
Nutrition Information:
(Approximate values per serving, based on standard ingredients)
- Yield: 8 pitas
- Serving Size: 1 pita
- Calories: 227
- Total Fat: 2g
- Saturated Fat: 0g
- Trans Fat: 0g
- Unsaturated Fat: 1g
- Cholesterol: 0mg
- Sodium: 268mg
- Carbohydrates: 44g
- Fiber: 2g
- Sugar: 1g
- Protein: 8g
*Nutrition facts are an estimate and may vary based on specific ingredients used, brands, and preparation methods. Please consult a professional nutritionist for precise dietary advice.
