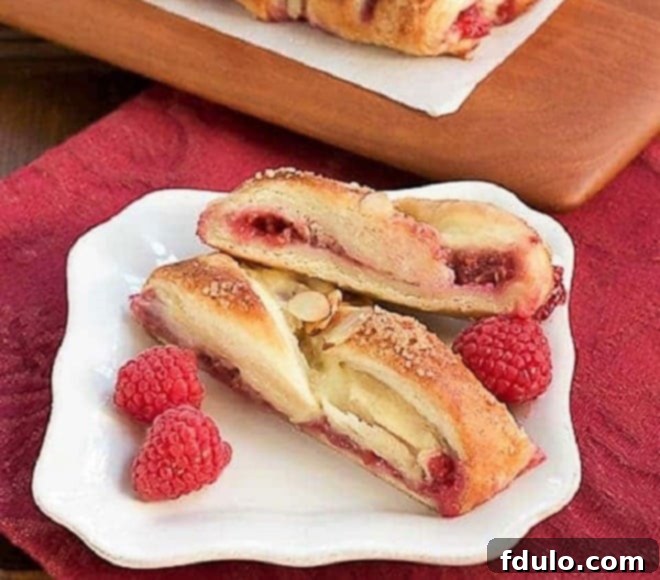
Indulge in the Irresistible Raspberry Danish Braid: Your Guide to a Flaky, Flavorful Masterpiece
Prepare to elevate your baking game with the exquisite Raspberry Danish Braid, a pastry so delightful it once earned the highest compliment from a dear friend: “This might just be the best thing you’ve ever baked!” This recipe isn’t just a dessert; it’s an experience, offering layers of tender, buttery dough wrapped around a luscious filling of vibrant raspberries and creamy vanilla. Inspired by the insights of Bea Ojakangas, a renowned baker and contributor to “Baking with Julia,” this particular method is celebrated in Denmark as the contemporary way to craft these beloved pastries. Forget the intimidation of traditional laminated doughs; we’re diving into a “cheater” version that promises professional results with significantly less fuss, making homemade Danish accessible to everyone.
If you’ve ever dreamt of serving a show-stopping pastry that looks as incredible as it tastes, your quest ends here. This Raspberry Danish Braid is not only a feast for the eyes but a symphony of textures and flavors – from the crisp exterior to the soft, airy interior, bursting with fruity sweetness and a hint of creamy luxury. It’s perfect for a special breakfast, an elegant brunch, or a decadent afternoon treat. Join us as we uncover the secrets to crafting this unforgettable baked good, proving that impressive results don’t always require endless hours in the kitchen.
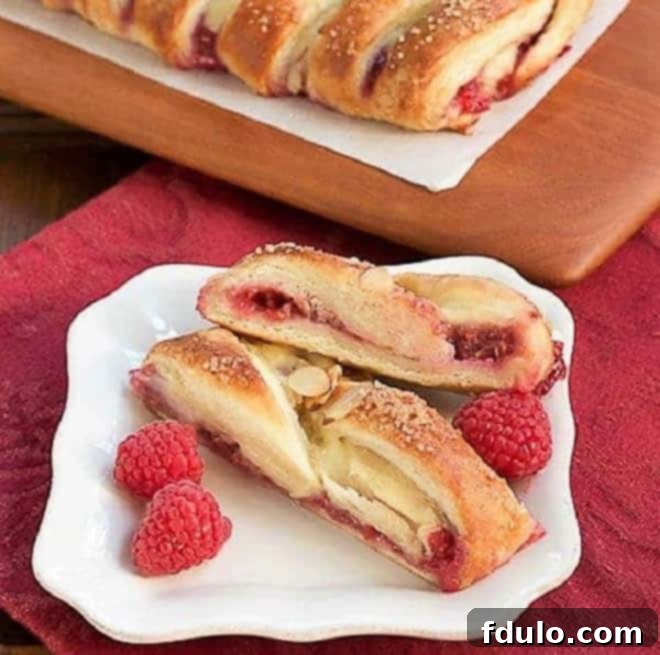
Why This Raspberry Danish Braid Recipe is a Must-Try
Beyond its dazzling appearance, this Raspberry Danish Braid offers a multitude of reasons why it should be your next baking project. It combines ease, authenticity, and unparalleled flavor into one irresistible package.
Effortless Elegance with “Cheater” Laminated Dough
Traditional Danish pastry dough, known as laminated dough, involves multiple folds of butter and dough, a process that can be time-consuming and often messy. Our “cheater” version revolutionizes this by utilizing a food processor, significantly simplifying the process without compromising on the signature flaky layers. Instead of meticulously layering butter, you’ll incorporate cold butter pieces directly into the flour in the food processor. This clever technique creates pockets of butter that, when rolled and folded, mimic the delicate layers of classic puff pastry. The result? A buttery, tender, and incredibly flaky dough that will fool even the most discerning palate, all achieved with a fraction of the effort.
A Taste of Authentic Danish Baking
It’s always a pleasure to learn baking techniques directly from the source, and this recipe comes with a stamp of approval from an expert. Bea Ojakangas, a respected baker featured in “Baking with Julia,” shared that this very method reflects how modern Danish pastries are made in Denmark today. This insight lends an authentic touch to our Raspberry Danish Braid, assuring you that you’re not just baking a pastry, but a piece of Danish culinary tradition, adapted for the contemporary home kitchen. It truly is a testament to how traditional flavors can be achieved through innovative, streamlined methods.
Sensational Flavor and Visual Appeal
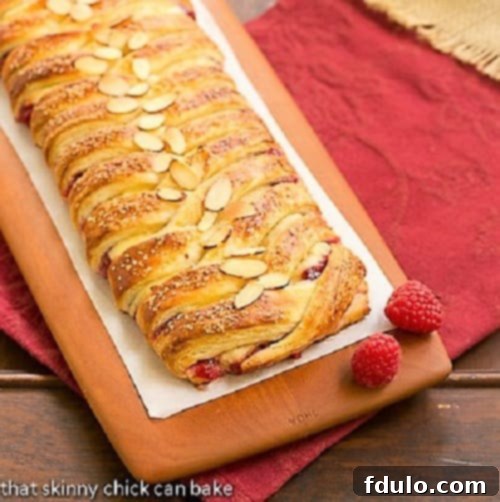
Imagine a light, airy pastry generously filled with two delectable components: a vibrant, sweet-tart gelled raspberry filling and a rich, creamy vanilla concoction. These fillings are perfectly balanced, offering a burst of fruity freshness against a backdrop of smooth, comforting creaminess. The magic continues with the assembly; crisscrossing strips of dough over the filling create a stunning braided pattern that elevates this pastry from simple treat to an impressive centerpiece. The visual appeal alone is enough to elicit “oohs and aahs,” and the taste, as my friend emphatically declared, truly lives up to its beautiful presentation. While the overnight resting period for the dough might test your patience, every moment is a worthwhile investment in the ultimate reward: a truly exceptional homemade Danish.
Key Ingredients for Your Perfect Raspberry Danish Braid
Crafting this delightful Danish pastry begins with understanding the role each ingredient plays. High-quality ingredients are crucial for achieving the best flavor and texture. Here’s a closer look at what you’ll need and why each component is important:
- Kitchen Staples: You’ll need standard pantry items like granulated sugar for sweetness, salt to balance flavors, and all-purpose flour to form the foundation of our flaky dough. Ensure your eggs are at room temperature for better incorporation into the dough and fillings, leading to a smoother, more consistent texture. A single egg yolk is vital for the confectioner’s cream, adding richness and helping with thickening. Cornstarch acts as a thickening agent for both the berry and cream fillings, ensuring they set beautifully without being runny.
- Cold Unsalted Butter: This is the secret weapon for our “cheater” laminated dough. Using cold butter, cut into small pieces, is essential. When processed with flour, these cold butter pieces create pockets that steam during baking, yielding those coveted flaky layers. Unsalted butter allows you to control the overall salt content of your pastry.
- Warm Water (105-115° F): Precision is key when activating yeast. Water within this temperature range is ideal for proofing the dry active yeast, waking it up and ensuring your dough will rise properly. Too cold, and the yeast won’t activate; too hot, and you risk killing it.
- Active Dry Yeast (2 ½ teaspoons): This leavening agent is what gives our Danish dough its airy texture and helps it puff up during proofing and baking. It’s slightly more than a standard packet, so be sure to measure accurately.
- Room Temperature Milk: Similar to eggs, milk at room temperature blends more smoothly with other ingredients, creating a homogeneous dough.
- Fresh Raspberries (Crushed): The star of our fruity filling! Using fresh, crushed raspberries provides the most vibrant flavor and natural sweetness. While frozen raspberries can work in a pinch, fresh ones offer superior taste and texture for this recipe.
- Fresh Lemon Juice: Always opt for freshly squeezed lemon juice over bottled. The bright, zesty notes of fresh lemon juice cut through the sweetness of the berries and cream, adding a delightful tang that truly elevates the flavor profile of the raspberry filling.
- Heavy Cream (36% Butterfat): This high-fat cream is crucial for achieving a rich, luxurious confectioner’s cream. The higher fat content contributes to a smoother, more stable cream that holds its shape beautifully within the braid.
- Pure Vanilla Extract: Invest in a good quality pure vanilla extract. Its warm, aromatic notes are essential for enhancing the flavor of the cream filling. Artificial vanilla simply cannot compare and will detract from the overall taste of your Danish.

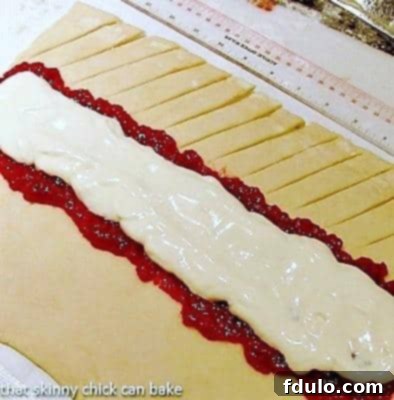
Visual guide to braiding: After making parallel cuts on both sides, begin by folding a strip over the filling from one end, then repeat with the corresponding strip from the opposite side. Continue this alternating pattern until the entire filling is beautifully enclosed within the braid.
Expert Tips for Crafting Your Perfect Raspberry Danish Braid
Achieving Danish pastry perfection is easier than you think, especially with a few insider tips. From mastering the “cheater” dough to perfecting the fillings and the beautiful braid, these insights will guide you every step of the way.
Mastering the “Cheater” Laminated Dough
- Temperature is Key: Always ensure your butter is very cold. The success of this laminated dough hinges on the butter remaining distinct within the flour mixture. If the butter melts into the flour, you lose the potential for those wonderful flaky layers.
- Gentle Processing: When combining flour and cold butter in the food processor, pulse gently. The goal is to break the butter down into pea-sized to half-inch pieces, not to create a smooth dough. You should still see visible chunks of butter, which will create steam during baking and result in the delicate layers characteristic of Danish pastry.
- The Art of Folding: The rolling and folding technique is crucial for developing the layers without the fuss of traditional lamination. Each time you fold the dough into thirds, you’re creating multiple thin layers. Ensure your work surface is well-floured to prevent sticking, but avoid over-flouring, which can toughen the dough. Always turn the dough so the folded (closed) side is to your left before the next roll; this maintains consistency in your layers.
- Overnight Chill for Optimal Texture: Do not skip the overnight resting period in the refrigerator. This allows the gluten in the dough to relax, making it easier to roll, and it also firms up the butter, which is essential for flakiness. This patient step pays dividends in the final texture of your Danish.
- Dough Storage: This recipe yields enough dough for two Danish braids. You can freeze half the dough for up to a month, tightly wrapped in plastic, or keep it in the fridge for up to four days. This makes it incredibly convenient for future baking endeavors!
Perfecting Your Fillings
- Microwave Caution: Be extremely vigilant when preparing the raspberry and cream fillings in the microwave. Microwave strengths vary significantly, and what takes 10 minutes in one oven might boil over in half that time in another. Start with shorter intervals and stir frequently. For the raspberry concoction, my powerful microwave nearly boiled it out of the measuring cup at the 7-minute mark. Monitor it closely to achieve a glossy, thick consistency without overflow.
- Alternative Stovetop Method: If you’re wary of microwave inconsistencies, both fillings can be prepared on the stovetop over low to medium heat, stirring constantly until thickened. This offers more control and can prevent accidental boiling over.
- Cool Completely: Ensure both the raspberry and cream fillings are completely cooled to room temperature before spreading them onto the dough. Warm fillings can melt the butter in the dough, compromising its flaky structure.
- Customizing Your Fillings: While raspberry and vanilla cream are a divine combination, the beauty of this Danish recipe lies in its versatility. Feel free to experiment with other fruit fillings like blueberries, apricots, or even a mix of berries. You can also explore savory options, though the sweetness of this dough lends itself perfectly to fruit and cream.
The Art of the Braid
- Simple, Yet Stunning: Don’t be intimidated by the braiding process; it’s surprisingly straightforward and often simpler than plaiting a traditional three-stranded bread. The visual guide (see photo above) is your best friend here.
- Precise Cuts: After spreading your fillings, make evenly spaced parallel cuts along both long sides of the dough, extending from the filling to the edge. These strips will become the “strands” of your braid.
- Alternating Folds: Begin by folding one strip from one side over the filling, then immediately follow with the corresponding strip from the opposite side, slightly overlapping the first. Continue this alternating pattern, working your way down the length of the pastry. This method ensures the filling is securely encased and creates that beautiful, interlaced effect.
- Sealing the Ends: Once all strips are folded, gently tuck in the ends to create a neat, sealed finish.
The moment I shared this beautifully braided pastry with friends, the “oohs and aahs” confirmed its visual appeal. But the true triumph came when they tasted it: “This is one of the BEST things you’ve ever baked!” That’s the ultimate compliment for any baker, and it perfectly encapsulates why this Raspberry Danish Braid, rooted in Bea Ojakangas’s wisdom, has become a cherished recipe.
Frequently Asked Questions About Danish Pastries
Danish pastries have a rich history and unique characteristics. Here are some common questions answered to deepen your appreciation for this delicious treat:
Why are these baked goods called “Danish”?
While universally known as “Danish pastries” in the U.S. and many other parts of the world, these delightful baked goods actually have their origins in Austria, not Denmark. The popular story dates back to the 1850s when pastry chefs in Denmark went on strike. Danish bakery owners, desperate to maintain production, hired Austrian bakers to fill the void. These Austrian bakers brought their traditional methods for creating laminated pastries, which were then adapted and embraced in Denmark. Interestingly, in Denmark, these pastries are often referred to as “wienerbrød” (Viennese bread), acknowledging their Austrian (Viennese) roots. So, while they are deeply entrenched in Danish culinary culture today, their name in English is a testament to their adoption and popularization in Denmark.
What exactly is a Danish pastry?
A Danish pastry is a classic sweet, multilayered, laminated pastry. Its defining characteristic is the flaky, buttery dough, which is achieved through a meticulous process of repeatedly folding butter into dough, similar to puff pastry or croissants. This lamination creates numerous thin layers that separate when baked, resulting in a wonderfully crisp exterior and a tender, airy interior. Danish pastries are typically filled with a variety of sweet ingredients, such as fruit jams (like our raspberry filling!), cream cheese, nuts, or poppy seeds, and often topped with a glaze or icing. The pastry’s rich flavor and delicate texture make it a popular choice for breakfast, brunch, or a sweet treat throughout the day.
Can I prepare the Danish dough in advance?
Absolutely! The “cheater” laminated dough recipe is perfect for making ahead. In fact, it requires an overnight chill, which helps develop flavor and makes the dough easier to work with. Once prepared, the dough can be stored in the refrigerator, tightly wrapped in plastic, for up to 4 days. You can also freeze half of the dough for up to one month. Thaw frozen dough in the refrigerator overnight before rolling and shaping.
What are some other popular fillings for Danish pastries?
Danish pastries are incredibly versatile when it comes to fillings. Beyond our delicious raspberry and cream combination, popular choices include cream cheese (often sweetened with sugar and vanilla), apple or apricot preserves, cherry pie filling, almond paste, or a rich cinnamon-sugar mixture. Some savory versions also exist, but sweet fillings are by far the most traditional and beloved. Don’t hesitate to get creative with your favorite fruits or creamy concoctions!
How should I store leftover Danish braid?
For the best taste and texture, Raspberry Danish Braid is most delicious on the day it’s baked. However, if you have leftovers, store them loosely covered at room temperature for up to 24 hours. If your home is particularly warm, or if you prefer, you can refrigerate it for up to 2-3 days. Bring it back to room temperature or gently warm it in a low oven (around 250°F or 120°C) for 5-10 minutes before serving to revive some of its freshness.
More Delicious Pastries and Breakfast Ideas You’ll Love
If you’ve enjoyed crafting this Raspberry Danish Braid, you’ll be thrilled to discover more delightful recipes that promise to impress. Expand your baking repertoire with these kindred treats:
- For a delightful variation, explore an exquisite apricot version of this Danish pastry, often featuring almond notes, providing a different fruity dimension.
- Indulge in the rich and creamy goodness of Cream Cheese Danishes, a timeless classic that perfectly balances sweet and tangy flavors.
- Discover another braided masterpiece with my Braided Cinnamon Danish, featuring the same innovative laminated dough technique with a beloved spiced filling.
- Explore my comprehensive Recipe Index for a wide array of the best breakfast recipes and brunch food, perfect for any occasion.
Connect with us and share your baking triumphs! Follow us on Instagram, Facebook, and Pinterest. Don’t forget to tag us when you try one of our recipes! Your feedback is invaluable, so if you love the results, please consider leaving a 5-star rating in the recipe card below.
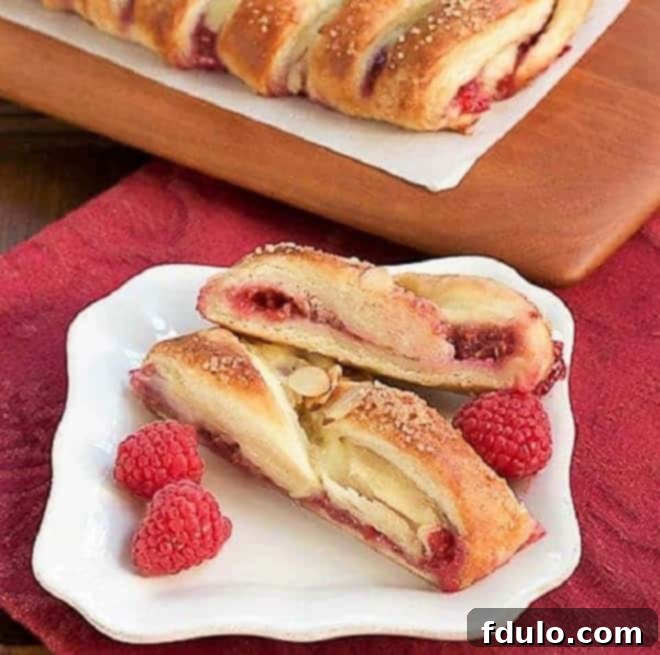
Raspberry Danish Braid
1 hour
20 minutes
1 hour 20 minutes
12 servings
Tender dough filled with raspberry and cream cheese. Plus how to make a cheater laminated dough!
Ingredients
Danish Dough (Makes enough for 2 danishes/2 pounds of dough):
- ¼ cup warm water (105-115 degrees F)
- 2 ½ teaspoons active dry yeast
- ½ cup milk at room temperature
- 1 large egg at room temperature
- ¼ cup sugar
- 1 teaspoon salt
- 2 ½ cups all purpose flour
- 8 ounces unsalted cold butter
- Extra flour to prevent sticking
Fresh Berry Jam Filling:
- 2 cups crushed fresh raspberries
- 1 cup sugar
- 1-2 tablespoons fresh lemon juice
Confectioner’s Cream:
- 1 cup heavy cream
- 1 ½ tablespoons cornstarch
- 2 tablespoons sugar
- 1 egg yolk
- 1 teaspoon vanilla
Instructions
- Pour the water into a bowl. Sprinkle the dried yeast on top of it and gently swirl until mixed through.
- Add the milk, egg, sugar, and salt and whisk to mix, and set aside.
- In a food processor combine the flour and cut up butter and pulse gently until the butter has been broken down into about half an inch. The butter must stay visible to make the pastry flaky and layered.
- Empty the flour mixture into the wet bowl and gently mix through with a spatula until well combined. Cover the bowl with plastic wrap and let rest in the fridge overnight.
- Divide the dough in half. Use half to make one danish and freeze the other half for another time.
- Flour a cool work surface and dump the dough onto it. Roughly shape the dough into a square. Sprinkle flour and roll the dough into a 16-inch square. Fold the dough in thirds and turn it so the folded closed side is to your left.
- Roll the dough out again to 10 x 24 inches. Remember to use the flour! Fold the dough into thirds again. Turn it so that the closed side is on your left again.
- Roll it into a 20-inch square and fold it again into thirds like a brochure. Roll the dough into a rectangle 10 x 24 and fold it in thirds again.
- Wrap the dough in plastic and chill for about 30 minutes. The dough is now ready to be rolled and shaped for pastries. It can be kept in the fridge for 4 days sealed in plastic or frozen for 1 month.
- For the berry filling, stir the berries and sugar together in a microwave-safe bowl. Cook for 10 minutes on full power. Stir and cook for 5-8 minutes until most of the liquid has been absorbed and the filling looks glossy. Mine took less time. Cook time will vary depending on the strength of your microwave. Stir in lemon juice and cool to room temperature before using it.
- For the cream filling, whisk together cream, cornstarch, and sugar in a large microwave-safe bowl. Microwave on full power for about 1 minute (time will vary depending on the strength of your microwave). Stir and cook for 2-3 more minutes till the mixture boils and thickens a bit. Watch carefully as all microwaves cook differently.
- Whisk together egg yolk and vanilla. Temper the egg mixture by slowly whisking in a little of the hot cream mixture, then slowly add the yolk mixture to the cream, whisking constantly.
- Microwave for 30 seconds more, then stir. The mixture should be thick like lemon curd. Press some plastic wrap over the surface and cool to room temperature.
- Spread some of the berry filling over the middle of the danish, then top with some of the cream filling. You may not need to use all the fillings.
- Slice slits along both sides of the filling that you’ll fold over the middle. See photo above.
- Preheat oven to 400° and line a baking sheet with parchment.
- Carefully transfer the danish to the pan. Cover with a kitchen towel and let rise for about 30 minutes, they will look puffy but not double in size.
- Bake for 18-20 minutes until lightly browned. Let cool before serving.
Notes
Adapted from Baking with Julia.
Tastes best on the day it is baked.
Recommended Products
As an Amazon Associate and member of other affiliate programs, I earn from qualifying purchases.
- 10-Inch Wire Whisk
- Food Processor
- French Rolling Pin
Nutrition Information:
Yield:
8
Serving Size:
1
Amount Per Serving:
Calories: 688Total Fat: 36gSaturated Fat: 22gTrans Fat: 1gUnsaturated Fat: 11gCholesterol: 142mgSodium: 475mgCarbohydrates: 84gFiber: 4gSugar: 37gProtein: 9g
HOW MUCH DID YOU LOVE THIS RECIPE?
Please leave a comment on the blog or share a photo on Pinterest
