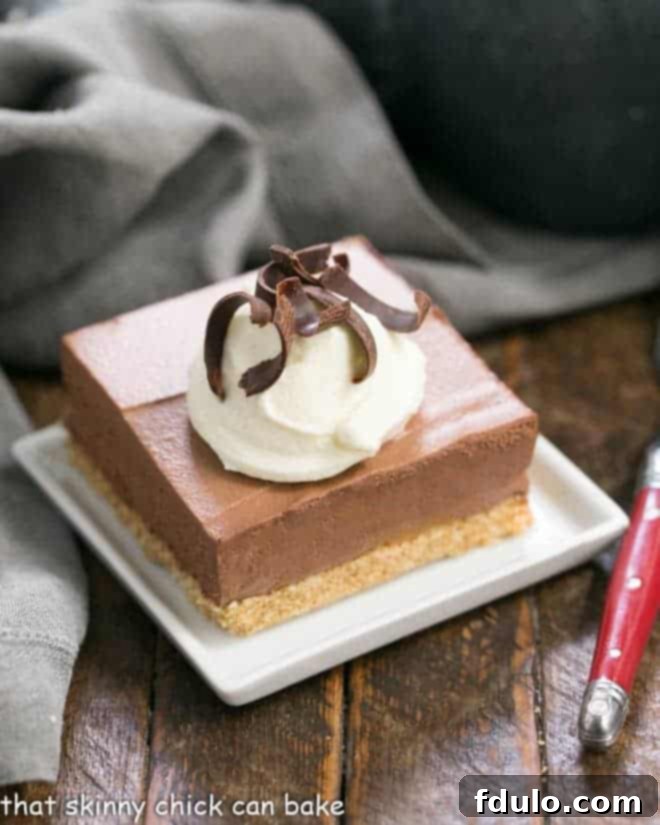
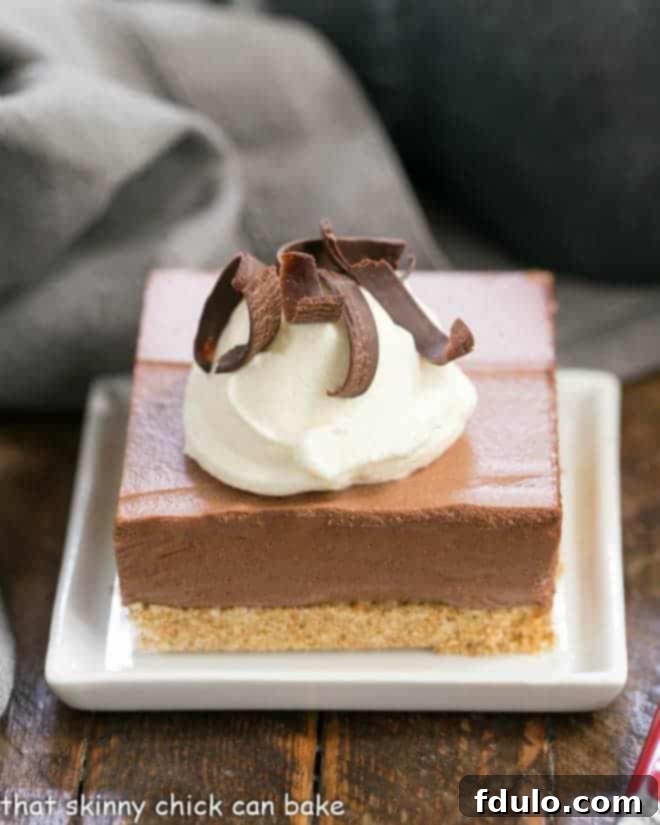
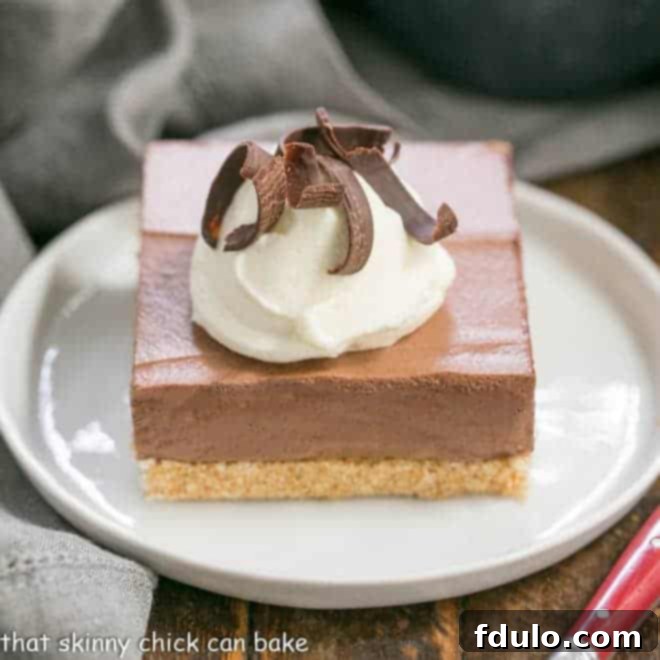
Indulge in a truly decadent yet surprisingly simple dessert with these Easy Chocolate Mousse Bars! For any chocoholic family, these no-bake wonders are an absolute dream come true. Imagine a rich, creamy chocolate mousse atop a buttery graham cracker crust, delivering a sublime melt-in-your-mouth experience without ever needing to turn on the oven. This recipe promises not only ease of preparation but also an unforgettable treat that will have everyone asking for more.

Why You Must Make These Irresistible Chocolate Mousse Bars
In the vast world of desserts, these Easy Chocolate Mousse Bars stand out for several compelling reasons. They combine safety, simplicity, and an incredibly satisfying flavor profile, making them a staple for any home baker, whether novice or experienced.
Safety and Simplicity: The Brilliance of Eggless Mousse
- While traditional mousses often rely on eggs for their airy texture, working with raw eggs can be time-consuming and comes with the inherent concern of salmonella contamination. Locating pasteurized eggs isn’t always easy, making egg-free recipes a highly desirable alternative for peace of mind.
- This recipe skillfully bypasses any egg-related worries, offering a safe and equally luxurious chocolate mousse experience. You get all the richness and ethereal texture without the added complexity or health considerations, streamlining your dessert preparation significantly.
Unforgettable Flavor and Texture
- Beyond their safety, these chocolate mousse bars are a symphony of flavors and textures. They are incredibly rich, lusciously smooth, and deliciously satisfying, striking a perfect balance between decadent and delightful. The creamy, light-as-air mousse melts in your mouth, perfectly complemented by the slightly crumbly, buttery graham cracker crust.
- Each bite delivers a powerful punch of chocolate flavor, enhanced by a secret ingredient that truly elevates the experience. This dessert is designed to impress, offering a sophisticated taste with a surprisingly straightforward creation process.
The Ultimate Crowd-Pleaser for Any Occasion
These bars are not just a personal indulgence; they are an undeniable crowd-pleaser. I remember serving these decadent treats to my entire family one Sunday evening, and they were an instant hit. The following week, my son, Nick, reported back that his med school roommates were absolutely enamored with these mousse bars, especially alongside some leftover Chocolate Chip Caramel Butter Bars I had sent along. These guys, with their demanding schedules, barely have time to cook, which tells you just how universally appealing and delicious these bars are. They’re my perfect guinea pigs for testing and sharing delightful leftovers!

Mastering the Art of No-Bake Chocolate Mousse Bars: Key Tips & Techniques
Achieving perfection with these Easy Chocolate Mousse Bars is well within reach with a few simple techniques and insider tips. From the crust to the garnish, each step contributes to the ultimate indulgence.
Crafting the Perfect Graham Cracker Crust
- Since this is a no-bake recipe, the graham cracker crust is firmed up in the freezer, not the oven. This crucial step helps it set properly before the mousse topping is added. Be aware that a no-bake crust tends to be slightly more crumbly than its baked counterpart, so a little breakage when slicing is normal.
- For maximum convenience, you can purchase pre-made graham cracker crumbs, or effortlessly create your own by pulsing whole graham crackers in a food processor. Using the food processor to then incorporate the melted butter and sugar saves you from dirtying an extra bowl.
- PRO-TIP for Easy Removal: Line your baking pan with nonstick foil or parchment paper. Make sure to leave a generous overhang on two sides – these will act as convenient “handles” to easily lift the entire chilled dessert onto a cutting board for neat slicing. This simple trick makes serving a breeze!
Achieving Ethereal Chocolate Mousse
The mousse is the star of this dessert, and getting its light, airy texture just right is key. Here’s how to ensure your chocolate mousse is perfectly ethereal every time.
The Power of Cold for Whipped Cream
- PRO-TIP: When whipping the heavy cream to fold into your chocolate mixture, always use a very cold bowl. I like to pop my mixing bowl into the freezer for 10-15 minutes while I’m preparing the crust. A chilled bowl significantly helps to stabilize the whipped cream, allowing it to achieve stiffer peaks and hold its volume, which is essential for a light and airy mousse.
The Gentle Art of Folding Ingredients
- If you’re new to the term “folding ingredients,” it’s a technique used to combine a lighter mixture (like whipped cream) with a heavier one (like the cooled chocolate base) without deflating the air you’ve worked so hard to incorporate.
- To fold properly, first mix a small amount of the whipped cream into the chocolate mixture to lighten it, then gently add the remaining whipped cream. Use a rubber spatula, lifting the mixture from the bottom of the bowl and gently turning it over the top. Rotate the bowl as you repeat this circular motion until no white streaks of cream are visible. The goal is to combine thoroughly while preserving as much of the whipped cream’s airy volume as possible.
The Espresso Secret: Enhancing Chocolate Flavor
- Did you know that coffee is a fantastic way to enhance the rich, complex flavor of chocolate? This recipe includes 1 teaspoon of instant espresso powder, which is just enough to deepen the chocolate notes without making the dessert taste overtly like coffee. It simply amplifies the inherent deliciousness of the chocolate.
- For those who adore a more distinct mocha flavor, feel free to increase the espresso powder to 2 teaspoons. This slight adjustment will create a delightful coffee-chocolate fusion that coffee lovers will adore.
Perfect Presentation: Slicing and Garnish
A beautifully presented dessert is always more inviting. Here’s how to make your mousse bars look as good as they taste.
Flawless Slicing for Neat Bars
- Once your mousse bars are thoroughly chilled and firm, an offset spatula is ideal for smoothing out the top of the filling, creating a pristine surface.
- For super clean cuts, employ a “hot knife” technique. Simply run a sharp knife under very hot water for a few seconds, then wipe it completely dry. The warm blade will glide effortlessly through the smooth mousse, giving you perfectly crisp edges. Just be aware it might meet a little more resistance when it hits the graham cracker crust!
Elegant Chocolate Shavings
- To create beautiful chocolate shavings for garnish, grab a high-quality semi-sweet or bittersweet chocolate bar (like Ghirardelli). Briefly microwave it for about 5-10 seconds – just enough to slightly warm and soften it, but not melt it.
- Then, holding the bar firmly, use a vegetable peeler to scrape along a flat edge over a piece of parchment paper. If the chocolate becomes too warm and starts to melt rather than shave, let it cool for a moment and try again. These delicate curls add an elegant touch and extra chocolatey goodness.
Serving Suggestions, Storage & Variations
These Easy Chocolate Mousse Bars are incredibly versatile, perfect for any occasion. Here’s how to make the most of them, from serving to customizing.
Creative Serving Ideas
While delicious on their own, a few simple additions can elevate your chocolate mousse bars even further. A generous dollop of freshly whipped cream is a classic accompaniment, adding another layer of creamy texture. For a vibrant contrast, consider adding fresh berries like raspberries or strawberries, which pair beautifully with chocolate. A sprinkle of cocoa powder or extra chocolate shavings can also enhance both the visual appeal and the chocolate intensity. Serve them at room temperature for the creamiest texture or chilled for a firmer bite, depending on your preference.
Storing Your Delectable Bars
These mousse bars are ideal for making ahead, making them perfect for parties or busy weeks. Once assembled and chilled, cover the pan tightly with plastic wrap to prevent any odors from permeating the dessert and to keep it fresh. Store the bars in the refrigerator for up to 3-4 days. For longer storage, individual squares can be wrapped tightly in plastic wrap and then foil, then frozen for up to one month. Thaw them in the refrigerator overnight or for a few hours before serving.
Endless Flavor Possibilities: Customize Your Mousse Bars
While the classic chocolate mousse bar is sublime, don’t hesitate to experiment with variations to suit different tastes:
- Crust Variations: Instead of graham crackers, try an Oreo crust for a rich chocolate base, or a shortbread cookie crust for a buttery, crisp foundation.
- Flavor Infusions: Add a hint of mint extract for a refreshing twist, orange zest for a bright citrus note, or a splash of your favorite liqueur like Kahlúa, Grand Marnier, or even a raspberry liqueur to the mousse for an adult-friendly dessert.
- White Chocolate Dream: For white chocolate lovers, adapt the recipe to create White Chocolate Mousse Bars, perhaps with a touch of Frangelico for a nutty flavor.
These small tweaks can transform the dessert, offering new culinary adventures with the same ease of preparation.
Explore More Decadent Mousse Desserts
If you’ve fallen in love with the luscious texture of mousse, you’re in for a treat! Beyond numerous chocolate mousse recipes, the world of mousse offers endless possibilities. You might also enjoy a delicate white chocolate mousse with Frangelico, a vibrant raspberry mousse, a playful grasshopper mousse, or a fresh strawberry mousse. I’m also always on the lookout for inspiring creations from my fellow food bloggers, like this elegant Chocolate Mousse Cake, the spectacular Easy Tiramisu Mousse, and the impressive Oreo Brookie Mousse Cake! If you’re craving an even deeper chocolate experience, these Dark Chocolate Mousse Bars are a must-try. And for an instant chocolate fix that takes just minutes, whip up this amazing 5-Minute Whipped Chocolate Mousse. There’s always a mousse to match your mood!
Stay connected for more delightful recipes and baking tips! Follow us on social media @ Instagram, Facebook, and Pinterest. Don’t forget to tag us when you try one of our recipes! We love seeing your creations, and if you’re thrilled with the results, please consider leaving a 5-star rating in the recipe card below.

Easy Chocolate Mousse Bars
20 minutes
20 minutes
24 servings
A delicious, no-bake dessert with a graham cracker crust and chocolate mousse topping!
Ingredients
Crust:
- 18 graham crackers (whole rectangles)
- ½ cup butter (1 stick), melted
- 2 tablespoons sugar
- ¼ teaspoon salt
Filling:
- 1 pound semisweet chocolate, finely chopped (I used 4, 4-ounce Ghirardelli bars)
- 3 cups heavy cream, plus more for serving
- 1 teaspoon instant espresso powder
- ¼ teaspoon salt
- 1 tablespoon pure vanilla extract
- Whipped cream to serve, if desired
Instructions
Make the crust:
Line a 9-inch-by-13-inch baking pan with nonstick foil, leaving a 2-inch overhang on 2 sides.
In a food processor, process the graham crackers until you have crumbs. You should have about 2 ¼ cups.
Add the butter, sugar, and salt, and pulse until the mixture is evenly moistened.
Tip the crumbs into the prepared pan and press them down into an even layer on the bottom.
Transfer to the freezer while you prepare the filling.
Make the filling:
Set the chocolate in a medium bowl.
In a small saucepan, heat 1 cup of cream, espresso powder, and salt until hot but not boiling.
Pour the hot cream mixture over the chocolate and let it stand for 2 minutes.
Add the vanilla and whisk until smooth.
Set aside to cool completely.
Assemble:
In a large bowl or the bowl of a stand mixer fitted with the whisk attachment, whip the remaining 2 cups of heavy cream until stiff peaks form.
Add the chocolate mixture and gently fold to combine.
Pour the mixture over the prepared crust, and spread it out into an even layer.
Cover with plastic wrap and chill until firm, at least 2 hours.
To serve, cut into squares and serve with a dollop of whipped cream and chocolate shavings, if desired.
Notes
Adapted from the New York Times.
Recommended Products
As an Amazon Associate and member of other affiliate programs, I earn from qualifying purchases.
- Food Processor
- Nielsen-Massey Madagascar Bourbon Pure Vanilla Extract, 4 ounces
- Covered 9 x 13 pan
Nutrition Information:
Yield:
24
Serving Size:
1 square
Amount Per Serving:
Calories: 280Total Fat: 21gSaturated Fat: 13gTrans Fat: 1gUnsaturated Fat: 7gCholesterol: 44mgSodium: 136mgCarbohydrates: 23gFiber: 2gSugar: 15gProtein: 2g
Thatskinnychickcanbake.com occasionally offers nutritional information for recipes contained on this site. This information is provided as a courtesy and is an estimate only. This information comes from online calculators. Although thatskinnychickcanbake.com attempts to provide accurate nutritional information, these figures are only estimates.
Varying factors such as product types or brands purchased can change the nutritional information in any given recipe. Also, many recipes on thatskinnychickcanbake.com recommend toppings, which may or may not be listed as optional and nutritional information for these added toppings is not listed. Other factors may change the nutritional information such as when the salt amount is listed “to taste,” it is not calculated into the recipe as the amount will vary. Also, different online calculators can provide different results.
To obtain the most accurate representation of the nutritional information in any given recipe, you should calculate the nutritional information with the actual ingredients used in your recipe. You are solely responsible for ensuring that any nutritional information obtained is accurate.
HOW MUCH DID YOU LOVE THIS RECIPE?
Please leave a comment on the blog or share a photo on Pinterest
