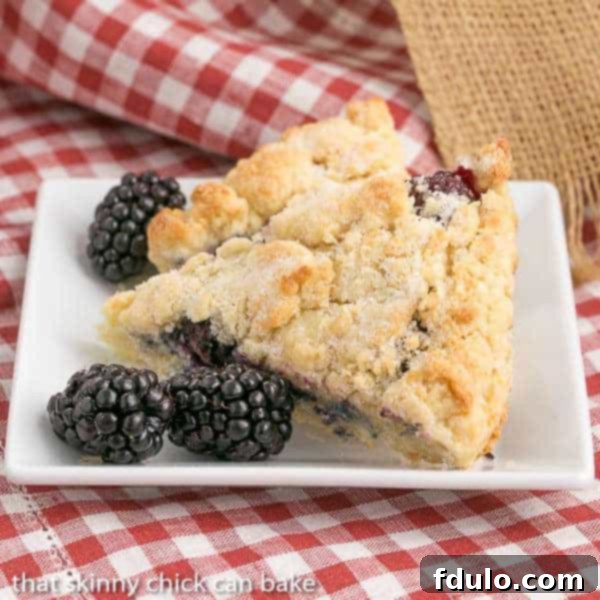
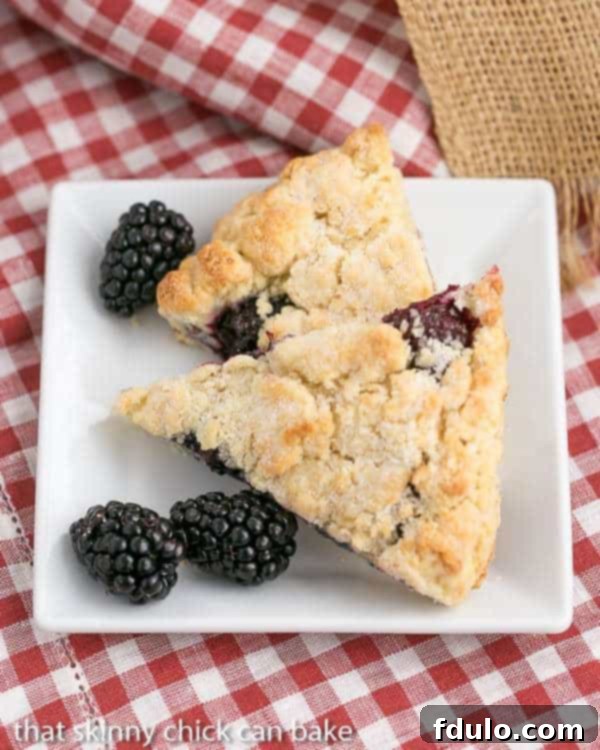
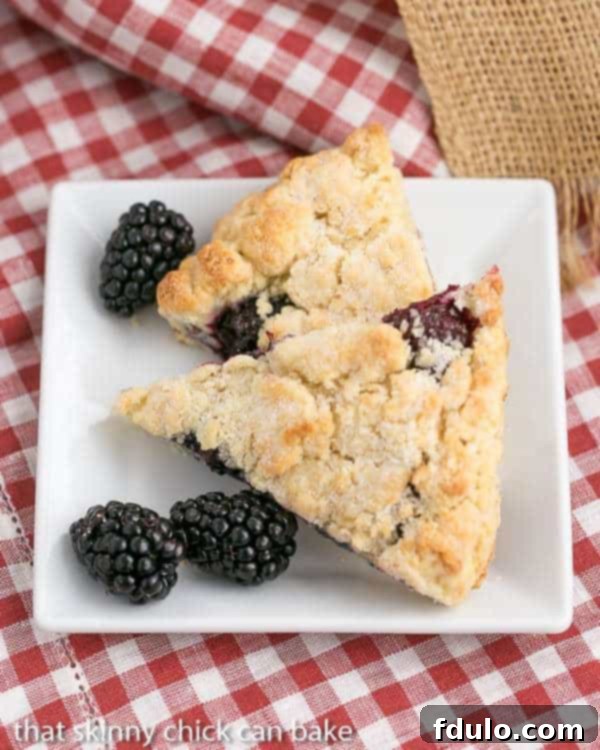
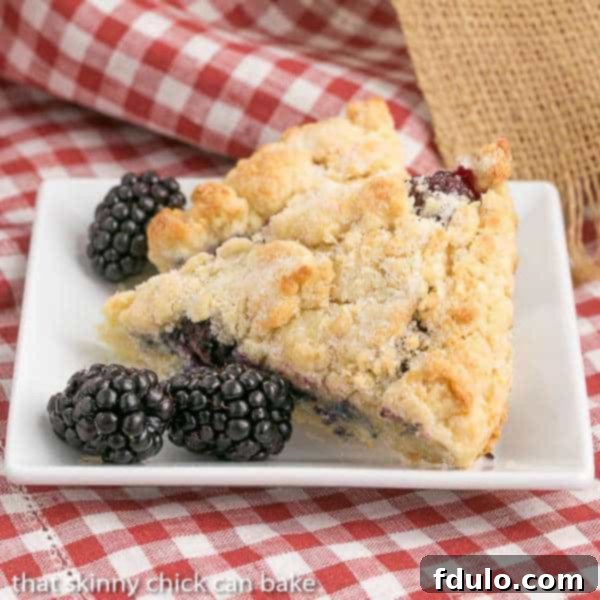
Indulge in the pure delight of homemade baking with these incredibly tender, buttery, and berry-filled Fresh Blackberry Scones. Crafted with rich cream and bursting with juicy blackberries, these scones are more than just a breakfast treat – they’re a moment of pure bliss. Forget dry, crumbly pastries; our recipe ensures a moist, fluffy interior with a delicately crisp exterior, making them an instant favorite. For the ultimate experience, we recommend enjoying these delectable scones fresh from the oven, perhaps with a dollop of clotted cream or your favorite jam.
While we highlight the gloriousness of fresh blackberries, this foundational recipe is incredibly versatile. Whether you choose to adapt it for luscious Blueberry Scones, vibrant Raspberry Scones, or a colorful medley of Mixed Berry Scones, the core formula guarantees success every time. This will quickly become your trusted, go-to Easy Scones Recipe, perfect for any occasion that calls for a touch of homemade magic.

Why These Fresh Blackberry Scones Are a Must-Bake
If you’re looking for a simple yet impressive recipe to elevate your breakfast or brunch, these blackberry scones are your answer. Here’s why you absolutely need to add them to your baking repertoire:
- Celebrate Seasonal Flavors: They offer a wonderfully delicious way to utilize an abundance of fresh, ripe spring and summer berries. Imagine biting into a scone where each piece of fruit bursts with sweet-tart flavor.
- Discover the Joy of Homemade: If you’ve never ventured into scone making before, prepare to be amazed. You’ll quickly learn just how superior fresh-from-the-oven, homemade scones taste compared to anything store-bought. The aroma alone is intoxicating!
- Unmatched Texture: Unlike many dry, dense scone recipes, ours yields an incredibly moist, tender, and fluffy interior, with a perfectly golden, slightly crisp crust. This ideal texture is what sets a truly great scone apart.
- Effortlessly Versatile: Not a fan of blackberries? No problem! This adaptable recipe works beautifully with plump blueberries, sweet raspberries, or a delightful combination of your favorite berries. Even dried fruits like cranberries or currants can be incorporated for a year-round treat.
- Perfect for Any Occasion: Whether it’s a leisurely weekend breakfast, an elegant brunch spread, an afternoon tea, or a thoughtful homemade gift, these scones fit the bill perfectly. Their rustic charm and exquisite taste make them a crowd-pleaser every time.
- Simple Ingredients, Incredible Results: With common pantry staples and a few fresh berries, you can create something truly extraordinary. The magic lies in the technique, which we’ll guide you through with ease.
- You’ll also love this Southern Blackberry Cobbler from the Cooking Bride for another berry-filled delight!
Essential Tips for Baking Perfect, Tender Scones
Achieving truly light and tender scones isn’t difficult, but it does require attention to a few key details. These pro tips will ensure your blackberry scones turn out beautifully every single time:
- The Golden Rule: Use COLD Butter. This is perhaps the most critical tip for tender scones. Small bits of icy cold butter will slowly melt in the hot oven, releasing steam and creating tiny pockets of air within the dough. These air pockets are what give scones their desirable light, flaky, and tender texture. Avoid using softened or room-temperature butter; it will blend too easily and result in a dense scone.
- Ensure Fresh Baking Powder: Baking powder is the primary leavening agent in scones, responsible for their rise and fluffiness. It’s not used as frequently as baking soda, so it often expires while sitting in your pantry. Always check the expiration date, or test its potency by mixing a teaspoon with a bit of hot water; if it bubbles vigorously, it’s good to go. Proper leavening is essential for scones to rise beautifully.
- Handle with Care: Add Just Enough Liquid. The goal is to bring the dough together, not to create a smooth, elastic mass. Add the liquid (heavy cream in this case) gradually until the dough just barely comes together. It should still look a bit shaggy and lumpy – this is perfectly normal and desired. Over-mixing introduces too much gluten development, leading to tough scones.
- PRO-Tip: Do Not Overwork the Dough. This tip cannot be stressed enough! The secret to tender scones lies in minimal handling. When incorporating the butter, the goal is not to completely blend it in, but to leave small, pea-sized pieces intact. Similarly, once the liquid is added, mix just until combined. Excessive kneading develops gluten, which makes baked goods chewy – great for bread, but detrimental for delicate scones.
- Keep it Cool: Chill Your Dough if Needed. If your kitchen is particularly warm, the butter in your dough might start to soften. To prevent this, chill your unbaked scones for 10-15 minutes in the refrigerator before baking. This helps solidify the butter, ensuring those precious steam pockets form properly in the oven, leading to maximum lift and tenderness.
- Watch Your Bake Time: Do Not Overbake. Scones bake relatively quickly. Overbaking is the quickest way to end up with dry, crumbly scones. Bake until the tops are light golden brown and a toothpick inserted into the center comes out clean. Keep an eye on them, especially during the last few minutes.
- Versatility is Key: This basic easy scones recipe is a fantastic foundation. Feel free to substitute blackberries with blueberries, raspberries, chopped apples, cranberries, or even chocolate chips. When adding delicate fruits, use a gentle touch to avoid crushing them or causing their juices to bleed too much into the dough.
- Serve with Homemade Clotted Cream: For the ultimate authentic scone experience, pair your warm scones with homemade clotted cream and a good quality fruit preserve. The rich, creamy clotted cream perfectly complements the tender texture of the scone.

Simple Steps for Irresistible Blackberry Scones
Baking delicious blackberry scones is easier than you might think! Follow these clear, step-by-step instructions to create a batch of perfect, tender treats:
- Preheat Your Oven: Begin by preheating your oven to 425°F (220°C). This ensures the oven is at the correct temperature when your scones go in, allowing them to rise quickly and achieve that desired flaky texture. Line a baking sheet with parchment paper to prevent sticking and for easy cleanup.
- Combine Dry Ingredients: In a food processor, or a large mixing bowl if doing by hand, combine the flour, fresh baking powder, sugar, and salt. Pulse or whisk briefly to ensure all dry ingredients are well distributed.
- Incorporate Cold Butter: Remove the lid of your food processor (or use a pastry blender/two knives). Add the cubed, cold butter over the dry mixture. Pulse in short bursts (about 10-15 times) until the mixture resembles coarse cornmeal with some pea-sized pieces of butter still visible. If working by hand, cut the butter into the flour until the same texture is achieved. Transfer the mixture to a large bowl.
- Add Liquid Gently: In a separate small bowl, combine the heavy cream and vanilla extract (or paste). Pour this liquid mixture into the dry ingredients. Using a rubber spatula, gently fold and stir until the dough just begins to come together. Be careful not to overmix; lumps are absolutely fine!
- Knead and Add Berries: Turn the shaggy dough out onto a lightly floured surface. Knead it just a few times (3-4 gentle folds are usually enough) to bring it completely together. Then, carefully knead in the fresh blackberries. To prevent them from bleeding too much, you can sprinkle some on top, fold the dough over, and repeat until they are evenly distributed. Remember, minimal handling is key for tender scones.
- Shape and Cut: Gently form the dough into an 8-inch round disc. Alternatively, you can press it into an 8-inch cake pan lined with parchment, then carefully flip it out onto your prepared baking sheet. Using a sharp knife or a bench scraper, cut the round into 8 equal wedges.
- Bake and Serve: Arrange the wedges on your prepared baking sheet, leaving a little space between each. Bake for 15 to 18 minutes, or until the tops are light golden brown and a toothpick inserted into the center comes out clean. Let them cool on a wire rack for at least 10 minutes before serving. Scones are best enjoyed warm or at room temperature, perhaps with a generous dollop of clotted cream or your favorite fruit preserve.
Frequently Asked Questions About Baking Scones
Absolutely, yes! While a food processor offers a quick and easy way to “cut” the cold butter into the flour mixture, it’s certainly not a requirement. Traditionally, scones were made by hand. You can achieve the same results using a pastry blender, which is specifically designed for this task, or even by using two table knives to cut the butter into small pieces. The key is to work quickly to keep the butter as cold as possible. The final mixture should resemble coarse cornmeal with a few larger, pea-sized pieces of butter visible throughout the flour.
Yes, you can use half and half as a substitute for heavy cream when making scones, but with a slight modification to ensure the richness and fat content are comparable. Heavy cream contributes significantly to the tenderness and richness of the scones. To mimic this, you’ll want to increase the fat content of the half and half. A good formula for substituting heavy cream is to combine 7/8 cup of half and half with 1/2 tablespoon of melted butter. When adding the melted butter to the cold half and half, whisk it vigorously. The butter will solidify into small pieces as it hits the cold liquid, which is perfectly fine and helps maintain the texture that heavy cream provides.
Yes, freezing unbaked scones is a fantastic way to prepare ahead! Simply form and cut your scones as directed, then place them on a parchment-lined baking sheet and freeze until solid. Once frozen, transfer them to an airtight freezer bag or container. They can be stored for up to 2-3 months. When ready to bake, place the frozen scones directly on a baking sheet (no need to thaw) and add an extra 5-10 minutes to the baking time.
Scones are always best enjoyed fresh from the oven. However, if you have leftovers, store them in an airtight container at room temperature for up to 2 days. To reheat, you can warm them briefly in a microwave (about 15-30 seconds) or in a preheated oven at 300°F (150°C) for 5-10 minutes until warmed through. This will help restore some of their tenderness.
While delicious on their own, blackberry scones truly shine when paired with complementary toppings. Traditional English clotted cream and your favorite berry jam (strawberry, raspberry, or more blackberry!) are classic choices. A simple dusting of powdered sugar, a drizzle of lemon glaze, or a side of fresh whipped cream also makes for a delightful treat. For a touch of elegance, serve them alongside a cup of hot tea or coffee.
You May Also Like:
- Strawberry Lemon Blondies from The View from Great Island
- Blueberry Sour Cream Muffins
- Raspberry Cream Scones
- Lemon Blueberry Muffin Bread
- More Breakfast Recipes
Stay connected and share your baking creations! Follow us on social media @ Instagram, Facebook, and Pinterest. Don’t forget to tag me when you try one of my recipes! If you love the results, please consider giving it a 5-star rating in the recipe card below.

Blackberry Scones Recipe
10 minutes
18 minutes
28 minutes
8 scones
Tender cream scones chock full of blackberries for a delightful breakfast or brunch.
Ingredients
- 2 cups all-purpose flour
- 1 tablespoon baking powder (ensure it’s fresh and active for proper rise)
- 3 tablespoons granulated sugar
- ½ teaspoon salt
- 5 tablespoons unsalted butter, very cold and cut into small pieces
- ½ cup fresh blackberries, gently rinsed and patted dry
- 1 cup heavy cream, chilled
- 1 teaspoon vanilla paste (or pure vanilla extract)
Instructions
- Preheat your oven to 425°F (220°C). Line a large baking sheet with parchment paper and set it aside.
- In a food processor, combine the flour, baking powder, sugar, and salt. Pulse a few times to thoroughly mix the dry ingredients.
- Remove the lid and sprinkle the cold, cubed butter over the flour mixture. Pulse the food processor about 10-15 times in short bursts until the mixture resembles coarse cornmeal with some small, pea-sized pieces of butter still visible. Transfer this mixture to a large mixing bowl.
- Add the vanilla paste (or extract) to the cold heavy cream, then pour the cream mixture into the flour and butter mixture. Using a rubber spatula, gently stir and fold until the dough just begins to come together. Be careful not to overmix; the dough should still look a bit shaggy.
- Turn the dough out onto a lightly floured surface. Gently knead the dough just a few times (3-4 turns) to fully combine. Then, carefully fold in the fresh blackberries, ensuring they are evenly distributed without crushing them. Avoid overworking the dough to maintain tenderness.
- Form the dough into an 8-inch round disc (approximately 20 cm). As an alternative, you can press the dough into an 8-inch cake pan lined with parchment paper, then carefully invert it onto your baking sheet. Cut the round into 8 equal wedges using a sharp knife or bench scraper.
- Place the cut wedges onto your prepared baking sheet, leaving a small space between each scone. Bake for 15 to 18 minutes, or until the tops are beautifully light golden brown and a toothpick inserted into the center comes out clean. Transfer the scones to a wire rack to cool for at least 10 minutes before serving. Enjoy them warm or at room temperature for the best flavor and texture.
Notes
Adapted from America’s Test Kitchen. Always make sure your baking powder is fresh; otherwise, your scones may not rise properly and will be dense.
Keeping the dough cool is vital for tender scones. If your kitchen is warm, cover your cut scones with plastic wrap and chill them in the refrigerator for 10-15 minutes before baking. This helps the butter stay firm, promoting a better rise.
Feel free to substitute the blackberries with other fresh berries like blueberries or raspberries, or even dried fruit. If you opt for dried fruit, you might need to slightly decrease the baking time to 12-15 minutes, as dried fruit doesn’t release as much moisture.
For a beautiful golden finish, you can brush the tops of the scones with a little extra heavy cream or an egg wash (one egg beaten with a tablespoon of water) just before baking.
Recommended Products
As an Amazon Associate and member of other affiliate programs, I earn from qualifying purchases.
- OXO Cutting Board
- Food Processor
- Baking Powder
Nutrition Information:
Yield:
8
Serving Size:
1 scone
Amount Per Serving:
Calories: 303Total Fat: 18gSaturated Fat: 11gTrans Fat: 1gUnsaturated Fat: 6gCholesterol: 53mgSodium: 381mgCarbohydrates: 31gFiber: 1gSugar: 6gProtein: 4g
HOW MUCH DID YOU LOVE THIS RECIPE?
Please leave a comment on the blog or share a photo on Pinterest
